Text & Media as Layers
Learn how to insert texts and import imagery to a Figma canvas for efficient work.
Text and media elevate designs from basic wireframes, filled with placeholders, to prototypes that closely resemble the final products. Figma offers various tools for incorporating and modifying text and images on your canvas. Learning how to accurately place text within your design and import different media formats into your projects will make your work with visuals in Figma both effortless and effective.
Text in interface design plays a vital role in the user experience, guiding and informing users. Whether it's a call to action, navigation, or content, the right placement, font, and arrangement make all the difference.
To create text in Figma, start with the Text tool found in the bottom toolbar. Press the T key to activate this tool, then click anywhere on the canvas to begin typing. With the Text tool, you can experiment with various fonts, sizes, and alignments, ensuring the text not only conveys the message but also complements the overall design aesthetic.

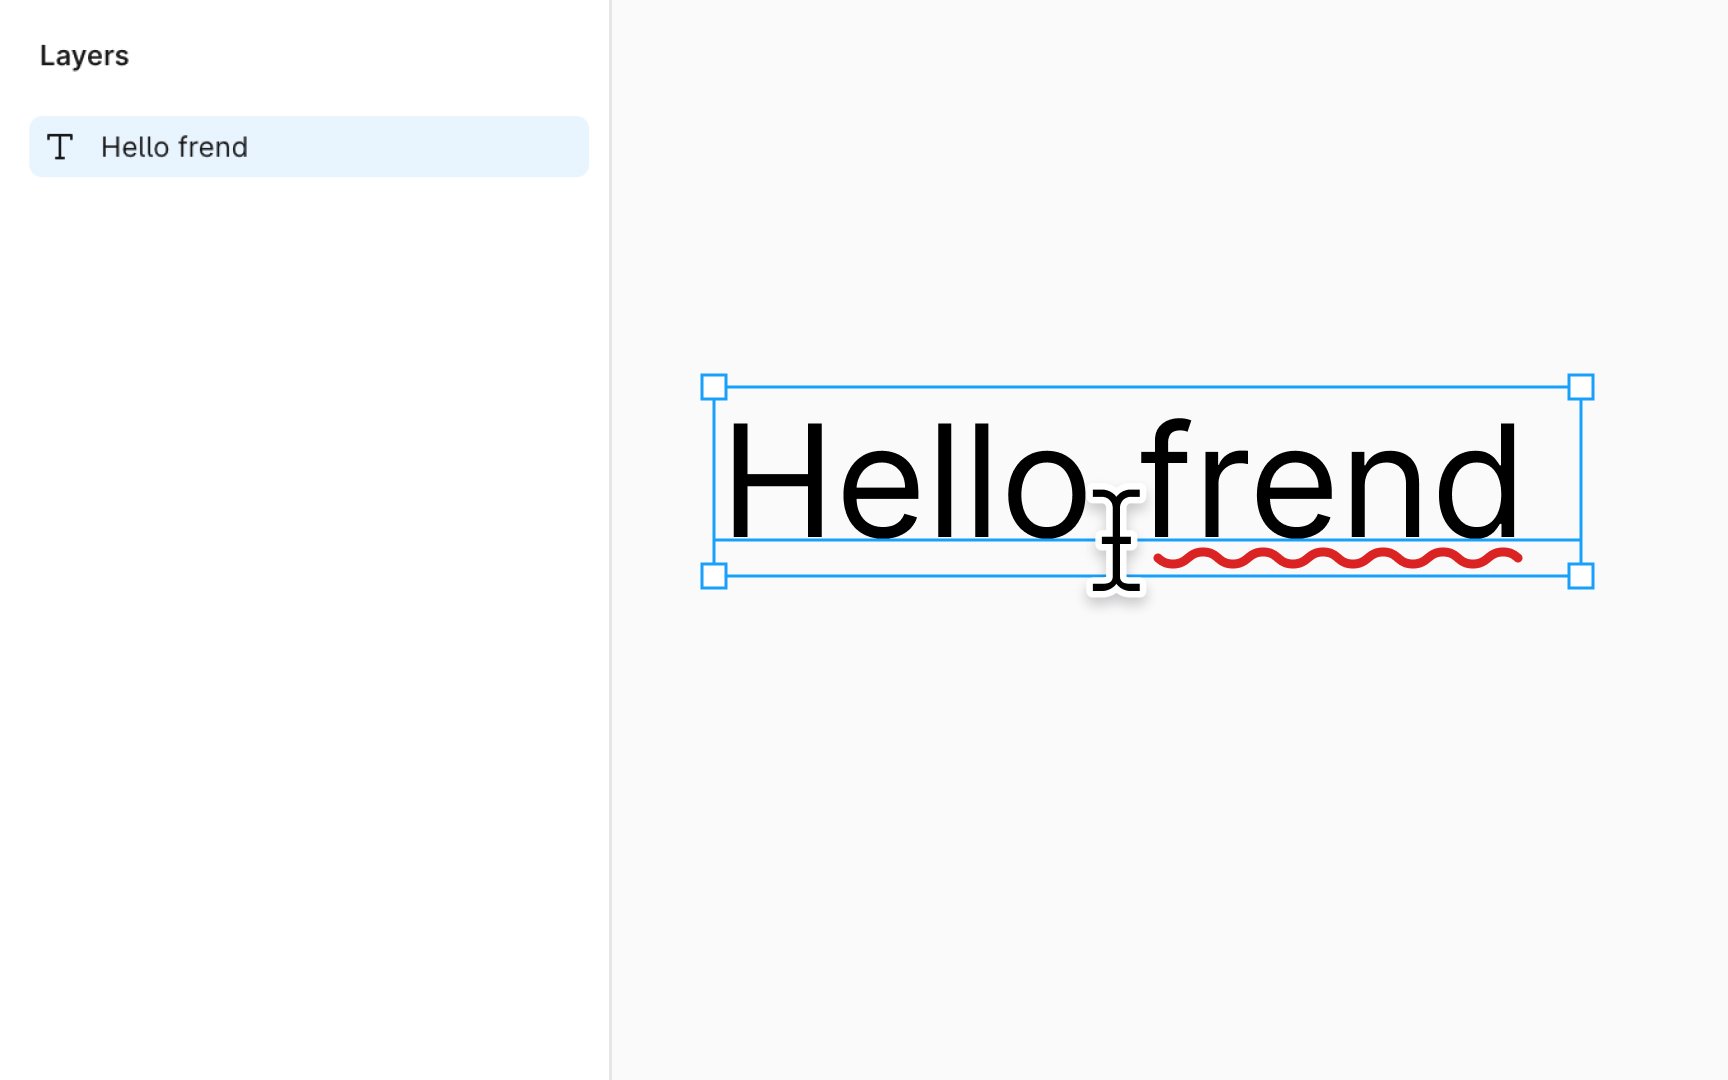
With the Text tool activated, just click on the canvas, and a new text layer will appear. This layer automatically adjusts its width to fit your
This method is often referred to as point text, paragraph text, or area text, allowing for dynamic text entry without the need to predefine the box size. It's perfect for labels, headings, or anywhere your text length varies.
To start:
- Activate the Text tool.
- Click on your canvas.
- Begin typing.
- Hit Return (Mac) or Enter (Windows) to start a new line and format your text as needed.
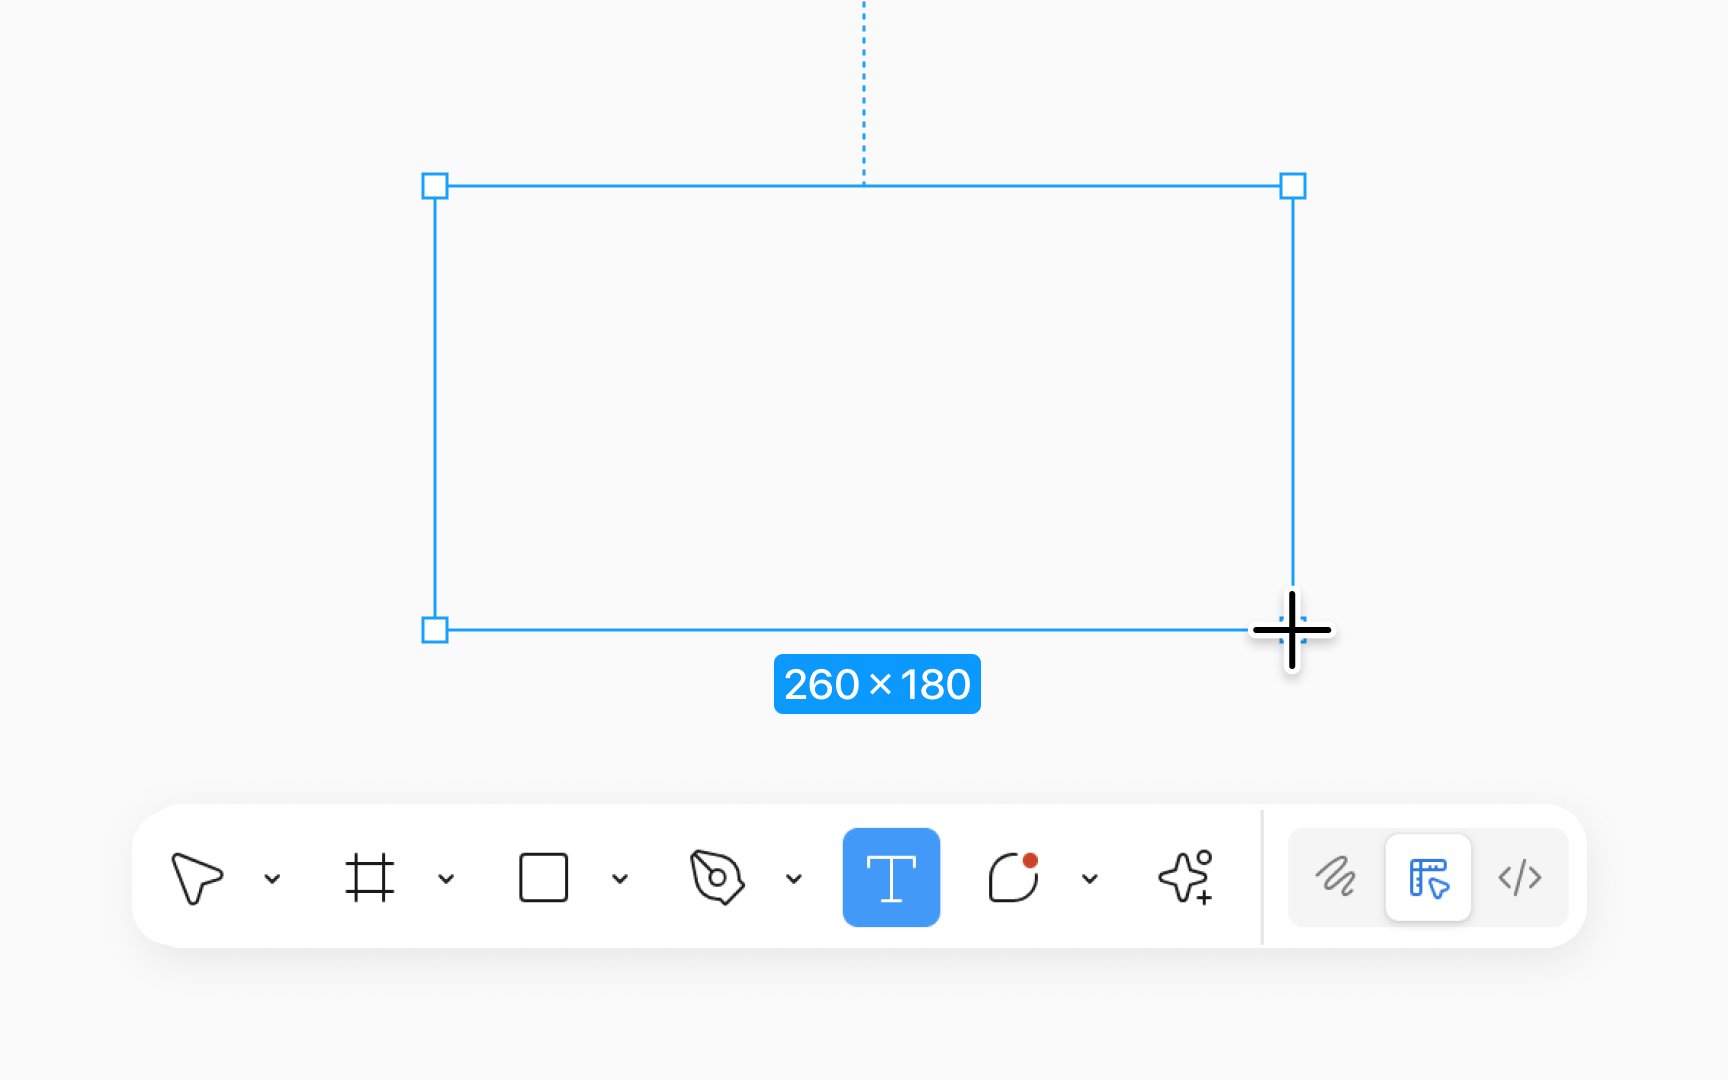
When you need text to fit within a specific space, Figma lets you create a text layer using the click-and-drag method. This is called area text. It ensures your text wraps and flows neatly within the bounds you define.
This approach works well for paragraphs in blog post layouts, product descriptions, or any
To create an area text layer:
- Select the Text tool.
- Click and drag on the canvas to define the text box size.
Editing text layers in Figma requires minimal fuss. Whether you're refining copy on a landing page or updating
Here's how edit a text layer:
- For selected layers: Press Return (Mac) or Enter (Windows) to jump straight into editing mode.
- For unselected layers: Double-click on the canvas layer to enter editing.
Once in edit mode, you can seamlessly transition to other text layers for editing by clicking on them. You don't need to exit or reselect.
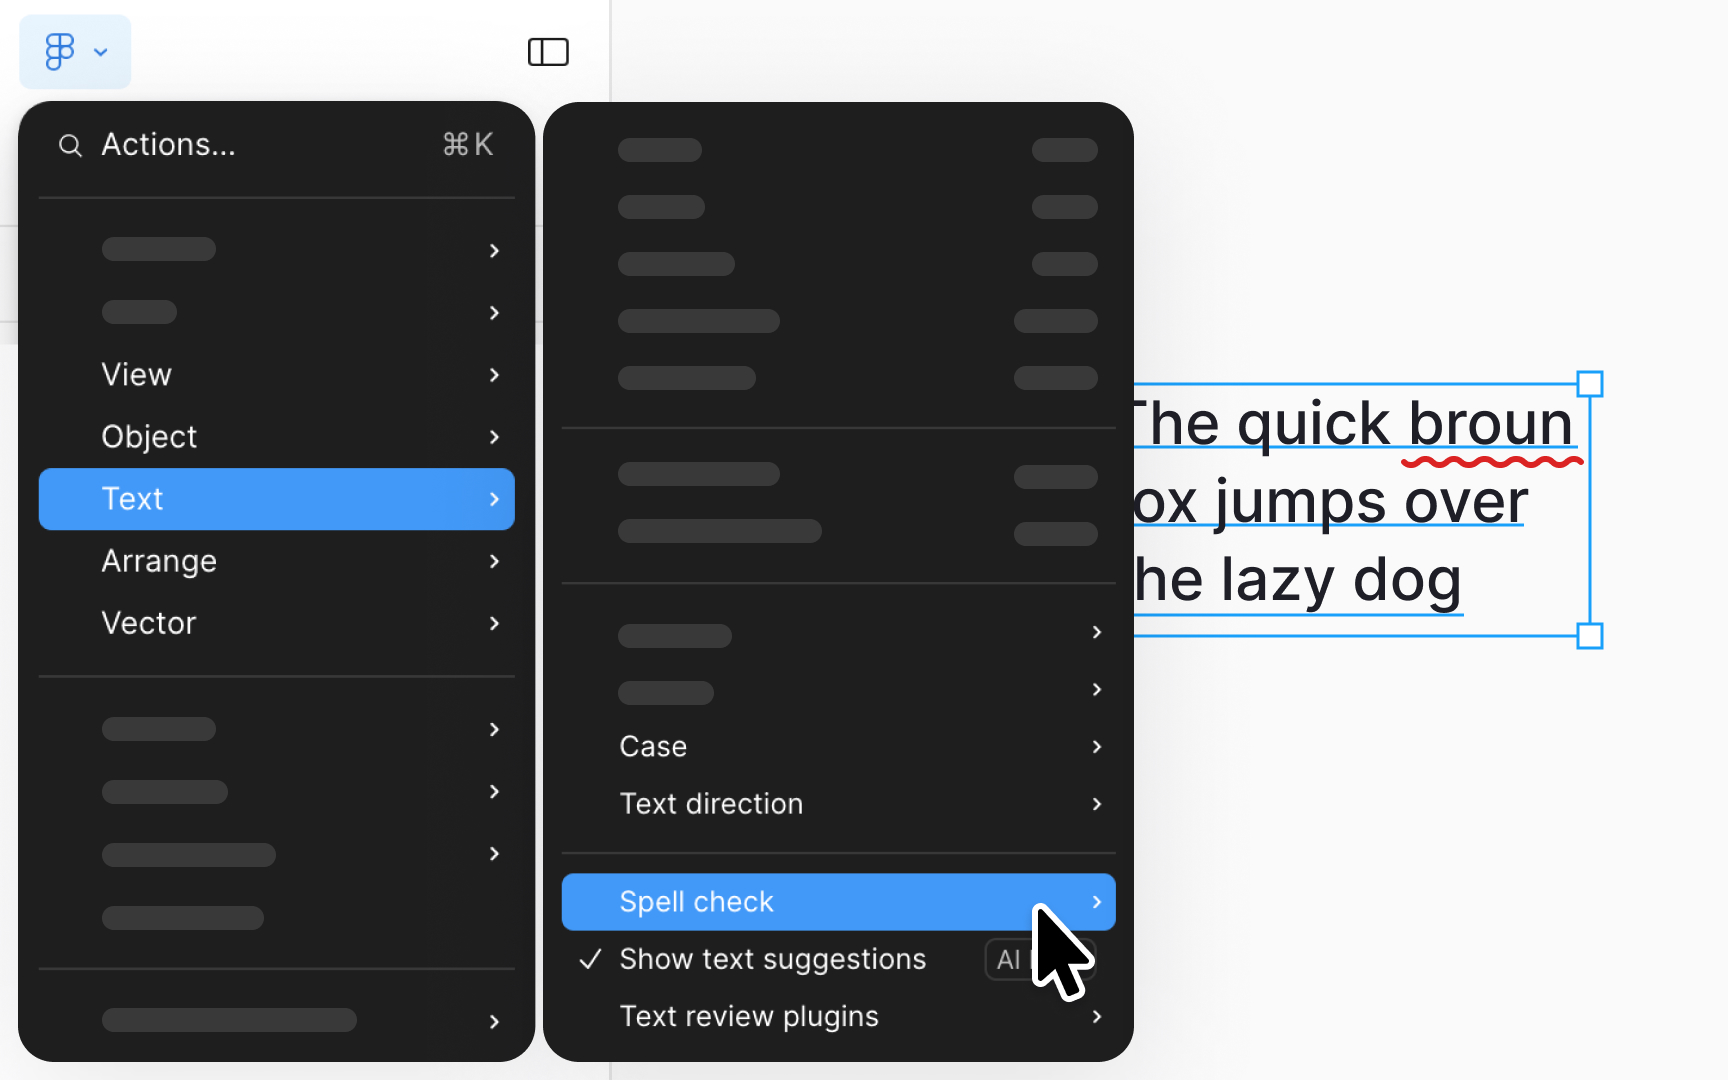
Even for native speakers, typos are inevitable. Figma's spell check underlines spelling mistakes with a squiggly red line.
To correct these errors:
- Right-click on the misspelled word to see a list of corrections.
- Click on the word and press Tab to swiftly choose the first suggestion.
For trickier spelling challenges, you can use a plugin like SPELLL.[1] Such plugins not only catch complex errors but also allow you to add new words to your dictionary and manage your text efficiently, all without leaving the Figma application.
If you write text in languages other than English or Russian, spell check is disabled by default. To enable spell check, go to Text > Spell check in the Main menu and click Check spelling. Before doing so, ensure you have installed your language via the Figma
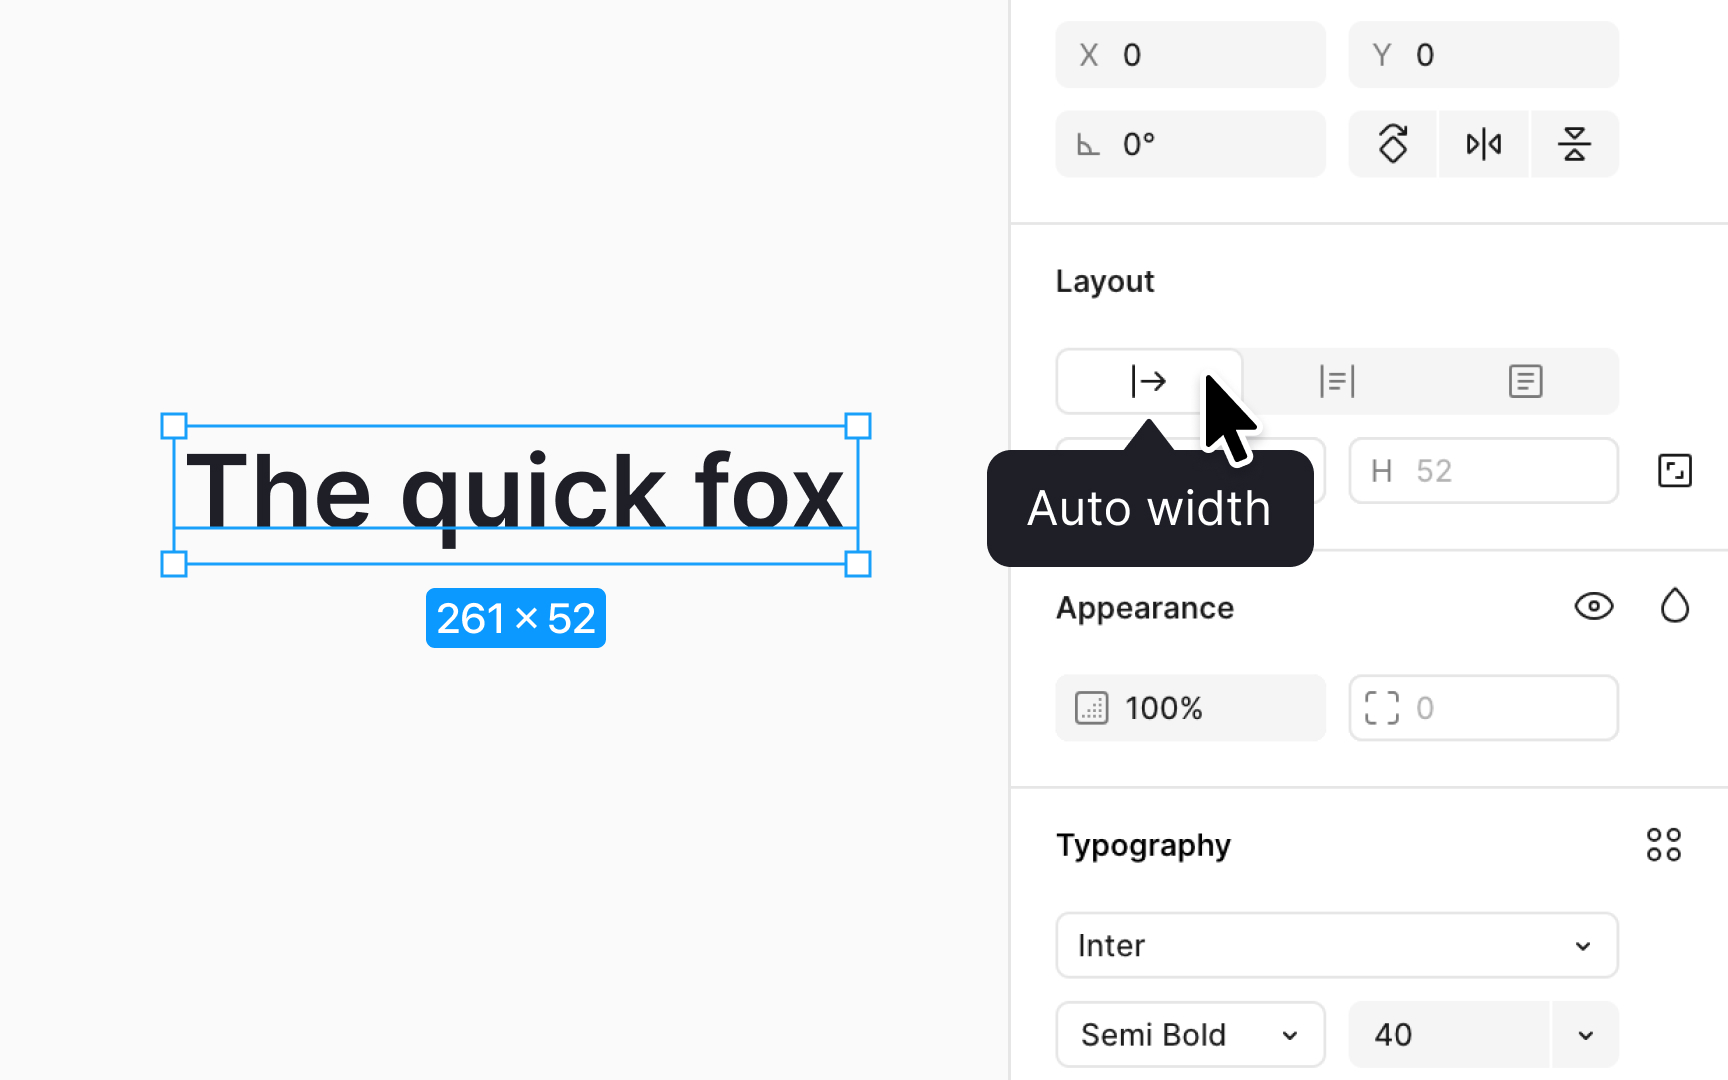
How text layer dimensions adapt to
- Auto width: This setting allows the layer's width to expand to accommodate the text. Pressing Return (Mac) or Enter (Windows) starts a new line, making it ideal for headings or short phrases that adjust horizontally.
- Auto height: With this setting, the height adjusts to fit the content. Text exceeding the layer's width wraps to a new line automatically. It's perfect for paragraph content where vertical space needs to adjust dynamically.
- Fixed size: Both the width and height of a text container remain unchanged, regardless of the amount of text. This type is useful for text boxes when you don't want to alter the overall structure and aim to keep the interface tidy.
You can find those settings in the Design panel in the
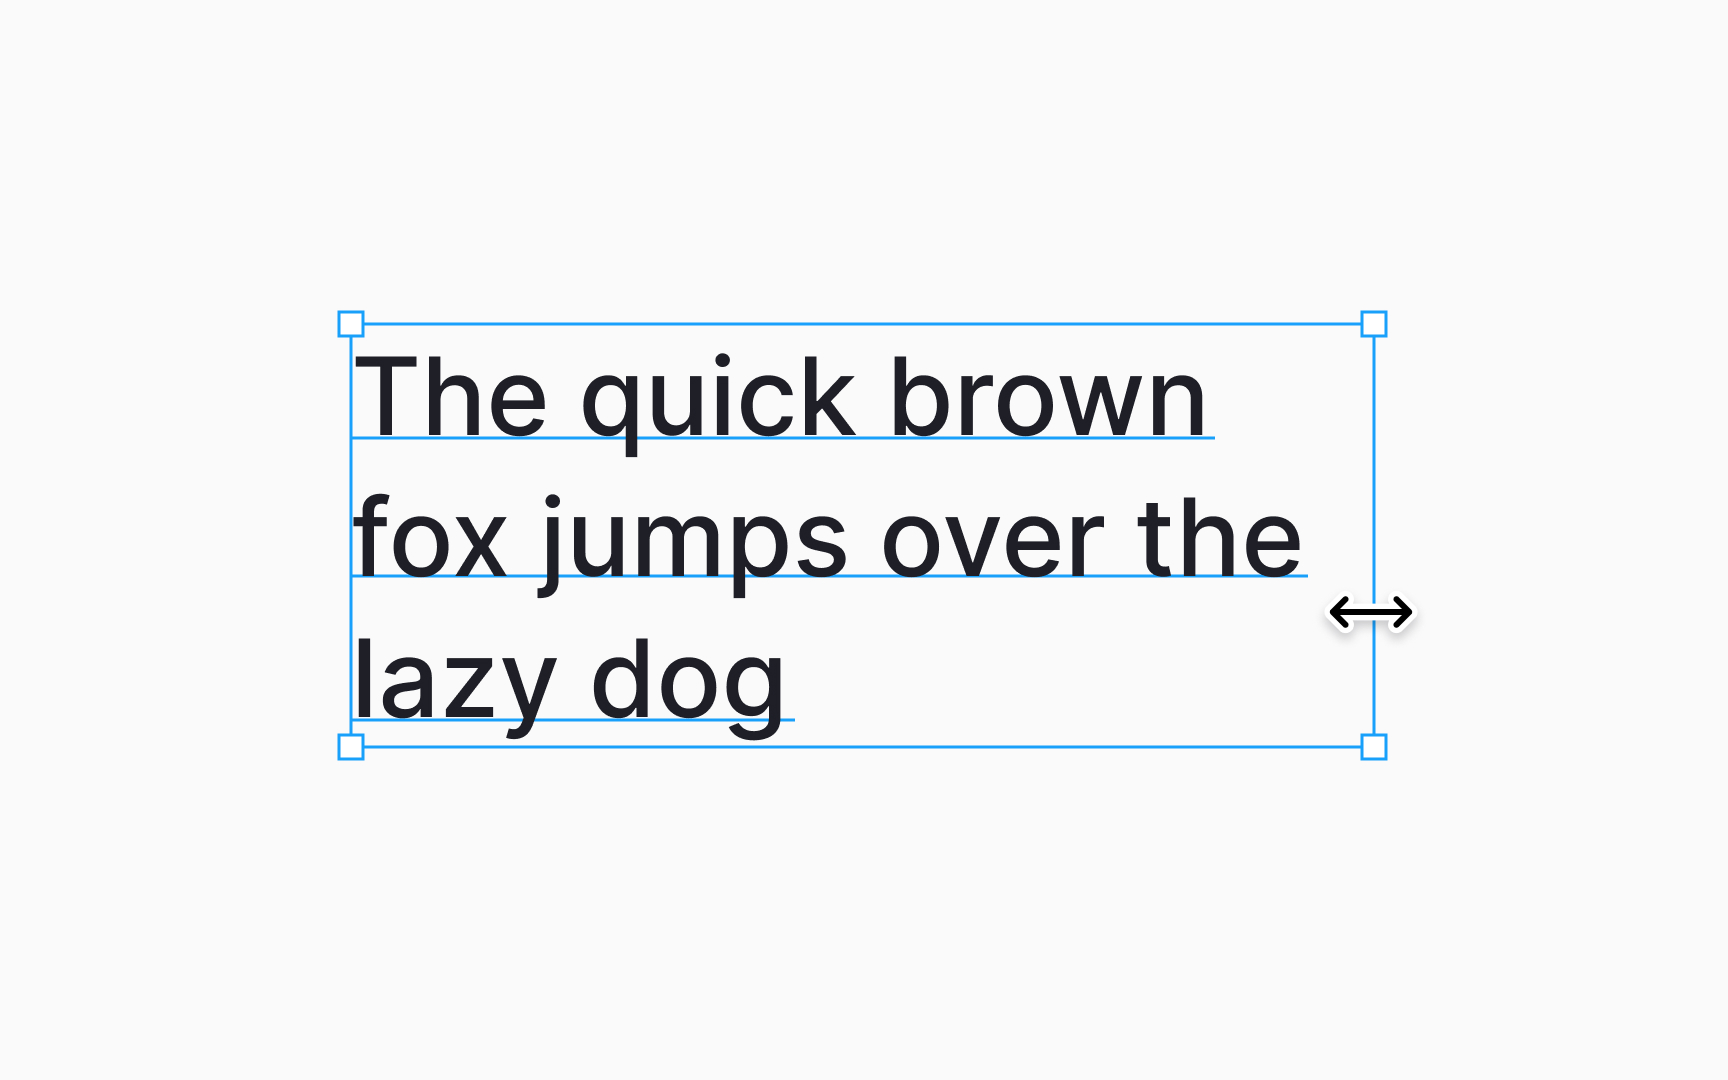
Editing text layers in Figma involves managing the bounding box which frames your text. It defines text position and how it occupies space on your canvas.
To adjust a text layer's bounding box:
- Choose the text layer you want to adjust.
- Hover your mouse over the bounding box's edge. Look for the cursor to switch to the Scale icon with arrows on both ends.
- Click and drag to resize the bounding box to your desired dimensions.
Figma recognizes these adjustments as manual changes, automatically setting the text layer's

Adding
- JPG, PNG, HEIC, WebP, TIFF (Safari only), and GIF for images
- MP4, MOV, and WebM for videos
This ensures flexibility in integrating high-quality visuals and animations. To easily identify media types in your layers panel, Figma displays an image
Note that Figma converts SVG files into vector layers, meaning you can edit them just like any Figma-drawn shapes.
Pro Tip: Keep in mind that adding videos is supported on any paid team or plan. On a Starter plan, you’ll only be able to place images.

To begin enriching your designs with
- Selecting Place image from the Main
menu → File → Place image/video. - Selecting Place image from the Shape tools dropdown in the bottom
toolbar . - Using the shortcut:
• Mac: Shift Command K
•Windows: Shift Ctrl K
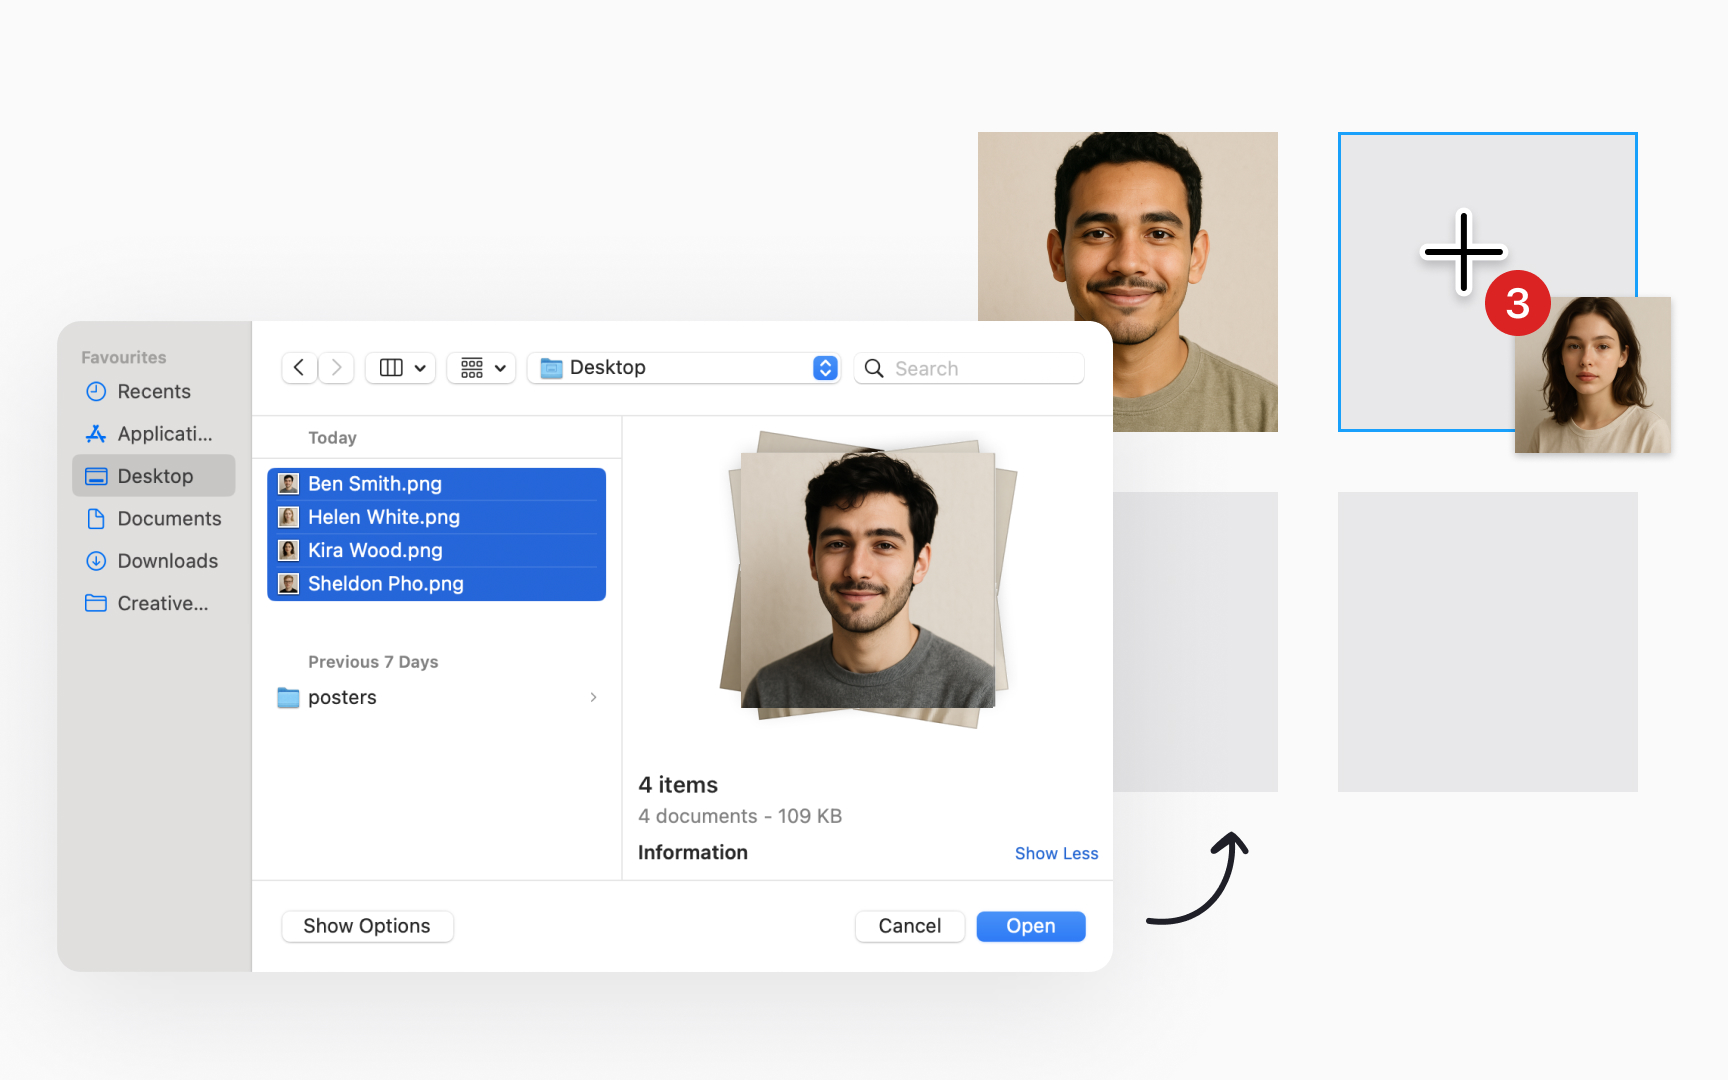
This action opens your file browser to choose one or multiple images. When selecting images, you have the flexibility to add them individually by clicking on the canvas. It allows precise control over their placement and initial size. A preview rectangle appears, showing the selected image(s) and a badge indicating the quantity chosen.
For a quicker approach, use the Place all button in the toolbar to add all selected images in stacked layers with a single click.
Pro Tip: You can also simply drag and drop images from your desktop or folder directly onto the canvas. Figma automatically arranges these images in neat rows of 10.
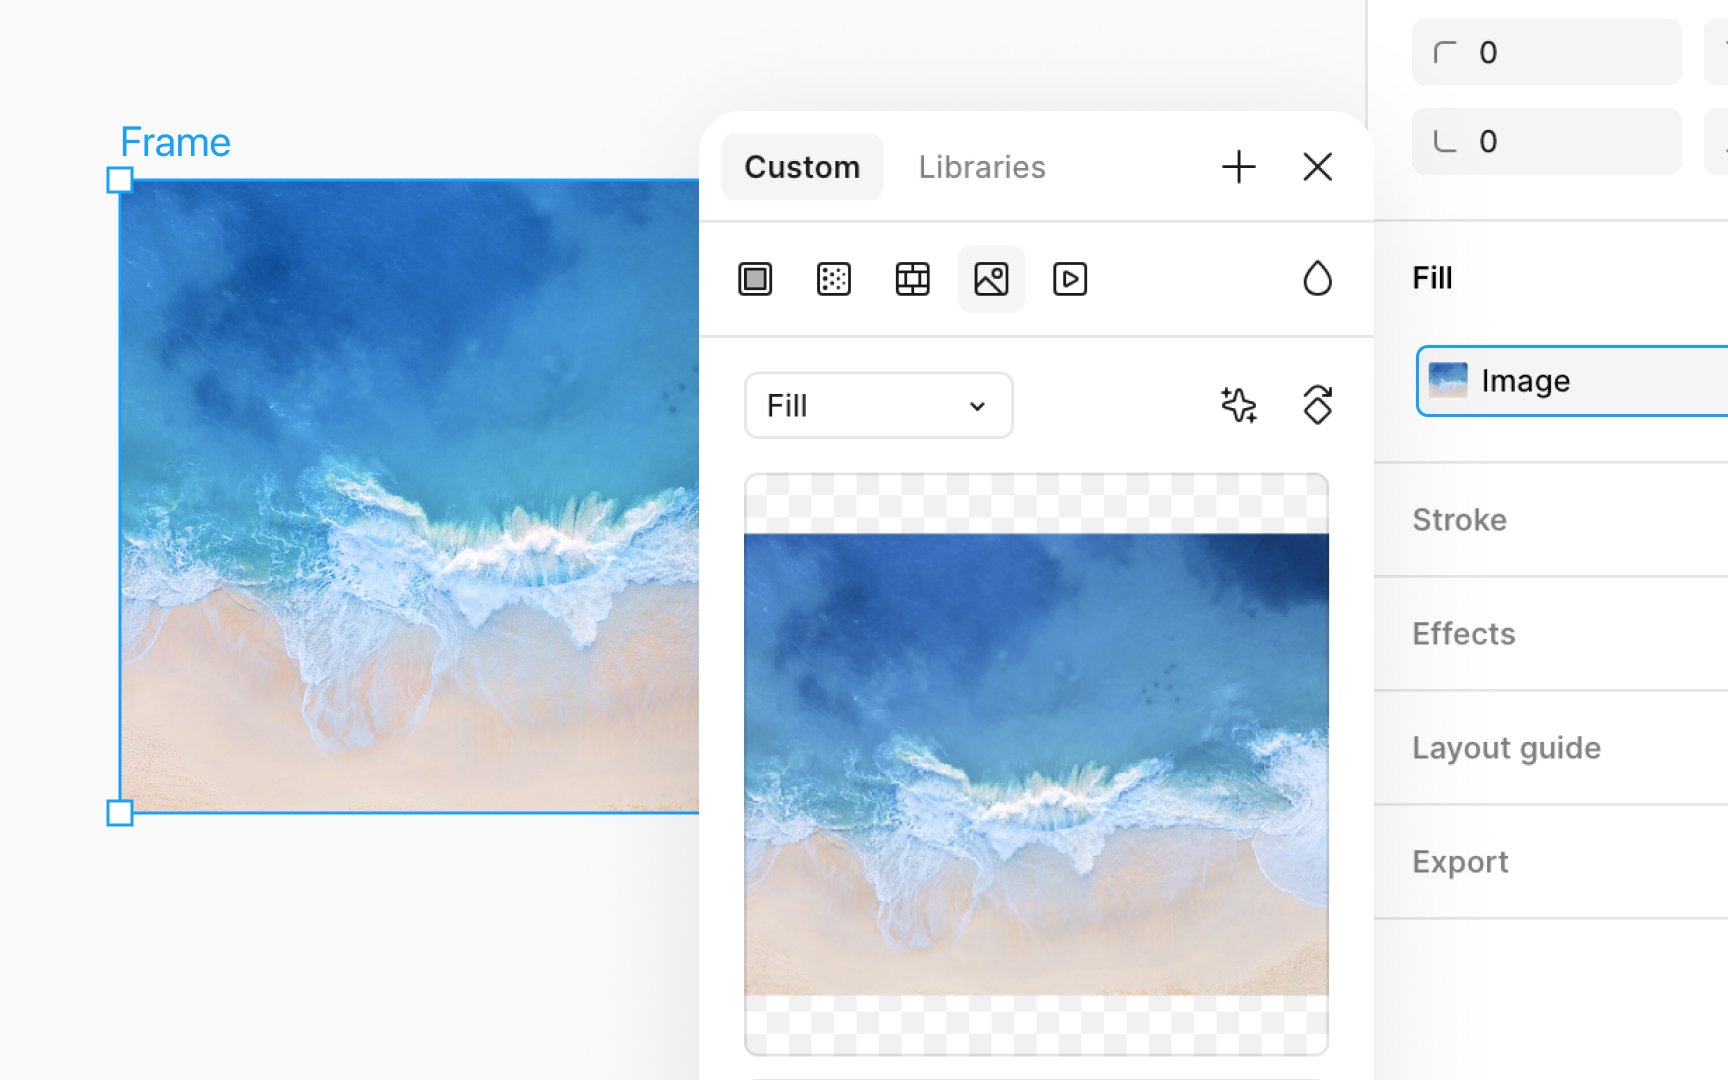
To start adding
Here’s what you do:
- Select the shape you want to customize.
- In the Design panel, click the Fill swatch to open the color picker. By default, you’ll see a black and white checker
placeholder . - Click Choose image in the preview, select your image file from your computer, and hit Open. Your selected shape will now display the image as a fill.
You can also use AI-generated images without leaving Figma. In the Fill
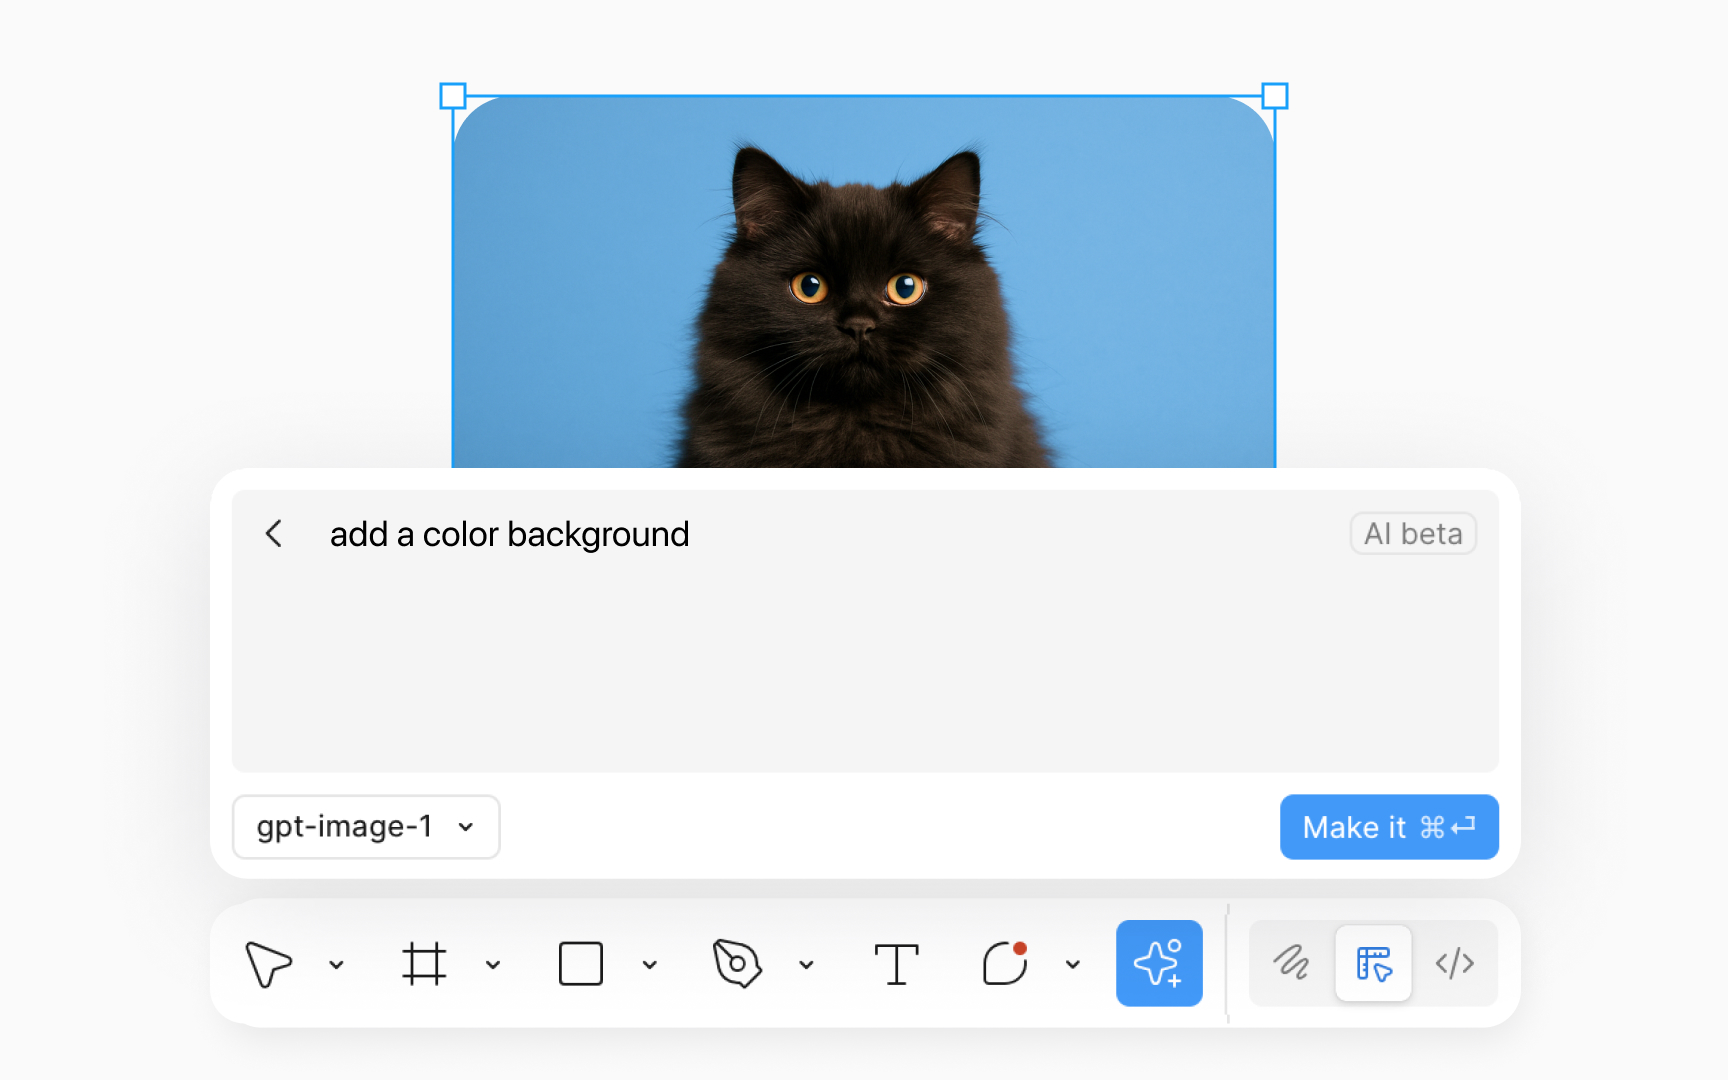
The Make an
To get started in Figma Design, FigJam, Slides, or Sites:
- Select a layer to fill or deselect everything to create a new layer
- Open the Actions
menu and select Make an image - Enter a detailed prompt
- Choose an available AI model
- Click Make it or press Command Enter
Quick prompt tips:
- Be specific: "a wooden desk with a laptop, coffee mug, and indoor plant" works better than "a desk"
- Add context: include lighting, mood, or color palette if relevant
- Keep it visual: focus on describing what you want to see, not how it should be used

While using
To add a mask over an image in Figma:
- Place the image on the canvas.
- Select both the image and the shape you intend to use as a mask from the Layers panel. Ensure the shape layer is beneath the image layer.
- Choose Use as mask from the right-click context
menu or by clicking the ellipse sunicon at the top of the Design panel.
Pro Tip: Changing the fill setting to "crop" in the properties panel, via a window pop-up, allows you to define the visible area of the image.
If you want to add multiple
Figma then opens an upload window, allowing you to select your images. Once you click Open, Figma displays a +
If you've selected multiple files, a badge indicates the number of files left to place, and you can:
- Click on an area in the canvas to add an image. Figma adds the file at its original dimensions.
- Click and drag to define the image's dimensions if you want different dimensions than the original.
- Select an existing object on the canvas to apply the image as a fill, with the Fill mode set to Fill.
References
Top contributors


Topics
From Course

Share


Similar lessons

Why Gamify?

Game Features
