Share & Collaborate on Figma
Learn how to communicate and collaborate with your colleagues on Figma, and share or export files for delivery.
Figma stands out as a highly collaborative platform, seamlessly blending communication, sharing, and presentation capabilities into one intuitive interface. The tool empowers designers not just to converse over their files but also to share their work effortlessly, create dynamic previews, and conduct comprehensive presentations directly within the platform.
Moreover, Figma offers exceptionally flexible exporting options, ensuring that your designs can be easily adapted and delivered in various formats to meet any requirement. Whether it's fostering teamwork, showcasing your latest creation, or preparing your design for the final reveal, Figma is your go-to tool for a smooth and integrated design workflow.
Figma's Spotlight feature is a powerful tool for sharing your view of a design file or prototype, enhancing collaboration and focus. It allows others to seamlessly follow your movements on the canvas, including zooming and page transitions, making it perfect for various collaborative scenarios without sharing toolbar or sidebar actions.
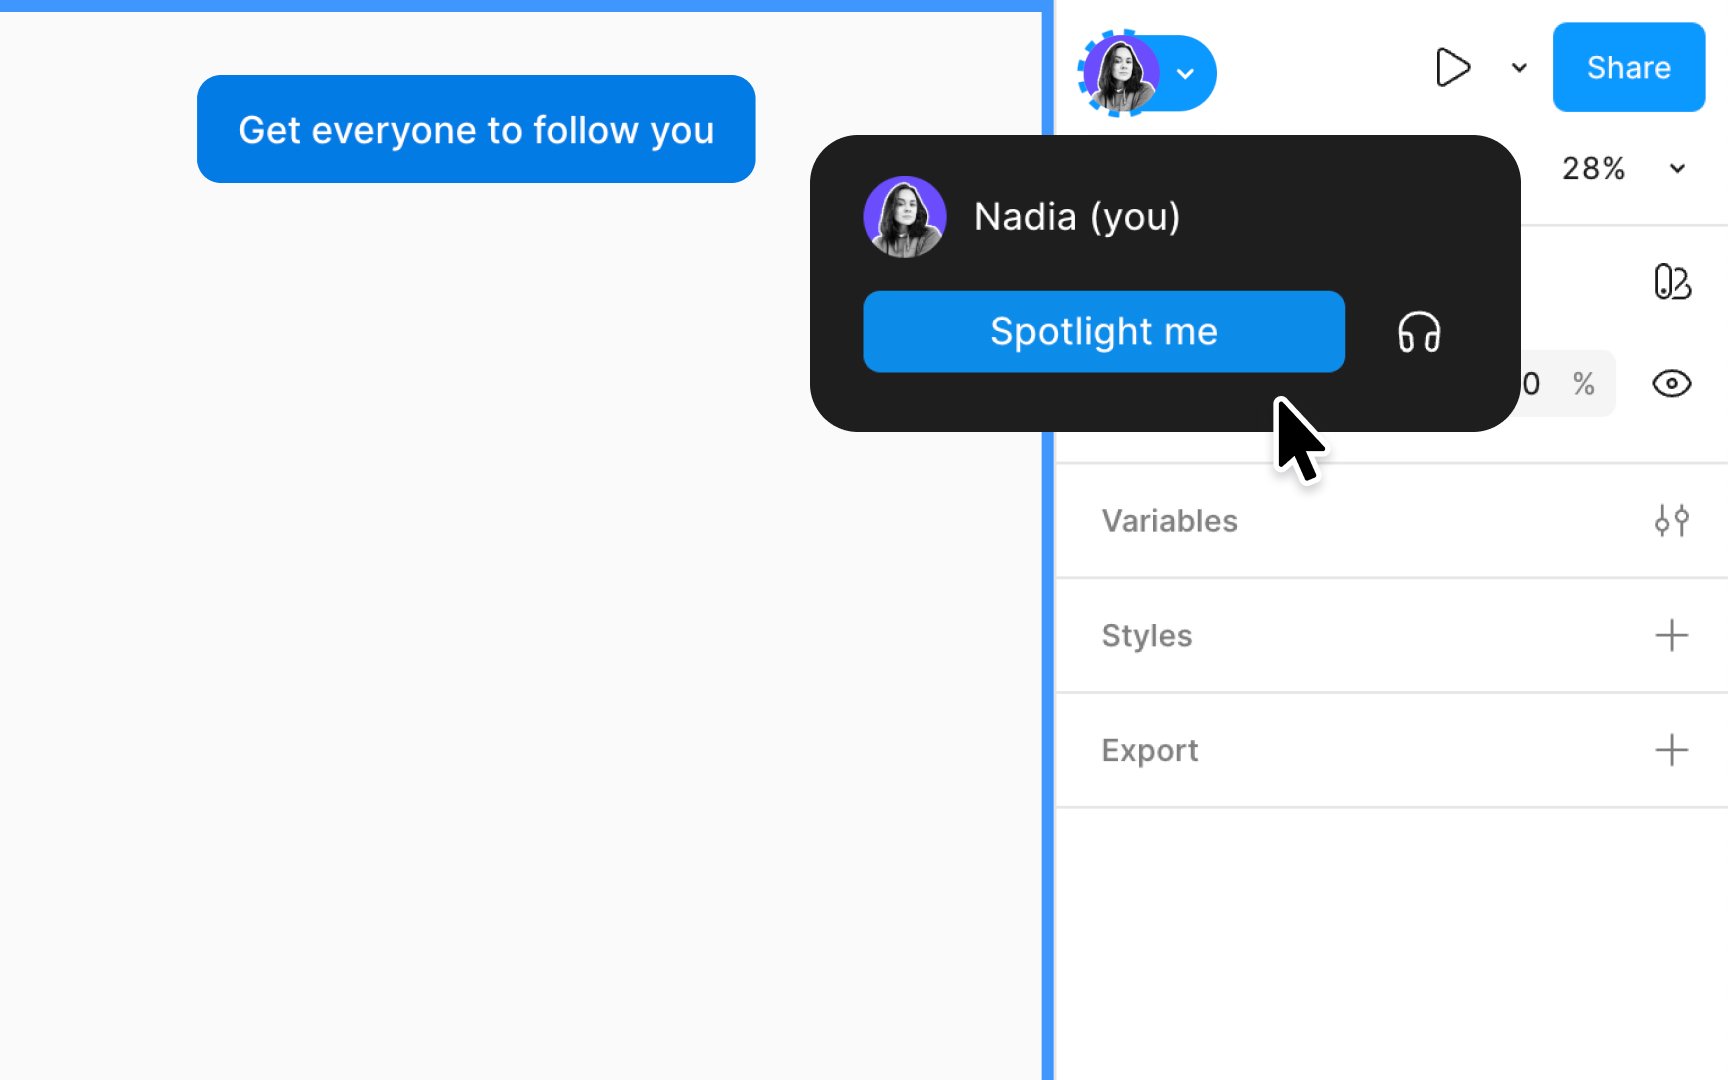
How to spotlight yourself:
- Hover over your avatar in the right sidebar and open the Multiplayer tools dropdown.
- Select the Spotlight me option. This action sends a prompt to your teammates, inviting them to view the board from your perspective. They will have a brief opportunity to click on Not now if they prefer not to join your view.
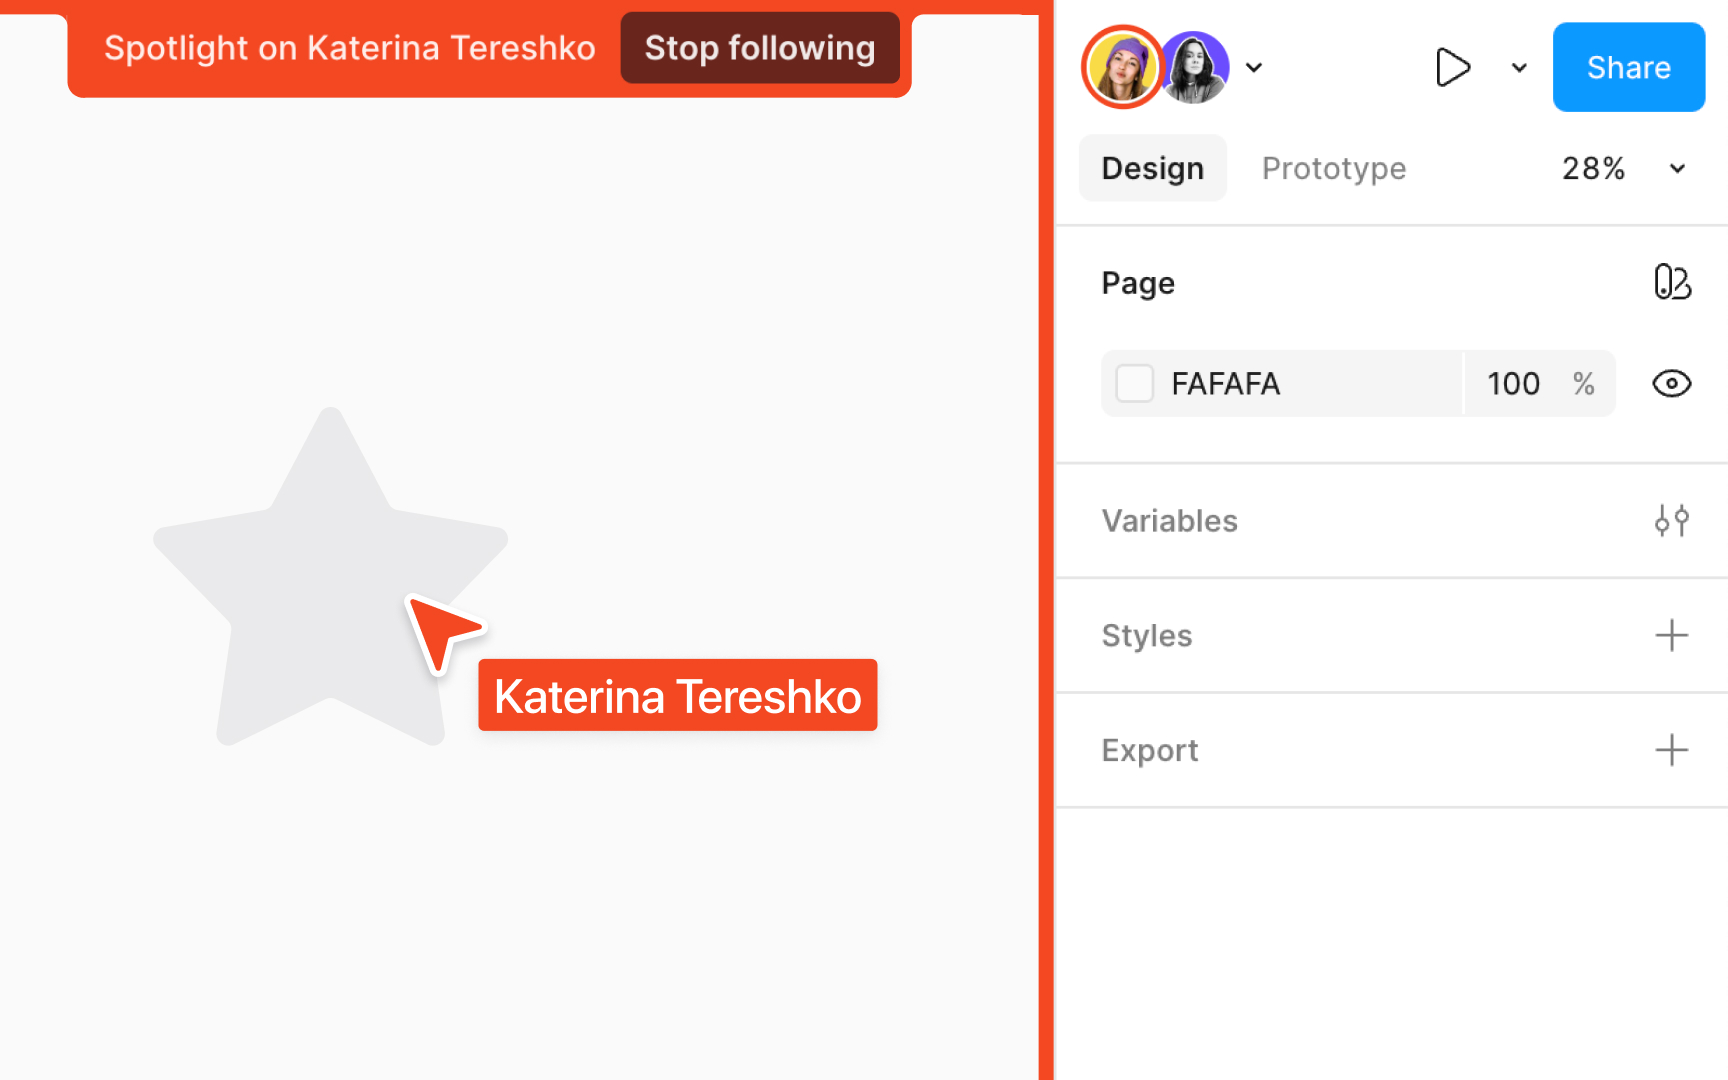
- While you are in the spotlight, your avatar is highlighted with a dashed border, providing a visual cue of your spotlight status. Additionally, a visible count informs you of the number of people following your view.
- To exit the spotlight mode and return to normal viewing, simply click the Stop button located at the top of your canvas.
Following other users on a Figma canvas is a seamless way to align with your team's perspective and foster a cohesive design process. Whether you're jumping into a collaborative session or just keeping track of your team's progress, you can smoothly navigate and synchronize with others with this feature.
Here’s how to follow other users on a canvas:
- Your presence on the canvas is indicated by your
avatar in theToolbar . - To follow someone, click on their avatar. You'll see their view of the canvas.
- To stop following, click Stop following at the top of the canvas.
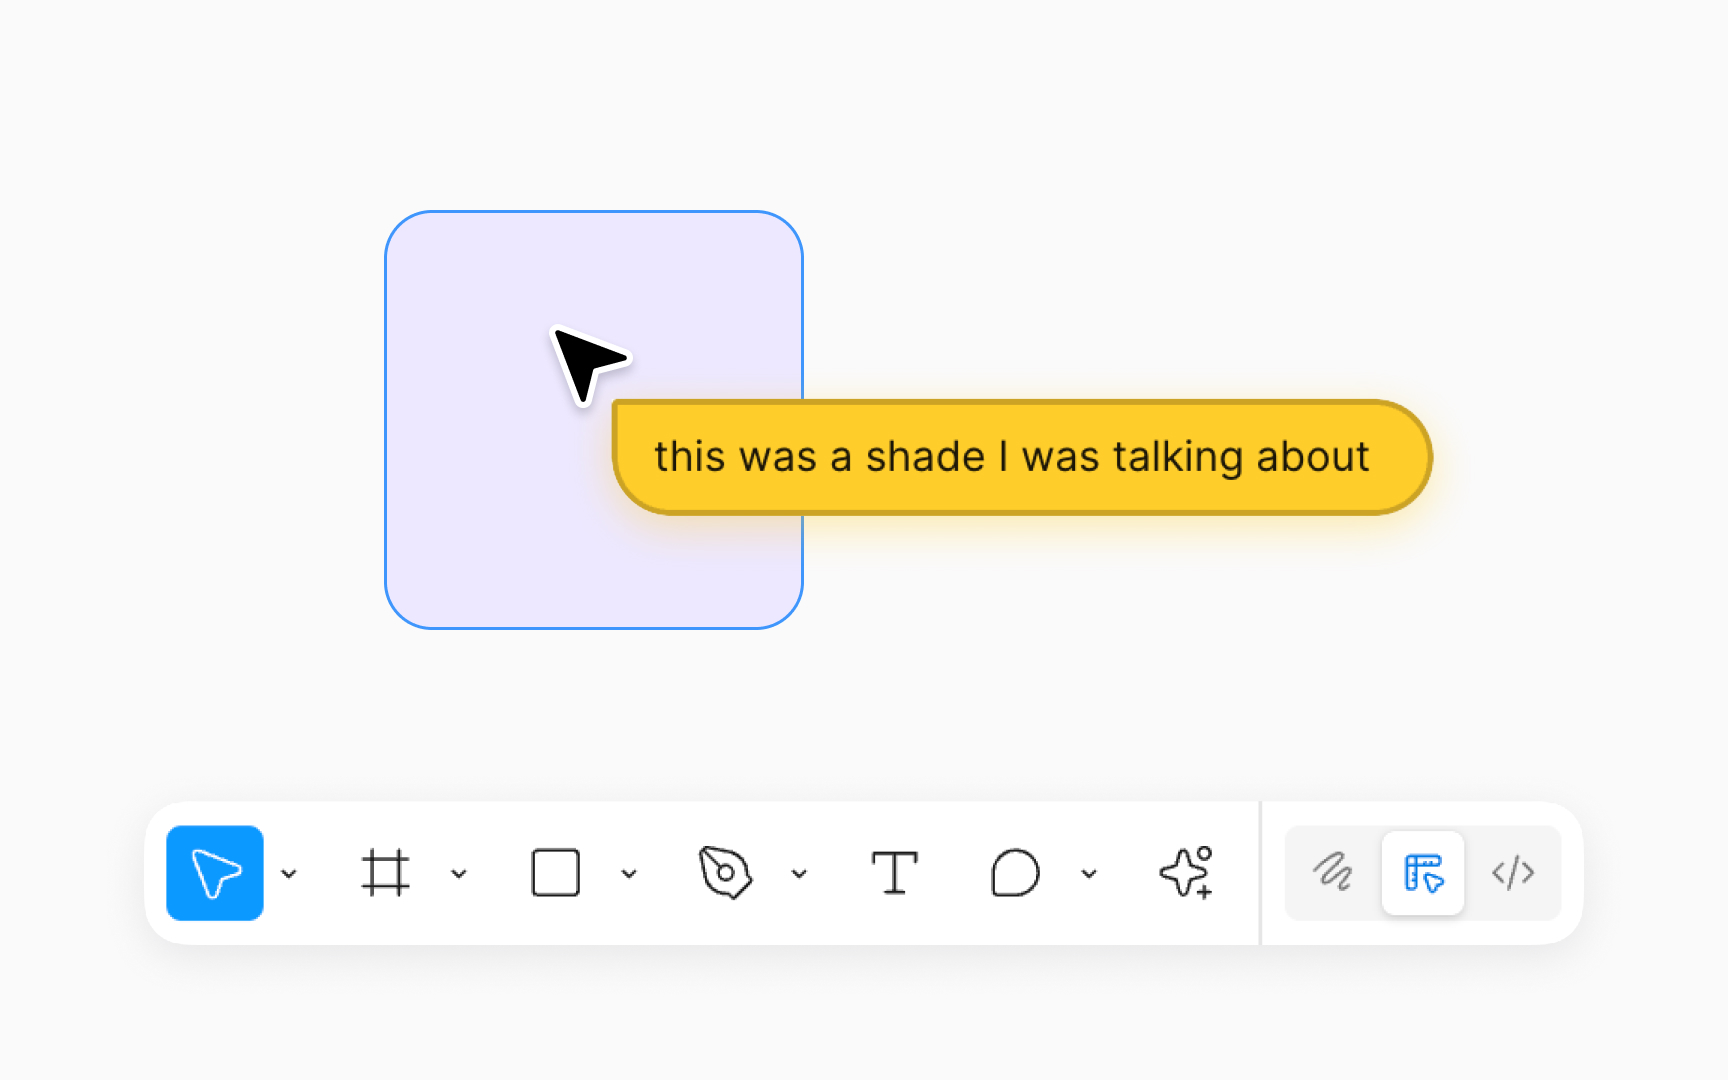
Cursor chats in Figma introduces a dynamic way to send live, temporary messages, enhancing real-time communication within your file. It's perfect for:
- Capturing a teammate's attention ("I meant this component")
- Casual collaboration queries ("Is this ready for review?")
- Discussing file details ("Should we adjust this shade?")
- Impromptu interactions ("Hey, are you here? How about a quick call?")
To start a chat, activate it by pressing the / key or right-click the canvas and choose Cursor chat. A blank chat bubble will pop up by your cursor. No need to hit send: your messages appear live and linger for 5 seconds after you stop typing. To ensure your collaborators see your messages, it's important that they can see your cursor. To clear your chat and type a new message, press Return (On Mac) or Enter (Windows) on your keyboard.
Pro Tip: Keep in mind that these are temporary messages that are not stored by Figma, so save important and permanent remarks using the Comments feature.
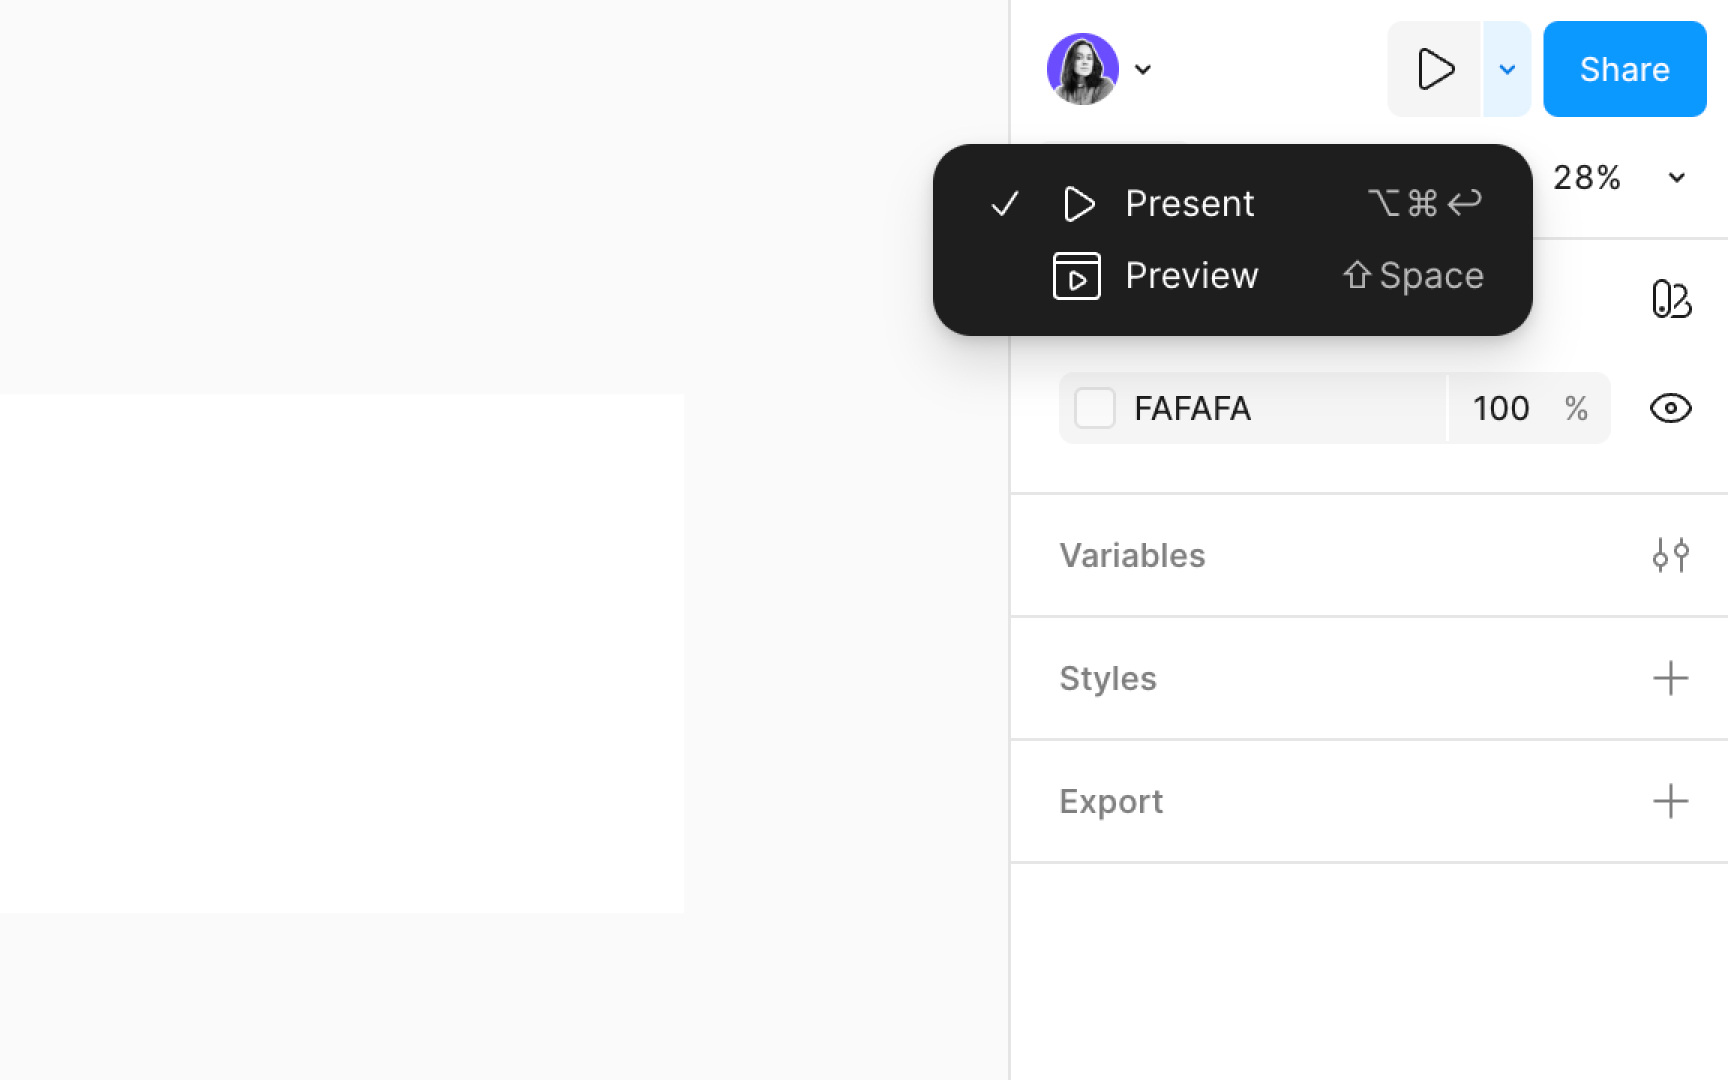
At the top-right of the
- Preview: Test your
prototype directly within the file using the inline preview. This feature lets you immediately see and interact with your prototype's functionality as you build it, all within the same tab. - Present: Showcase your prototype in a presentation view, which opens in a separate tab. Use Present to demonstrate your prototype to collaborators or to examine how it appears on a specific device.
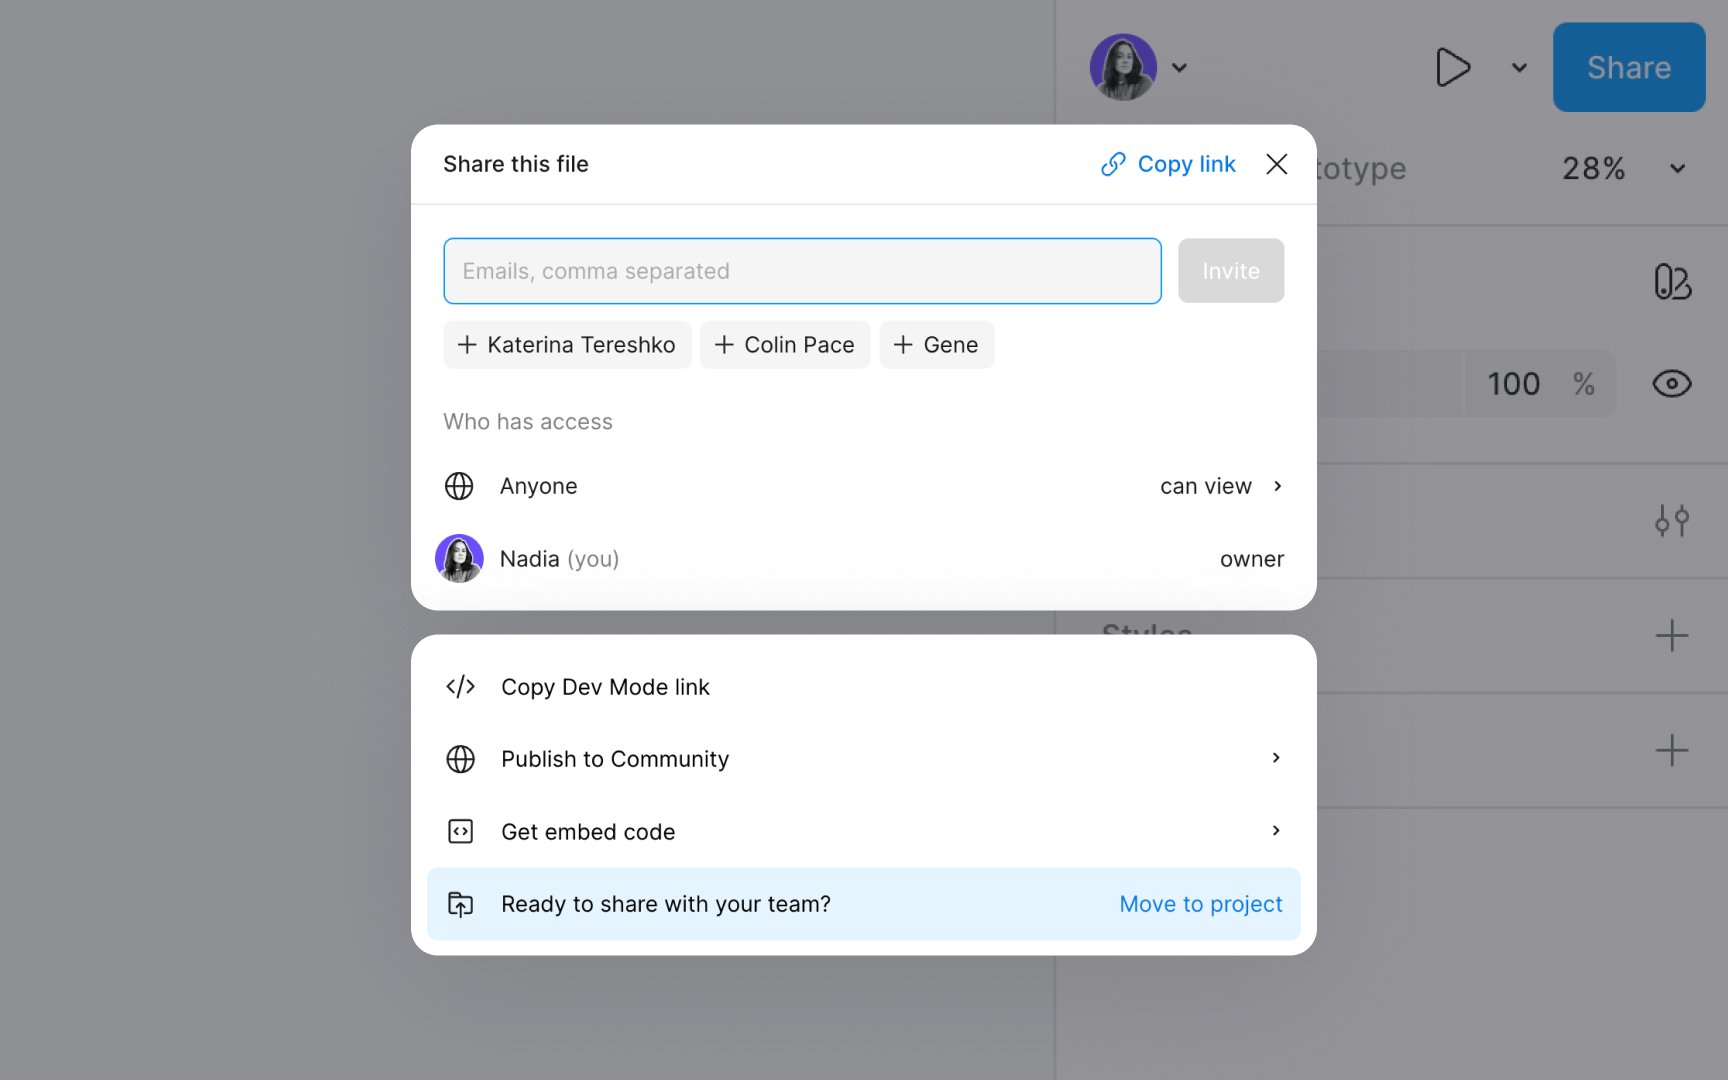
Need to gather feedback from colleagues or showcase your designs to your community without granting edit access? Figma's sharing features are both versatile and user-friendly. Start by clicking the Share
If you aim to share a particular frame, select it before sharing. The link you provide will then precisely direct recipients to that specific frame.
Pro Tip: Press Cmd L (on Mac) or Ctrl L (on Windows) to copy a shareable link for your file or selected element instantly.
In Figma, setting the right
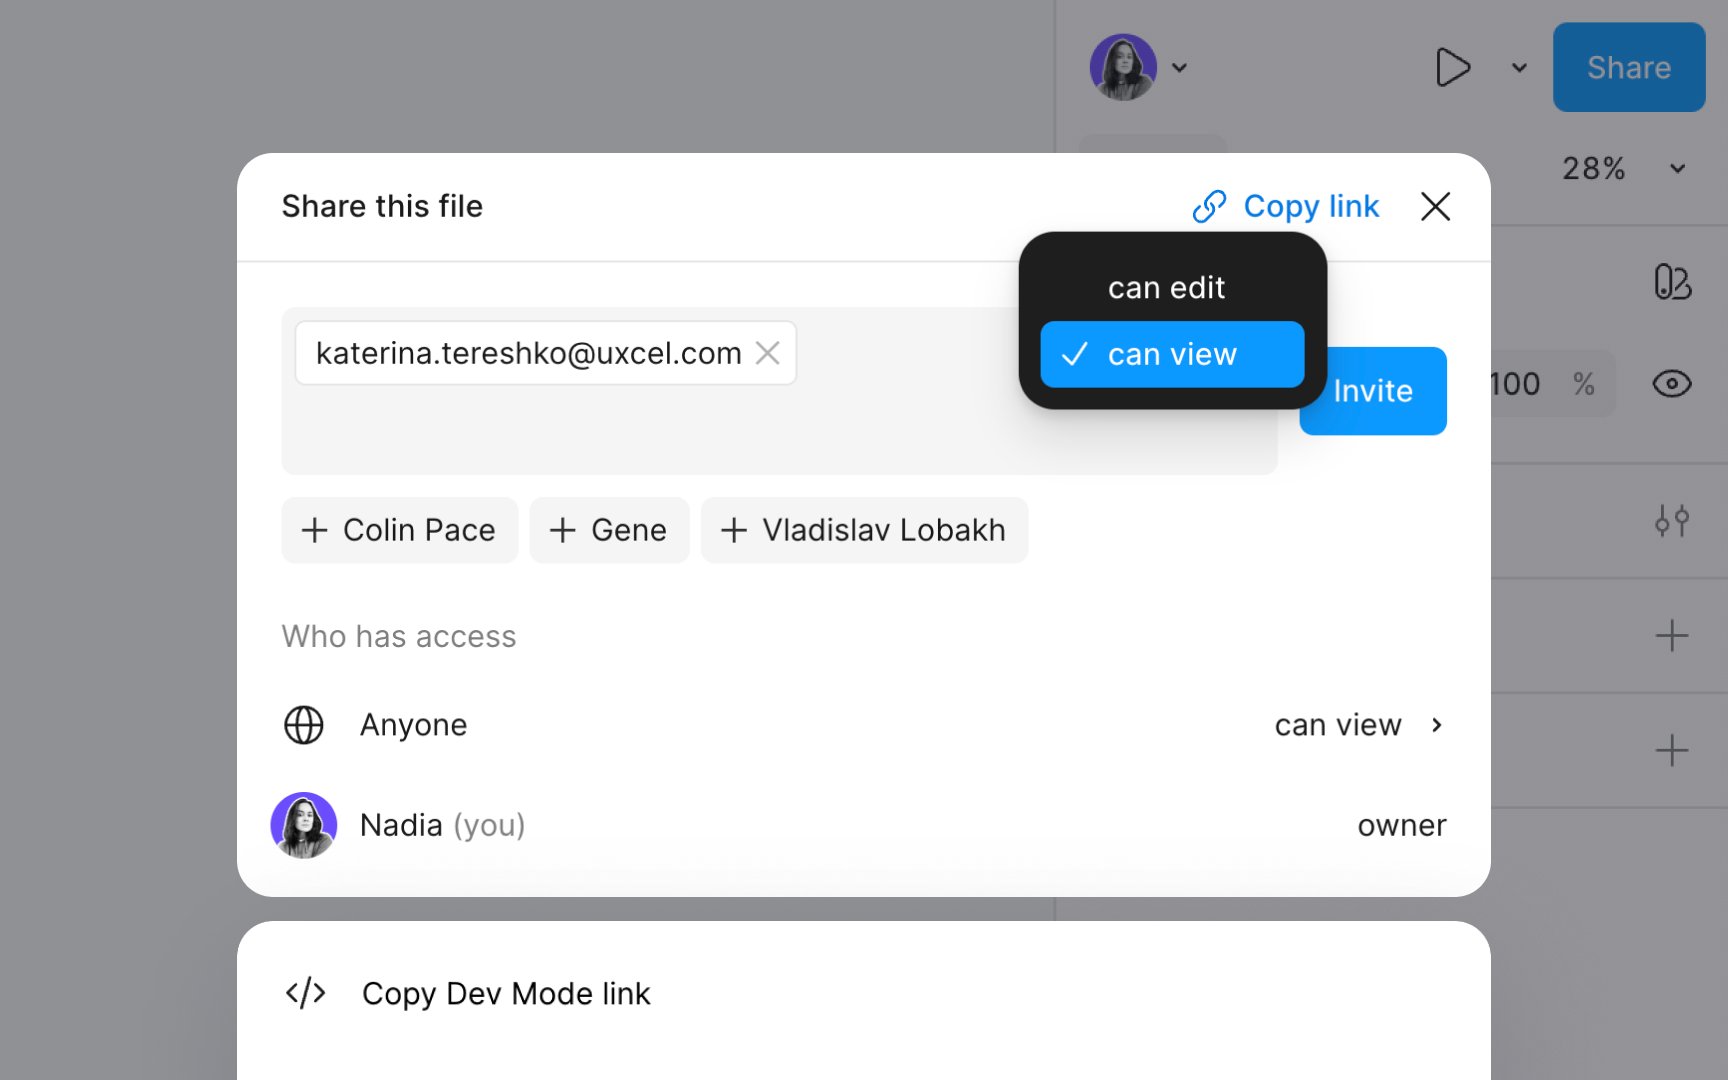
- Can Edit: This permission allows users full creative control. They can edit content, reposition elements, rename the file, and even manage sharing settings or delete the file. This is ideal for team members actively involved in the
design process . - Can View: Viewers can explore the file in depth without altering the content. They can inspect layers, review properties, and understand prototype flows and connections. Plus, they can engage through comments,
cursor chat , audio chat, and emotes in Figma and FigJam files. It is perfect for stakeholders reviewing the project or team members providing feedback.
You can set these permissions by clicking the Share
Alternatively, the Share modal allows you to copy
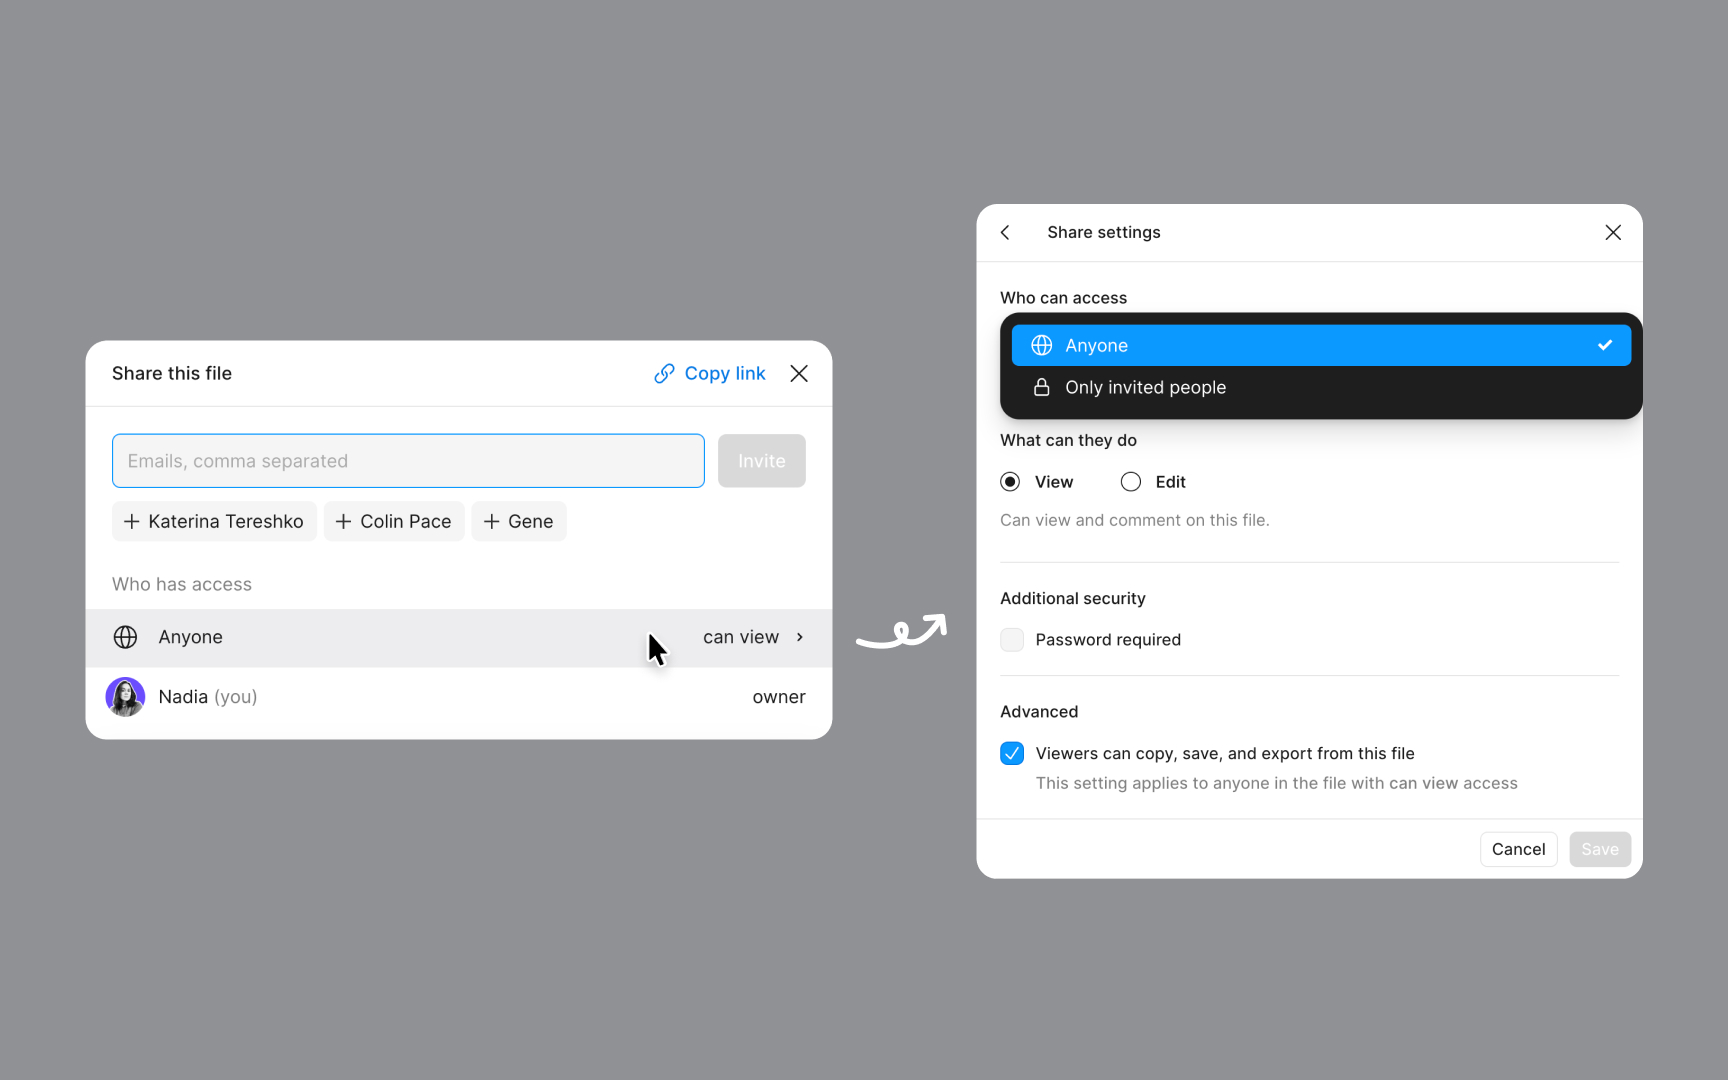
Figma's access
- Anyone: Offers broad access. Anyone with the
link , team member or not, can view or edit the file, making it suitable for public sharing and inviting mass feedback. You can click on the Password required checkbox below to add an extra security layer in this setting. - Only invited people: Provides the most restrictive access. Only the individuals you invite via
email can view or edit the file. It is best for highly confidential projects where viewer discretion is paramount.
You can find these settings by clicking the Share
For organizations, additional settings allow restricting access to members only, either through a

In Figma, the Export section is where you prepare assets for download:
- You’ll find it in the right sidebar after selecting an element
- Use the preview to check how the export will look before saving
- You can export in multiple formats like PNG, JPG, SVG, and PDF
What's exportable in Figma?
- Individual layers, frames, components, groups, or specific sections
- Specific areas of the canvas, neatly defined using the Slice tool
- The full canvas of any
page , capturing the entire design in one go - The complete file, savable as a .fig file for comprehensive backup or sharing
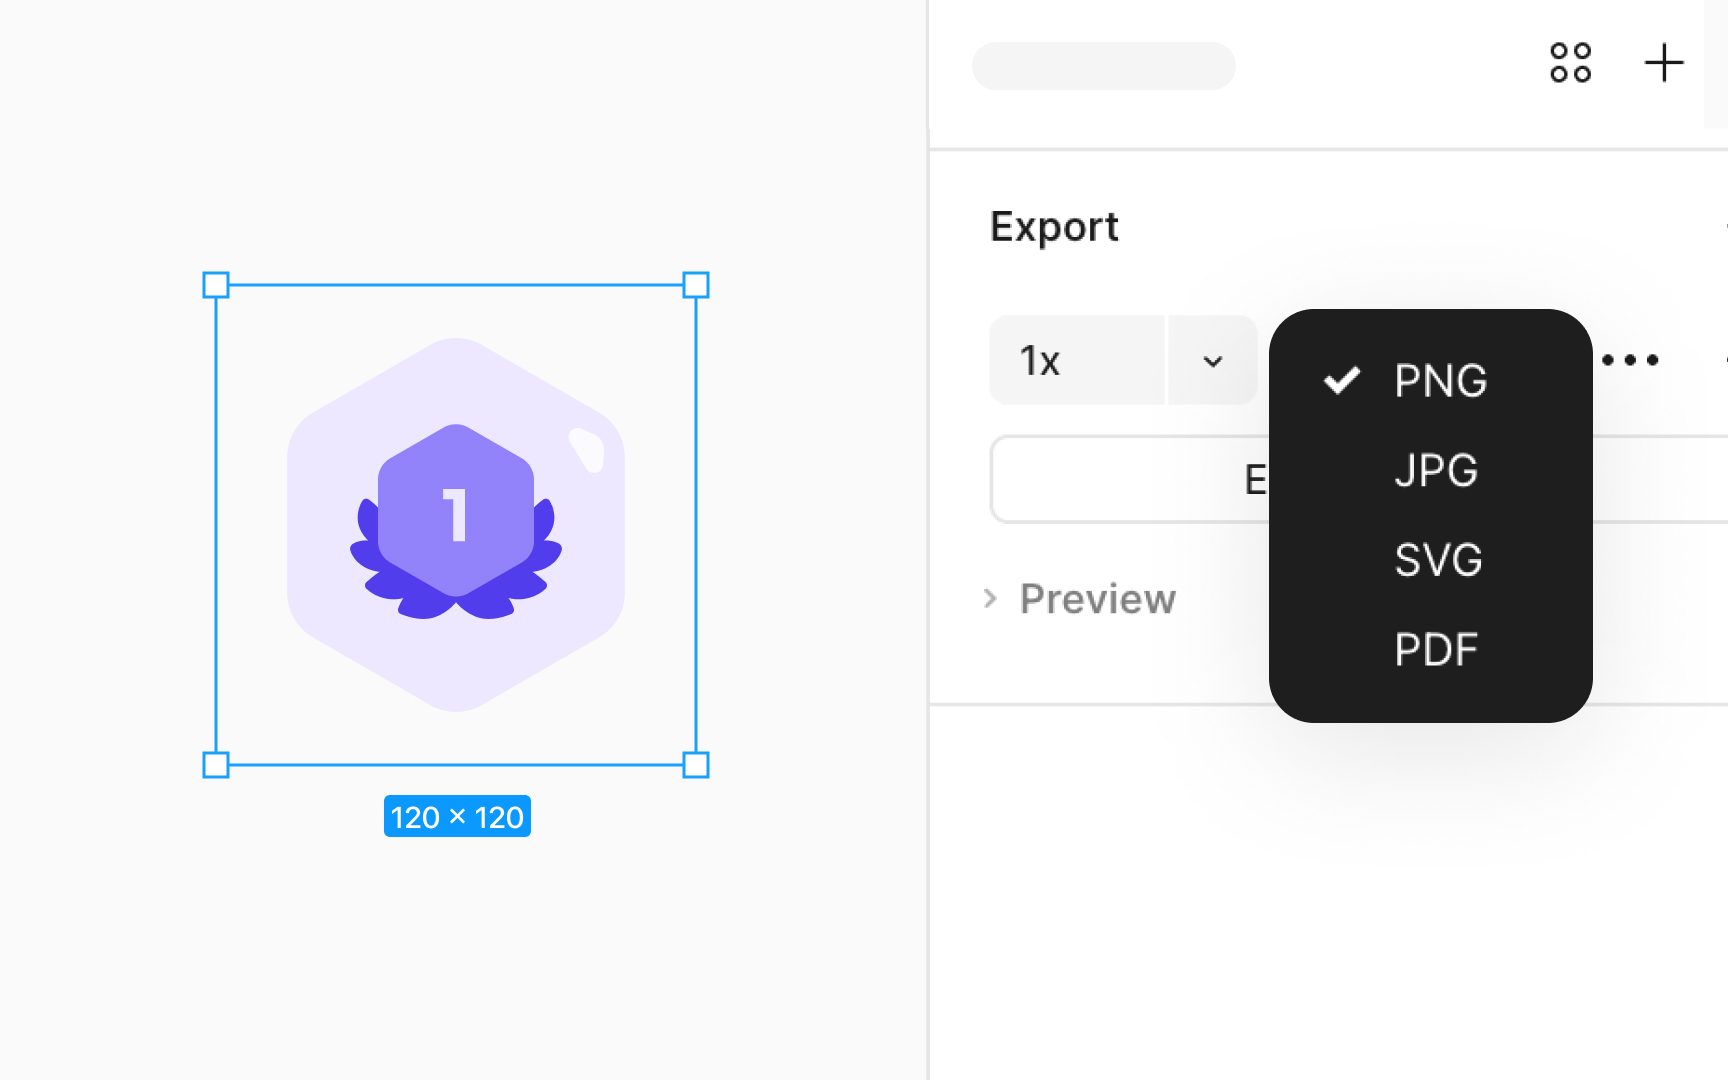
Choosing the right format for your Figma exports ensures optimal clarity and functionality:
- PNG: Ideal for images needing transparency or a mix of text and graphics, like logos or illustrations. It offers lossless compression, preserving quality but resulting in larger file sizes than JPG.
- JPG: Great for web use or print photography due to its smaller file size from lossy compression. However, it lacks support for transparency and may reduce text clarity, making it less suited for graphics with text.
- SVG: Perfect for logos, icons, or responsive design elements. SVGs are scalable vector graphics, maintaining quality at any size and supporting transparency. They're code-friendly, aligning well with digital design needs.
- PDF: Use for sharing detailed, interactive layouts across systems. PDFs encapsulate text, fonts, vector graphics, and images, maintaining the design's integrity. They're ideal for print mockups, iOS development assets (supported by Xcode), or exporting slide decks.
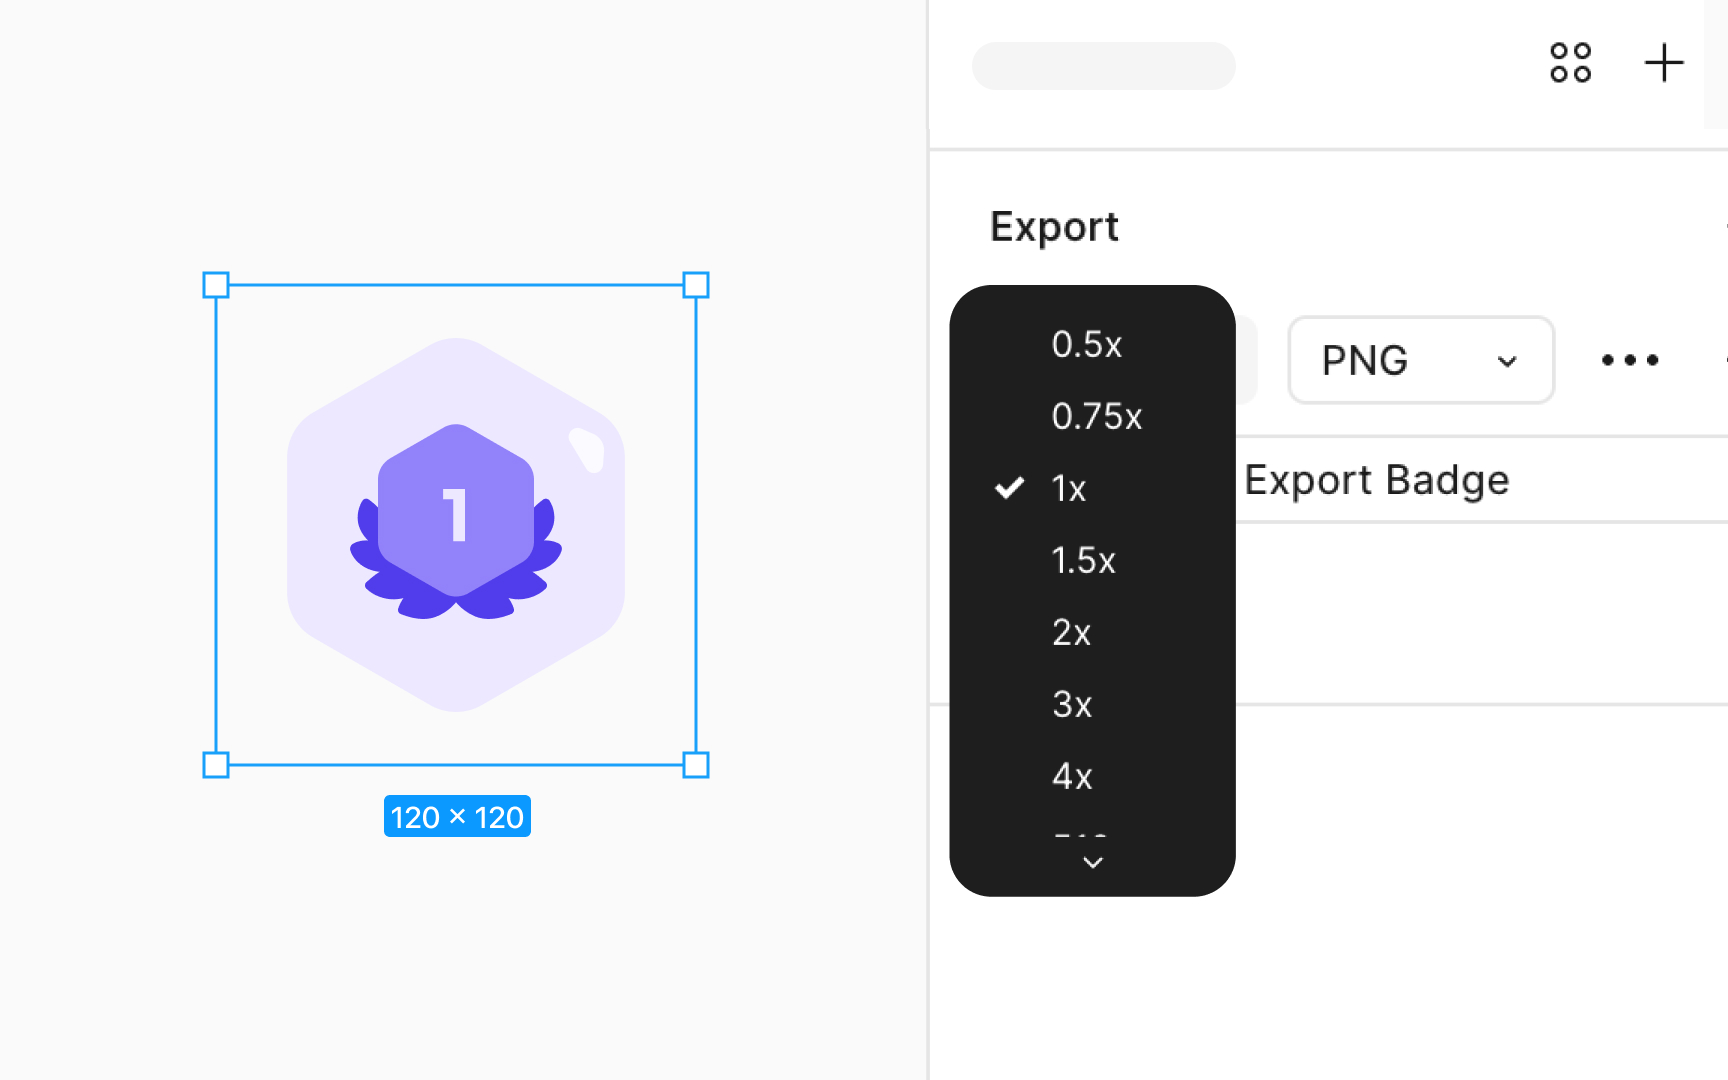
Figma's export
To tailor the size, enter a number followed by:
- “x” to scale by that multiplier
- “w” for a specific width
- “h” for a designated height
Scaling is particularly useful for high-density displays like retina screens, enhancing the resolution of your
Figma's

Bulk exporting is a time-saver in Figma, ideal when you need to export multiple
- Mac: Shift Command E
- Windows: Shift Ctrl E
The Export
Top contributors


Topics
From Course

Share


Similar lessons

Mentorship Program

How to Make the Best Out of Mentorship
