Designing for Motor Disabilities
Understand the most common motor disabilities and learn how to design products that work for all users
Designing an accessible web product for users with motor disabilities requires an understanding of the challenges these people experience and the strategies and tools they use to operate.
People with motor disabilities often have difficulties using digital interfaces as they have trouble controlling a mouse or making accurate keystrokes. While assistive technologies can help, interacting with a keyboard or emulating it, they're not enough to make the web accessible.
As designers, you should ensure all features are keyboard-accessible and provide visual feedback to indicate a currently active link or element.
Motor disability is a physical and mobility impairment resulting from traumatic injuries, diseases, and congenital conditions. People with motor disabilities experience coordination difficulties, muscle weakness, sensory limitations, or pain while performing physical activities or specific tasks.
For navigating websites, such users rely on assistive technologies such as an alternative keyboard, head wand, trackball mouse, or mouth stick. Also, single-switch devices, speech recognition software, puff and sip devices, eye-tracking technologies, and other similar tools make users' experience more efficient.
Inclusive design not only caters to permanent disabilities but also takes into account temporary disabilities, such as broken or sprained limbs, stiff legs after a long journey or an uncomfortable seating position, or numb fingers due to cold weather.
We can integrate features such as voice control, gesture recognition, and assistive devices like switches or joysticks into products or services to make them accessible to all users.
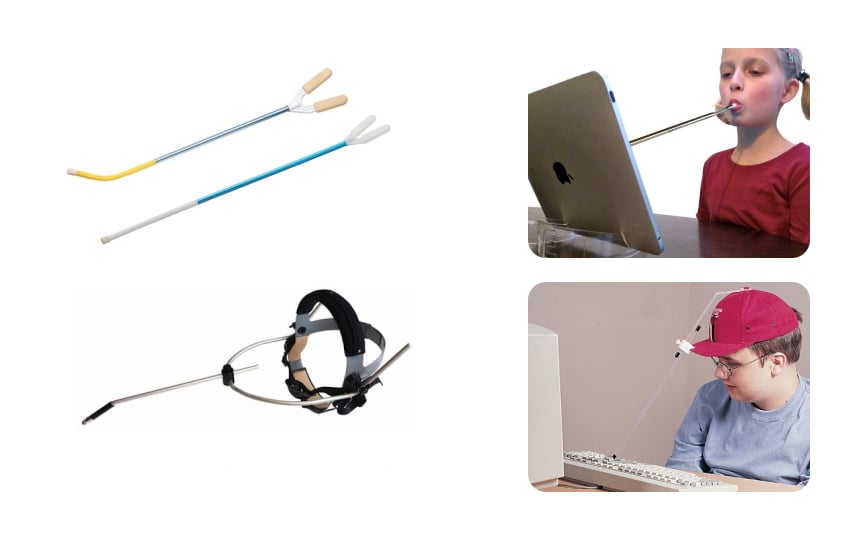
People with motor disabilities use head wands and mouth sticks to perform tasks such as drawing, typing, pressing buttons, turning pages, and other interactive activities.
Here's how they work:
• Head wands are worn on the head and controlled by moving them. They offer greater precision than mouth sticks and allow users to keep their hands free for other tasks. However, they can be tiring and challenging for users with limited head or neck mobility.
• Mouth sticks are held in the mouth and controlled by the jaw or mouth muscles. They are better suited for these users, but can also cause discomfort after extended use.
Image credit: Ergo Canada
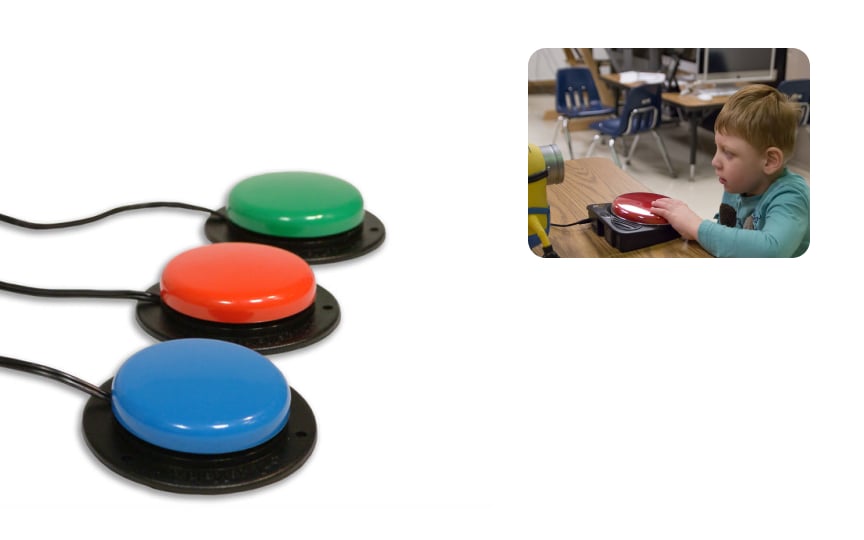
Image credit: DiSA
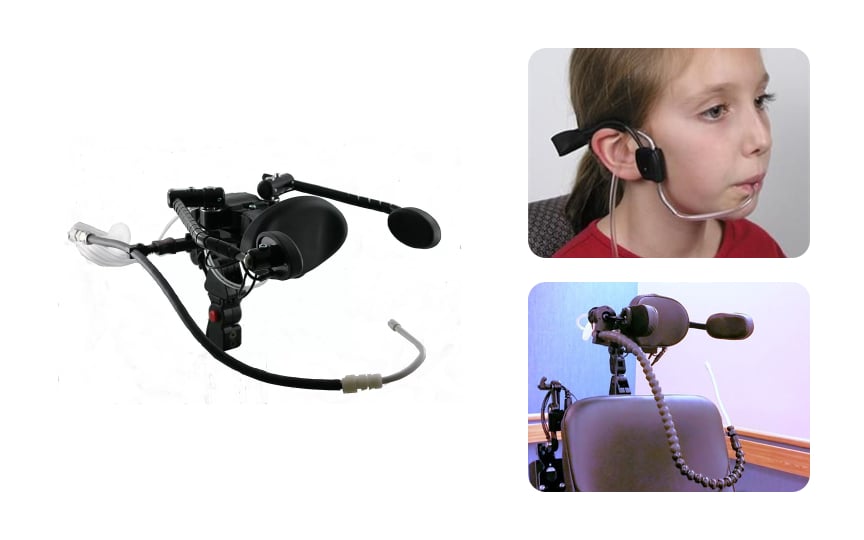
Image credit: Volkswitch
People with motor disabilities often find it hard to do tasks that require careful movements, like reaching for things or pressing
An adaptive switch can be controlled by any part of the body the person can move, whether it's their head, hand, elbow, or even just a blink or puff of air. Each switch is made to match what's easiest and most comfortable for the person using it.
When connected to a computer or other device, these switches turn simple movements into commands. For example, a gentle touch or small movement can help someone type, control their wheelchair, or use their phone. The switch only needs to do two things: turn on and off, but how it does this can be changed to fit each person's needs and abilities.
Image credit: Queen's University
Sip-and-puff (SNP) switches help people with paralysis or limited motor skills navigate computers, mobile devices, and wheelchairs. These devices work through a straw-like mouthpiece that detects air pressure changes when users blow into (puff) or suck from (sip) it. The mouthpiece connects to a system that translates these actions into digital
Here's how SNP systems work:
- Setup: The mouthpiece attaches to a headpiece or mounts on a wheelchair or desk, connecting to devices via wire or wireless technology
- Operation: Users sip or puff air through the mouthpiece to trigger different commands
- Customization: Software interprets these actions based on user preferences — for example, puffs might move between screen elements while sips activate them
- Functionality: Systems can range from single switches to multiple ones for complex tasks, with specialized software to emulate keyboard and mouse actions
Image credit: Pinterest
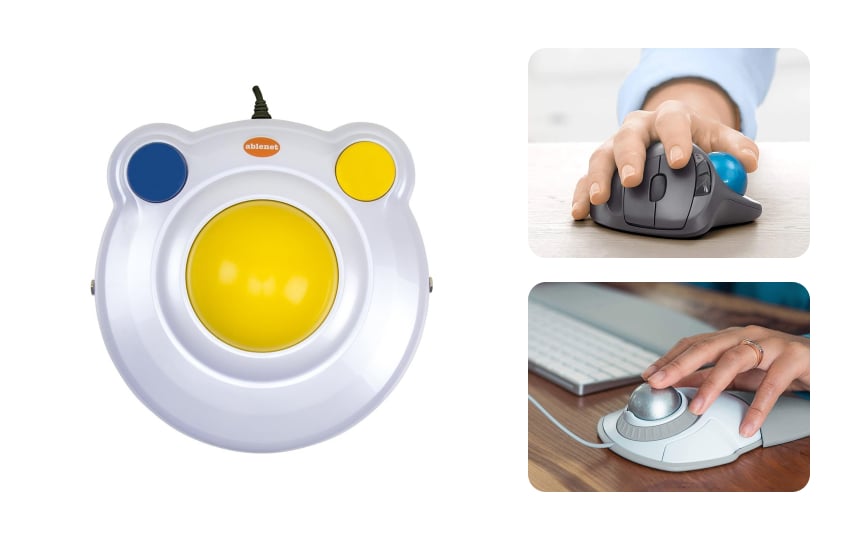
Trackball mice offer unique benefits that make them valuable for both people with motor disabilities and those seeking alternative input methods. These devices excel in situations where traditional mice might be impractical or uncomfortable to use.
Here's what makes trackball mice stand out:
- Versatile Positioning: Users can place them anywhere: on a desk, knee, or armrest, without compromising accuracy or performance
- Minimal Movement Required: Only finger control is needed to operate the trackball, eliminating strain on wrists, arms, shoulders, and neck
- Space Efficiency: Unlike traditional mice that need a clean, flat surface and a mousepad, trackballs work in confined spaces
- Flexible Control Options: Users can operate the device with various body parts, including feet, making it adaptable to different physical abilities and preferences
- Gaming Applications: Some gamers prefer trackballs for their precise control and consistent tracking, especially in situations requiring quick, accurate movements[1]
Image credit: iMore
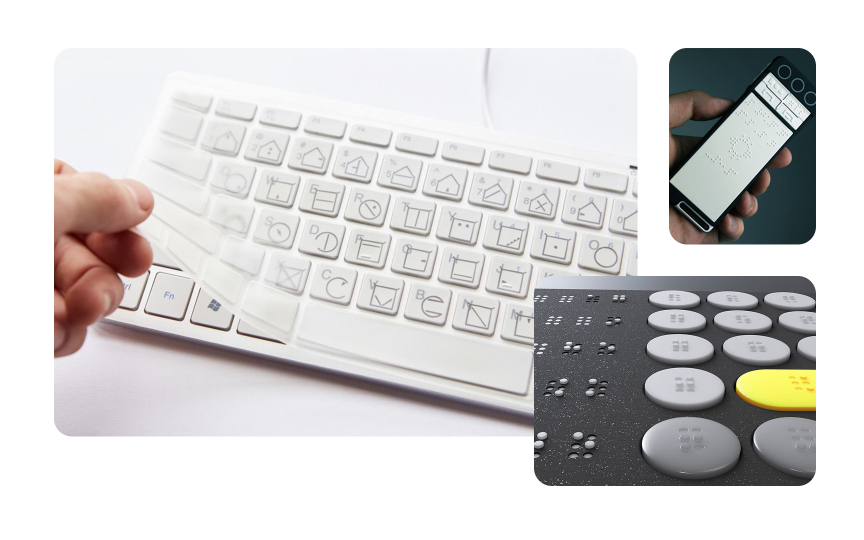
Adaptive keyboards help people with limited mobility type more effectively by adapting to their specific needs and abilities. These specialized devices come with various features that make typing easier and more comfortable.
Here's how adaptive keyboards make typing more accessible:
- Physical design: Features raised areas between keys that serve as hand rests, helping users with muscle spasms or tremors maintain stability
- Key modifications: Offers larger keys and increased spacing to help users with limited dexterity or fine motor control type more accurately
- Smart features: Includes word-completion tools that predict and suggest words, helping users type faster with fewer keystrokes
- Customization options: Provides adjustable settings like:
- Sticky Keys for sequential key presses
- Filter Keys to reduce accidental keystrokes from tremors
- Adjustable key repeat rates for better control
- Custom shortcuts for easier navigation
- Alternative layouts: Offers different keyboard layouts, including tenkeyless (TKL) designs that remove the numeric keypad to reduce reaching distance[2]
Image credit: PCD Maltron
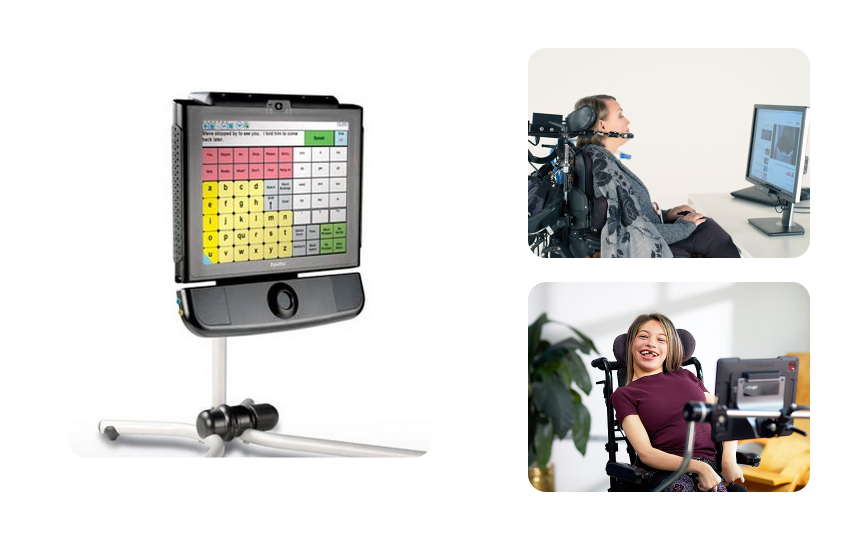
For people experiencing severe motor impairments, simple devices like mouth sticks or head wands don't remove roadblocks that prevent users from navigating the screen. In turn, eye-tracking devices can be a powerful alternative. They allow individuals with disabilities to navigate their computer or mobile devices with only eye movements.
Specifically, to use the device from the example, you should connect it via USB to your computer and stick the metallic mount to the bottom of your monitor. The device is very flexible and doesn't require you to sit still. Its sensors catch your eyes even when you're moving your head.
Sometimes, eye-tracking systems may include word-completion tools, so users can generate speech faster by typing or choosing from suggested phrases. Naturally, such sophisticated devices are more expensive and less common.
Image credit: NS Medical Devices
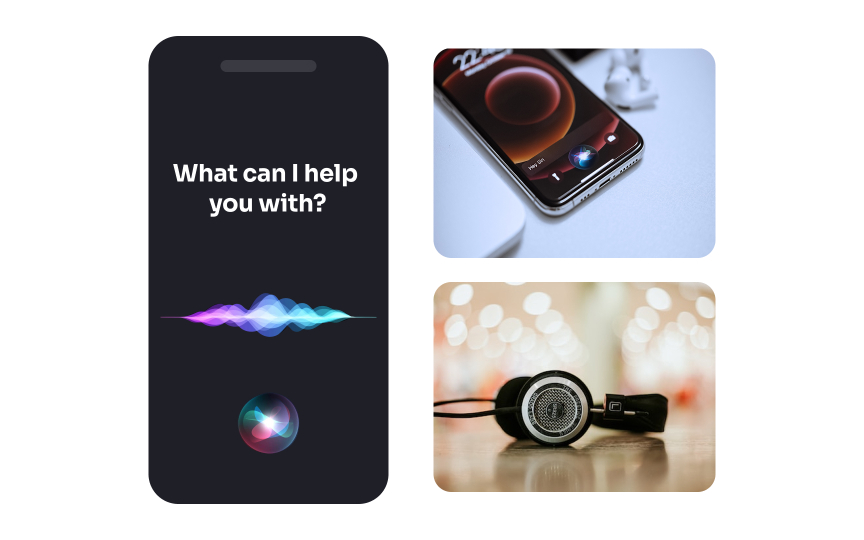
Voice recognition helps people with motor disabilities control their computers and mobile devices by speaking instead of typing or clicking. These tools turn spoken words into computer
Here's how voice recognition works:
- Basic function: Converts spoken words into text and commands that computers understand
- Setup process: Users speak into a microphone, and specialized software processes their voice
- Accuracy factors: Works best in quiet spaces with clear speech and proper microphone positioning
- Practical uses: Helps with typing emails, browsing the internet, and controlling smart home devices
While voice recognition can be very helpful, it has some limitations. The software might have trouble understanding speech if:
- Users have conditions that affect how clearly they can speak
- There's background noise in the room
- The microphone quality is poor
- Users speak too quickly or quietly[3]
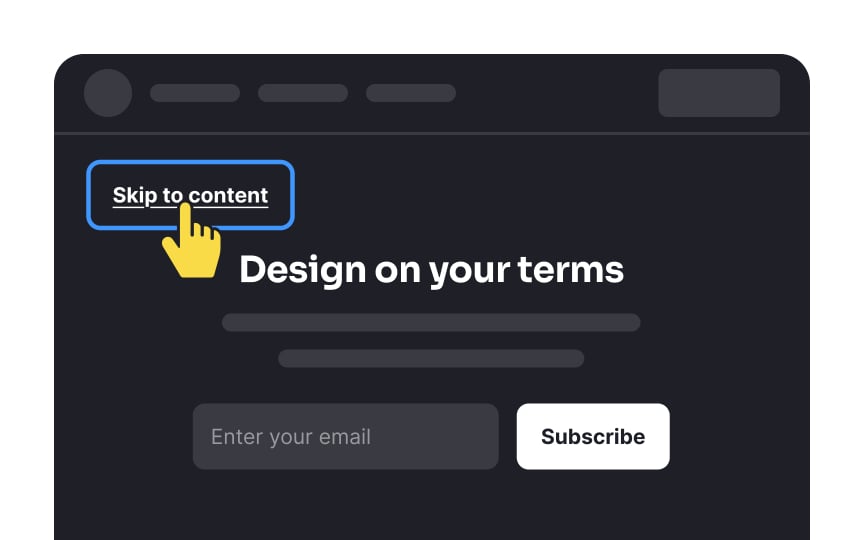
A "Skip to Main Content"
Here's why a "Skip to Main Content" link is essential:
- Navigation challenge: Users with mobility disabilities need to tab through many links before reaching the main content
- Physical effort: Repeatedly pressing keys or switches can be physically demanding for users controlling devices with limited movements
- Quick access: This feature helps users jump directly to the main content, skipping past menus and headers
How to implement it:
- Place the skip link as one of the first elements on the
page - Make it hidden by default but visible when receiving keyboard focus
- Ensure it appears prominently when users tab to it
- Position it at the top of the page for quick access[4]
Imagine navigating a website without a cursor. You'd probably feel completely lost and disoriented. That's what people using keyboards or similar assistive technologies experience when there's no visual indicator of keyboard focus. Here's what you can do to enhance accessibility in design:
- Provide a consistent focus indicator. By default, most browsers use a dotted grey outline or solid blue border, but you can use your brand colors.
- Ensure keyboard navigation. Provide keyboard access to all interactive elements, including forms,
buttons , dropdowns, and modal boxes. - Maintain the logical hierarchy in code. It ensures that the keyboard focus can move in the intended order from top to bottom and from left to right, from the most important to less important
content .
Adding a search
It's easier for users to pronounce a word or phrase and then search for it by clicking through elements via voice control.
Make sure your site is SEO-optimized so that the search results are helpful and relevant to users and don't confuse them.
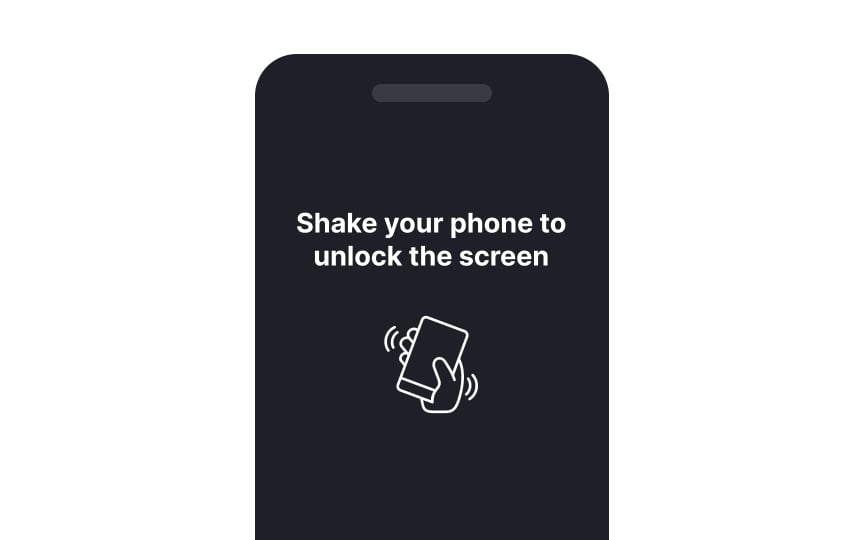
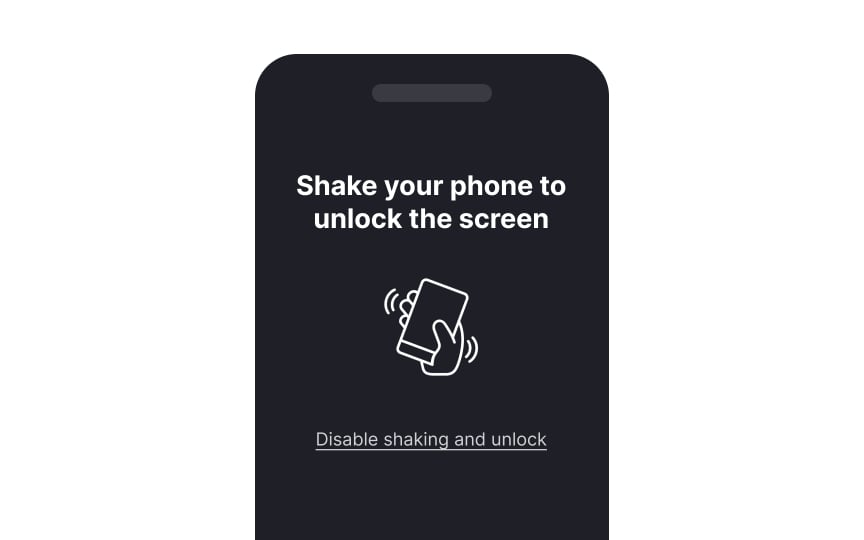
If your app uses device motion, like shaking to undo, tilting to scroll, or gesturing to trigger actions, always provide an alternative method, such as a visible
For example, the “shake to undo”
Controls that are too small or placed too close to each other are hard to activate. This can cause frustration, especially for users with motor impairments, hand tremors, or those using assistive tools like a stylus, head pointer, or voice-controlled interface.
WCAG 2.2 recommends that all interactive targets should be at least 24 by 24 CSS pixels. If making them this size is not possible, designers must provide enough spacing so that a 24-pixel circle centered on the target does not overlap with any nearby target. This helps prevent accidental taps and makes interfaces more reliable for everyone.[5]
People with motor disabilities often need more time to find, read, react, type, and complete tasks. For activities with a time limit, the
Additionally, some
Dragging movements, like moving items between lists or sliding a control, may feel intuitive, but not all users can perform them. People with motor disabilities or those using alternative input devices like head pointers, speech control, or eye-gaze tools often struggle with pressing, holding, and moving simultaneously.
To make your interface accessible, always provide an alternative that works with a single pointer action like a tap or click. For example, allow users to click on “Move up” or “Send to column” instead of dragging cards on a taskboard. Sliders can offer text
Pro Tip: Test your interface using only single taps or clicks without holding or dragging.
Most users interact with mobile devices using just one thumb. For left-handed users, the natural area of reach is a mirror
To design more inclusively, it’s important to understand how thumb reach affects comfort and
- Assess common UI placements: Look at
buttons ,tabs , andmenu triggers: are they accessible for both thumbs? - Use a mirrored heatmap: Test how your
layout performs for left-hand vs. right-hand use by flipping the thumb zone.
Pro Tip: Avoid placing essential controls in the bottom-right corner. Left-handed users will struggle to reach them comfortably.
References
- Accessible Keyboards & Their Main Features, Explained | Top 5 | Top 5 Accessibility
- Using Voice Technologies to Support Disabled People | ScienceOpen
Top contributors
Topics
From Course
Images provided by
Share
Similar lessons

Intro to Accessibility

Inclusive Design Basics

