Strokes in Figma
Learn when and how to use different stroke styles and properties in Figma.
A stroke refers to the outline or border that surrounds a shape or object, allowing you to define edges, create visual boundaries, and add detail to your designs. You can apply strokes to a variety of objects, including rectangles, circles, and custom shapes, giving you the flexibility to enhance the visual appeal of your work.
Figma also offers extensive control over strokes, enabling you to adjust thickness, color, and style. This means you can easily customize how bold or subtle you want the border of an object to be, choose from a spectrum of colors to match your design scheme, and select styles such as solid, dashed, or dotted lines to convey different visual effects or meanings, opening up creative possibilities for intricate designs.
Strokes can have multiple applications in design including but not limited to:
- Defining boundaries: Use strokes to delineate the edges of shapes, text, or images, enhancing distinction against varied backgrounds.
- Enhancing visibility: Apply strokes to improve the readability and visibility of design elements.
- Creating visual hierarchy: Employ strokes to emphasize certain elements, directing the viewer's focus and establishing order within your design.
- Styling: Utilize strokes for decorative effects, such as patterns and frames, or to add depth, enriching the overall aesthetic appeal.
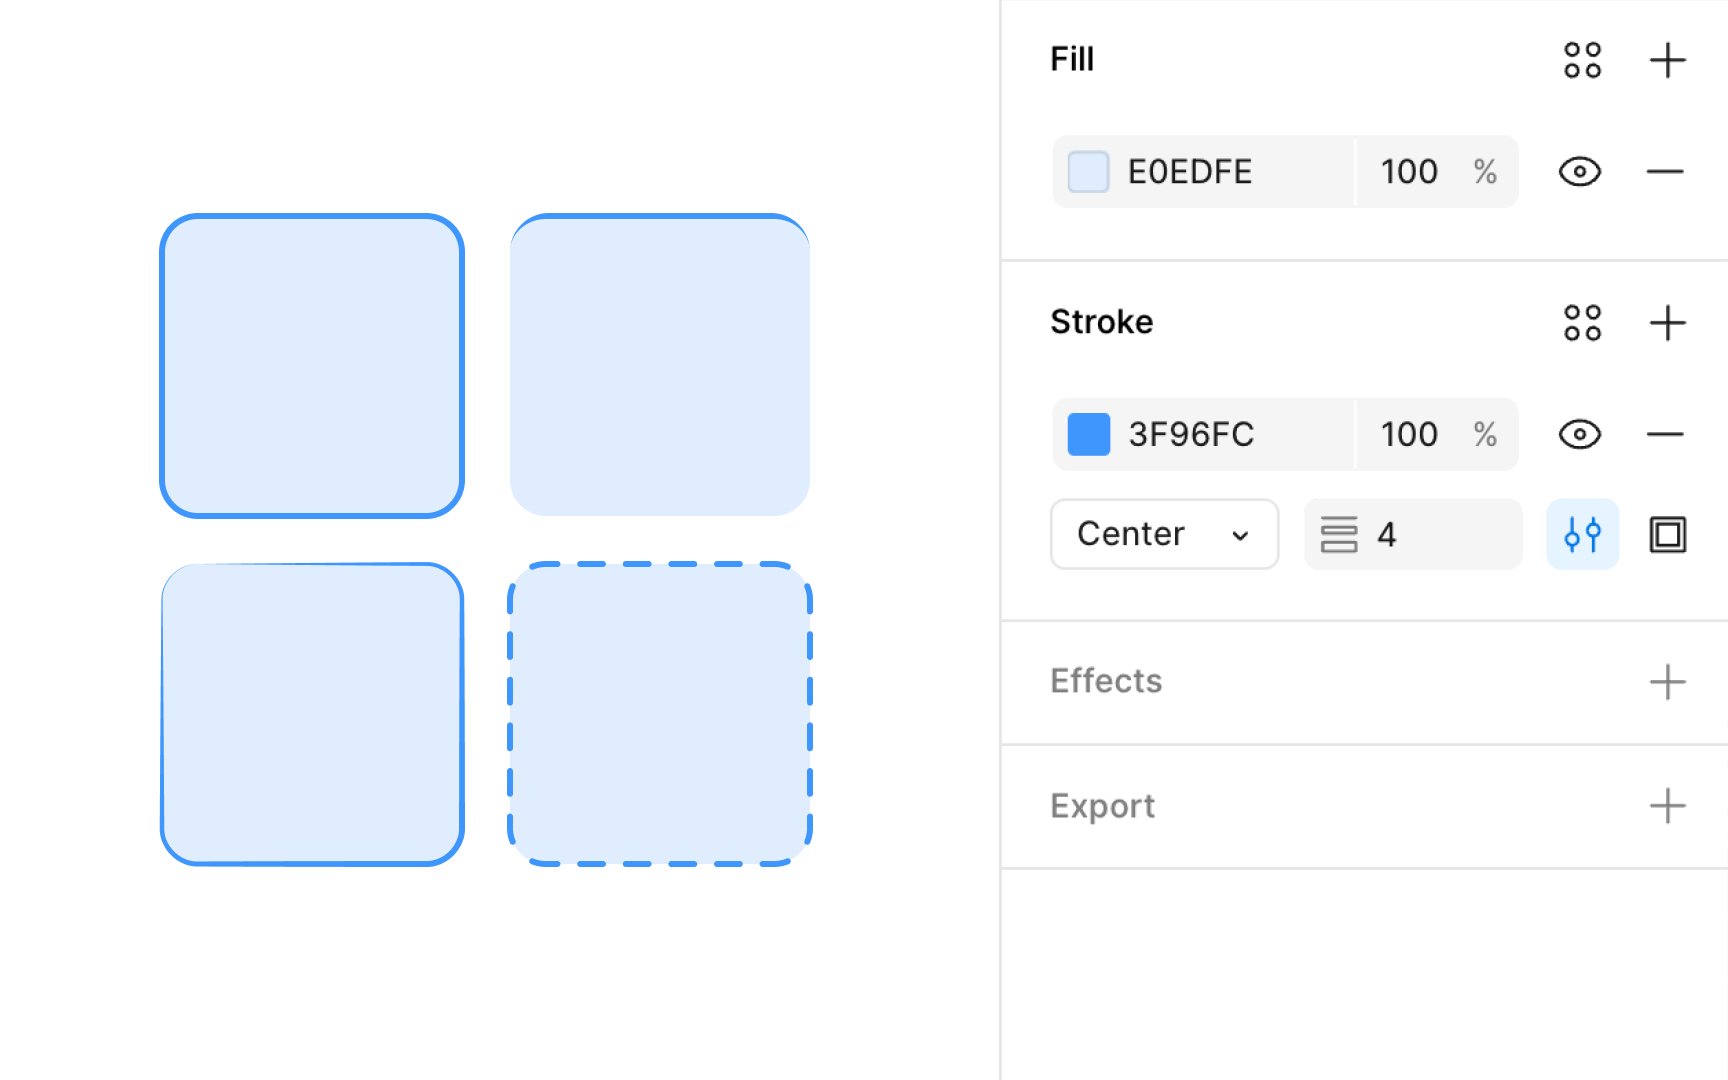
Stroke properties are accessible within the Design panel in Figma, with various options to customize stroke appearance. The Paints property allows the addition of solid colors, gradients, or
To add paints to strokes:
- In the Design panel, locate the Stroke section.
- Click on the
color swatch to open the color picker and select from solid, gradient, or image fills. Adjust opacity as desired. - Click "+" to layer more paints, mixing colors or textures.
- Use the eye icon to experiment with the visibility of different paint layers without having to make any permanent changes.
- Click "-" to delete a paint layer or stroke.
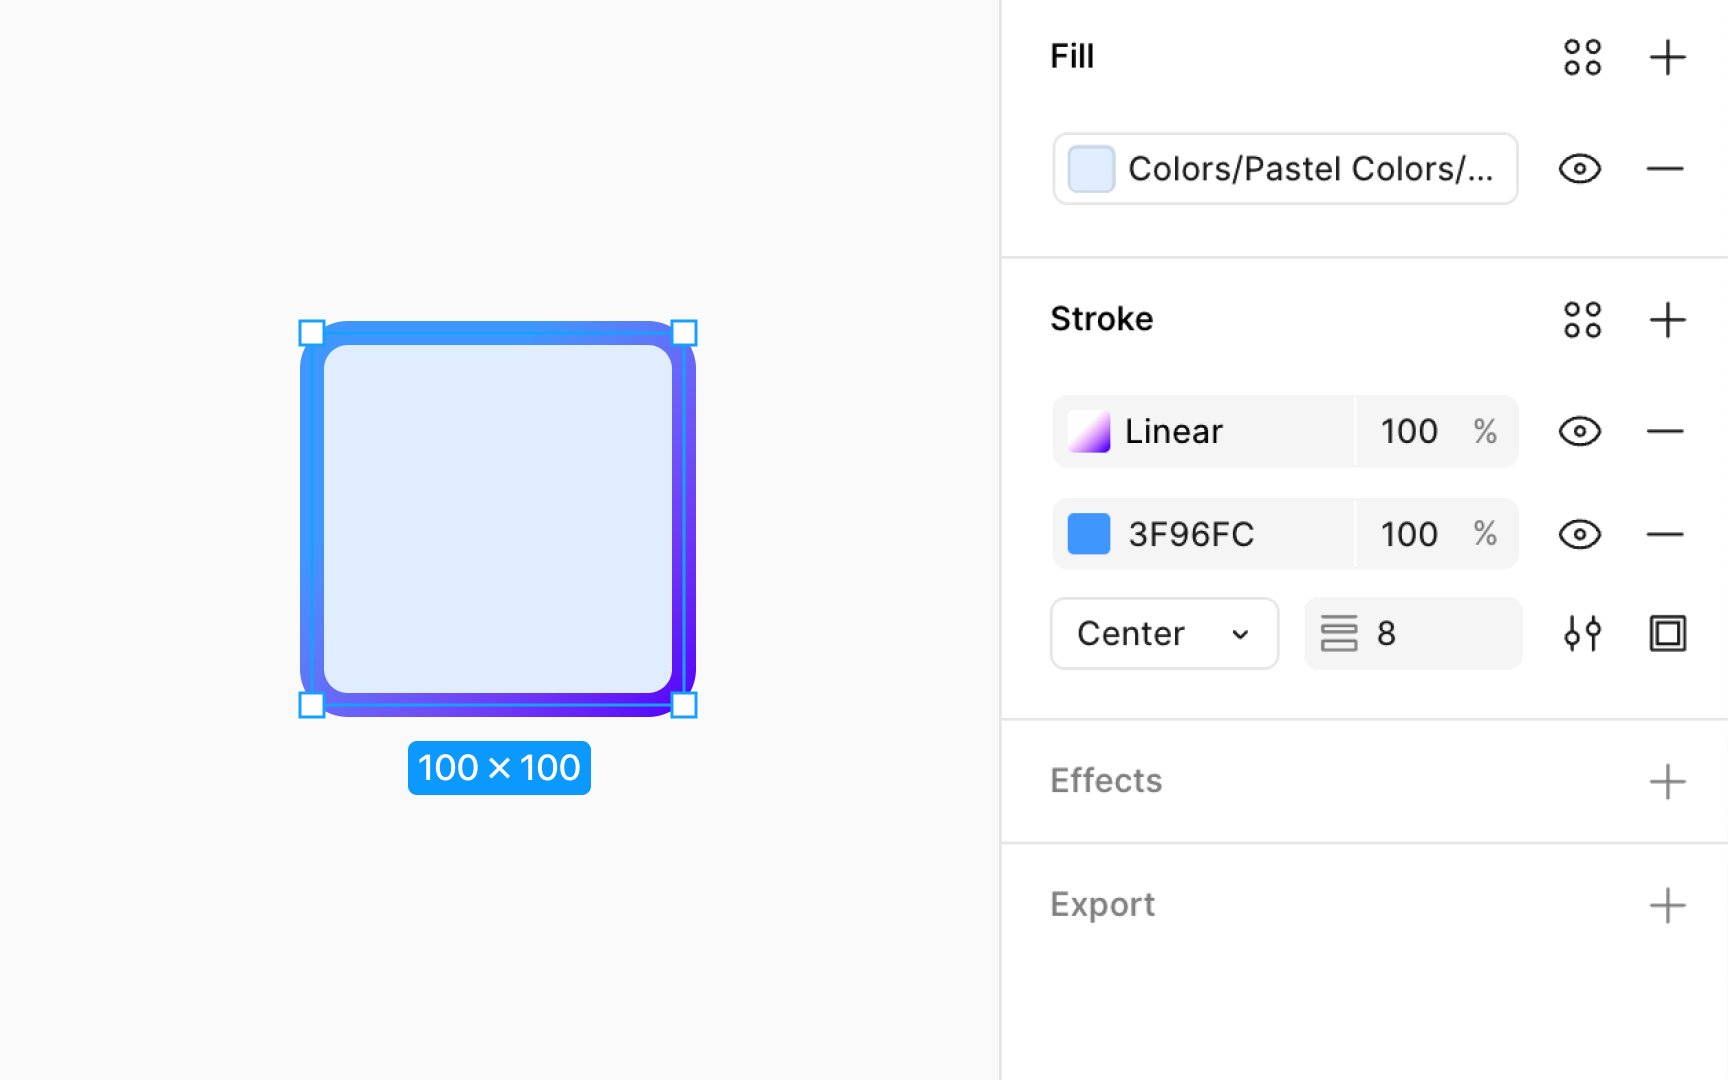
Pro Tip: When adding more than one stroke paint layer, the weight, position, and style properties of all layers must be the same.
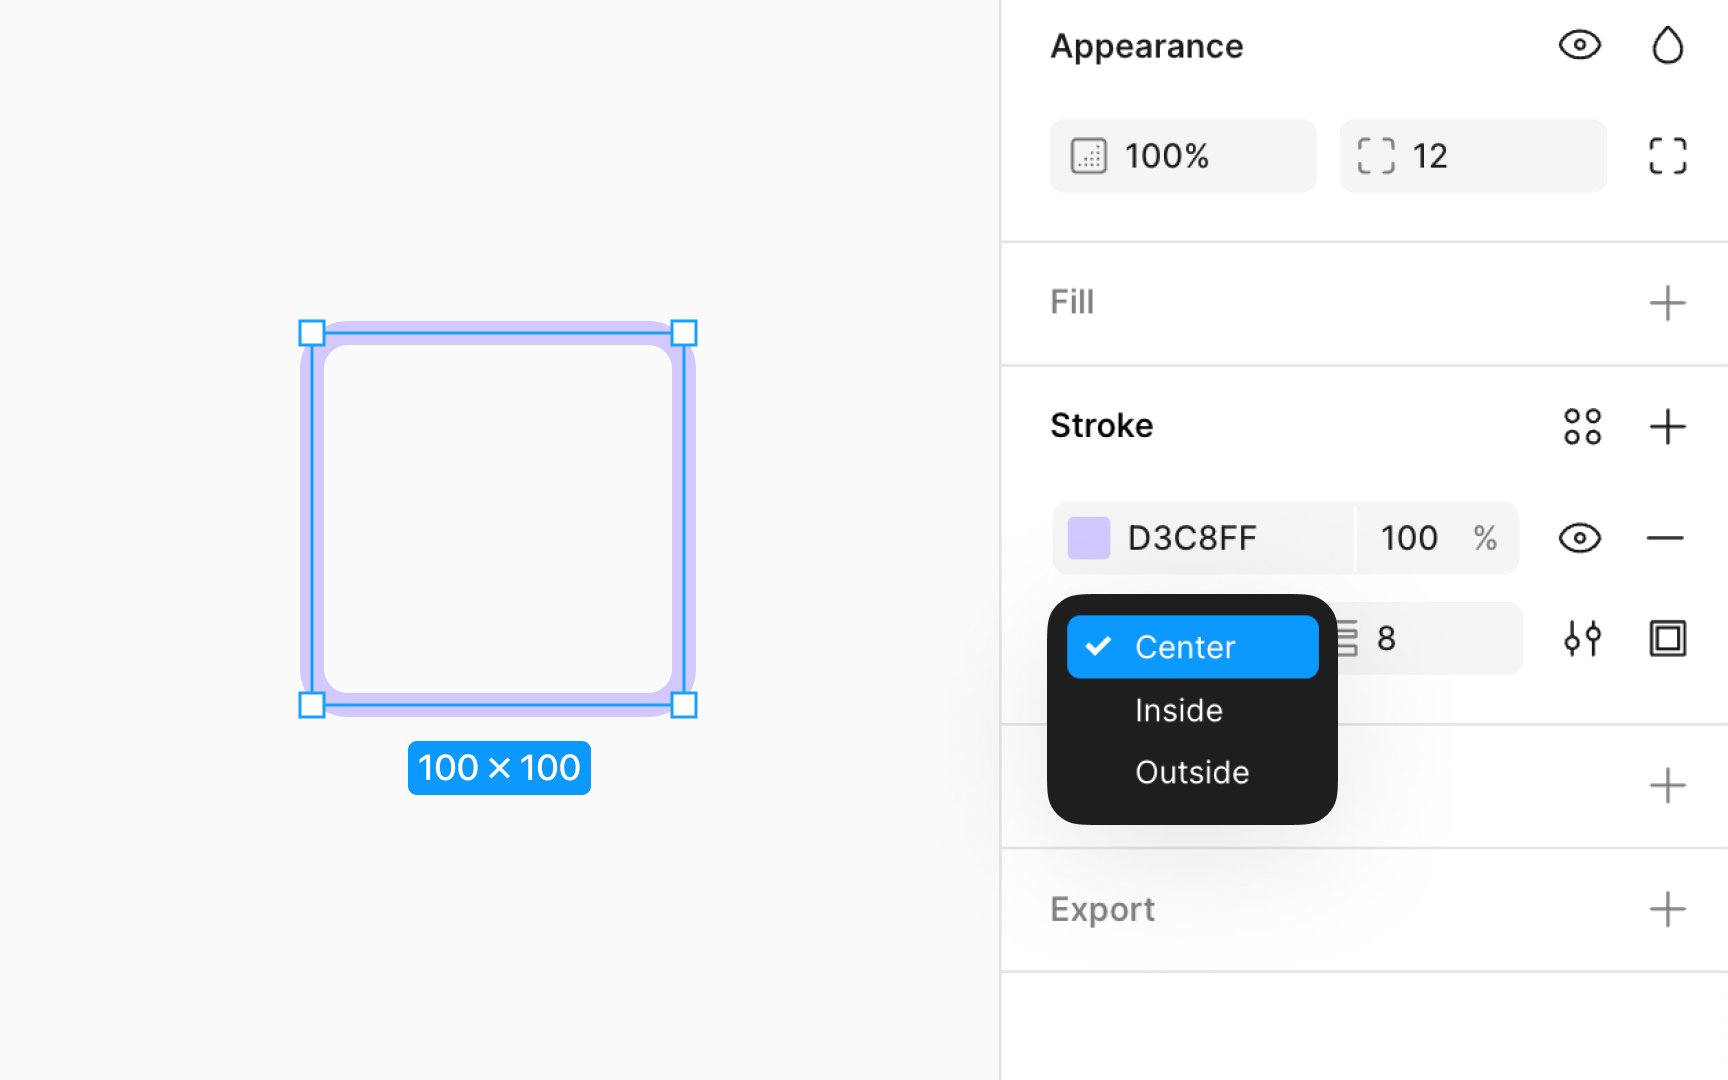
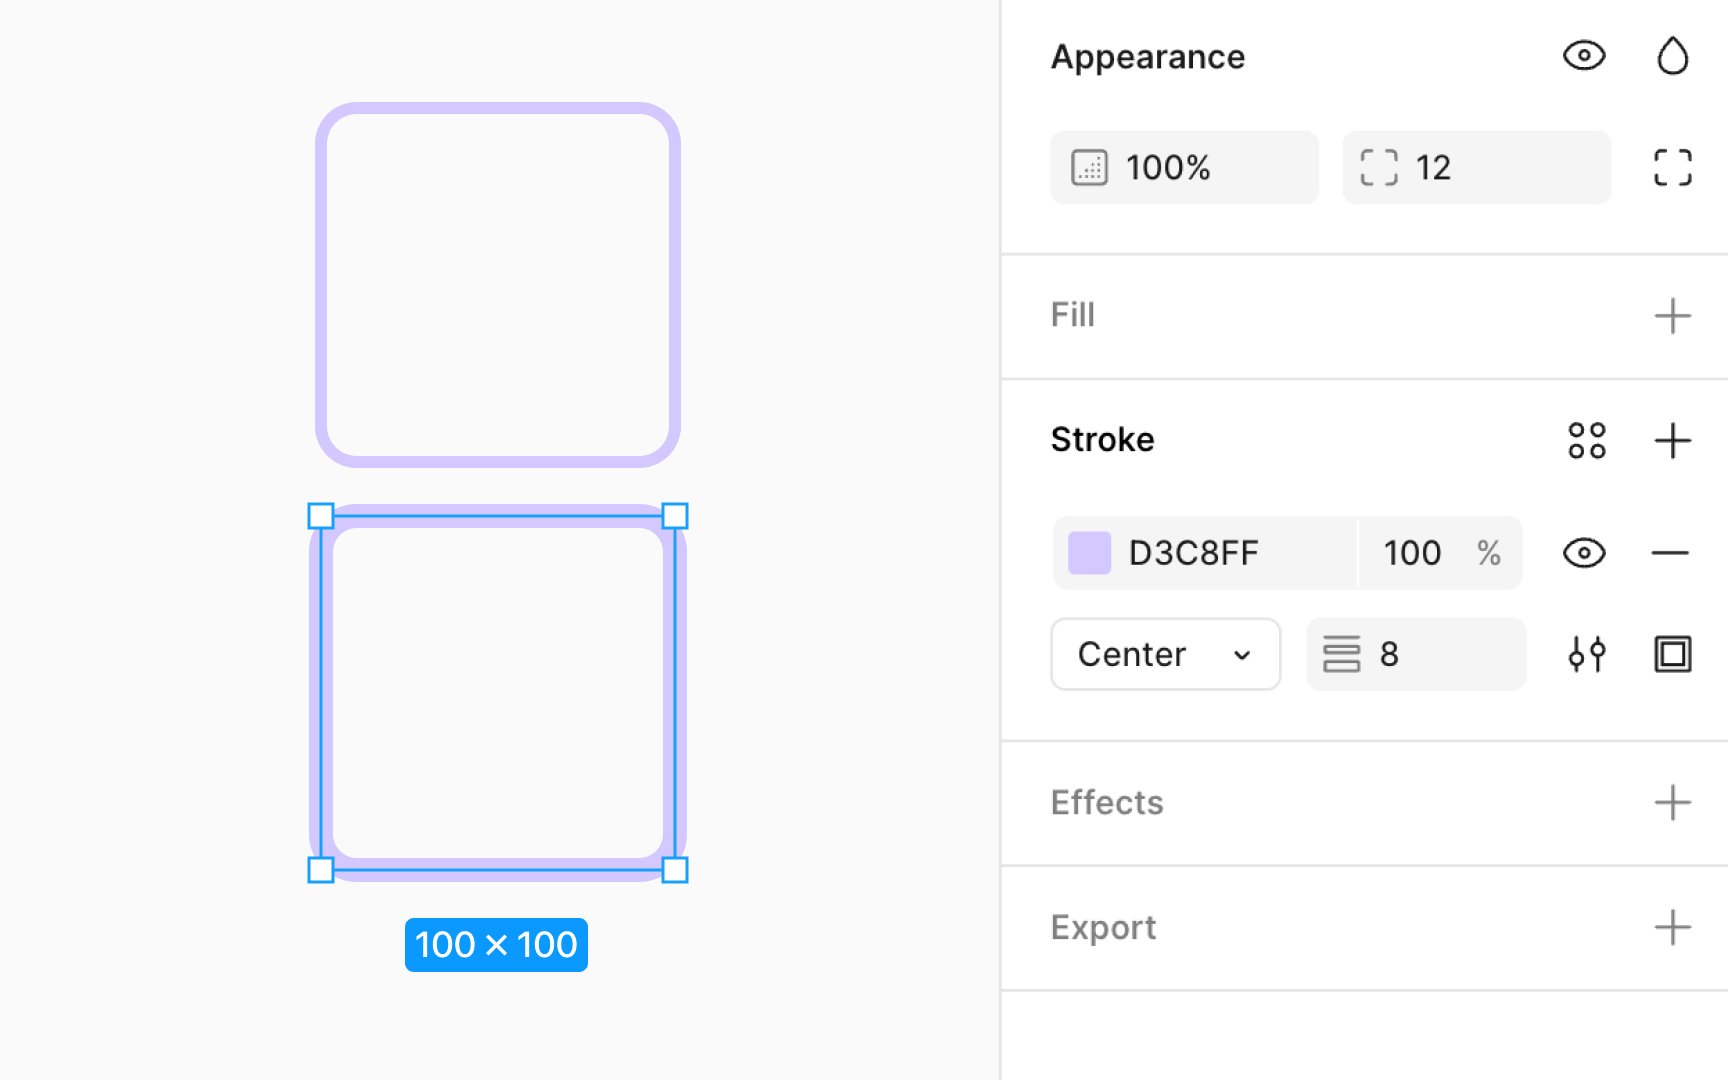
By default, shape layers have strokes set to inside, while lines default to center. However, you can position strokes inside, outside, or the center of a layer's path by using the dropdown Position menu in the Stroke section of the Design panel. This flexibility allows you to enhance the visual clarity and precision of your
Before finalizing your choice, Figma offers a preview feature. By hovering over each stroke position option in the dropdown menu, you can see a live preview on the canvas, helping you make informed decisions about the best stroke position for your design.
Adjusting stroke weight allows you to modify the thickness of strokes. This adjustment can dramatically impact the visual appeal and readability of your design, enabling fine control over how bold or subtle you want the outlines or borders of your elements to be.
To change the stroke weight:
- Select the layer you wish to modify.
- Navigate to the Design panel’s Stroke section.
- Here, you'll find a numeric input field labeled with an
icon that looks like a stack of lines. You can either type in a specific value for the stroke weight or use the up and down arrows on your keyboard within the input field to incrementally adjust the thickness. - Alternatively, you can click on the Apply variable button next to the numerical input to select an existing stroke variable from your libraries.
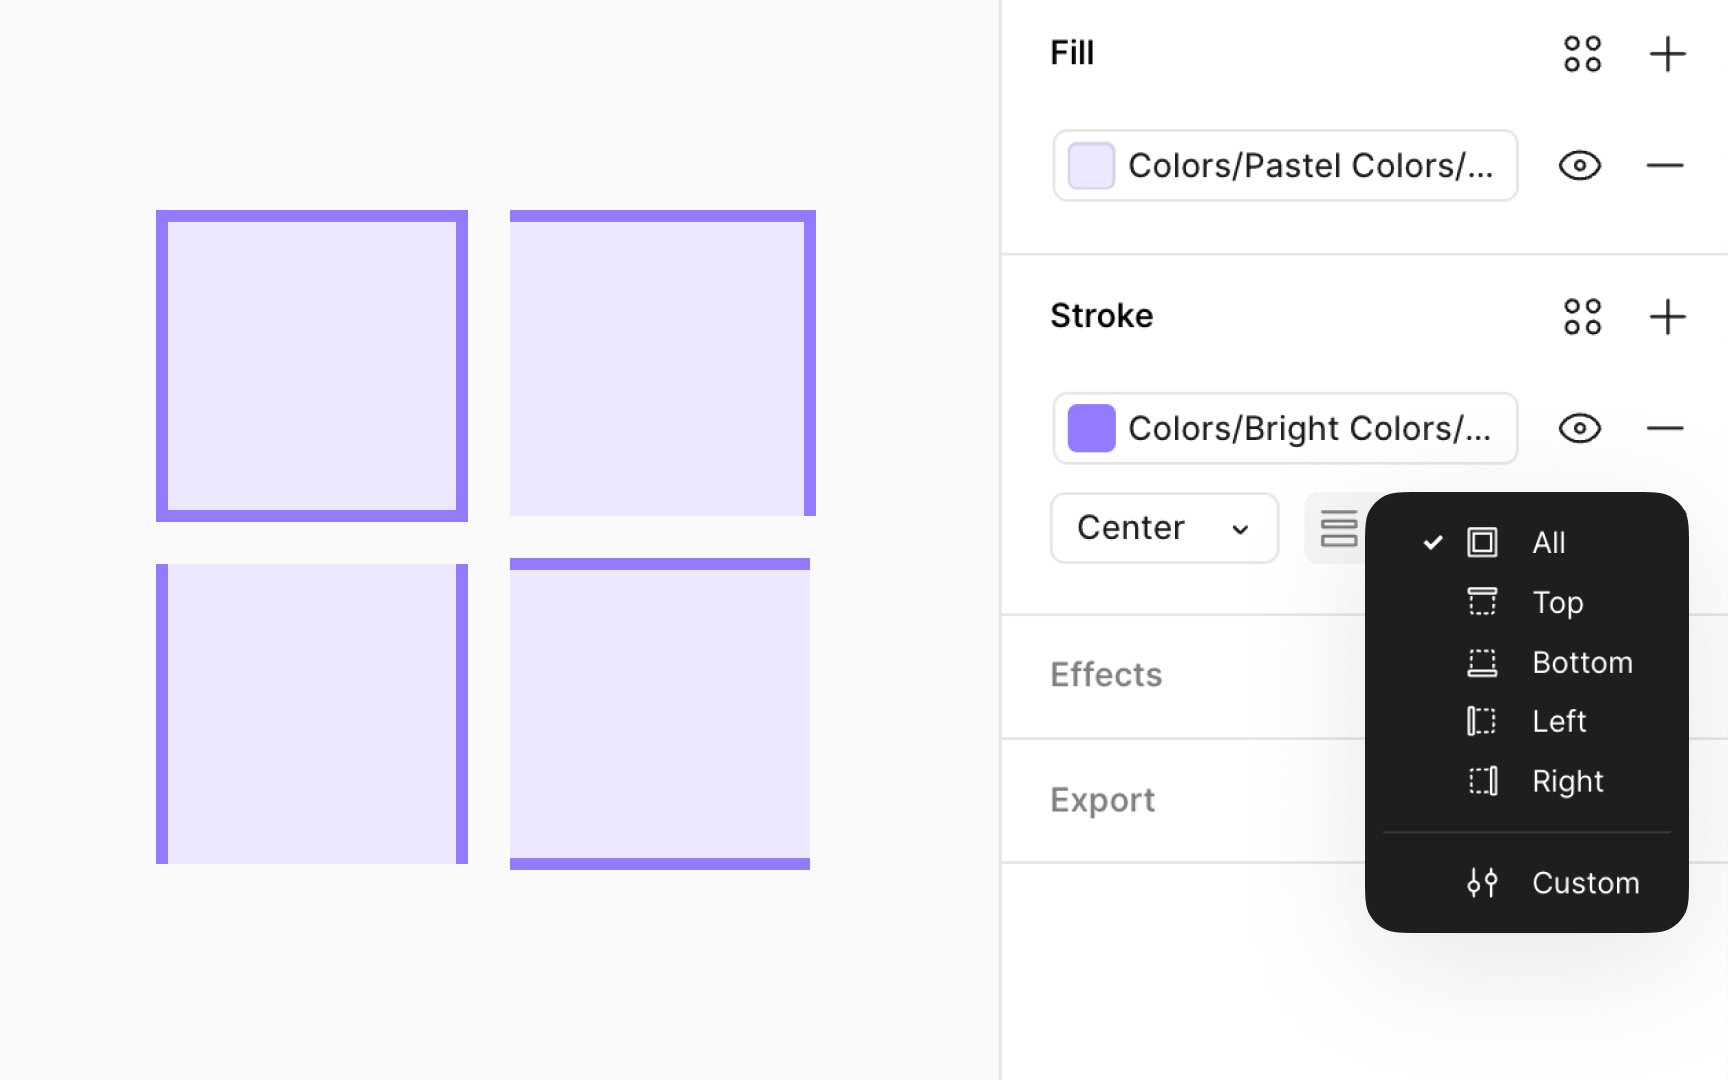
You have the flexibility to apply stroke properties selectively across different sides of a layer, such as rectangles, frames, or components/instances that utilize frames. This is made possible through the Individual strokes
- All (default): Applies the stroke uniformly around the entire layer
- Top: Adds the stroke only to the top edge
- Bottom: Applies the stroke solely to the bottom edge
- Left: Targets the stroke application to the left edge
- Right: Focuses the stroke on the right edge
- Custom: Enables selective application of strokes to specific sides, also allowing for varied stroke weights on each side. When the Custom option is selected, 4
input fields appear under the Stroke section, permitting independent weight adjustments for each side. Setting a side's weight to 0 effectively removes the stroke from that side.
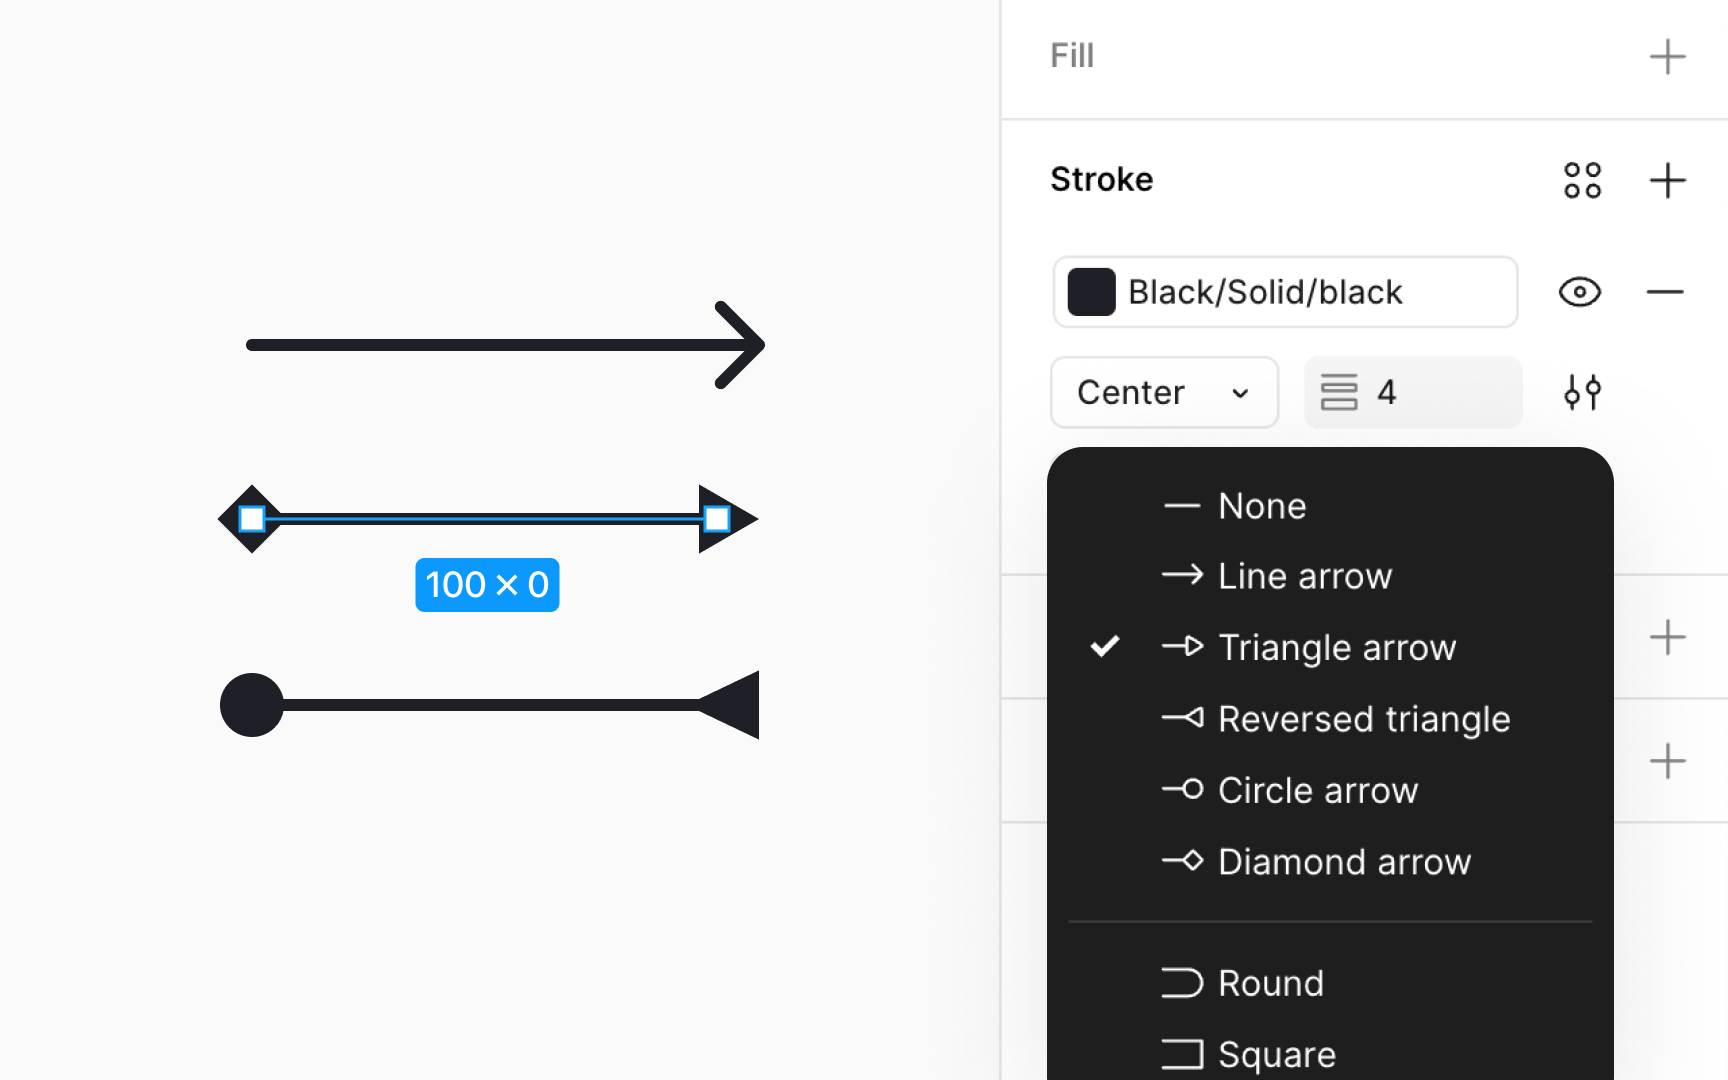
Start and end points are the
For layers with only two endpoints, such as lines or arrows, you can directly set the style for both points in the main Stroke section under the Start point and End point
To add unique individual end caps for shapes with more than two endpoints:
- Enter vector edit mode by pressing Return (Mac) or Enter (Windows) with the layer selected.
- Then, select a specific endpoint to customize.
- Locate the Advanced stroke
settings under the Stroke section in the Design panel. - Select the desired style under the End point dropdown.
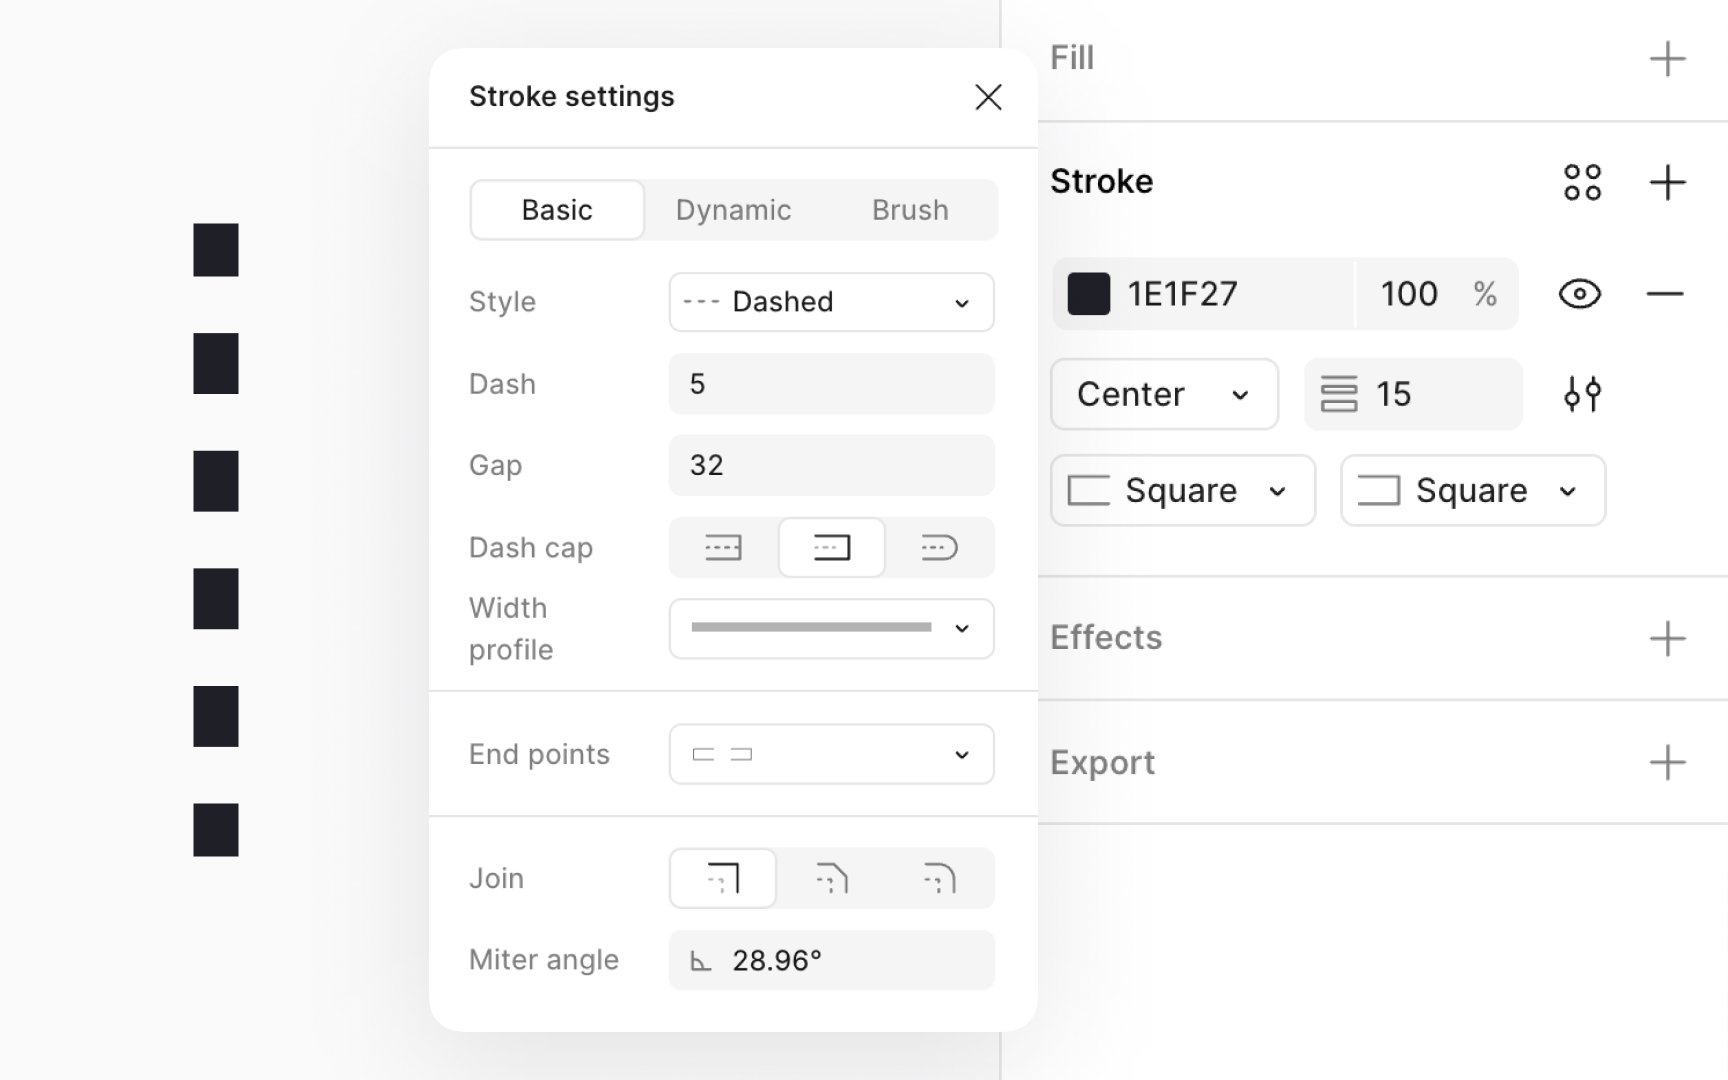
Dashed strokes are useful for creating patterns, emphasizing boundaries, or guiding user attention without being too overwhelming.
To apply a dashed stroke:
- First, access the Stroke
settings in the Design panel and click the Advanced stroke settingsicon . - Choose the Dashed stroke option in the Style
dropdown . - In the settings that open up, specify your desired dash length in pixels, which determines the length of each dash.
- Then,
input the gap length in pixels to set the space between dashes. - Lastly, select the cap type for your dash (none, round, or square) to define the dash ends' appearance.
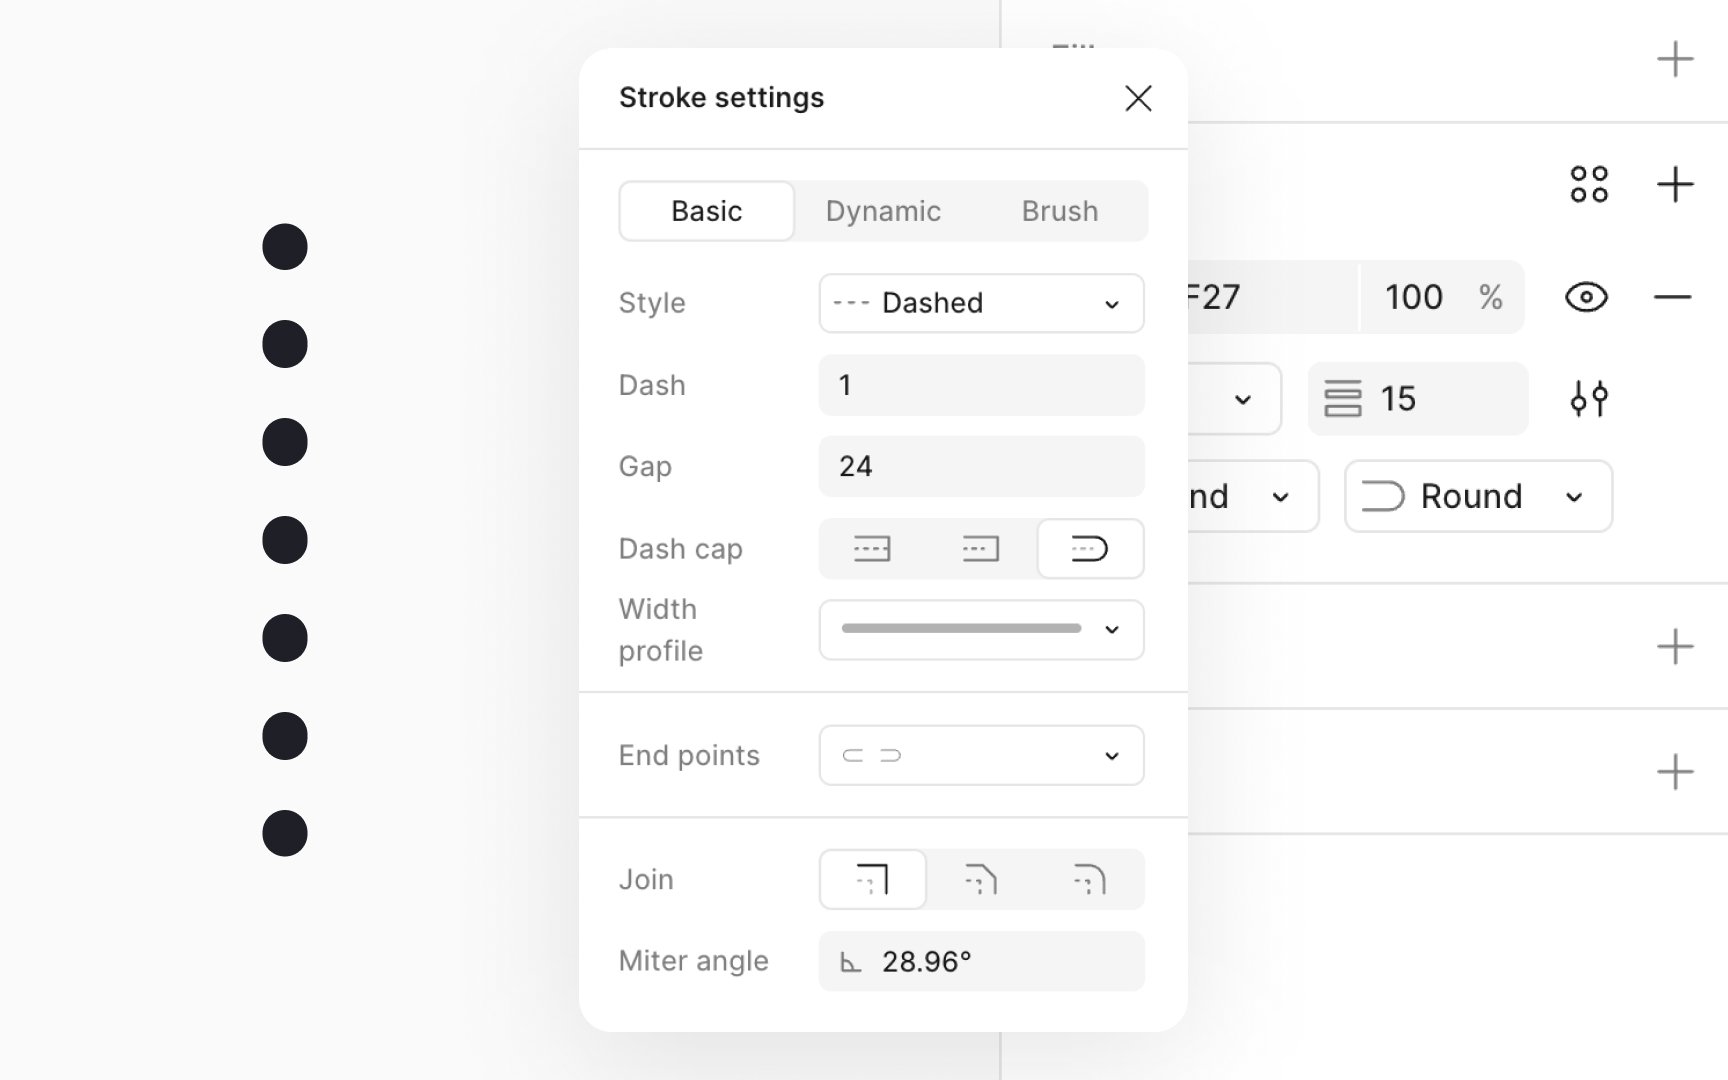
Dotted strokes, like dashed strokes, are particularly useful for guiding user attention, delineating sections subtly, or adding a decorative touch to designs without overwhelming the visual composition. They serve as a lighter alternative to solid lines, offering a nuanced way to organize content or embellish elements with a delicate, refined aesthetic.
To apply a dotted stroke:
- Head to the Stroke section in the Design panel and set the stroke position to Center.
- Click the Advanced stroke
settings button . - From the modal that opens up, select the Dashed stroke style from the Stroke style
dropdown . - Set the Dash length to 1px or lower for small, discrete dots and increase the value to make them larger.
- Choose Round in the Dash cap setting to give each dot a perfect circular shape.
- Adjust the gap between dashes to control the spacing between dots, tailoring the pattern to your design's needs.
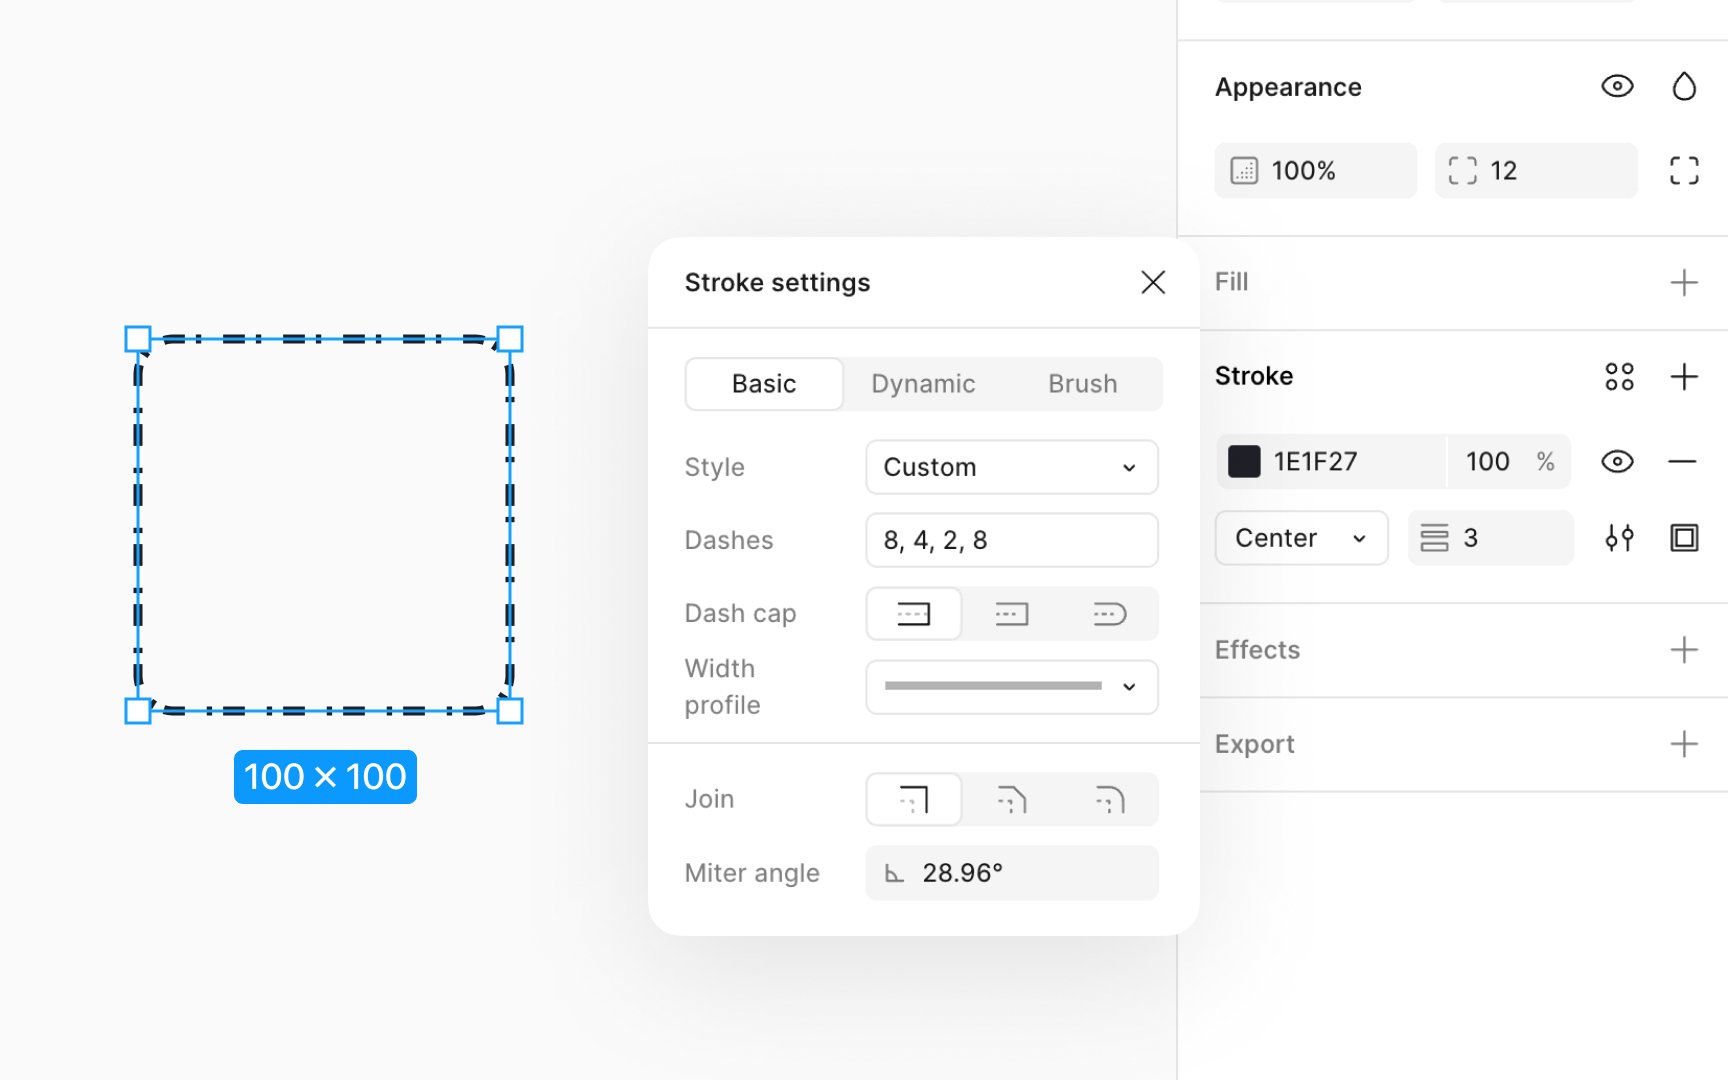
Custom strokes help you create unique dashed or dotted lines with tailored patterns. This is ideal for emphasizing specific elements, creating visual rhythms, or guiding user navigation in a design.
To apply a custom stroke:
- Go to the Stroke section in the Design panel and click the Advanced stroke
settings icon . - Choose the Custom option under Stroke style
dropdown . - In the Dashes setting,
input your pattern using the syntax [dash size, gap size, dash size, gap size...] This allows for intricate sequences of dashes and gaps. For instance, to create a pattern of a long dash followed by a short gap, then a short dash and another short gap, enter [10, 5, 5, 5]. Adjusting these values lets you experiment with various visual effects tailored to your design's needs. - Select a Dash cap to define the shape of the dash ends.
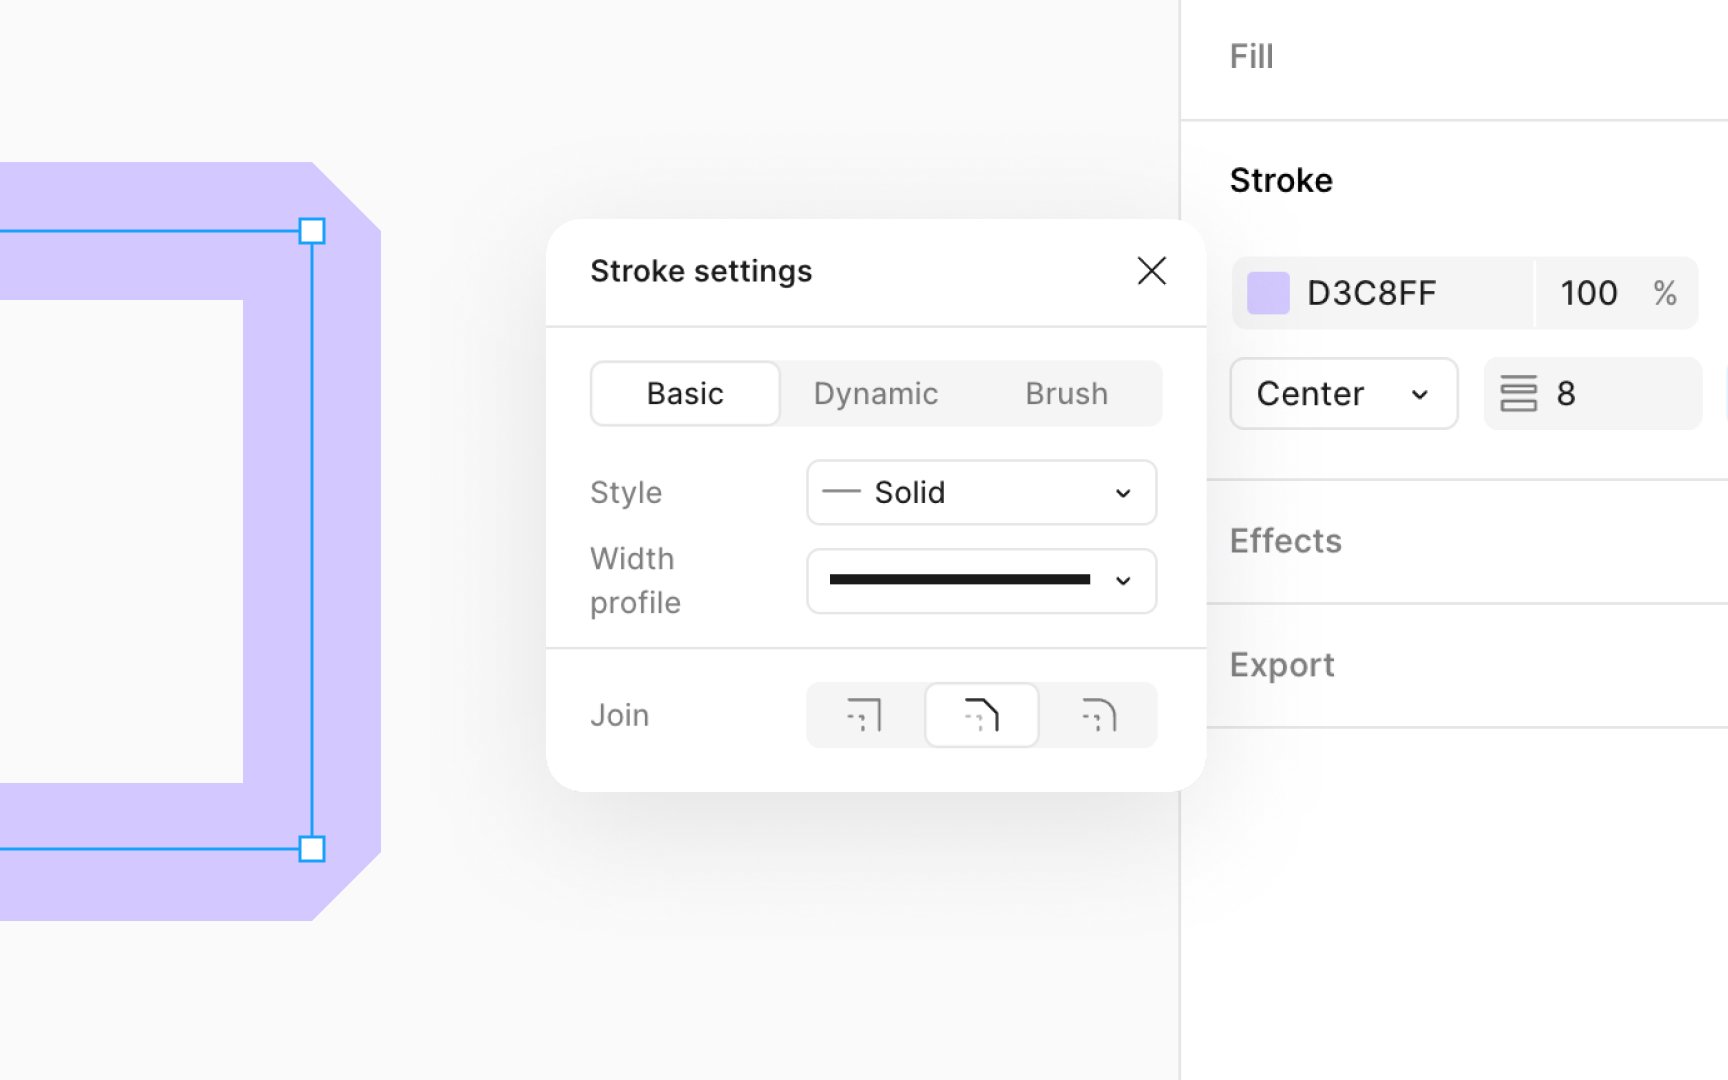
Join and miter angles are tools used to define how lines connect within a path or vector network. These
To use join and miter angles:
- To adjust joins for an entire path, navigate to the Advanced stroke settings in the Design panel.
- For specific adjustments, enter vector edit mode by pressing Return (Mac) or Enter (Windows). Select a single anchor point and then navigate to the Advanced stroke settings.
- Next, choose the type of join:
- Miter: Creates a sharp point where two paths meet, ideal for geometric designs or to emphasize angles. You can adjust the angle to control the sharpness of the join.
- Bevel: Cuts off the sharp point for a flat edge, useful for a more modern and clean look.
- Rounded: Rounds the point where paths meet, softening the connection for a friendlier appearance.
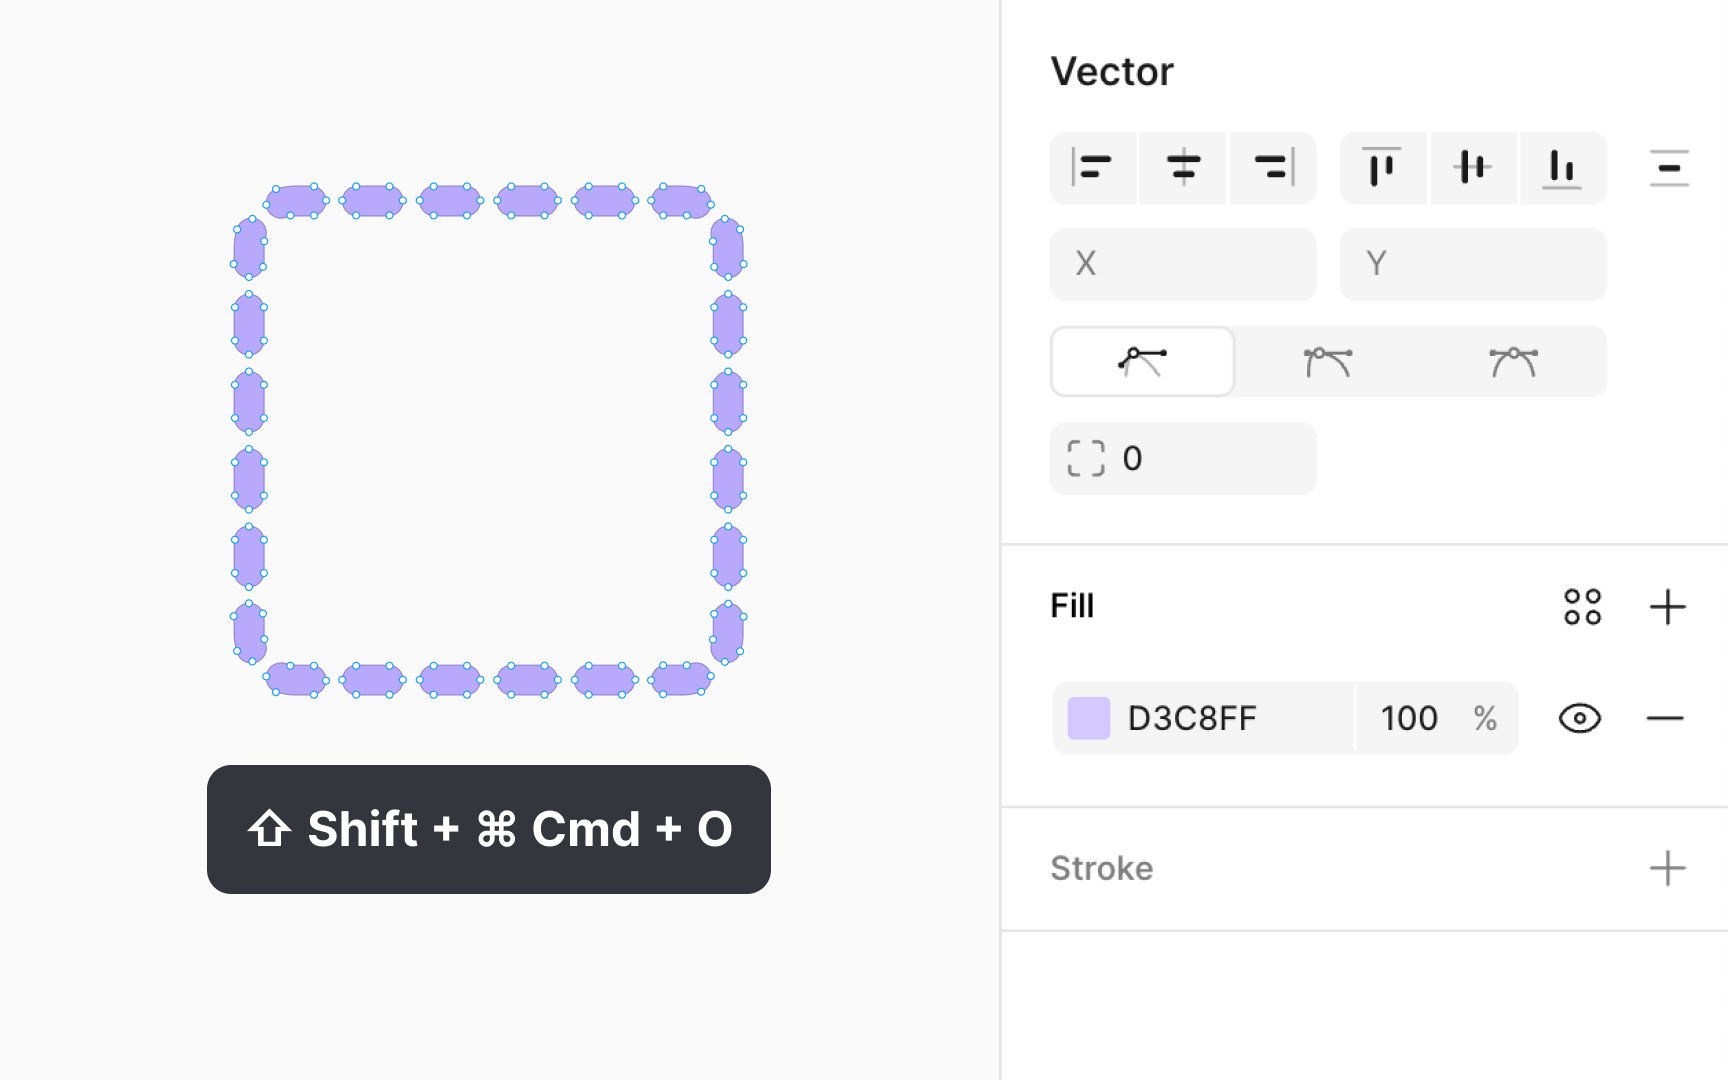
The Outline stroke feature in Figma is a transformative tool that converts strokes into editable vector objects. This process turns each path of an object into a singular, modifiable shape, significantly expanding design possibilities. With this feature, you can craft custom shapes for intricate designs, merge multiple paths for unified objects, and scale vector objects uniformly without distortion.
You can apply Outline stroke in 2 ways:
- Right-click on the layer and select Outline stroke.
- Employ keyboard shortcuts: Option Command O (Mac) or Alt Ctrl O (Windows)
Upon conversion, any stroke paints are applied as fills to the new vector object, maintaining the visual aesthetics. To further edit this new vector object, enter vector edit mode by pressing Return (Mac) or Enter (Windows).
Pro Tip: Once a stroke is outlined, reverting it to a stroke format directly isn't possible unless you undo the action immediately using Command Z (Mac) or Ctrl Z (Windows).
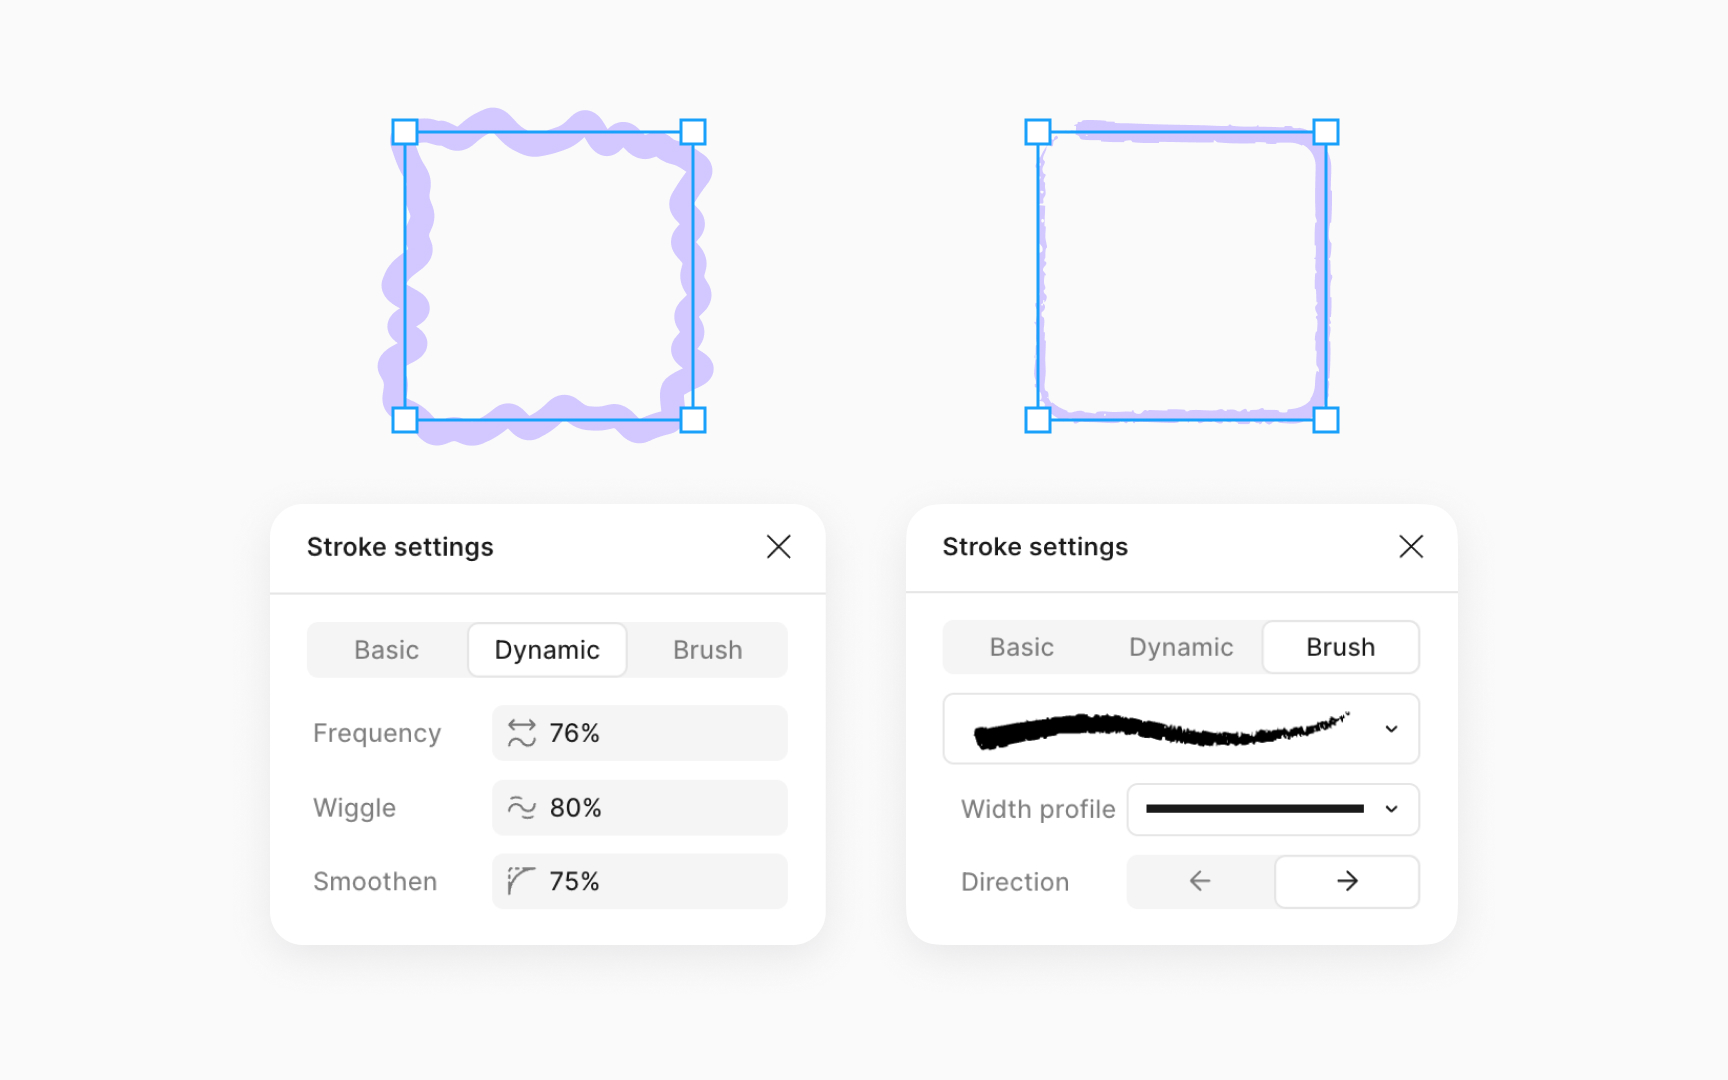
Figma's Dynamic and Brush Strokes are found under the Advanced stroke
In the Dynamic tab, you can adjust how the stroke behaves along the path. You can control settings like:
- Frequency: How often the stroke changes width
- Wiggle: How irregular or wavy the stroke is
- Smoothen: How much smoothing is applied
- End points: Adds cap shapes at the start or end of the stroke if it’s an open path
In the Brush tab, you can apply textured effects and adjust the stroke direction (left or right). This adds a hand-drawn or painted feel to your vector paths. These features are helpful when you want more expressive strokes, like for illustrations,
Top contributors


Topics
From Course

Share


Similar lessons

Common UI Components Part I

Image Terminology
