Text Properties in Figma
Discover ways to define the appearance and behavior of text in Figma.
Text properties allow for customization of text appearance, ensuring readability and visual harmony within a design. Understanding these basic properties is key to creating effective typography, as they influence how text looks and feels, enabling you to convey the right message and mood. Proper use of text properties also ensures that content is accessible and engaging to all users, improving the overall user experience.
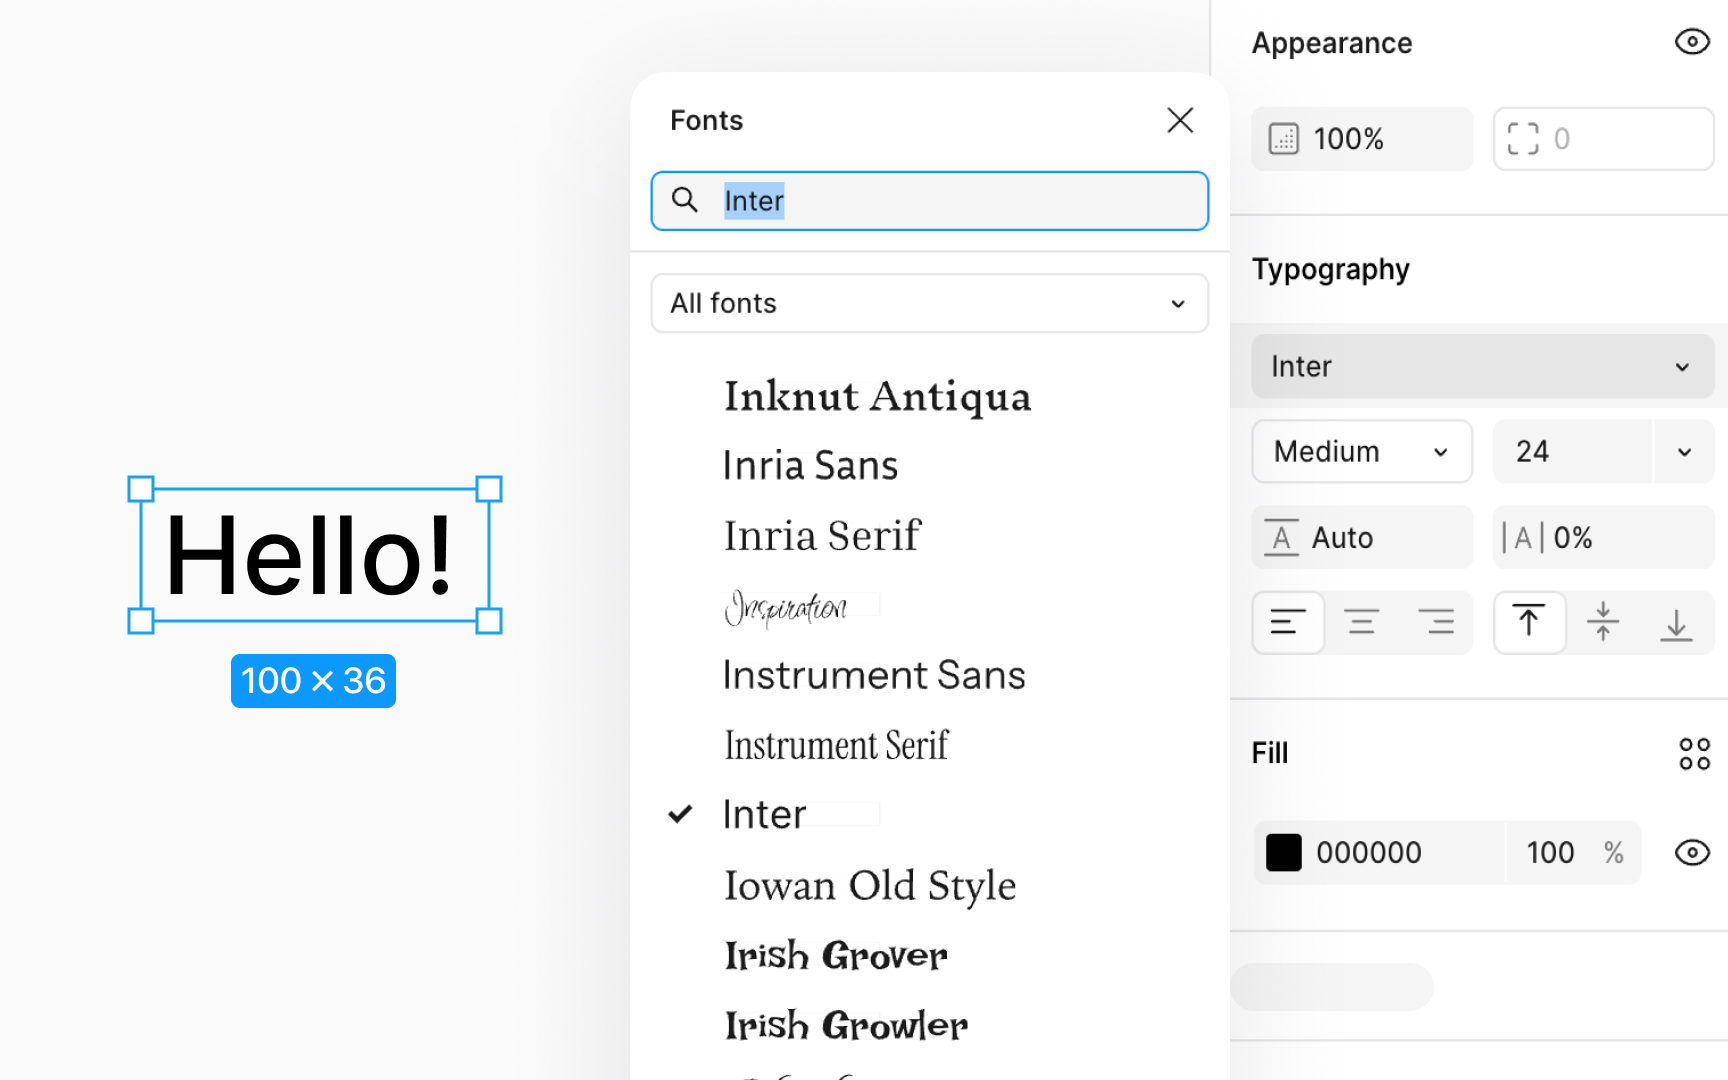
You can find text properties in the Design panel when you select this text element. The Text section in the Design panel allows you to adjust the text’s font type, size, line height, letter spacing, alignment, and color, among many other detailed settings.
A typeface consists of letterforms and glyphs sharing design features, while a
To change the font family:
After choosing a
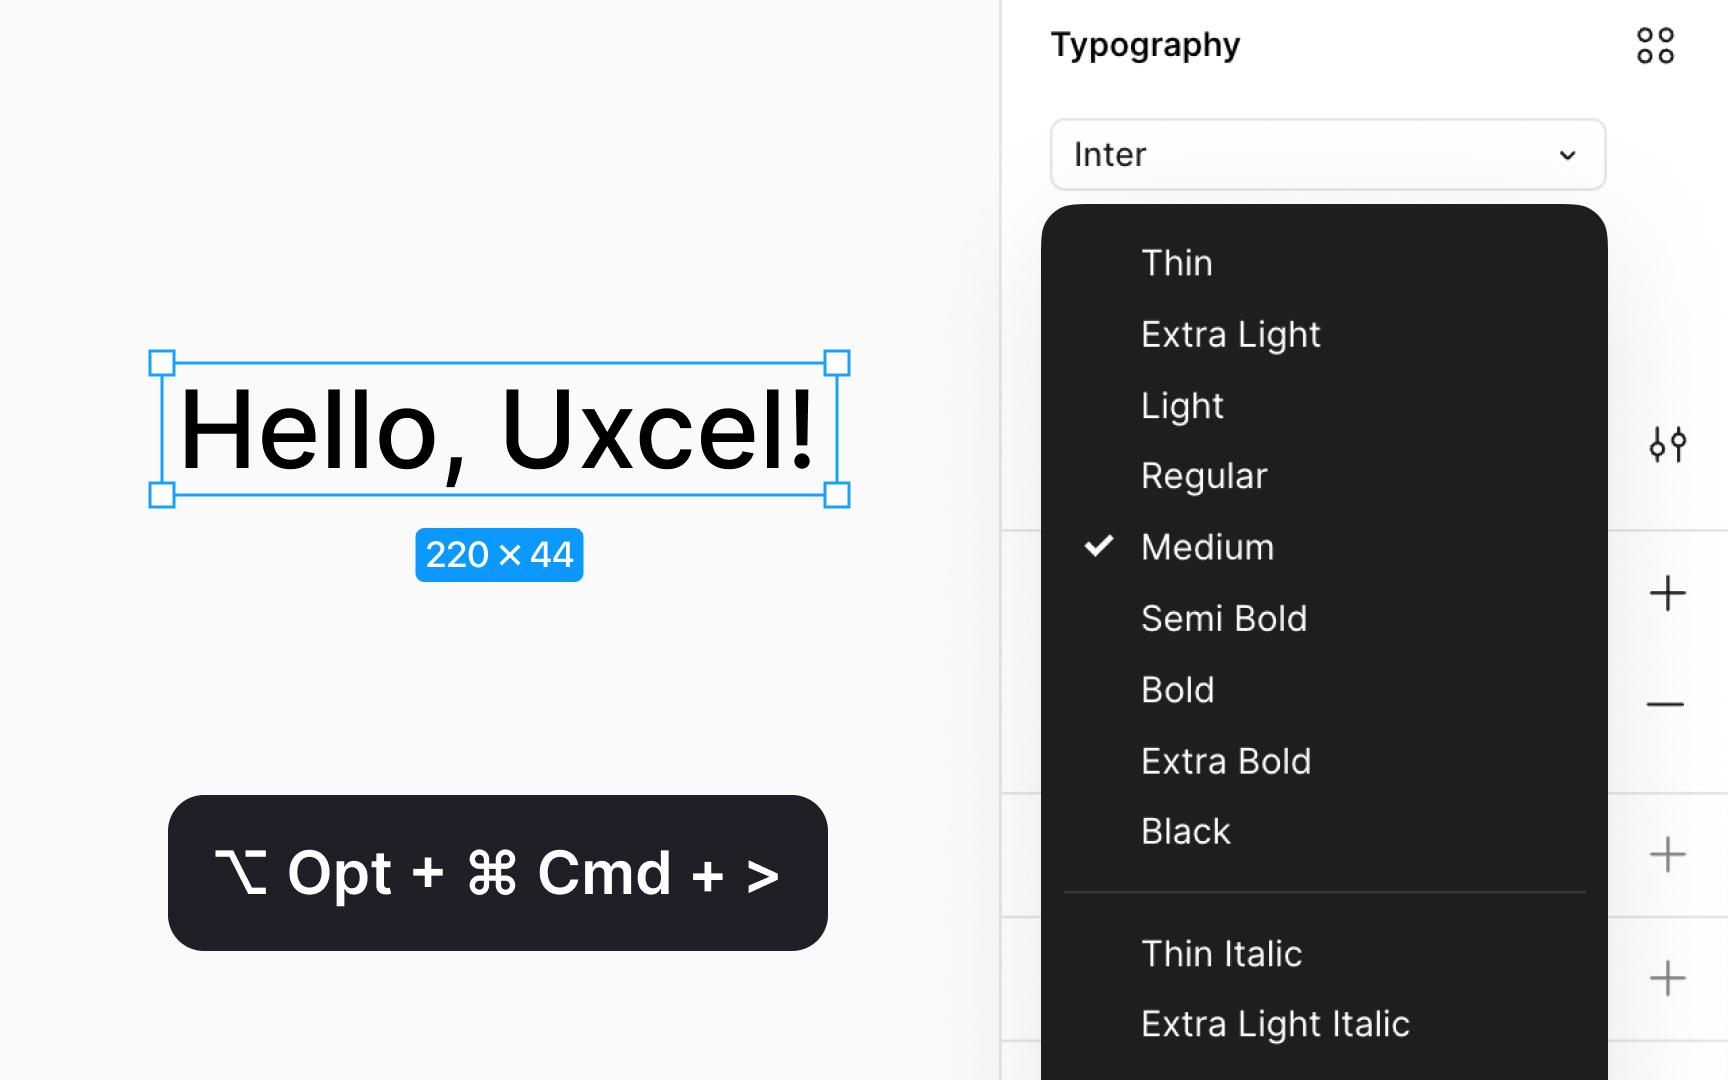
To adjust the font weight for a selected font family:
- Locate the field directly below the font family selection in the Design panel.
- Click the
dropdown menu indicated by an arrow to explore and select from the available styles. - For quicker adjustments, use keyboard shortcuts:
- Mac: Option Command with < or > keys
- Windows: Ctrl Alt with < or > keys
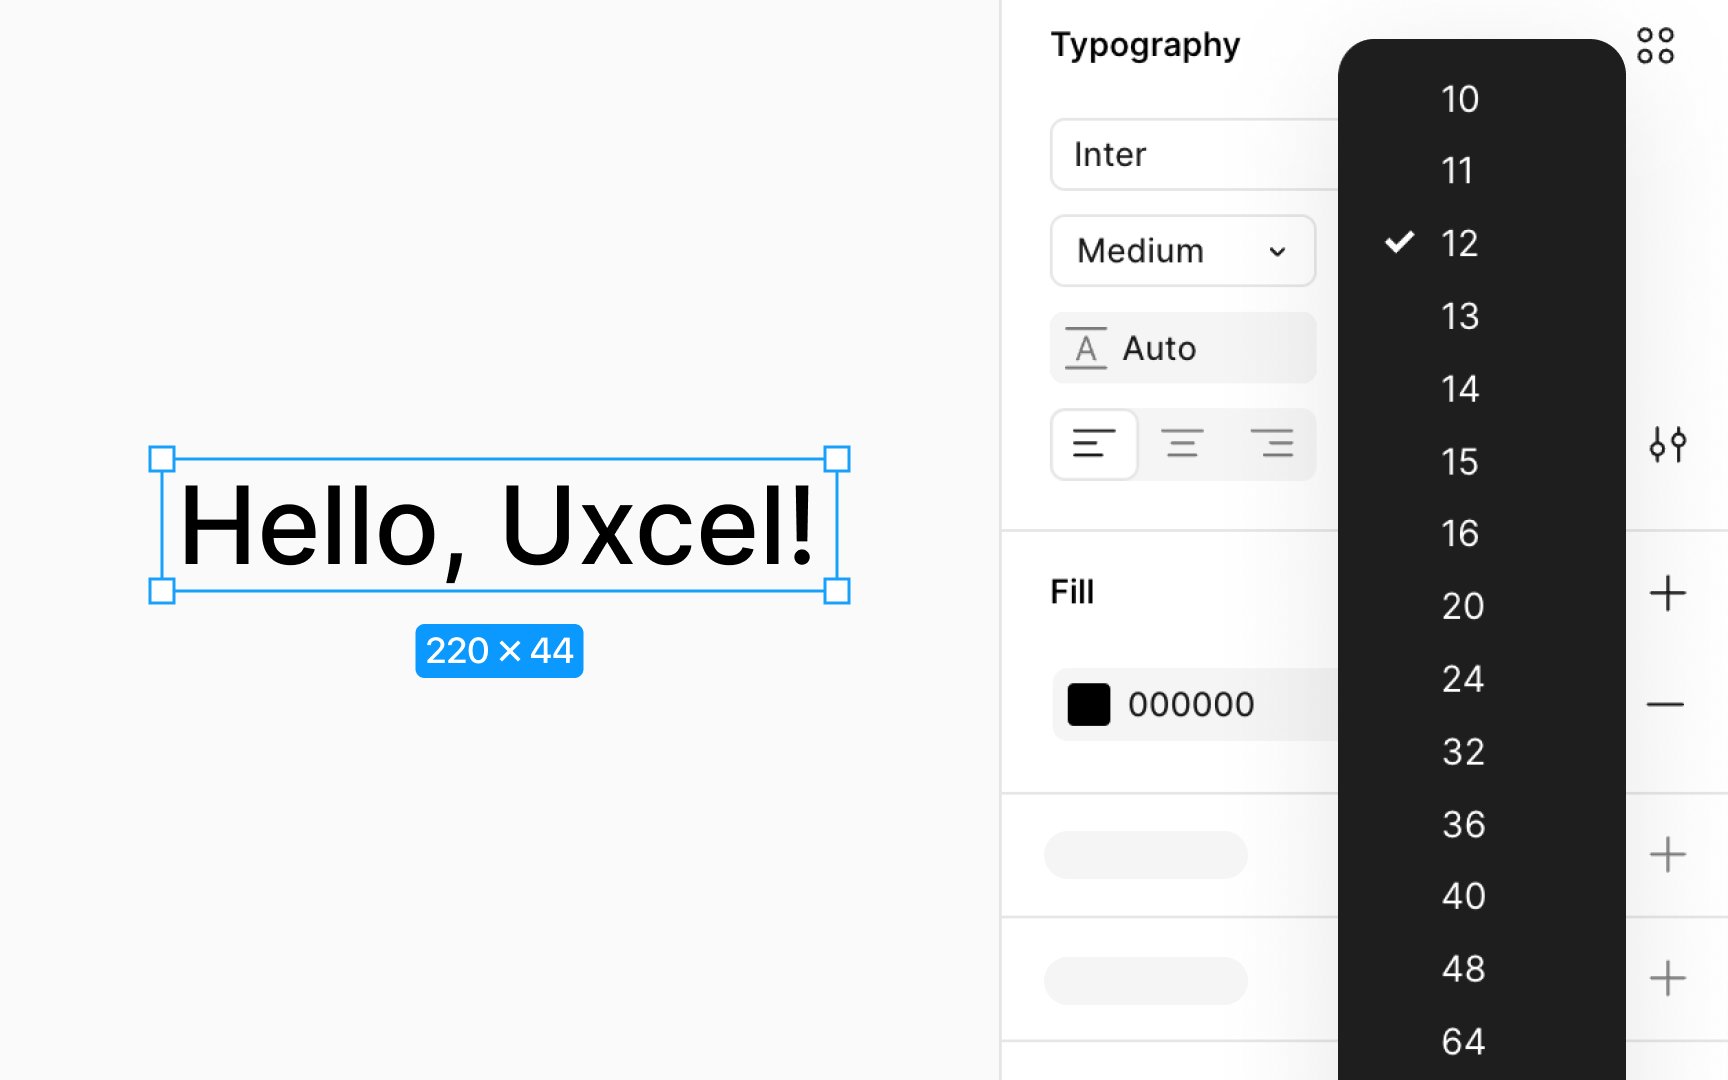
Font size determines how large or small your text appears. It is measured in density-independent pixels to ensure consistency across different screens.
To adjust font size:
- Look for the
Typography section in the Design panel. Here, you'll find a numericaldropdown filled with the default font size. - Clicking the arrow allows you to choose a predefined size, or you can type a specific number directly into the field for custom sizing.
- Additionally, Figma supports quick adjustments via keyboard shortcuts:
- Mac: Press Shift Command and use the < key to increase size or the > key to decrease size.
- Windows: Hold down Ctrl Shift while pressing < to enlarge or > to shrink the text.
When translating designs to code, screen resolution affects text size. You can find the CSS pixel values in Dev mode's Typography section. For PDF exports, Figma renders font sizes in traditional print points (pt).
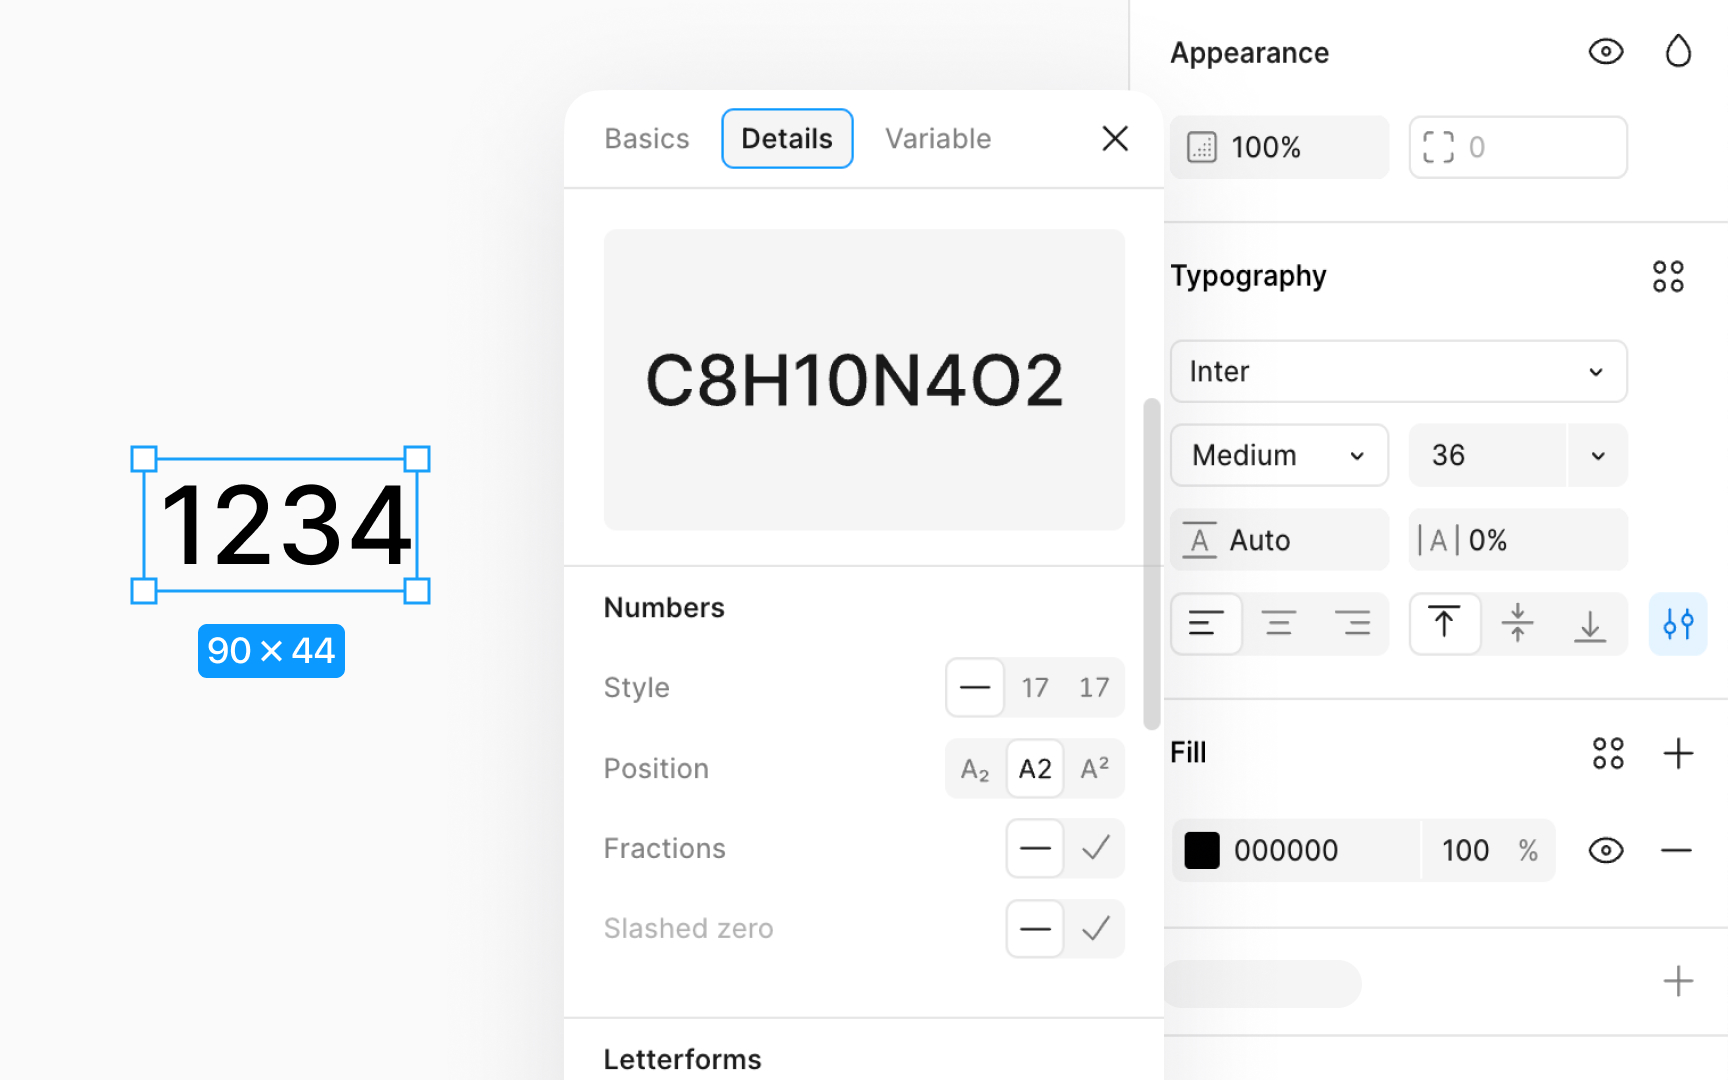
To adjust Numbers settings for your text:
- Select a text object on your canvas to bring up the Type
settings in the Design panel on the right. - Within the
Typography section, click on Type settings icon and then select the Details tab in the window that pops up. - Scroll to the Numbers section to find options for customizing numerical figures, which vary by
font family.
Here, you will find these
- Style: Choose between proportional or monospace figures. Proportional figures adjust spacing based on character width, while monospace figures have uniform width.
- Position: Opt for subscript (below line) or superscript (above line) to change number positions, making them smaller than main text.
- Fractions: Convert numbers into fractions by typing X/X and applying the fraction feature.
- Slashed zero: Add a slash through the zero to differentiate it from the letter O.
The Fixed size
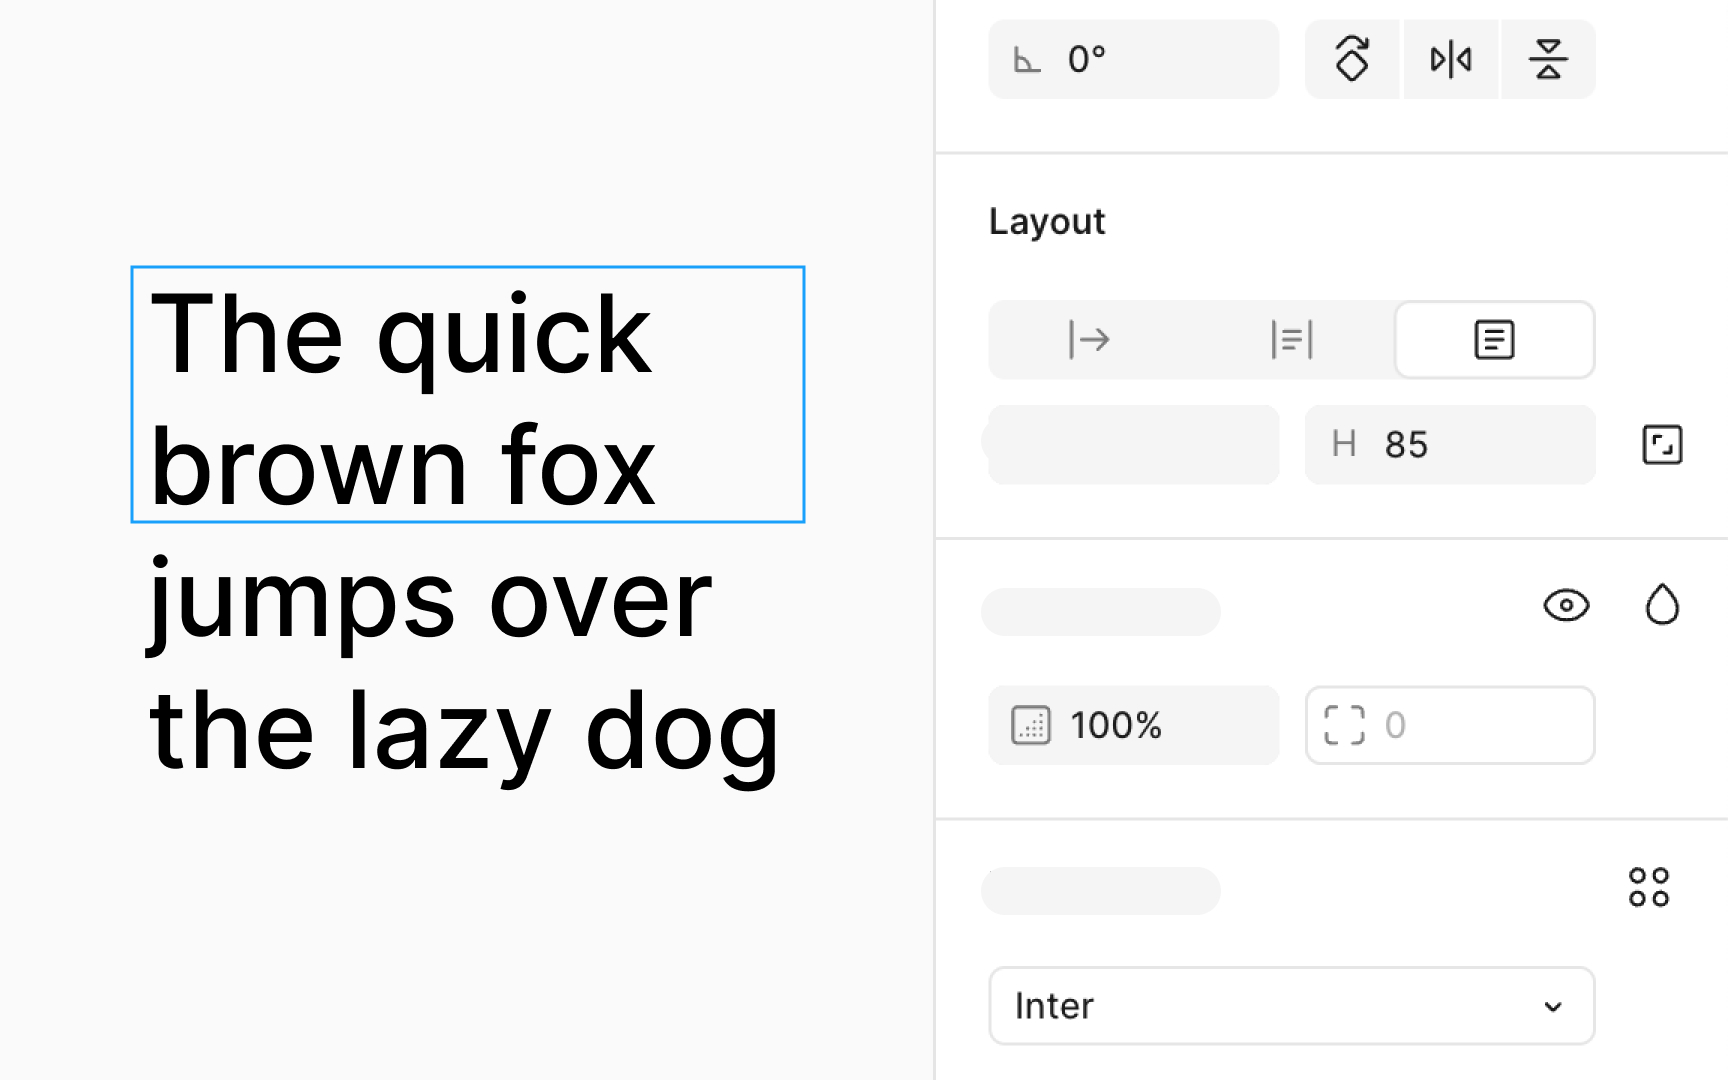
Keep in mind that when your text exceeds the horizontal bounds, Figma automatically wraps it within the layer. However, text can overflow vertically without being clipped.
If you create a text box by clicking and dragging on the canvas, Figma defaults to Fixed size. Also, if you adjust a text layer's size after creation, Figma switches its resizing to Fixed size.
Under the
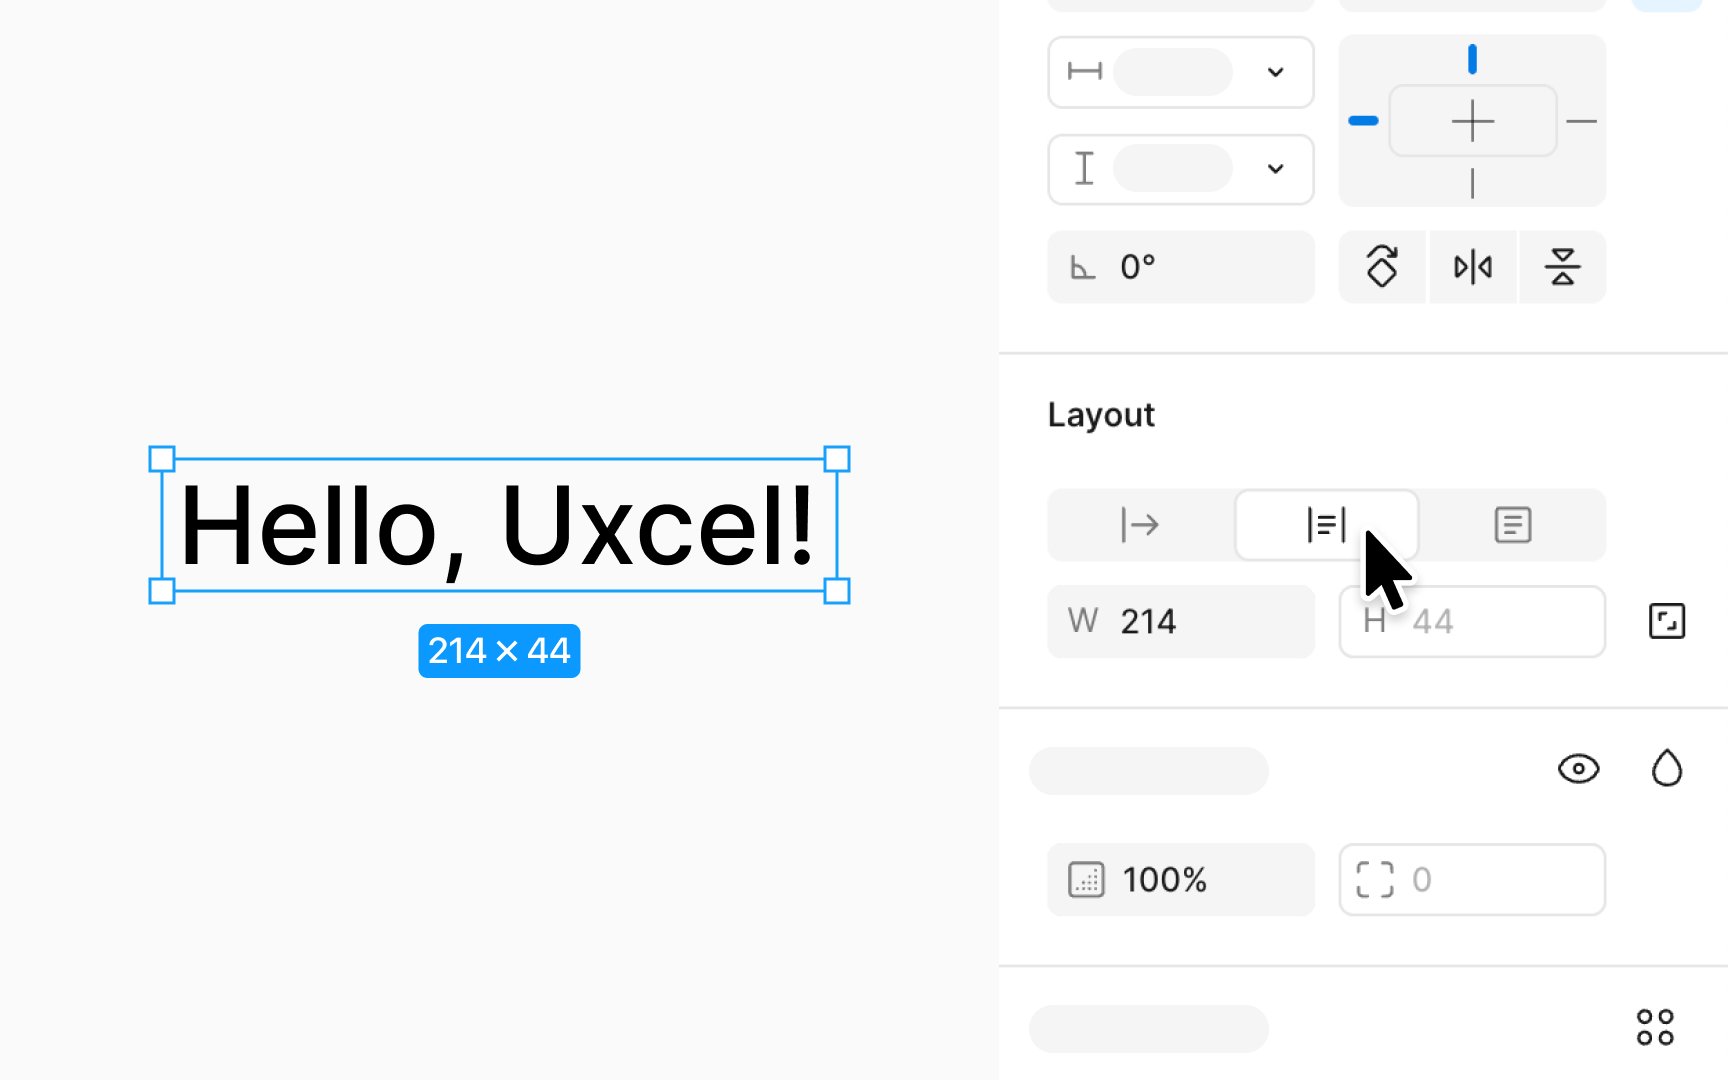
Auto width makes the text layer wider to accommodate all its contents in a single line, unless you press Return (Mac) or Enter (Windows) to start a new line. When you click on the canvas to add a text layer, Figma defaults to Auto width, allowing the layer to expand horizontally as you type.
Auto height, on the other hand, allows the text layer to grow vertically, fitting its contents within. If the text exceeds the layer's original width, Figma automatically wraps the text to a new line, expanding the layer's height to ensure all text is visible. These settings are useful for adapting text boxes to content dynamically, ensuring text remains legible and well-organized within your design.
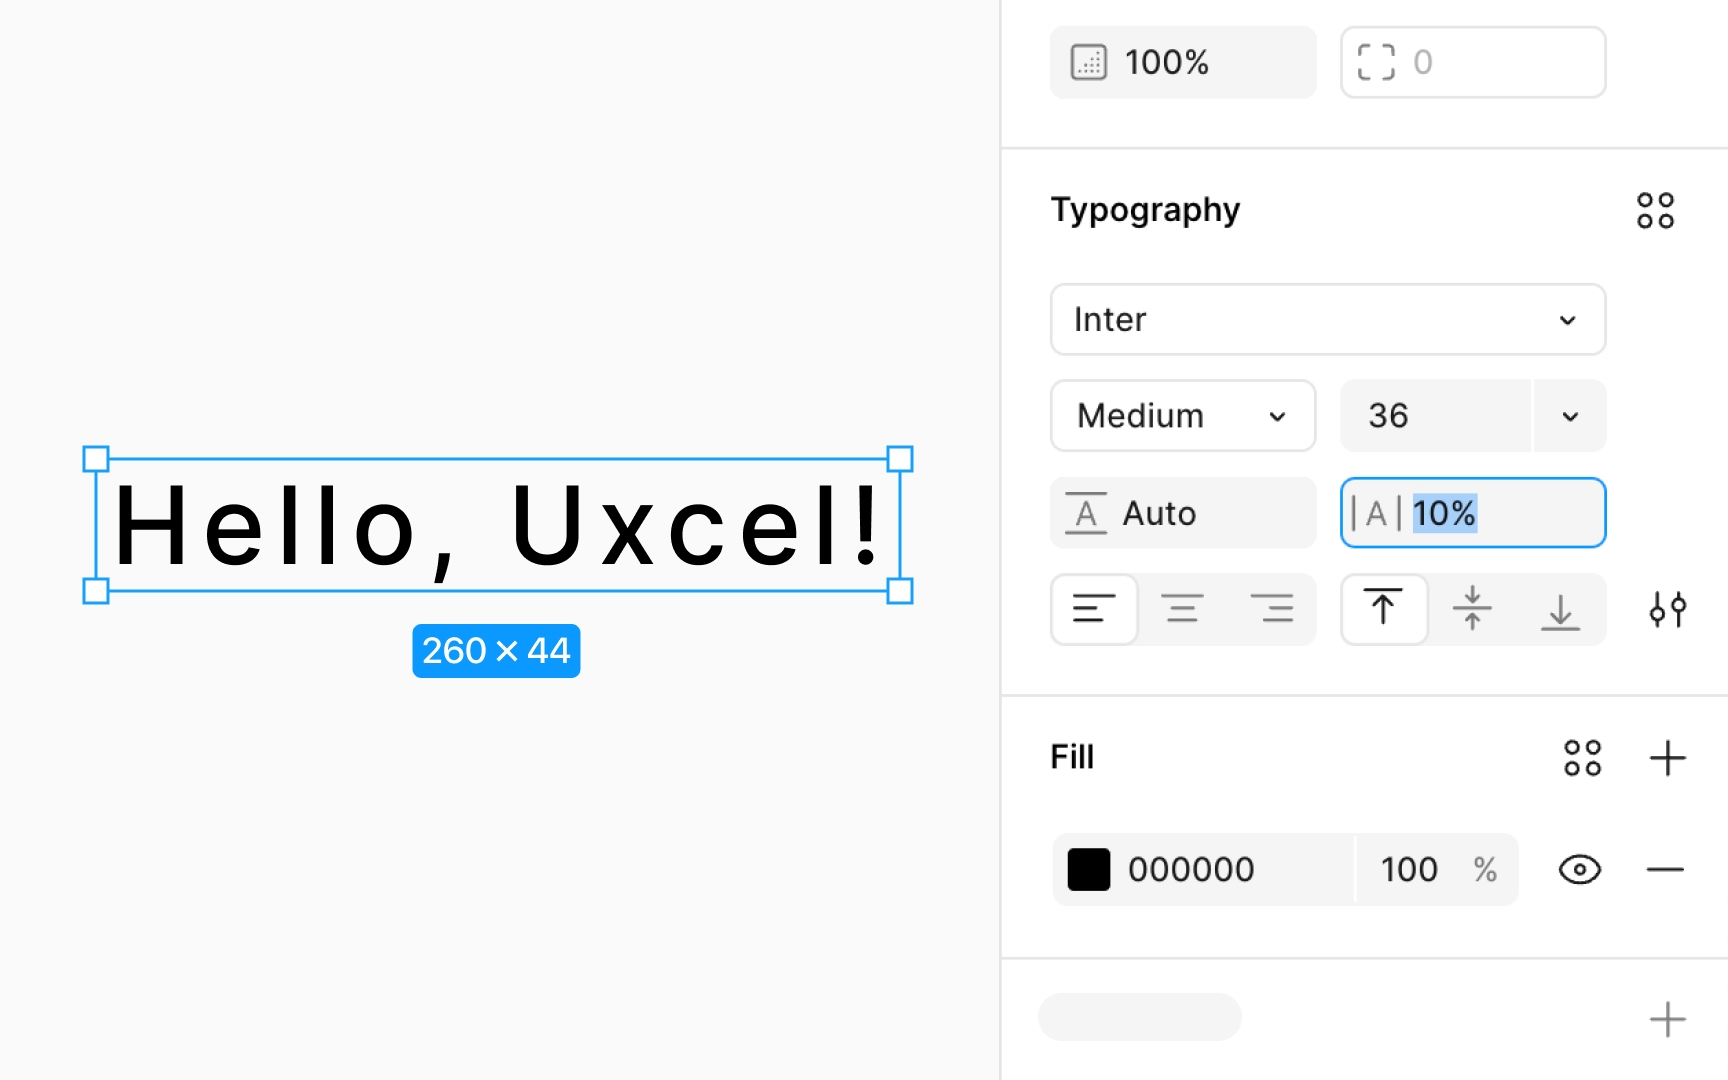
The Letter spacing
To adjust letter spacing in Figma:
- Select a text layer or just specific characters.
- Change the input value in the Letter spacing property input.
- Alternatively, use keyboard shortcuts to manipulate this value:
- Mac: Use Option with < or > to decrease or increase spacing.
- Windows: Use Alt with < or > to decrease or increase spacing.
If you need to adjust the space between two letters (mimicking kerning), simply place the cursor between them and modify the spacing using the steps above.
Top contributors
Topics
From Course

Share


