Masks in Figma
Delve into the potential of masks in Figma to craft elements that elevate every interface.
Using masks in Figma is similar to viewing a landscape through a window — you decide the window's shape and size and choose which part of the scenery to show, with the rest remaining hidden yet untouched.
This technique is invaluable in UX/UI design. For example, when creating user avatars for a chat app, circular masks can neatly display users' profile pictures. In a product catalog, square masks can uniformly frame product images, offering a clean, professional look. Masks provide a way to control visuals without altering the original images, keeping your designs flexible and your images unchanged.
Masks let you shape how parts of your design look by using layers like shapes, text, or pictures. Think of a mask as a stencil placed over your design elements. Whatever part of the design is under the mask shows through, while the rest is hidden.
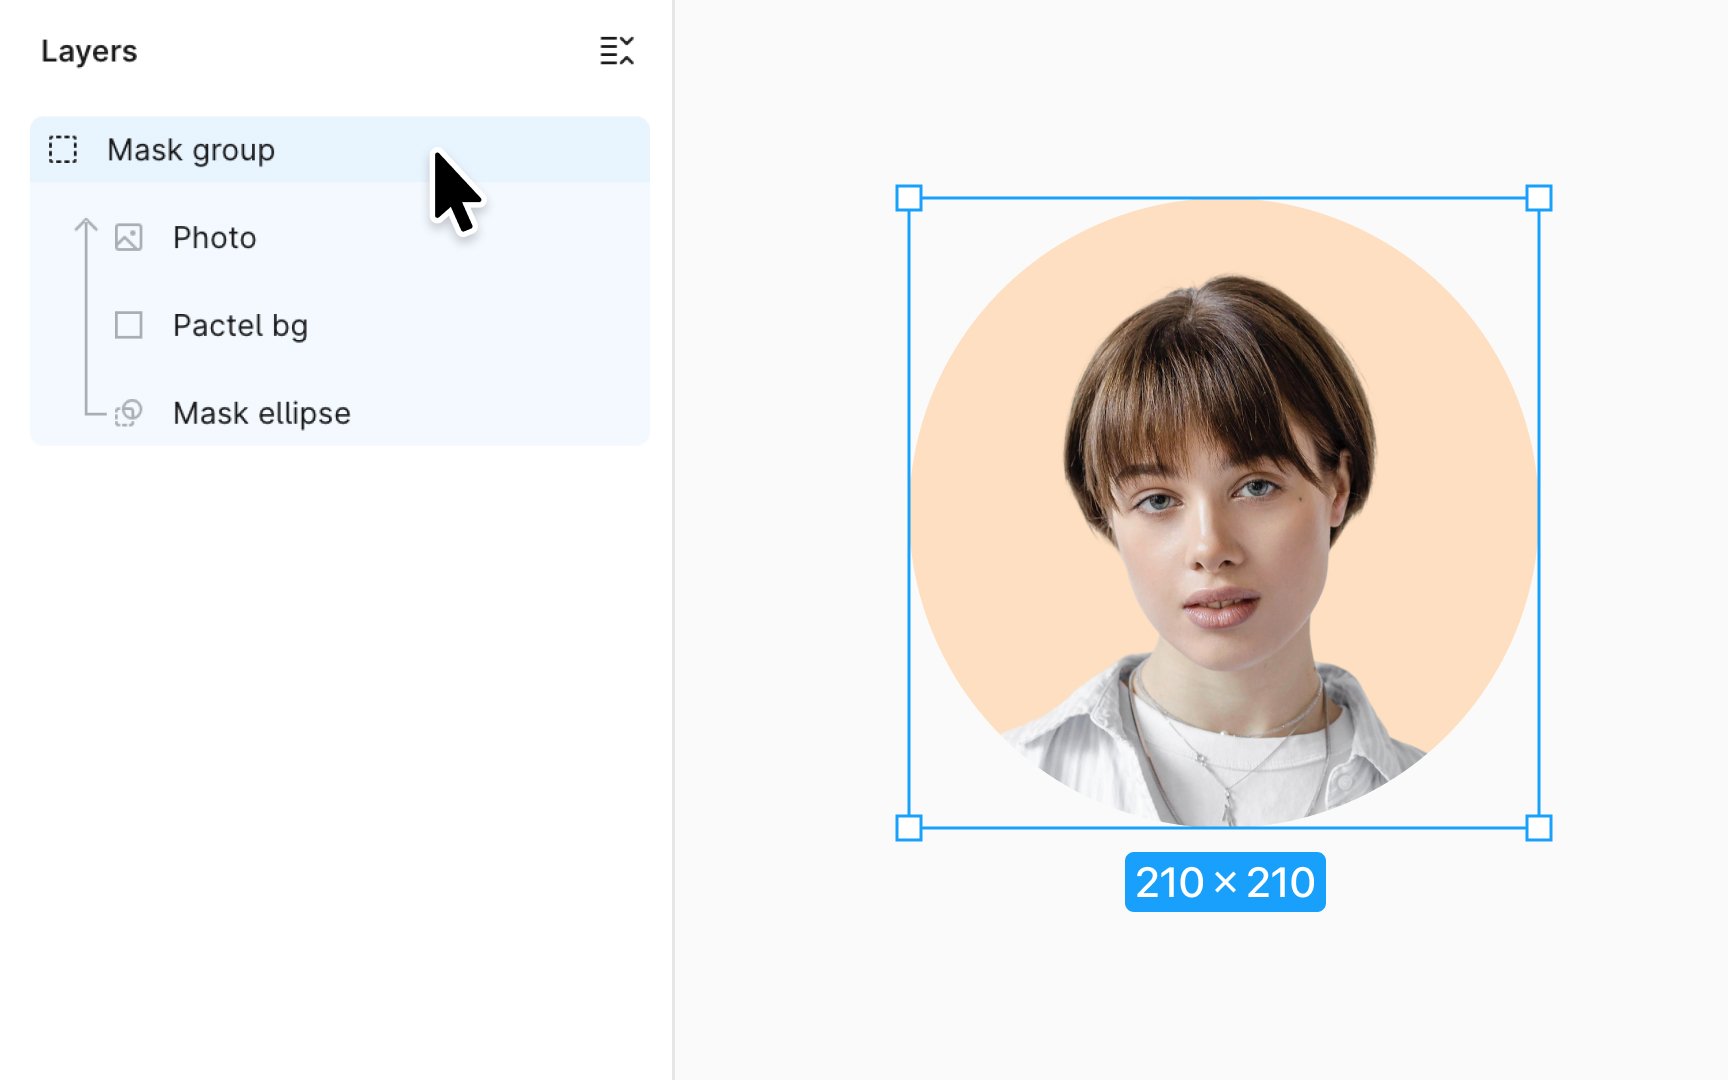
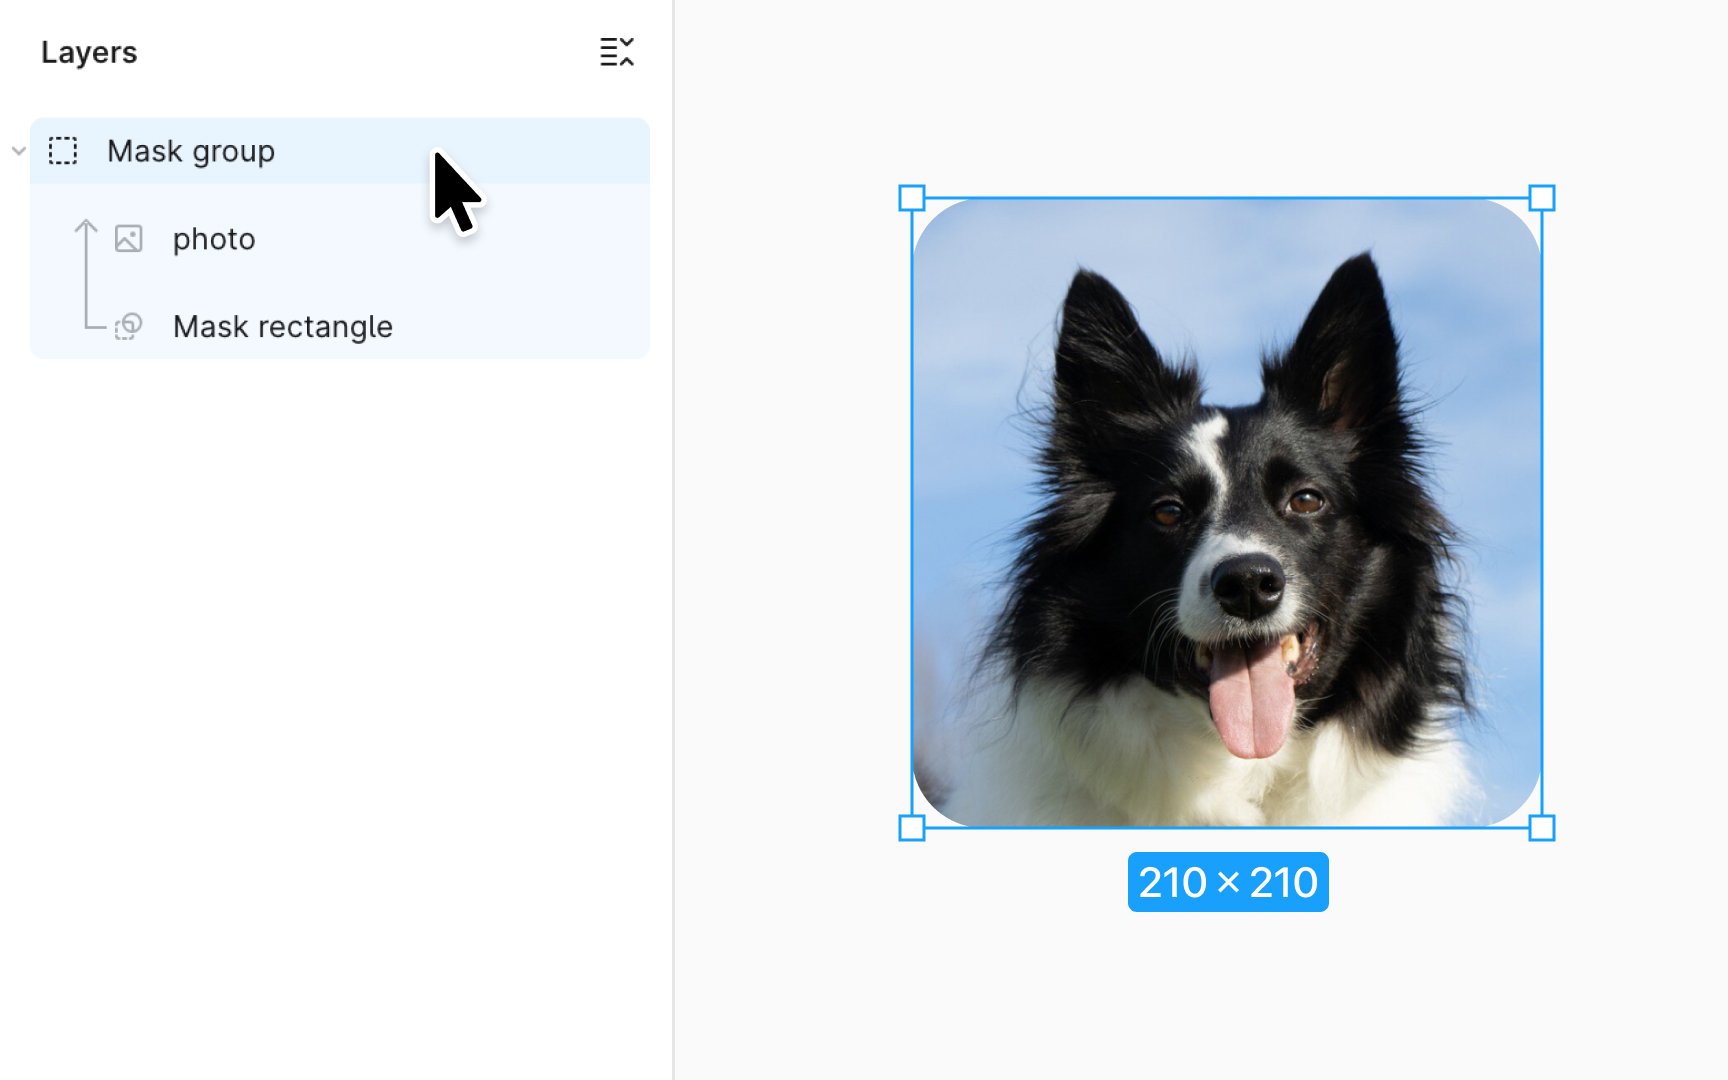
These masks are easy to find in the Layers panel because they're marked with an icon of interlaced shapes. The layers being shaped by the mask have an upward arrow.
Here's a simple way to understand it: masks act like a layer sitting just under the ones they affect. They change everything directly above them until they hit another mask or the edge of their group. This makes it easy to mix and match different parts of your design creatively.
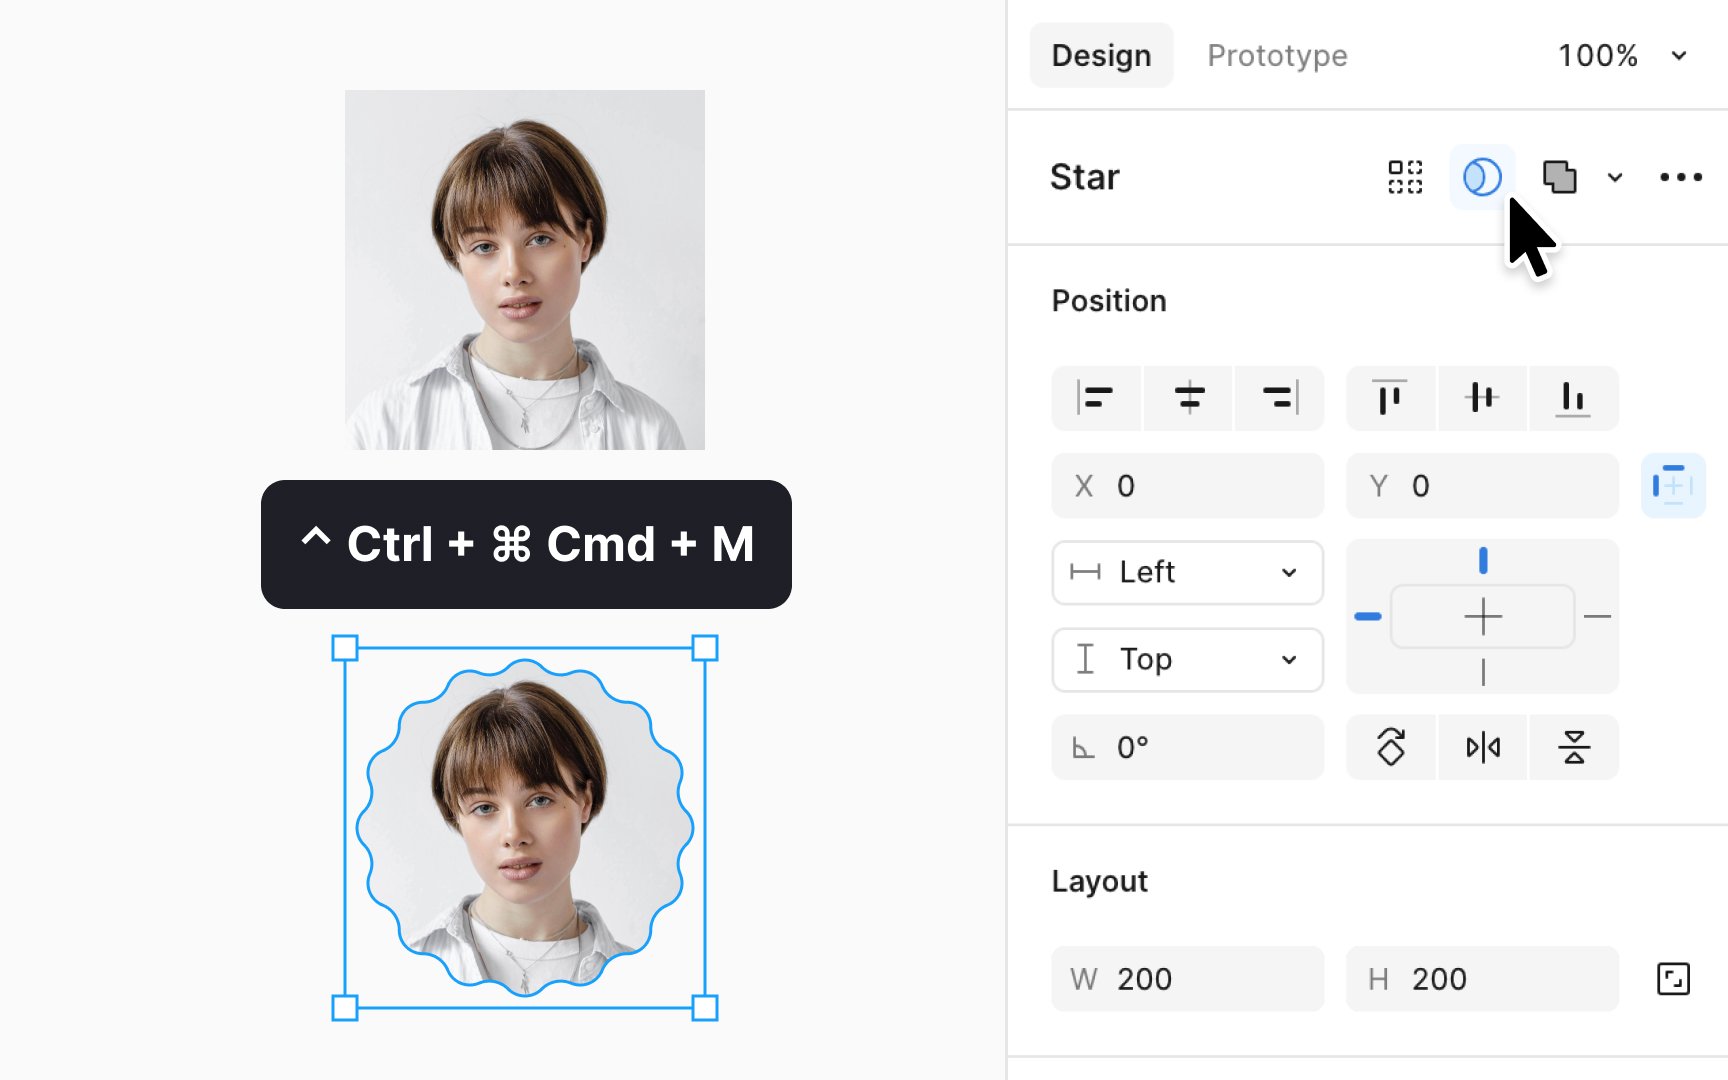
Creating masks in Figma is a straightforward way to control the visibility of elements in your design. Start by placing the shape or object you want to use as a mask behind the elements you wish to mask. Then, select all these layers together.
To make the mask, hit the
- Mac: Control Command M
- Windows: Ctrl Alt M
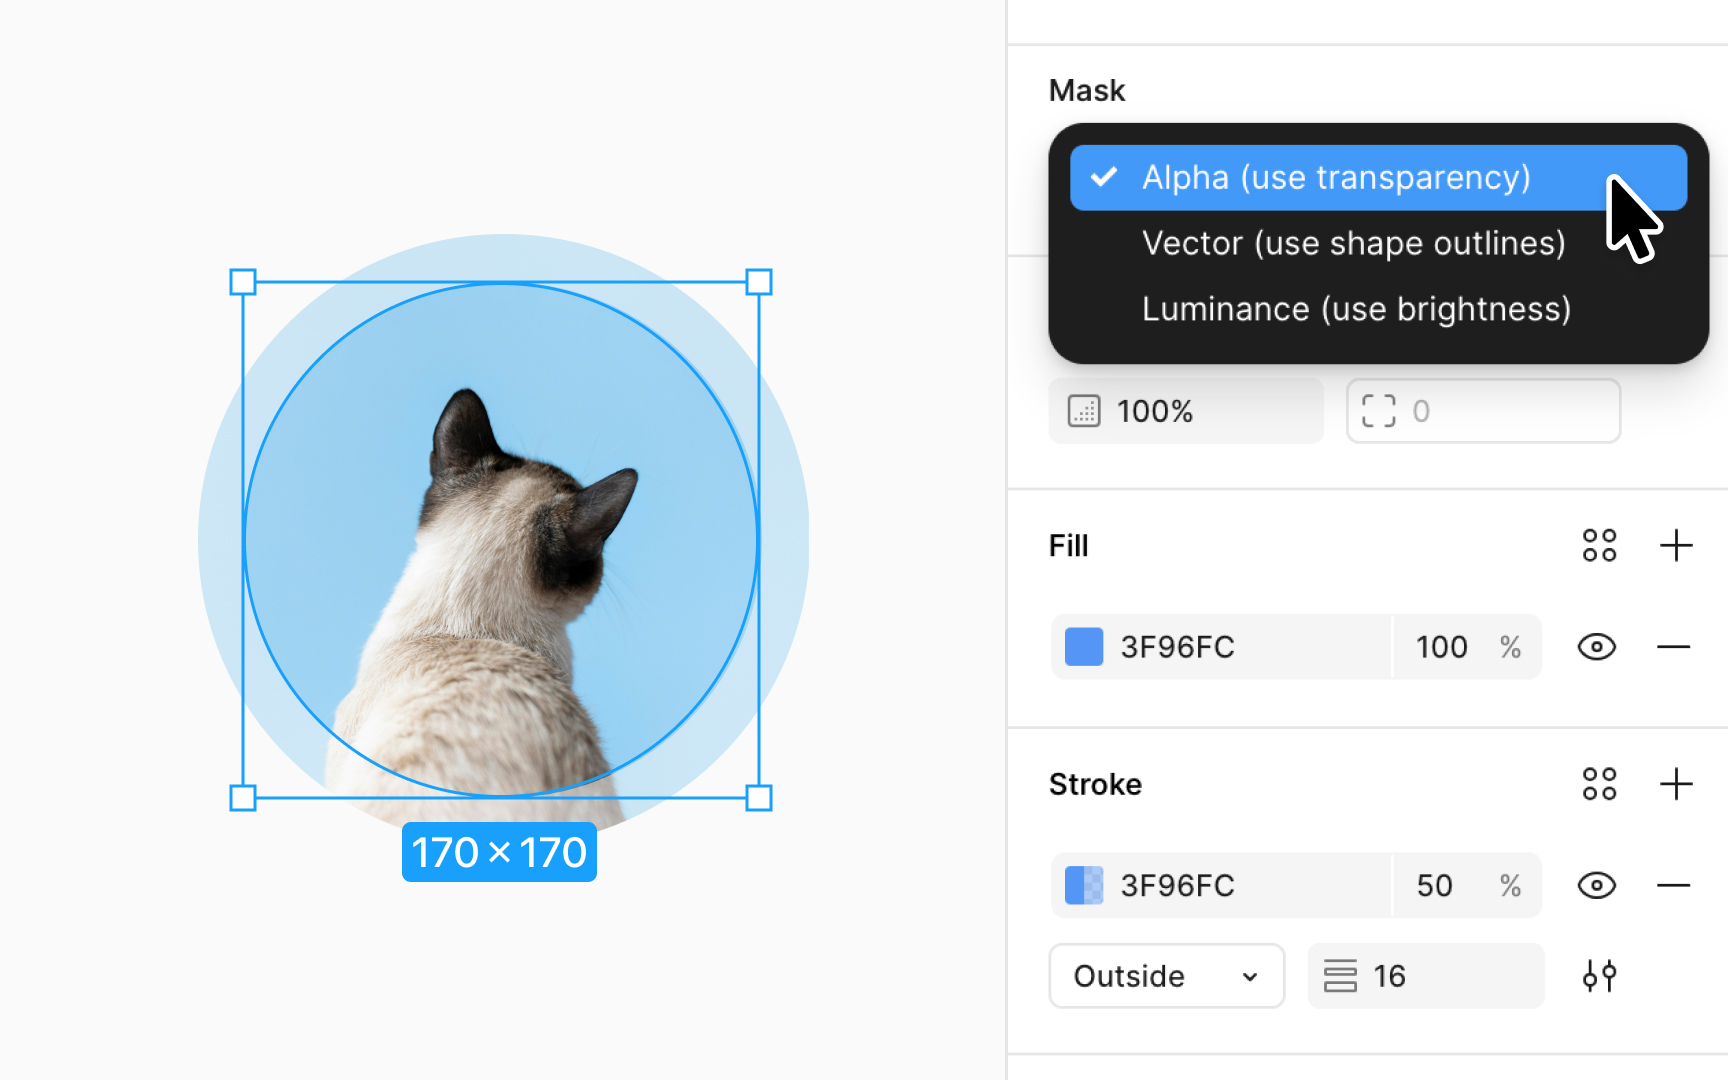
By default, your mask is set to Alpha, but you can change it. Click the mask layer and pick a new type from the Mask dropdown in the Design panel. Hover over options to preview them directly on your canvas.
Pro Tip: To add more layers to your mask, drag them into the mask group in the Layers panel.
Masks with
- Transparency import: Import images like PNGs, GIFs, or WebP files with alpha channels to incorporate complex transparency effortlessly, such as logos with fading edges.
- Feathering with ease: Feathering softens the edges of images or text by blurring them slightly, making transitions smoother and more natural. Alpha masks make applying this effect straightforward.
- Depth and shadows: Use alpha masks to add realistic shadows and depth, enhancing the 3D appearance of your designs.
- Opacity: With alpha masks, you can create designs featuring fills, strokes, and gradients with variable opacity, allowing for intricate effects like buttons with transparent borders that blend seamlessly into the interface.
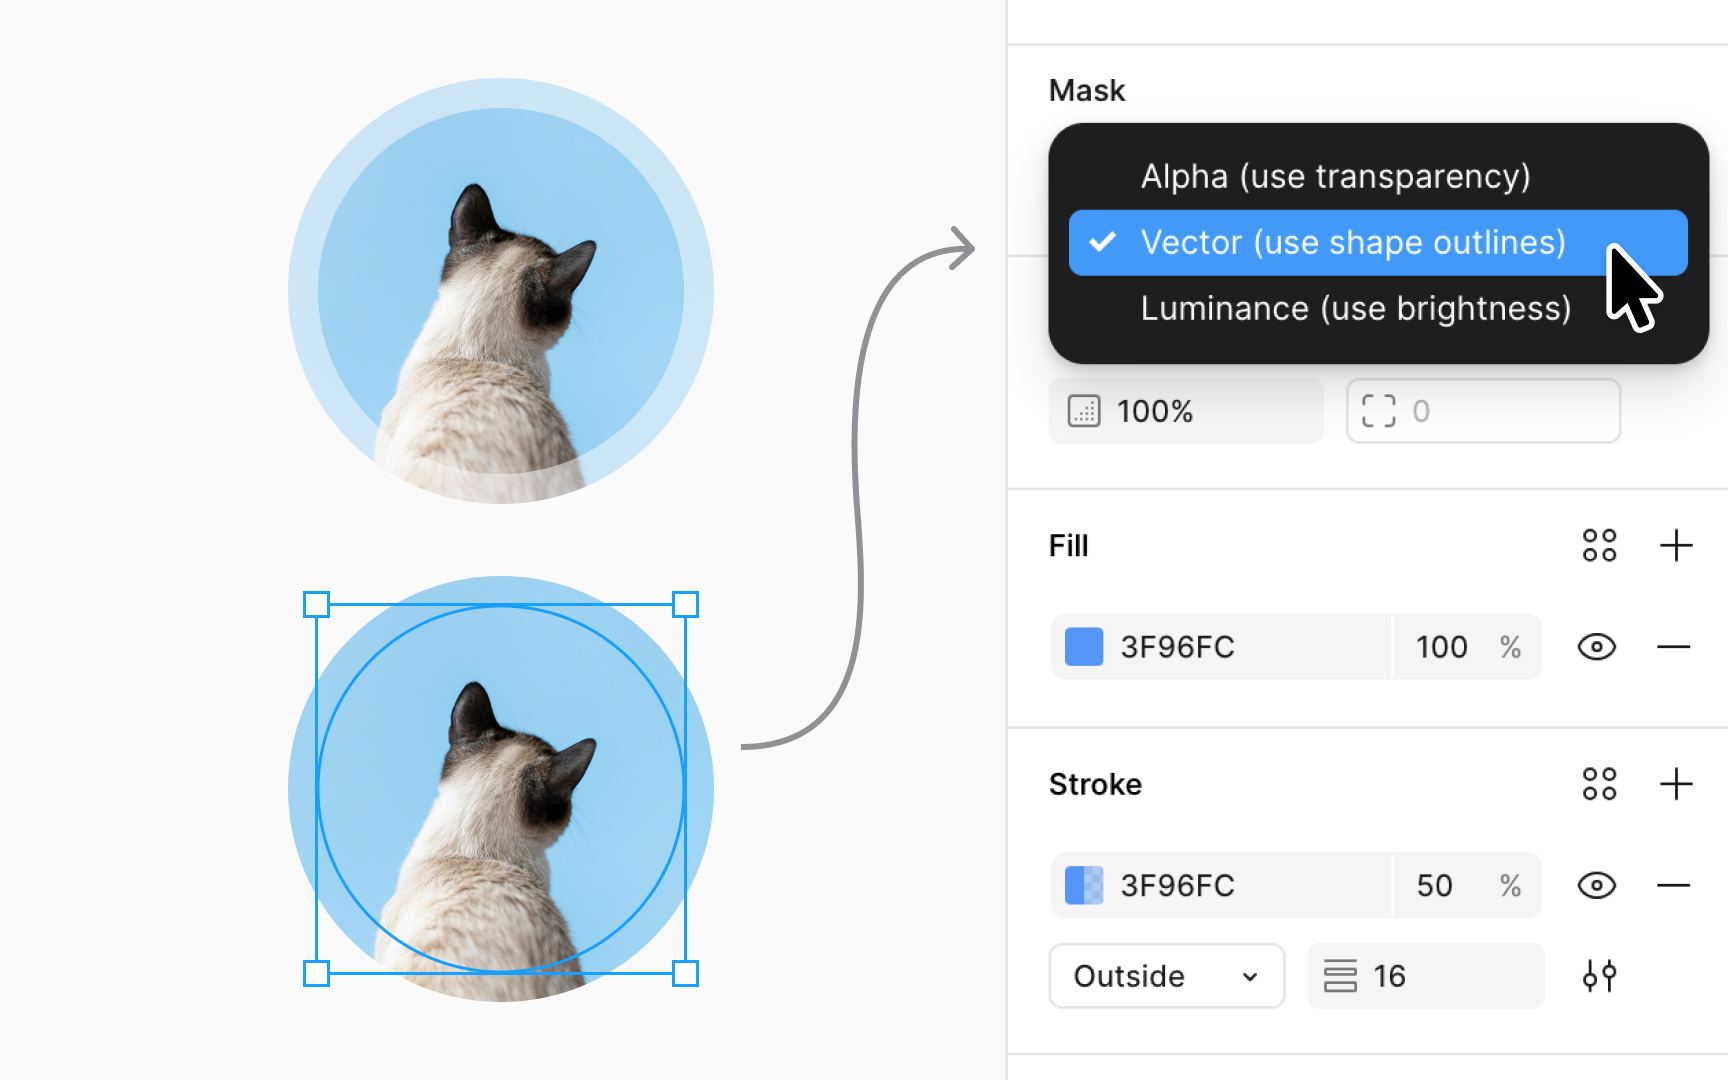
Vector masks use shape outlines to define visible areas in your designs, disregarding any translucency in the mask's fill or stroke. Essentially, if a mask's outline is present, the area it covers appears fully, without any transparency.
This tool is ideal for creating crisp, clean layers in your projects. For instance, designers can craft intricate
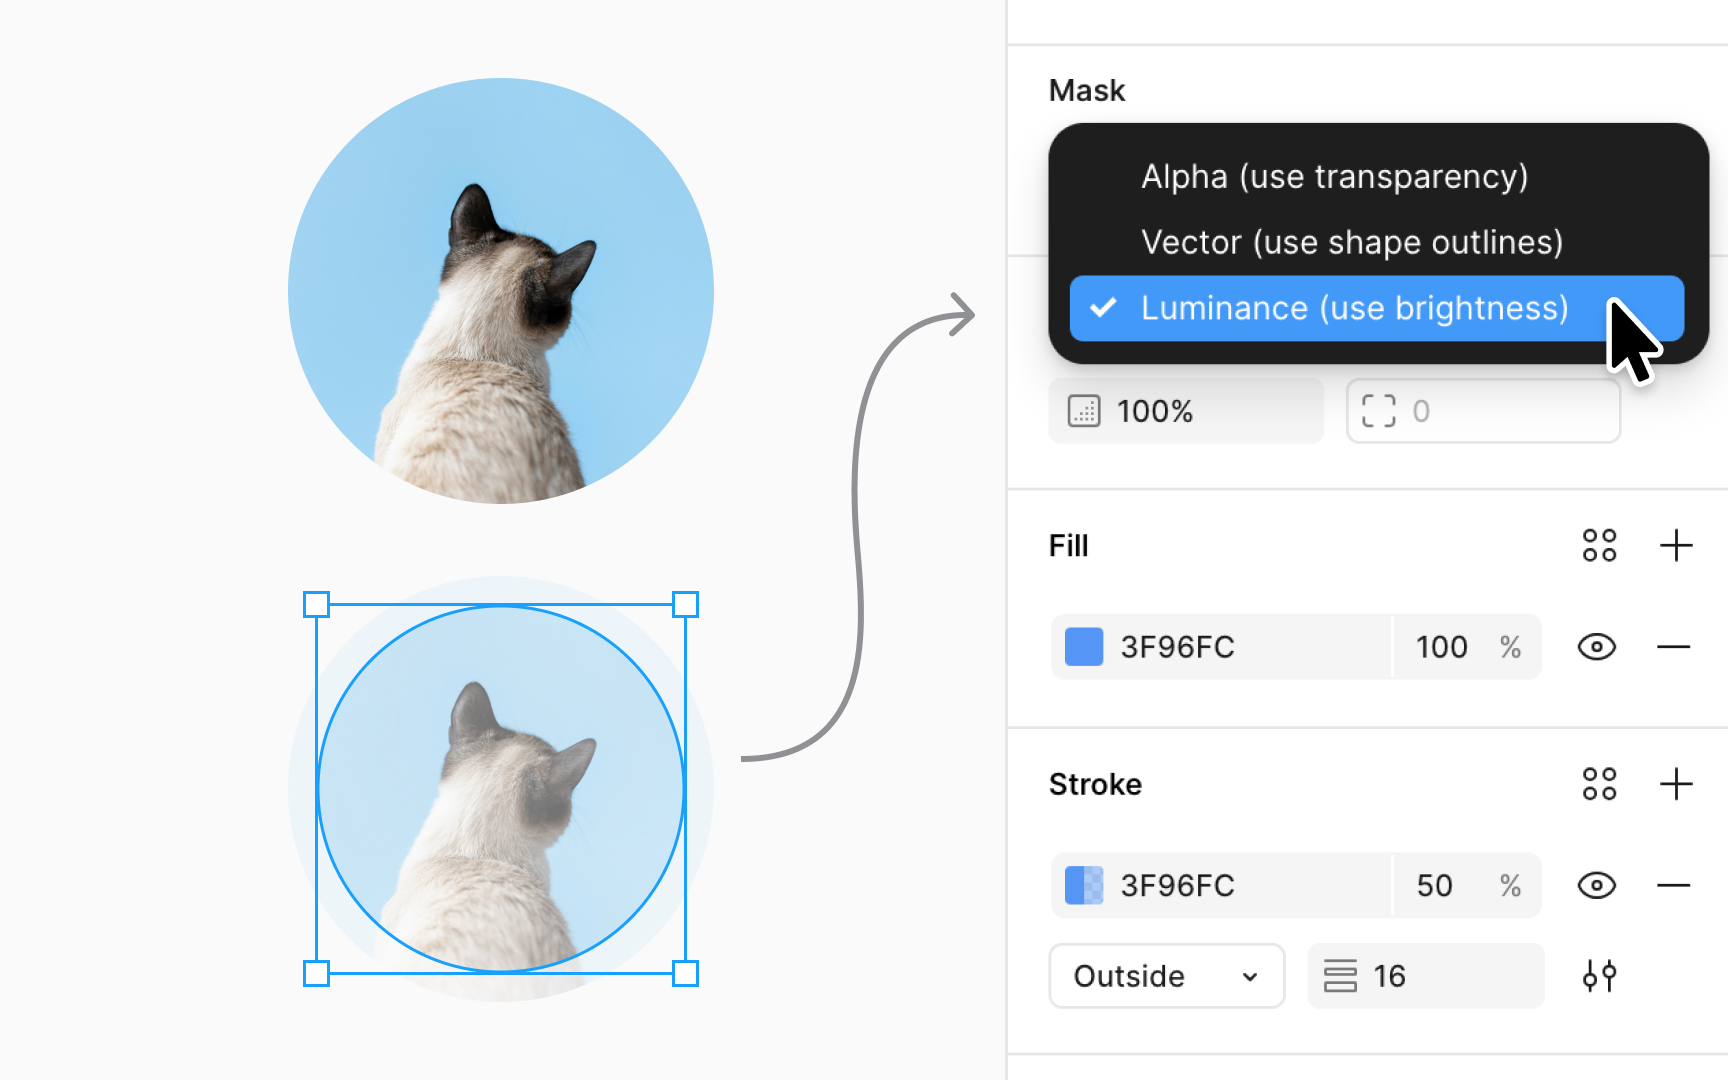
Luminance masks use brightness levels to control what parts of a layer are visible, essentially using light to unveil your design. Bright areas in the mask show more of the layer beneath, while darker areas conceal it. Think of it like a dimmer switch: the brighter the mask, the more you see underneath.
This tool is perfect for creating depth or focus in
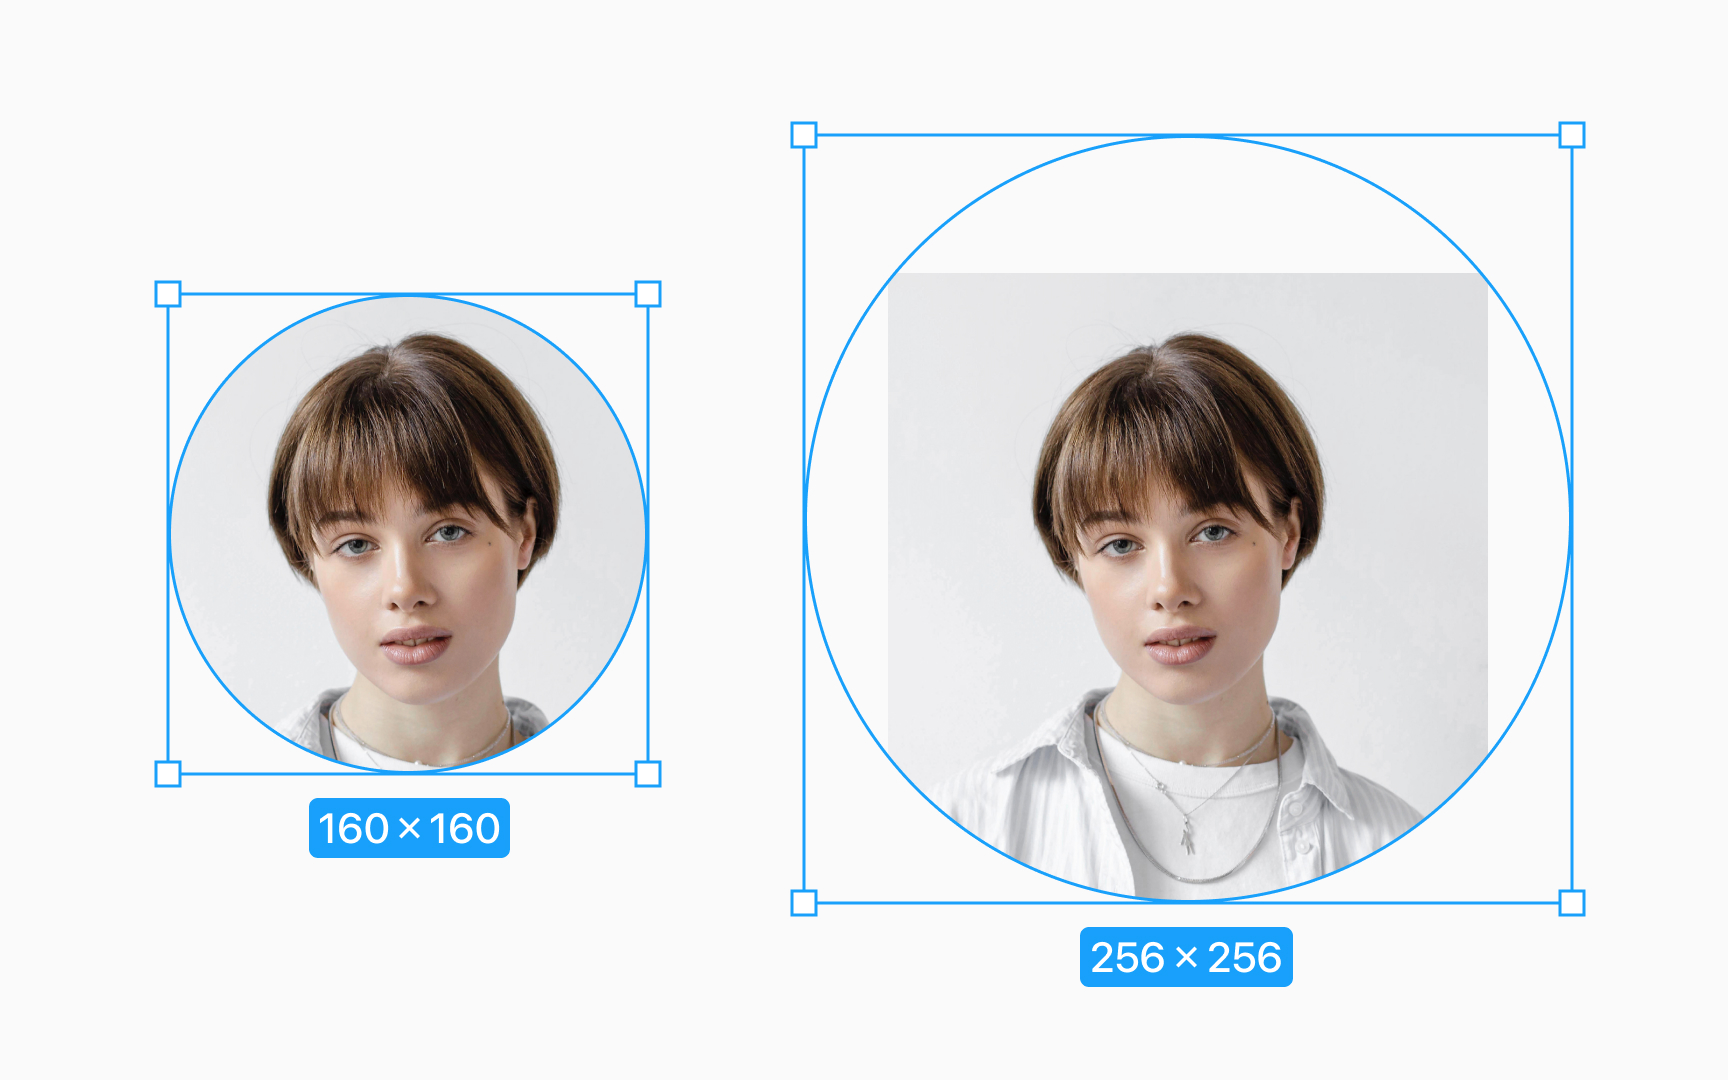
Masks and the layers they cover operate independently, giving you flexibility in adjusting your design. If you move or resize a mask, the layers beneath it won't be disturbed. The same is true if you adjust the masked layers, and the mask stays put. Think of them as siblings rather than parent and child. They don't automatically influence each other like frames or groups.
This independence is useful when fine-tuning details. For instance, you might want to shift a photo within a circular mask to focus on a specific part without altering the mask's size or position. This separate control ensures precision and ease in your design process, allowing you to adjust elements exactly how you envision them.
Masks are great for creating
Here are the steps to create an avatar:
- Select a shape for the
avatar , like a circle or square, to serve as the mask. This shape defines the visible area of the avatar. - Place a photo or an illustration of the person you want to feature as the avatar in front of the mask shape
- Select both the shape and the image.
- Click the Use as Mask option in the Design Panel on the right. The image will now be clipped to the shape of the mask, showing only the part of the image within the mask's boundaries.
You can
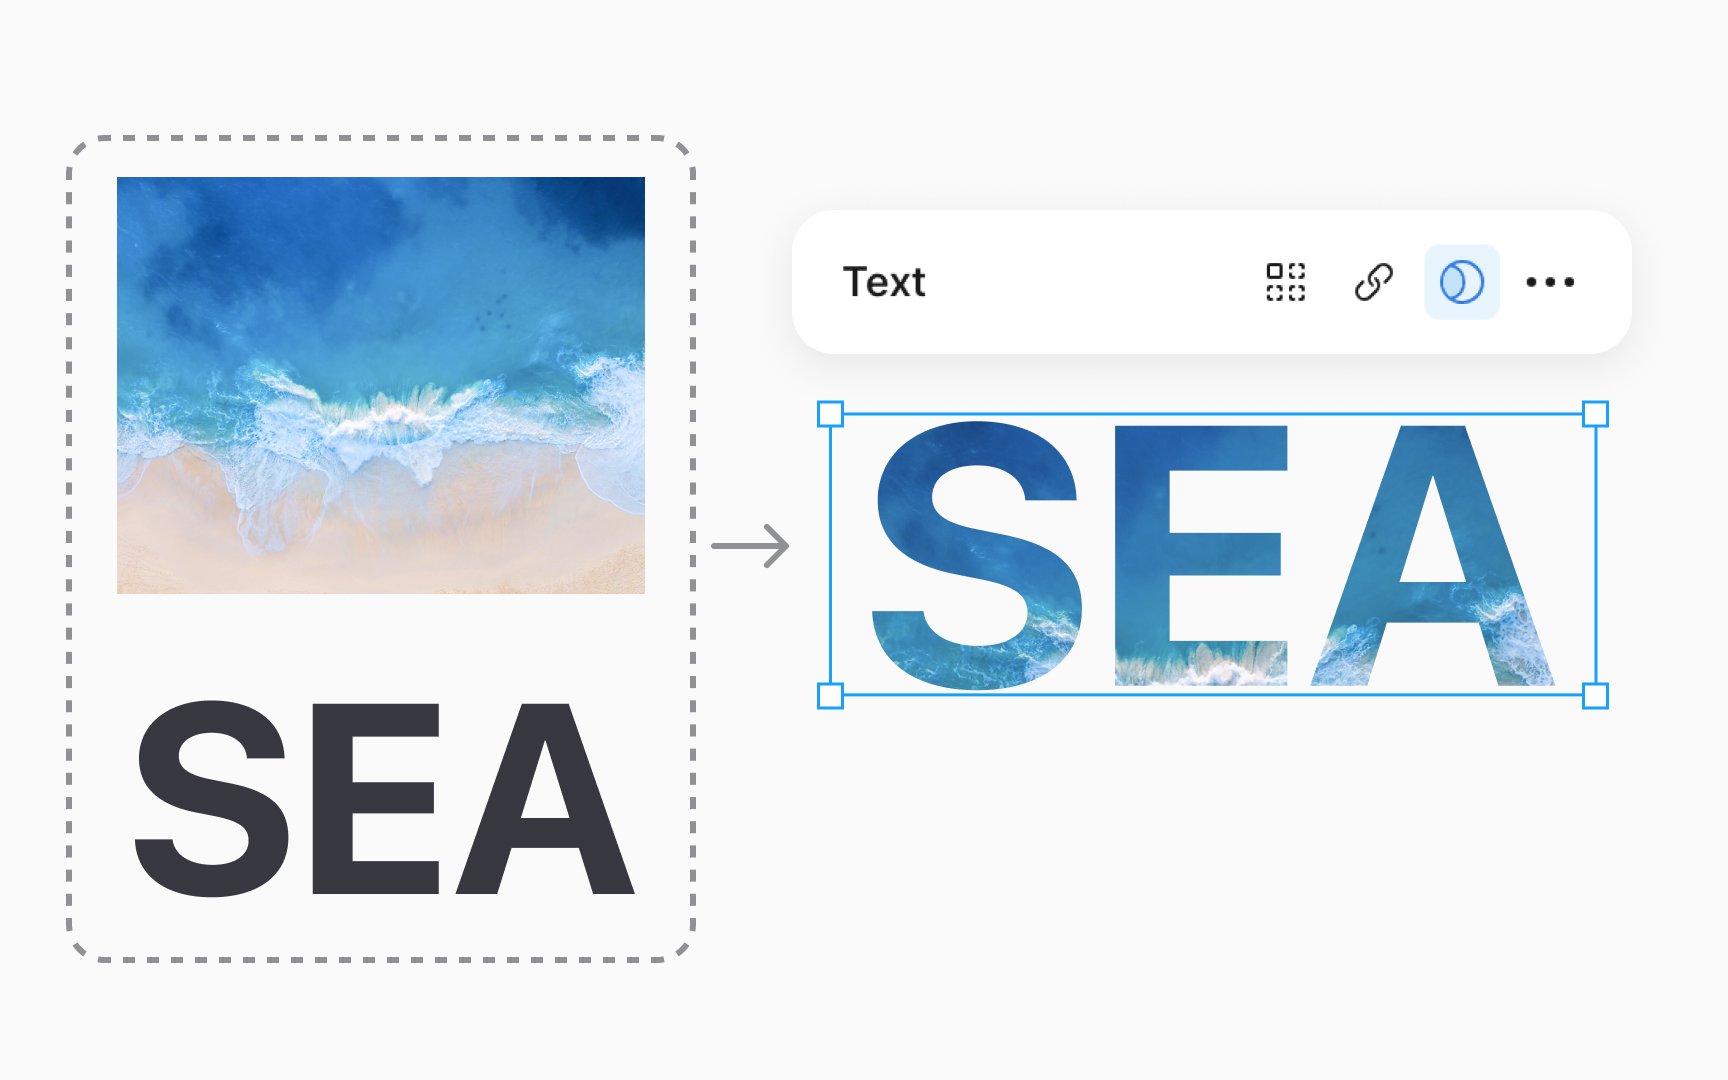
Creating a text mask in Figma allows you to fill your text with
Follow these steps to create a text mask:
- Begin by typing out your text.
- Adjust the font and size to your liking.
- Place your chosen image or pattern above the text layer. This will be what fills the text.
- Once your text and image are ready, select both layers.
- Use the Use as Mask option in the right sidebar.
The text will now act as a mask, with the image visible only within the text outlines. You can move or


Similar lessons

Common UI Components Part I

Image Terminology
