HTML Tables
Learn the best practices to organize and present tabular data in a structured manner on your web pages with HTML
Tables are a valuable tool for organizing and presenting complex information in a structured and easy-to-understand manner. With their rows and columns, tables provide a systematic framework that allows users to compare data, make connections, and derive insights. In this lesson, we delve into the art of creating tables using HTML and CSS, uncovering the essential markup techniques that bring order and clarity to your data.
Whether you're designing a pricing comparison chart, displaying product specifications, or presenting statistical data, mastering HTML tables is indispensable for conveying information effectively. Discover the correct HTML syntax for constructing tables, including the tags and attributes necessary to define the table structure, headers, and data cells.
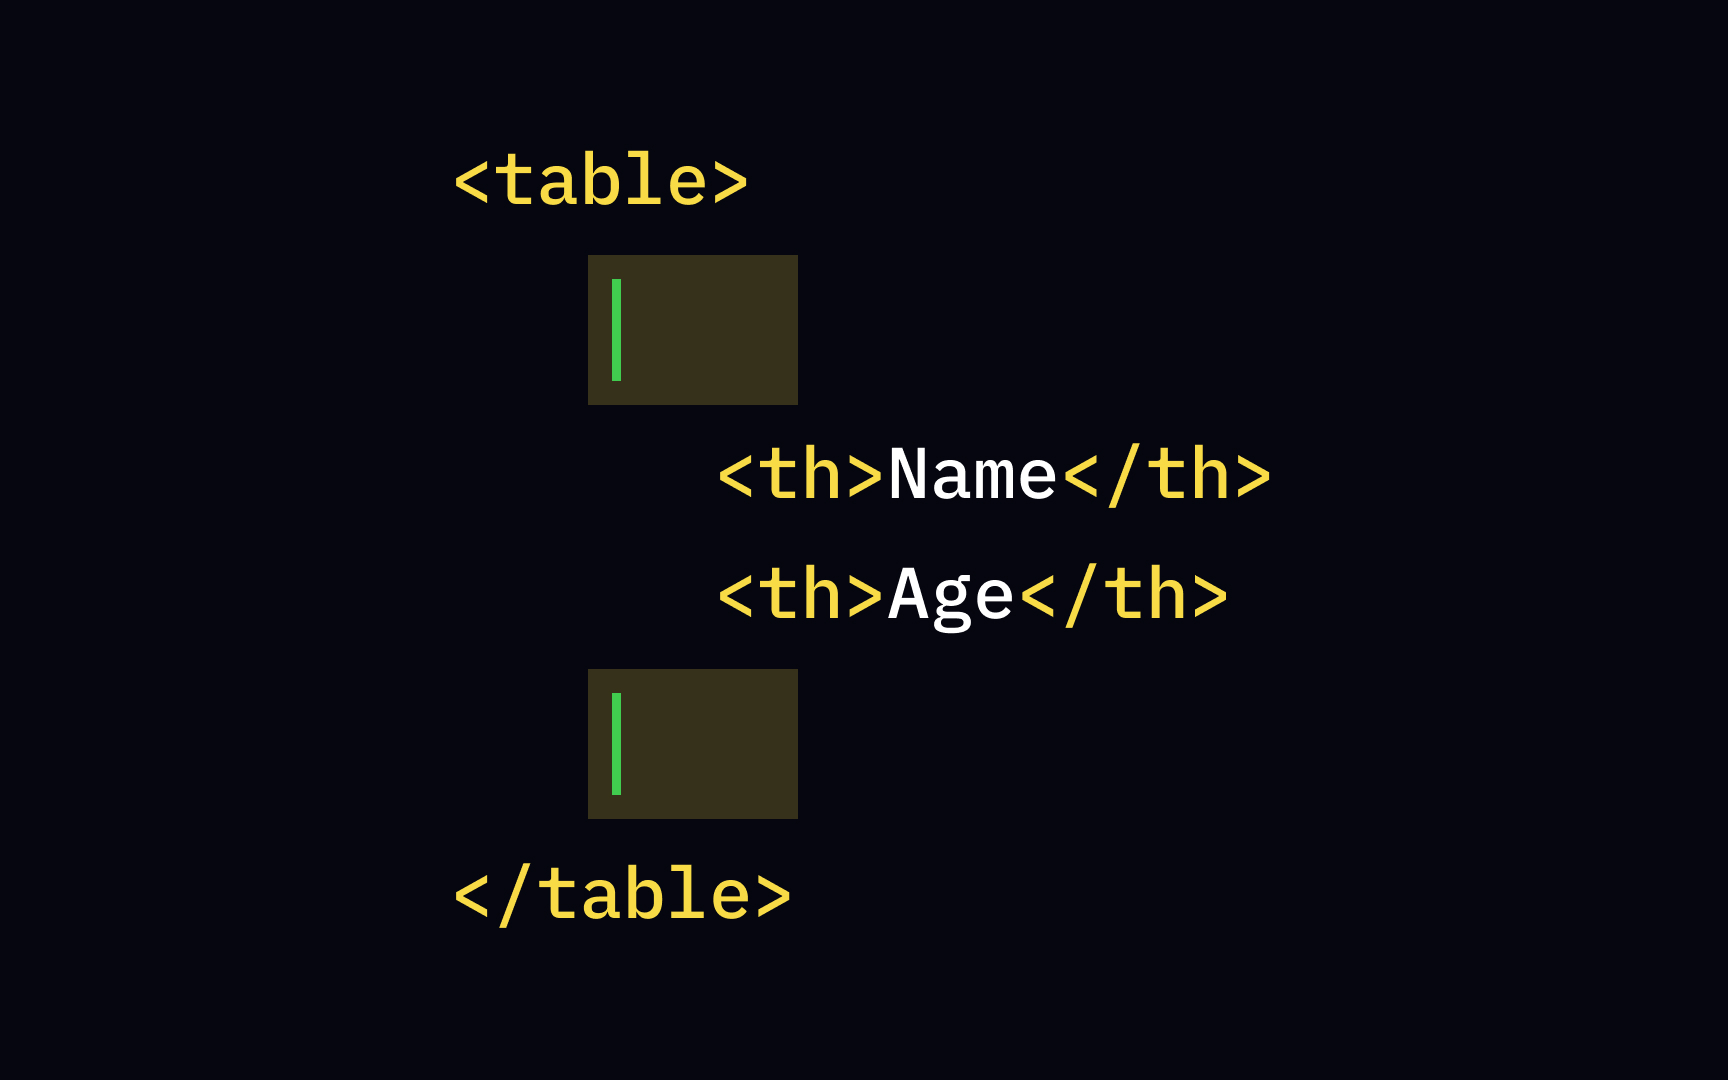
At its most basic level, a table is built using the <table> element and one or more of the <tr>, <th> and <td> elements to define rows, headings, and cells respectively.
Pro Tip: Avoid using the <div> tag for tabular data — although it can separate content into blocks, its purpose is to create layouts.
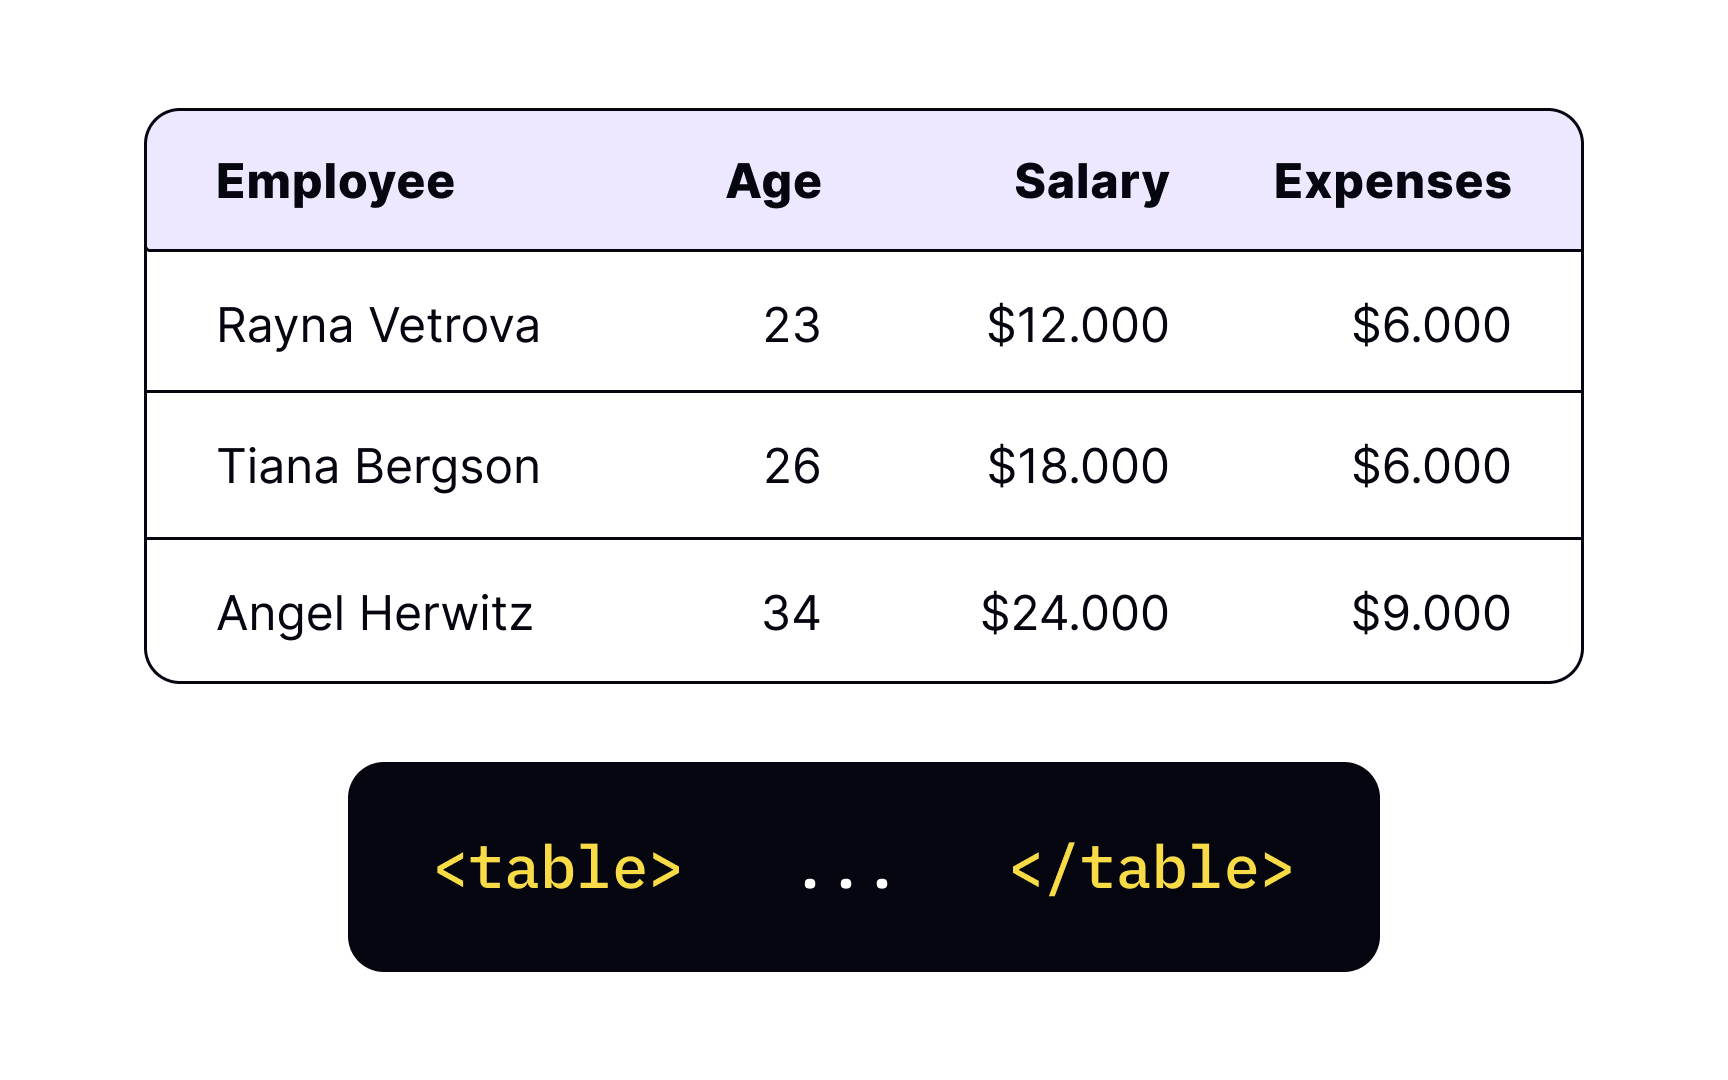
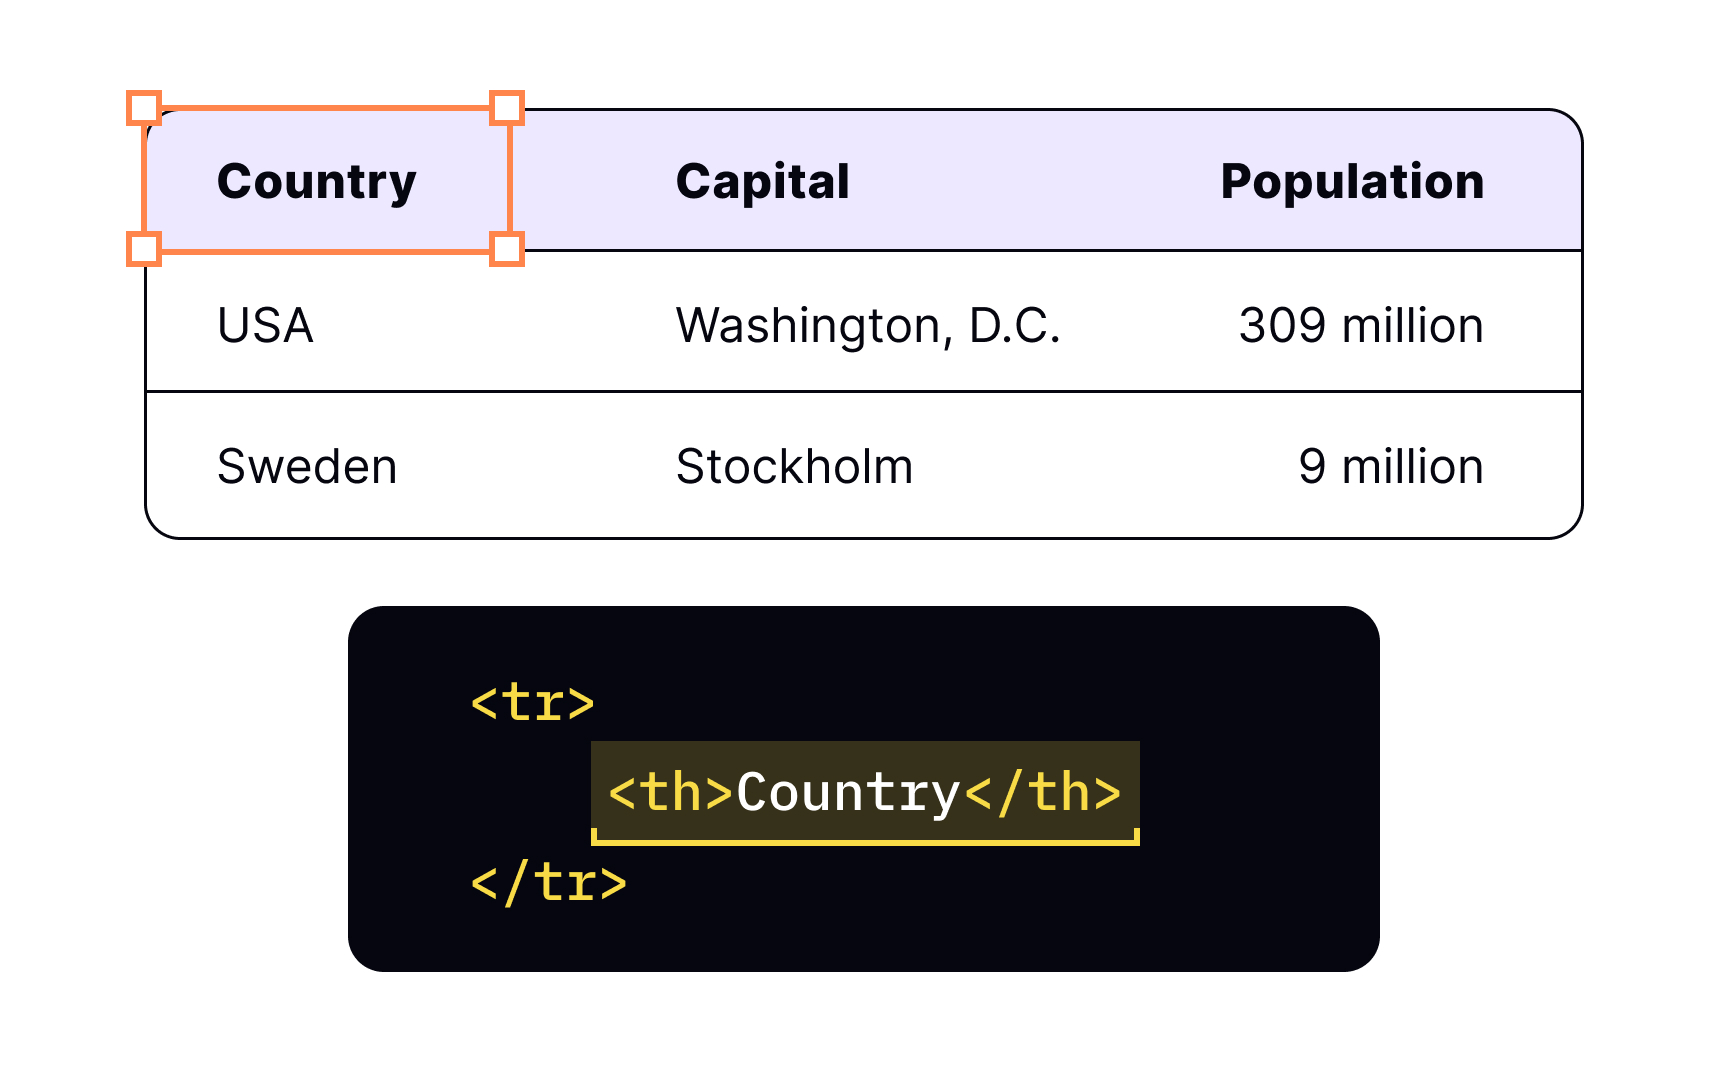
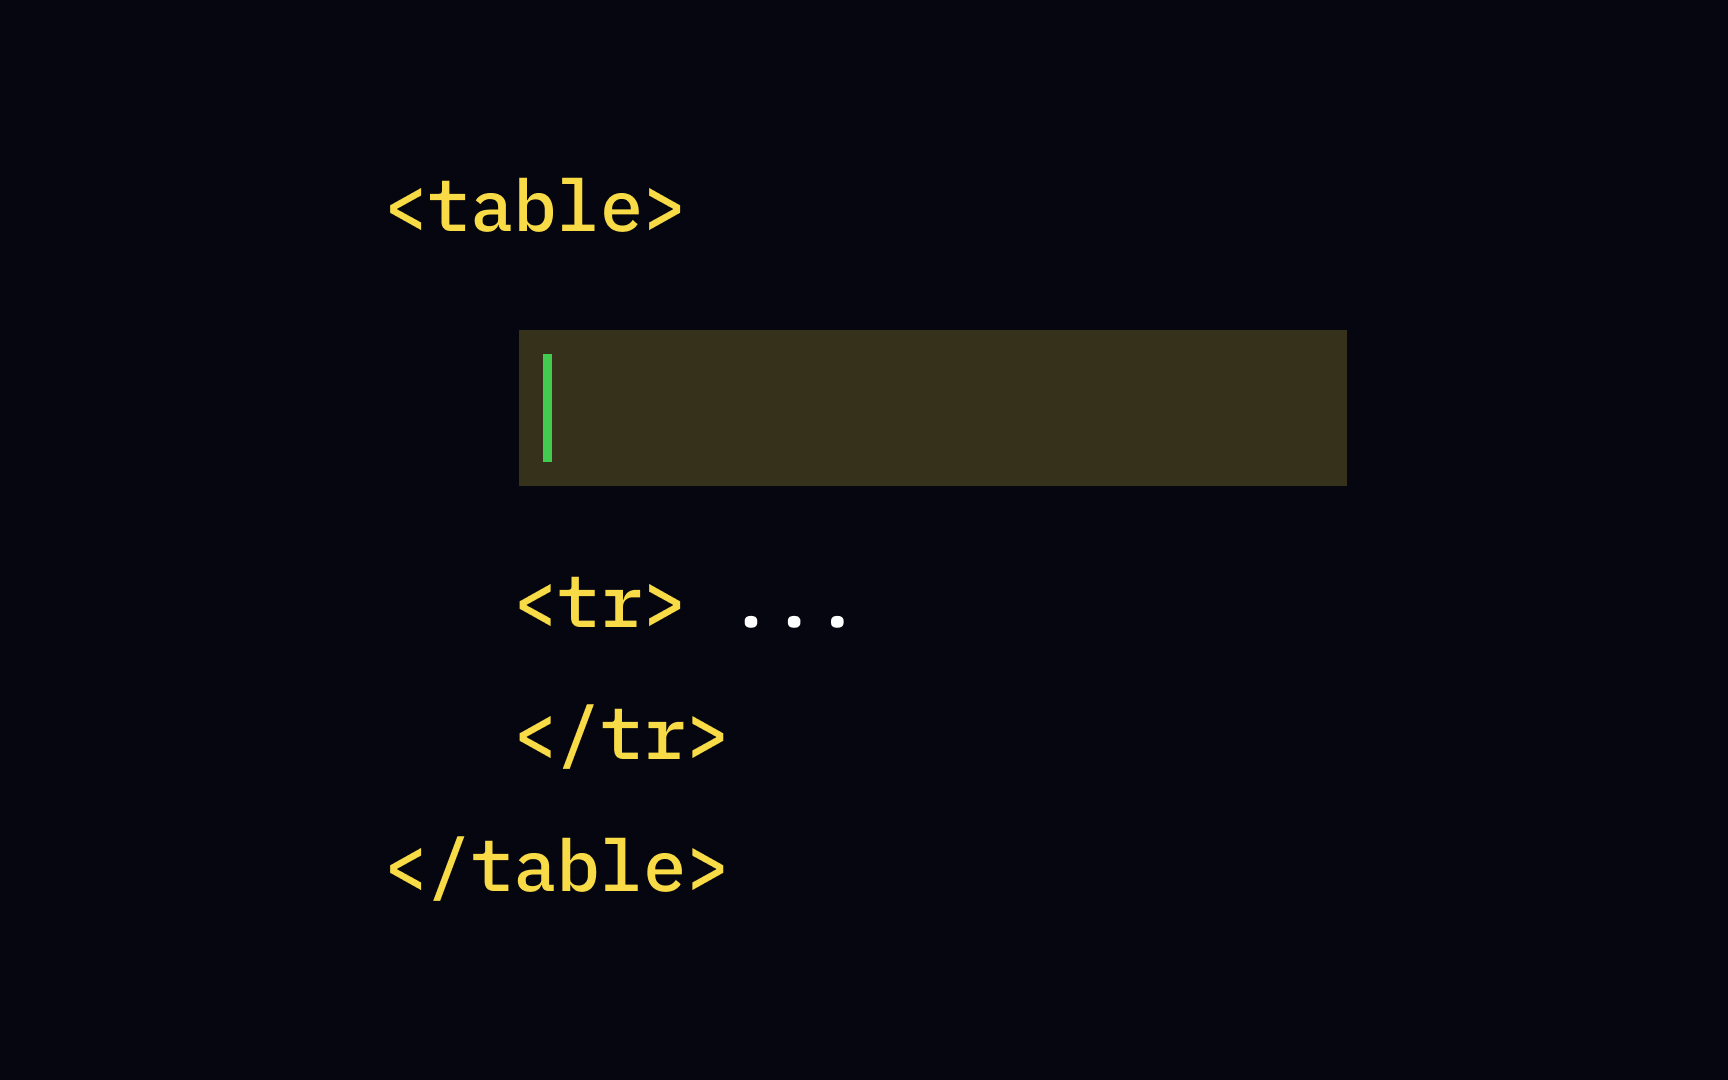
The <tr> element — short for <tr> tag itself is nested inside the <table> tag. Your table will need as many <tr>

We use the <td> <tr> tag.[1] In this example, the second
• Angel Herwitz
• 34
• $24.000
• $9.000
The code for this row would look like this:
<tr>
<td>Angel Herwitz</td>
<td>34</td>
<td>$24.000</td>
<td>$9.000</td>
</tr>
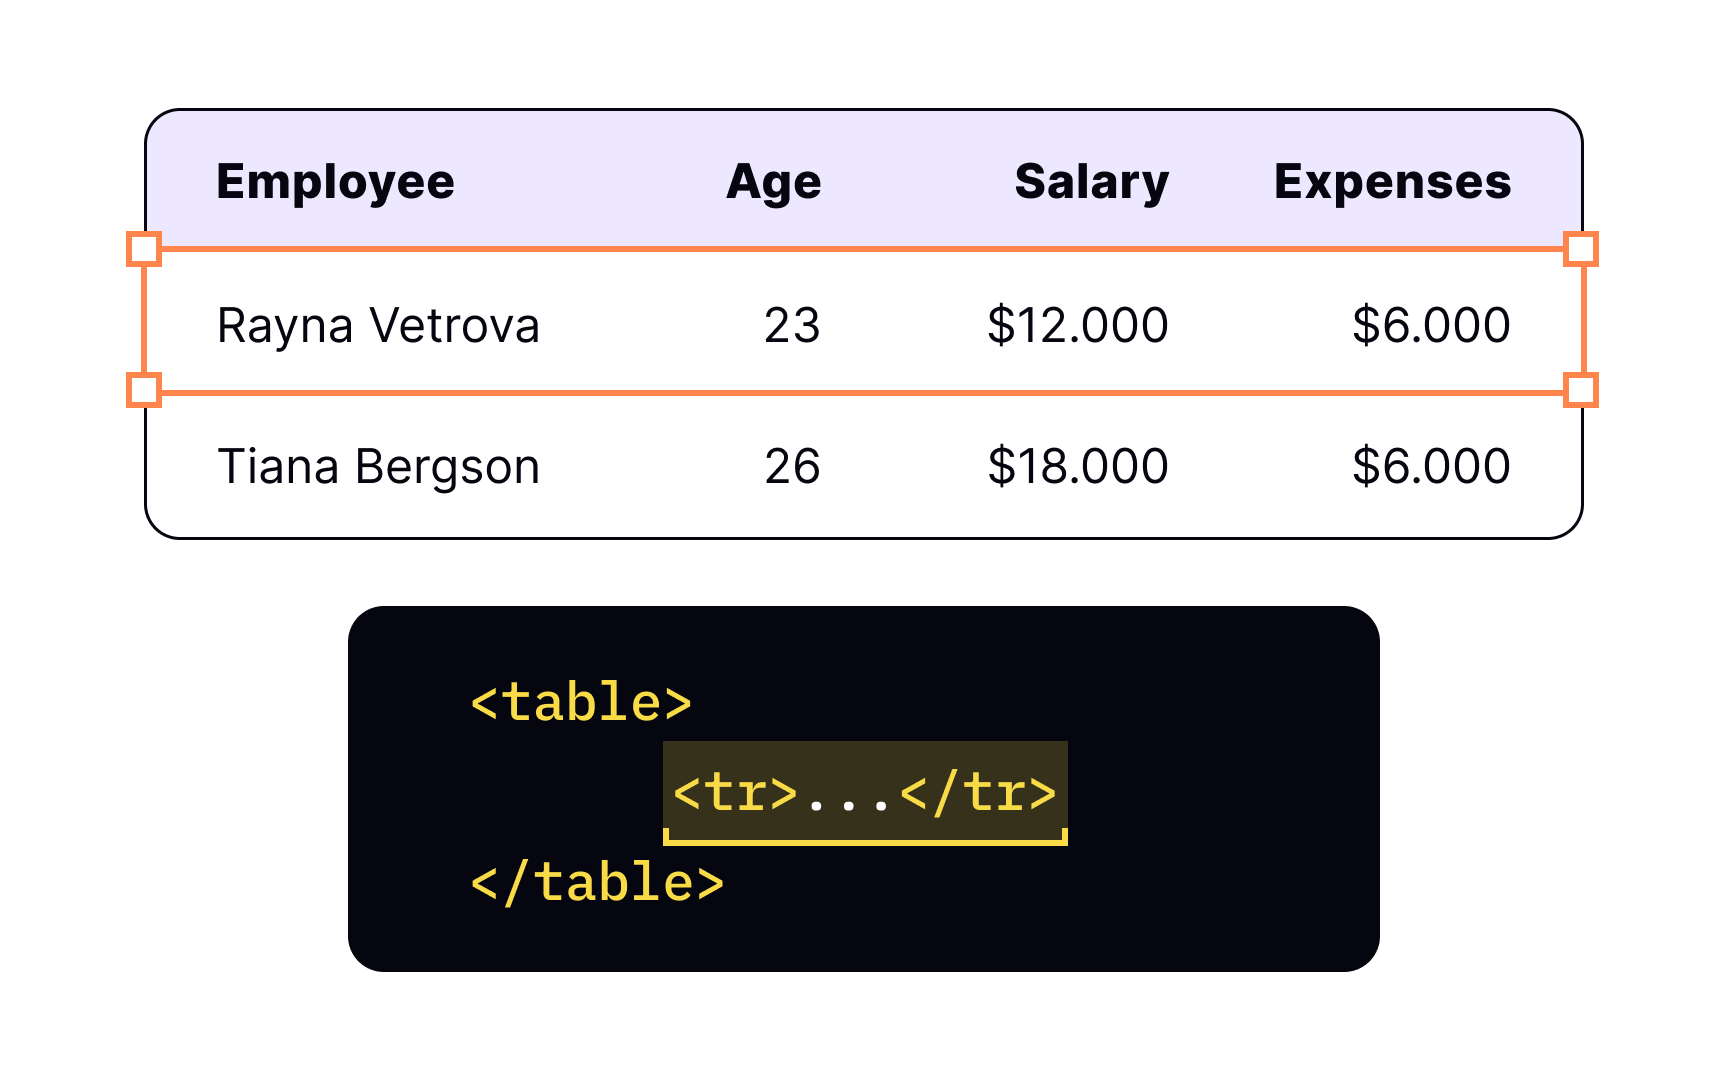
The <th>
Another function of the table header markup is that it's crucial for accessibility. Screen readers announce headings as users move through the table, giving assistive technology users the context that is available to visual users at a glance. Failing to use the correct markup for table
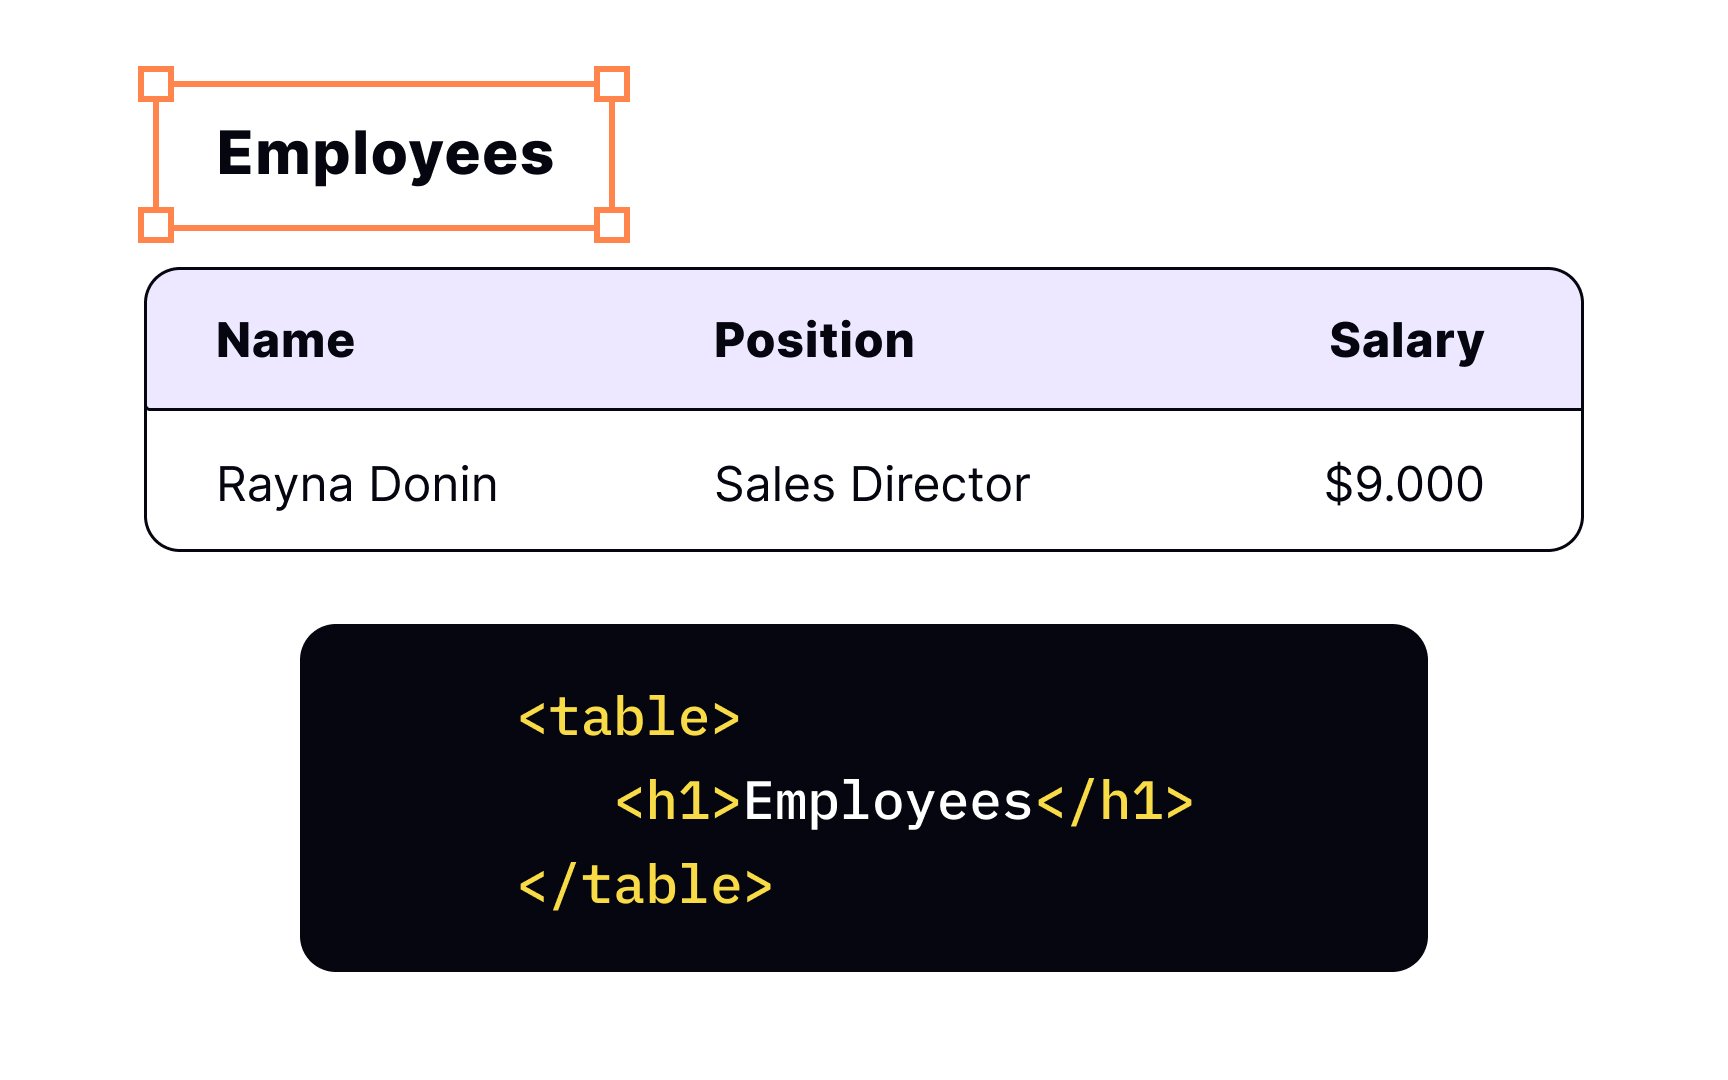
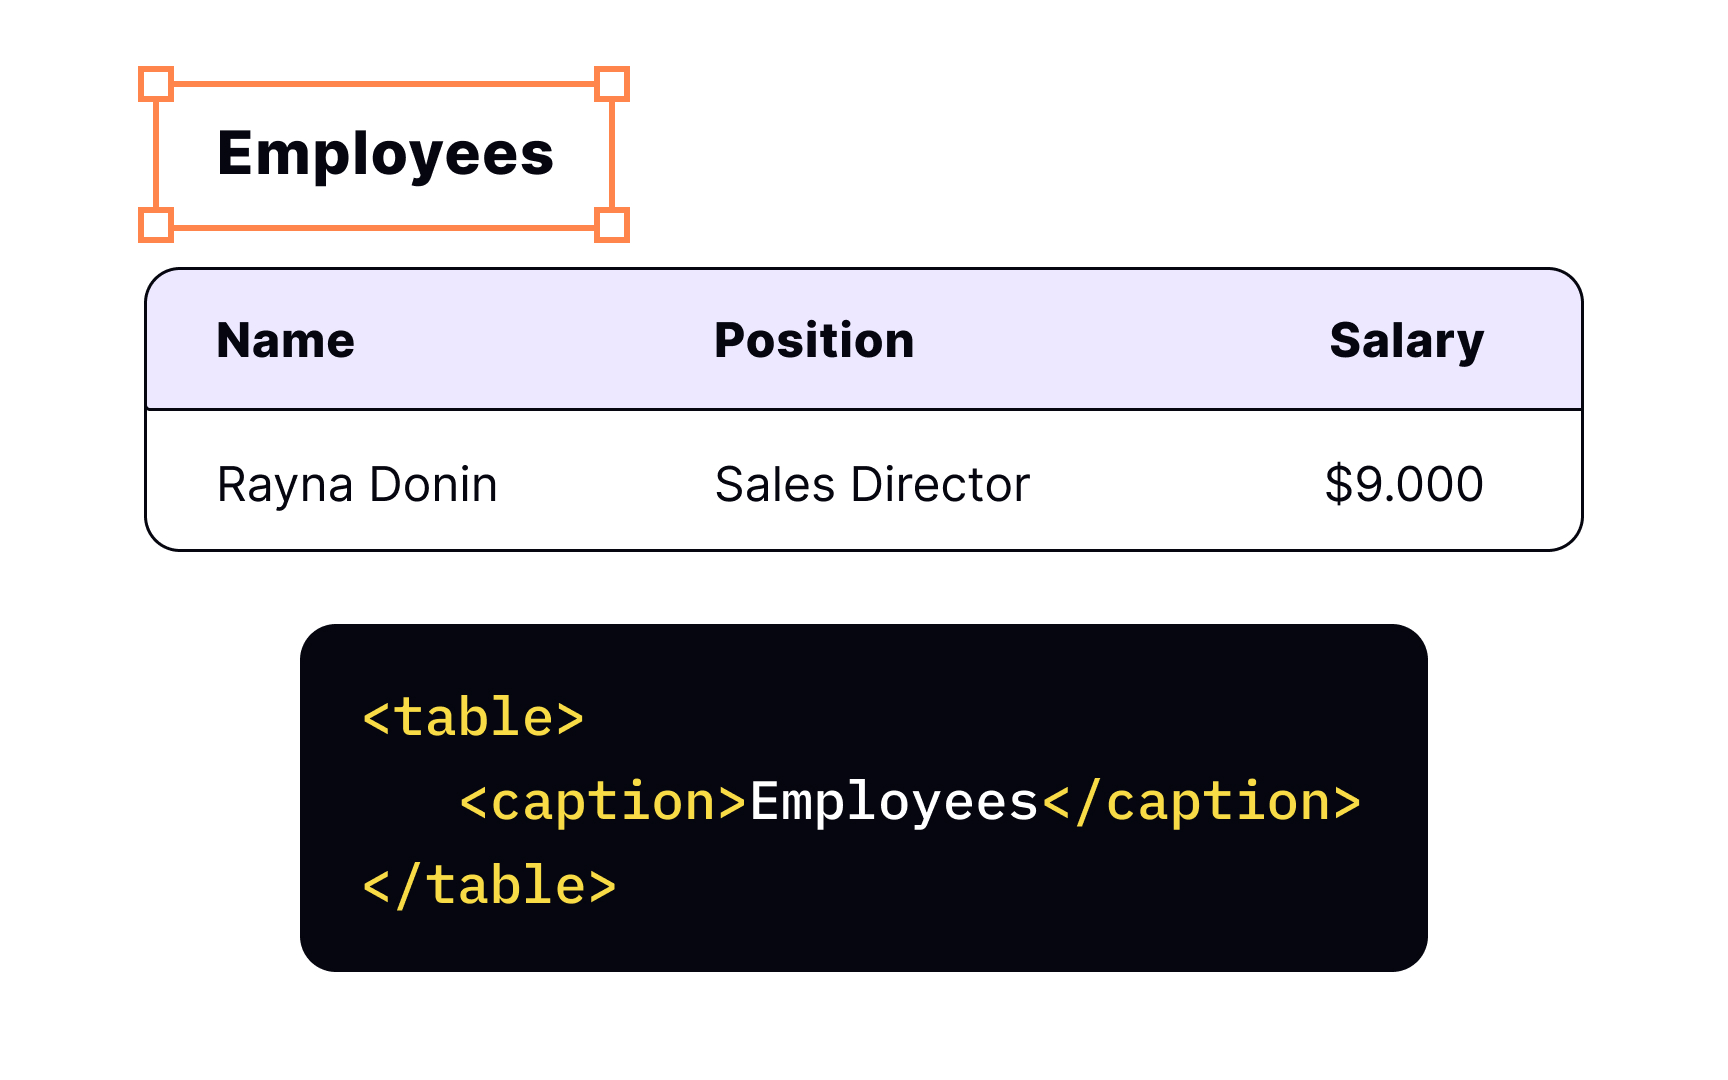
You can specify your table's title with the <caption> <table> tag. It's a paired tag which means the
While the <caption> element is not compulsory, it's crucial for assistive technology users. It helps users identify a table, understand what it's about and decide if they want to read it.
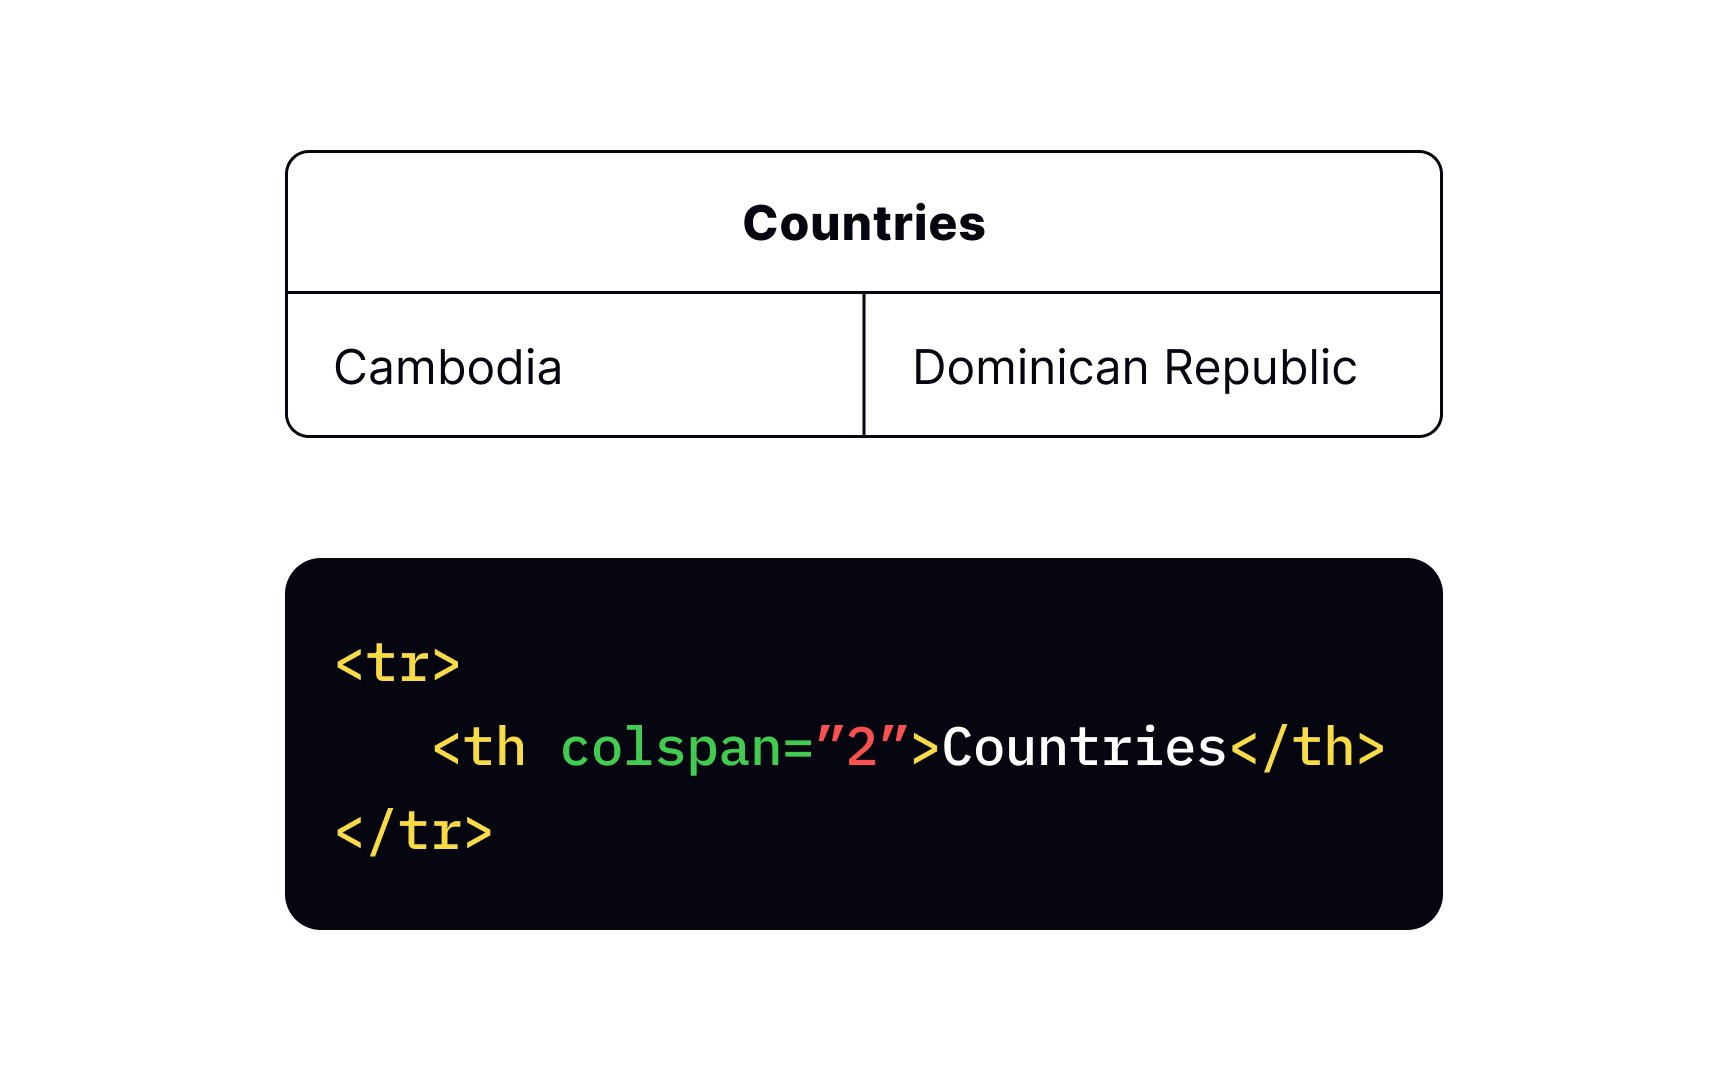
The colspan attribute stands for column spanning, which allows you to extend a column across multiple other
To merge two columns into one <th> with the attribute colspan and the value 2.
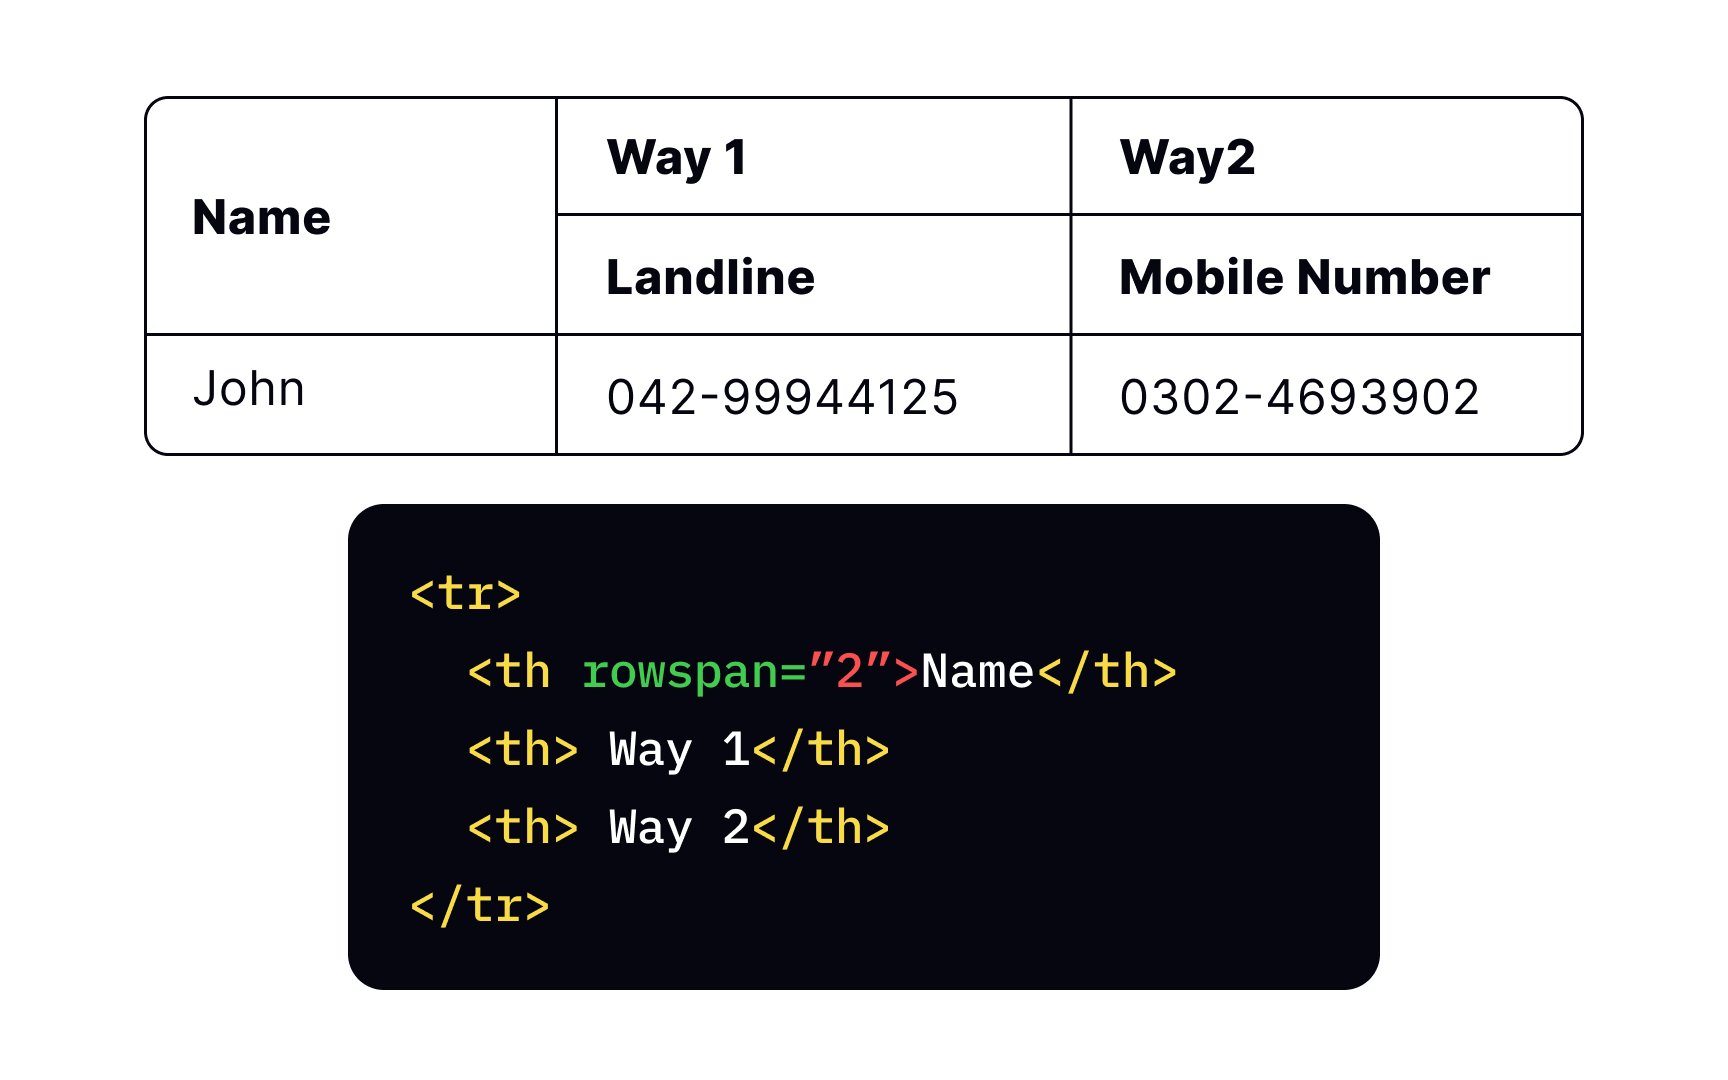
The rowspan attribute allows you to extend a row into multiple colspan attribute that does the same with
Keep in mind that assistive technology like screen readers may have difficulty parsing complex rowspan and colspan only when necessary — if merging two cells makes more sense than separating them. Alternatively, consider breaking bigger tables apart into a group of related smaller tables.
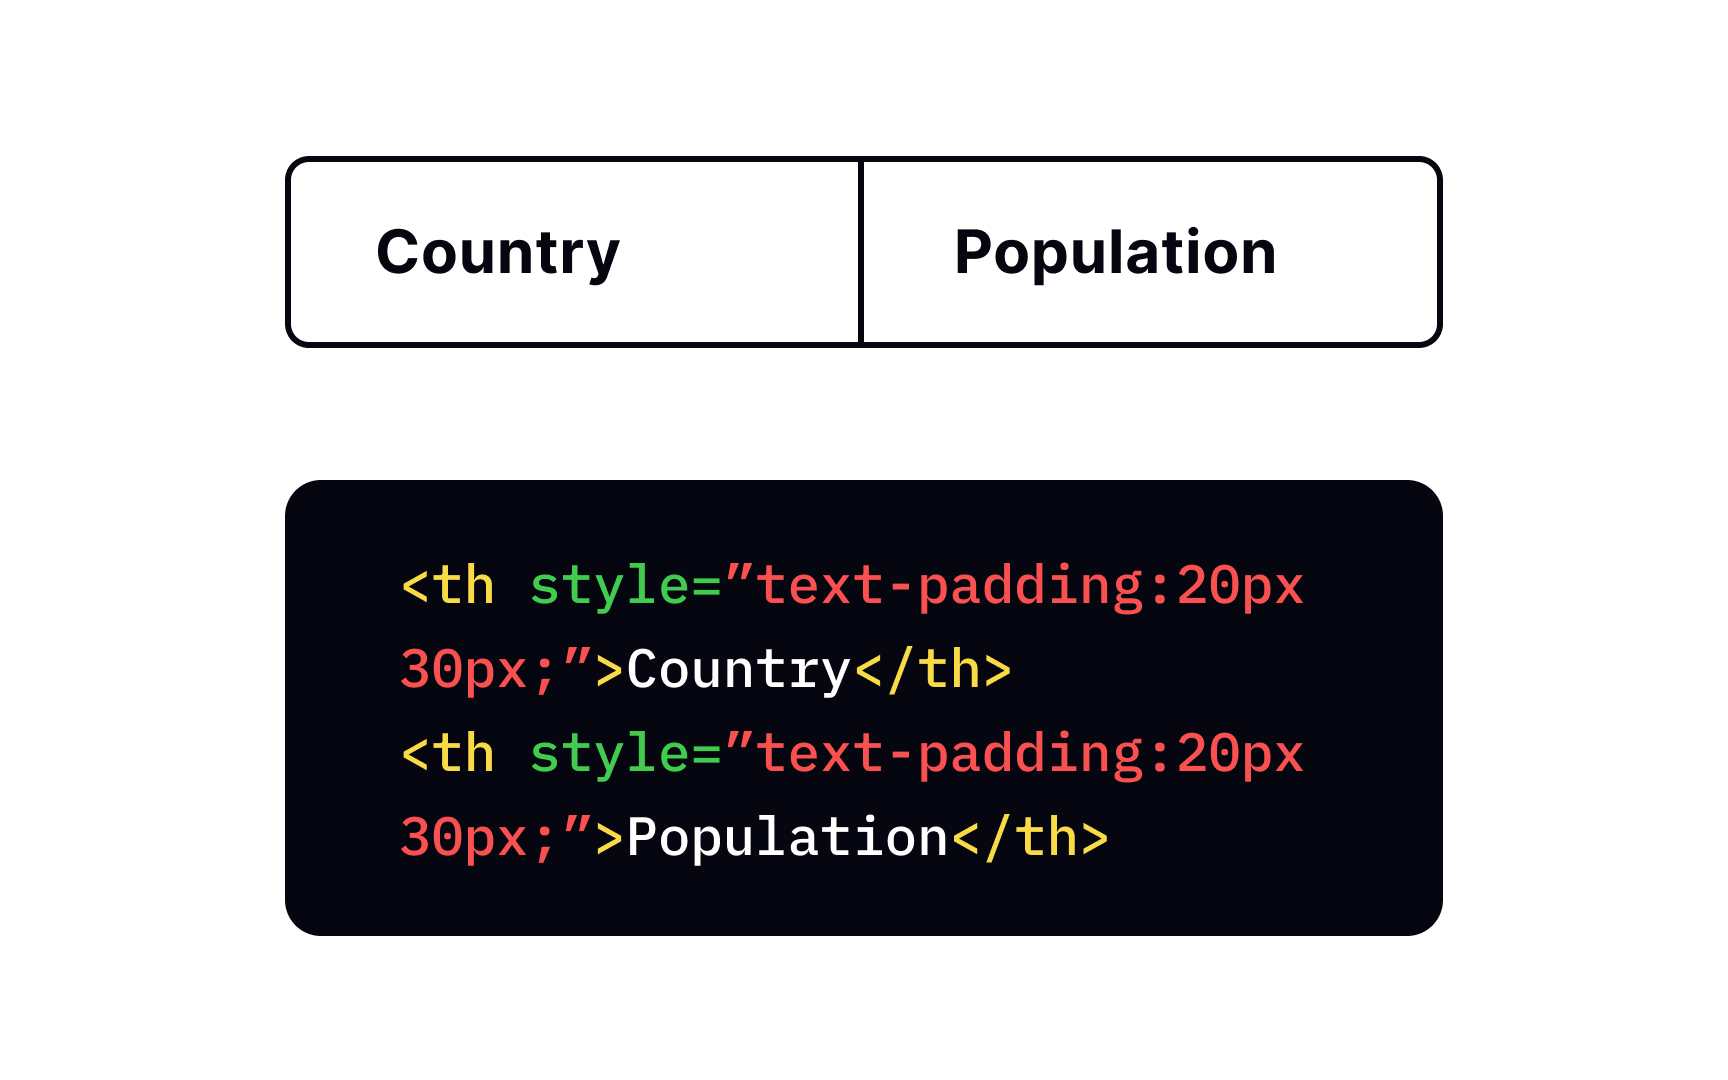
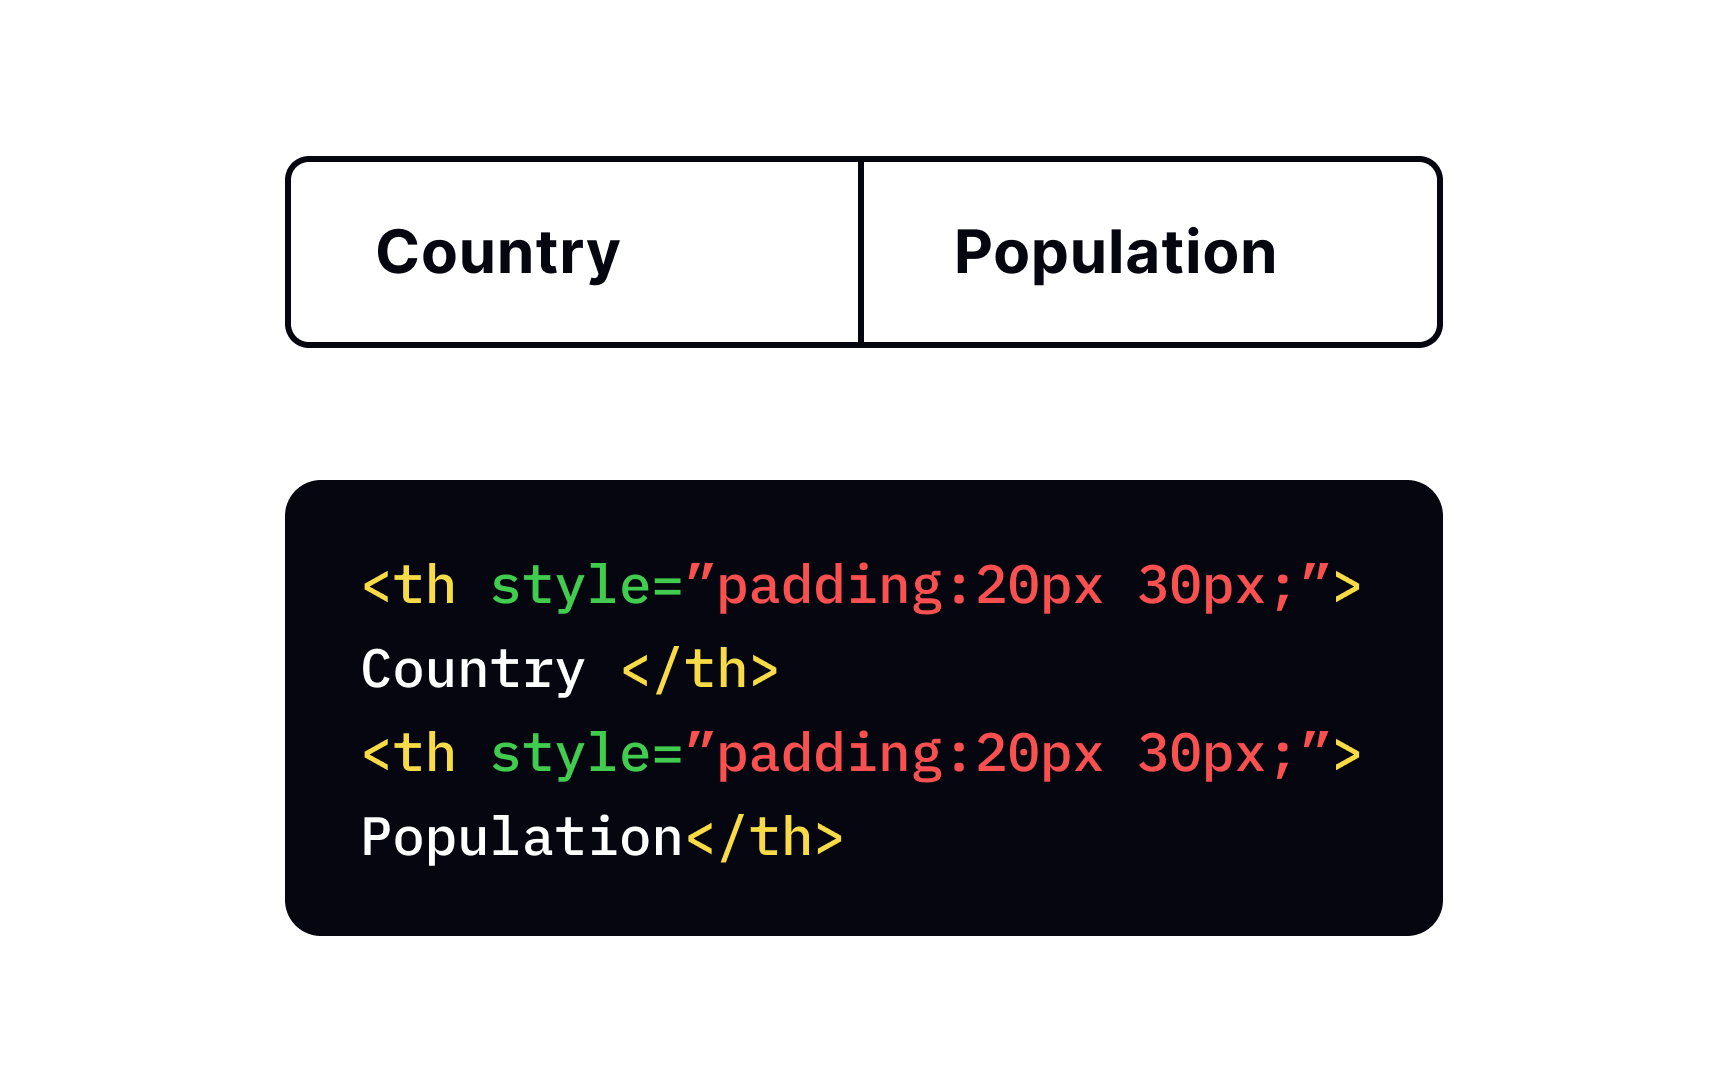
By default, padding property. It's a shorthand that allows you to set the padding for each side in one property. The padding property can take 4, 3, 2, and 1 values.
Depending on the number of values, it sets the padding for the following sides:
• 4 values: top, right, bottom, left
• 3 values: top, left&right, bottom
• 2 values: top&bottom, left&right
• 1 value: all sides[3]
In the example above ”padding:20px 30px;” sets the top and bottom padding to 20px and the left and right padding to 30px.
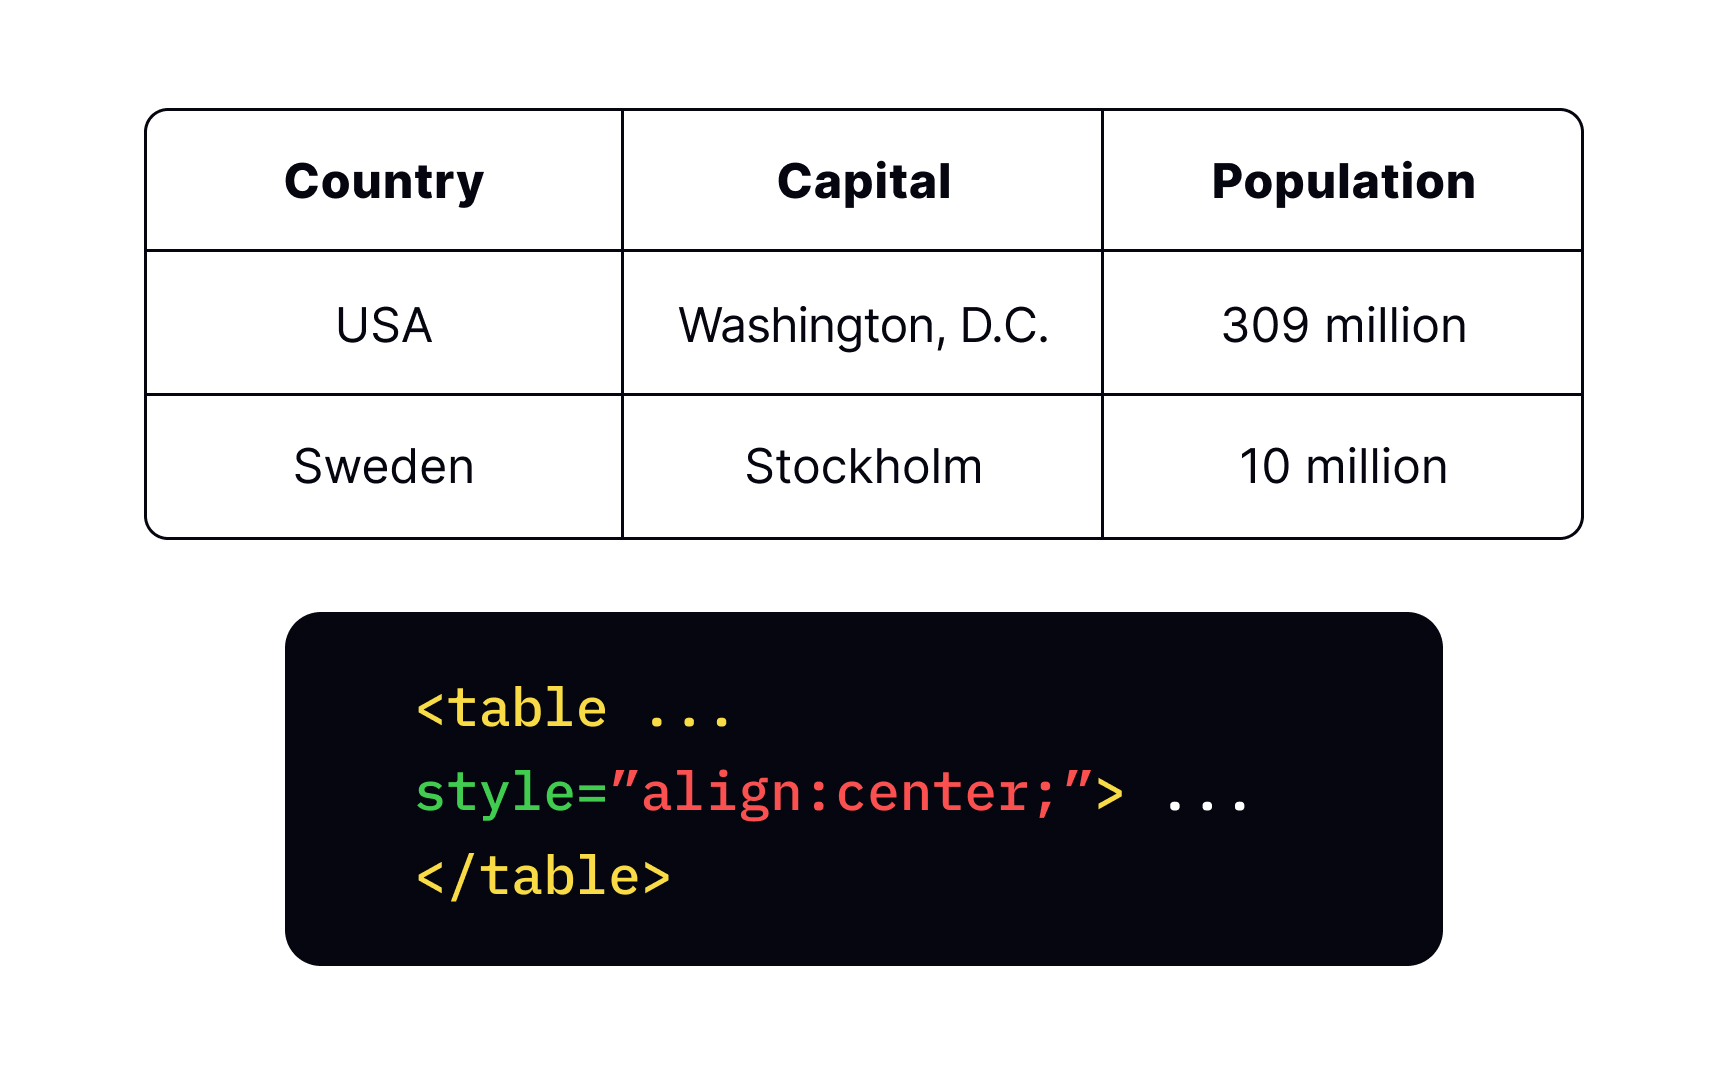
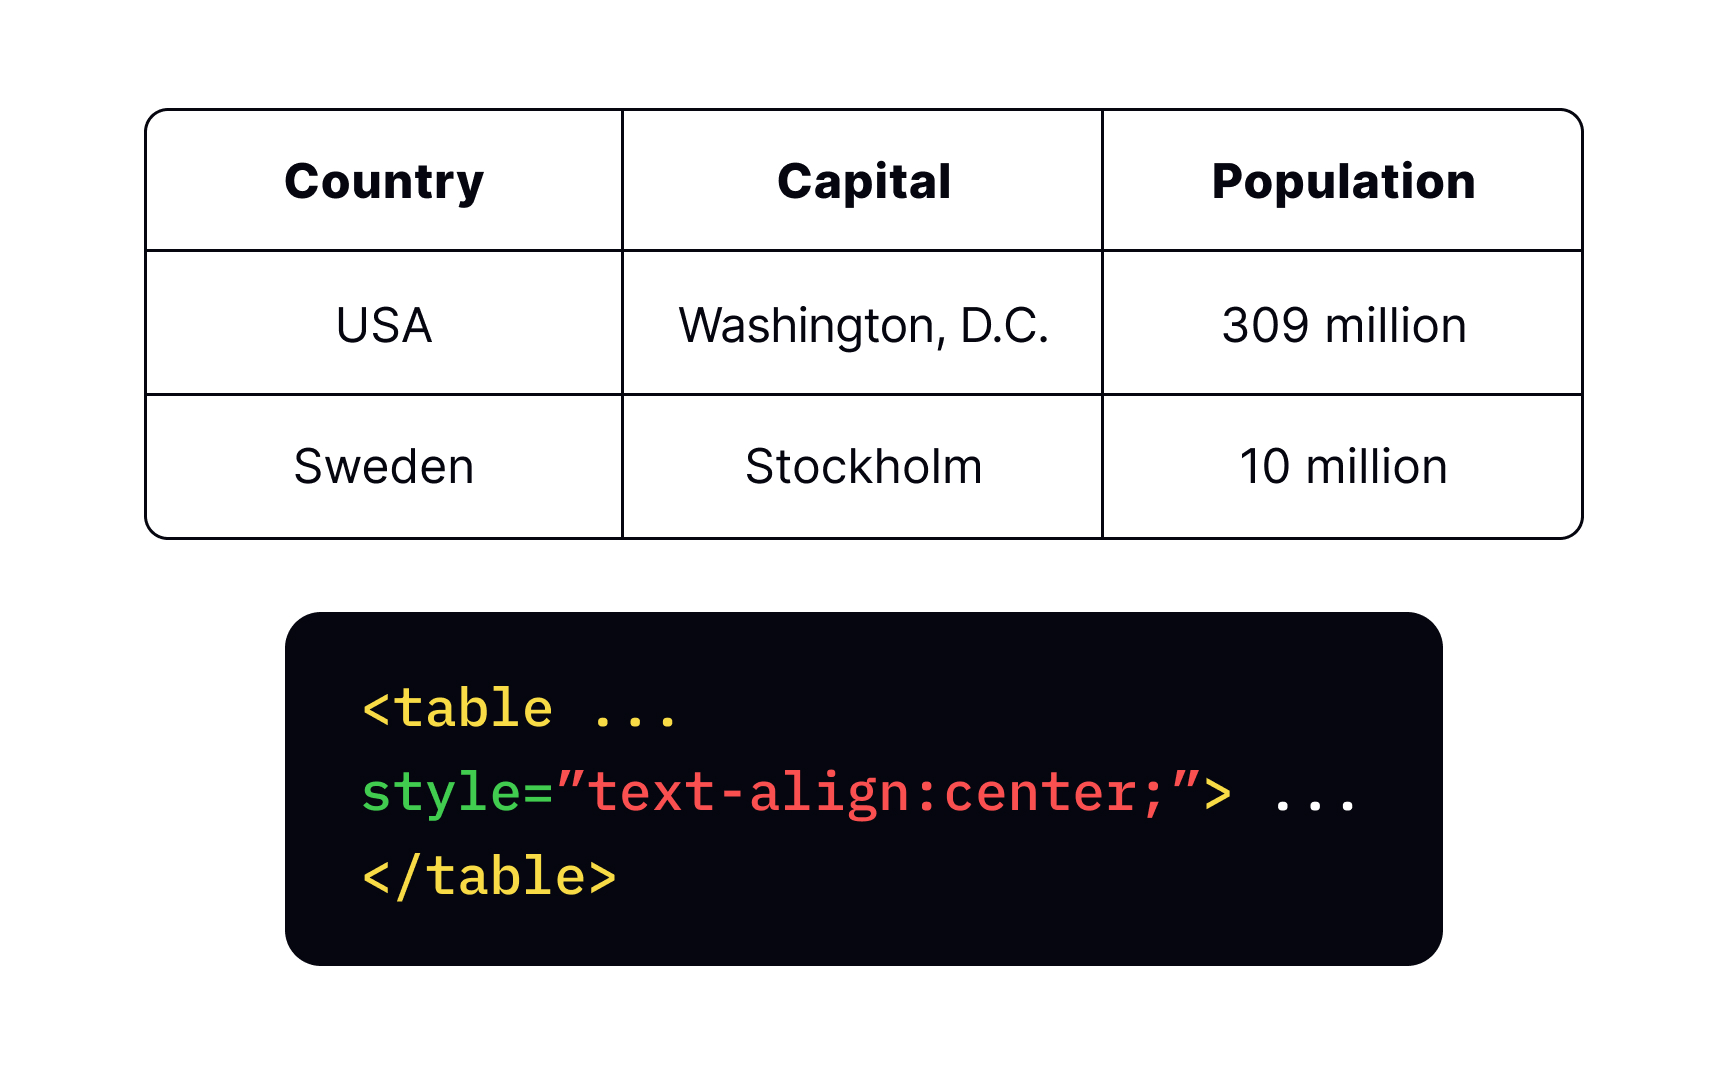
By default, the text inside text-align within the style attribute. Available values are left, right, and center.
To align the cell's vertical-align property. Although the default alignment is middle, you can change it to top, bottom, or other less common values.[4]
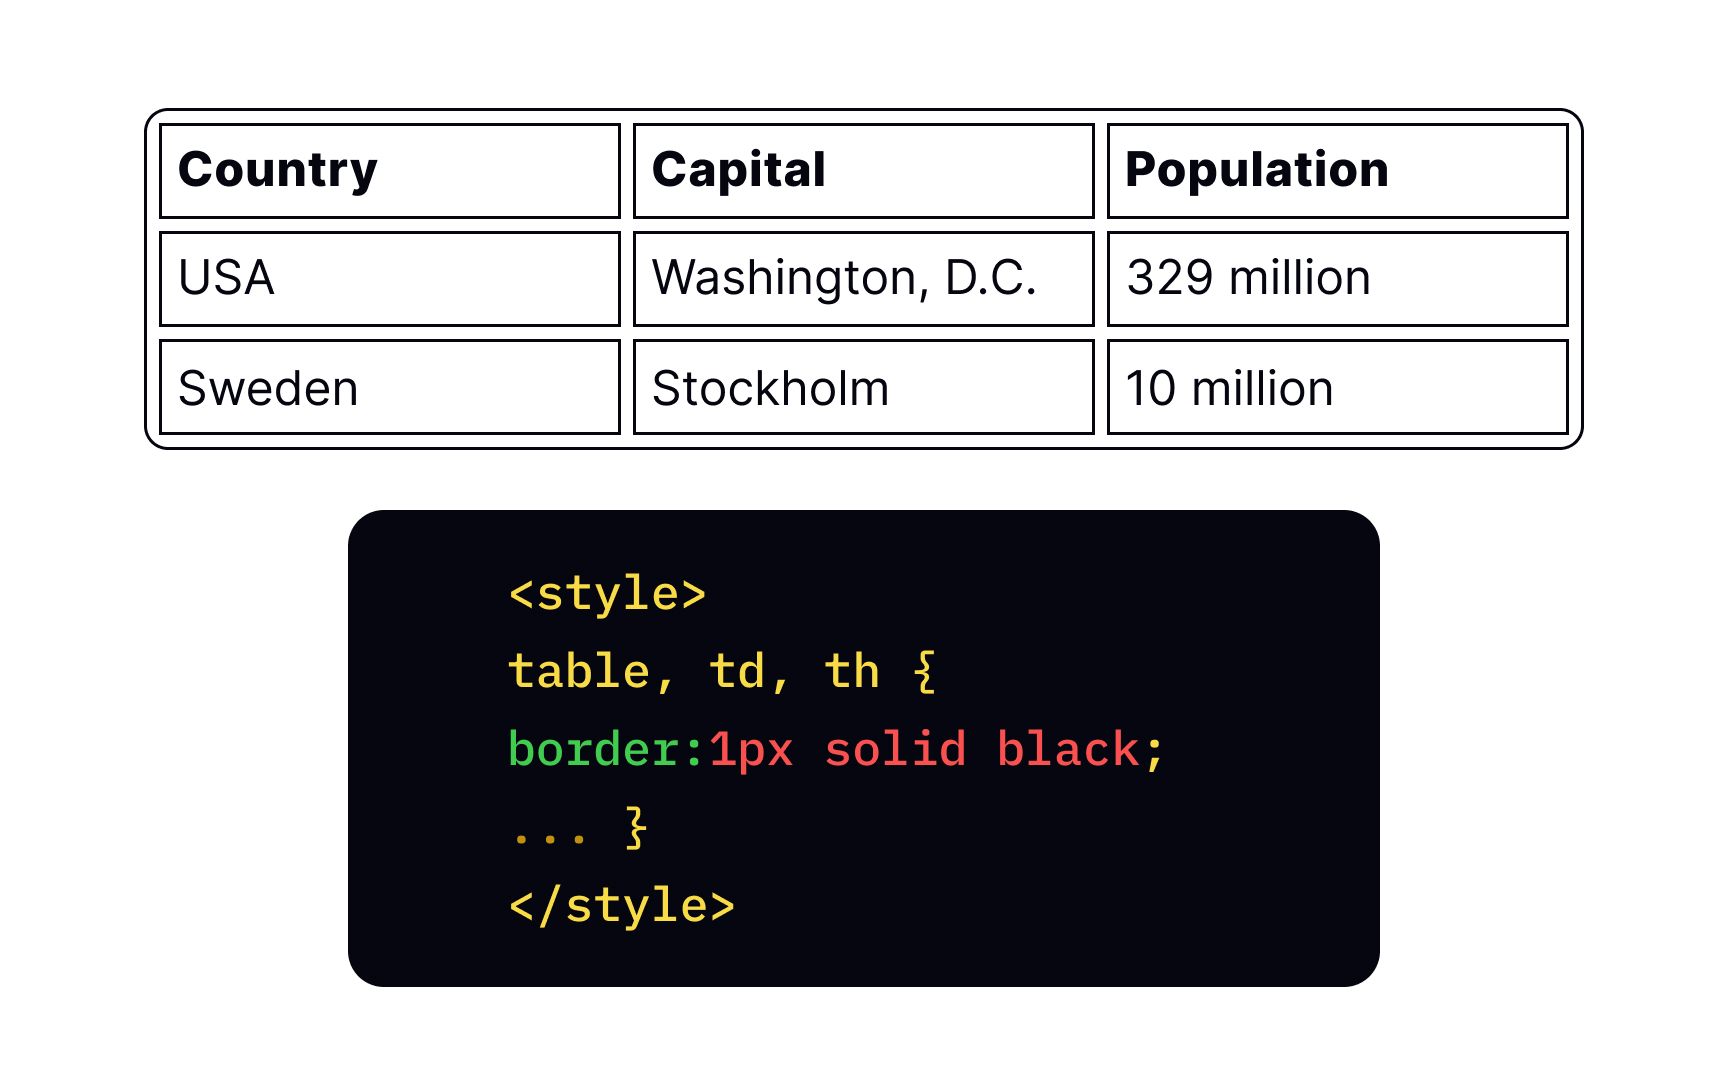
In older versions of border attribute. However, this code is archaic and illustrates older conventions that you may come across while learning. In modern HTML versions, developers use
When adding a border rule to the style sheet, keep in mind that it's applied separately for the border around the table and borders around cells. So, to set all borders for your <table>, <th>, and <td>. As a result of this logic, the default border looks double.


When adding borders to the table as a selector and set the property border-collapse to collapse.
To define each <tr> tag. For better code readability, you can start each tag with a new line. Inside the <tr> tag, establish the row's cells with <td> <th> tags for <tr> tags as the number of
Add captions to <caption>


Similar lessons

Intro to HTML

Intro to HTML Elements
