Wireframes Annotations & Documentation
Discover effective techniques for adding annotations and documentation to wireframes
Wireframes without annotations are like blueprints without measurements — technically complete but practically useless. Annotations bridge the gap between what you envision and what others understand, transforming static sketches into actionable specifications. They explain the why behind every design decision, the how of every interaction, and the what of every content element.
Whether communicating with developers who require technical constraints, designers who need visual direction, or clients who require business context, well-crafted annotations ensure that everyone builds from the same mental model. Annotating conditional logic, interactive behaviors, business rules, and edge cases helps create wireframes that speak for themselves when you're not in the room.
Your wireframe annotations serve multiple audiences, each looking for different information:
- Developers scan for technical requirements and
interaction logic - Visual designers seek layout rationale and element hierarchy
- Copywriters need context for messaging tone and
content constraints - Clients want assurance that business goals are met.
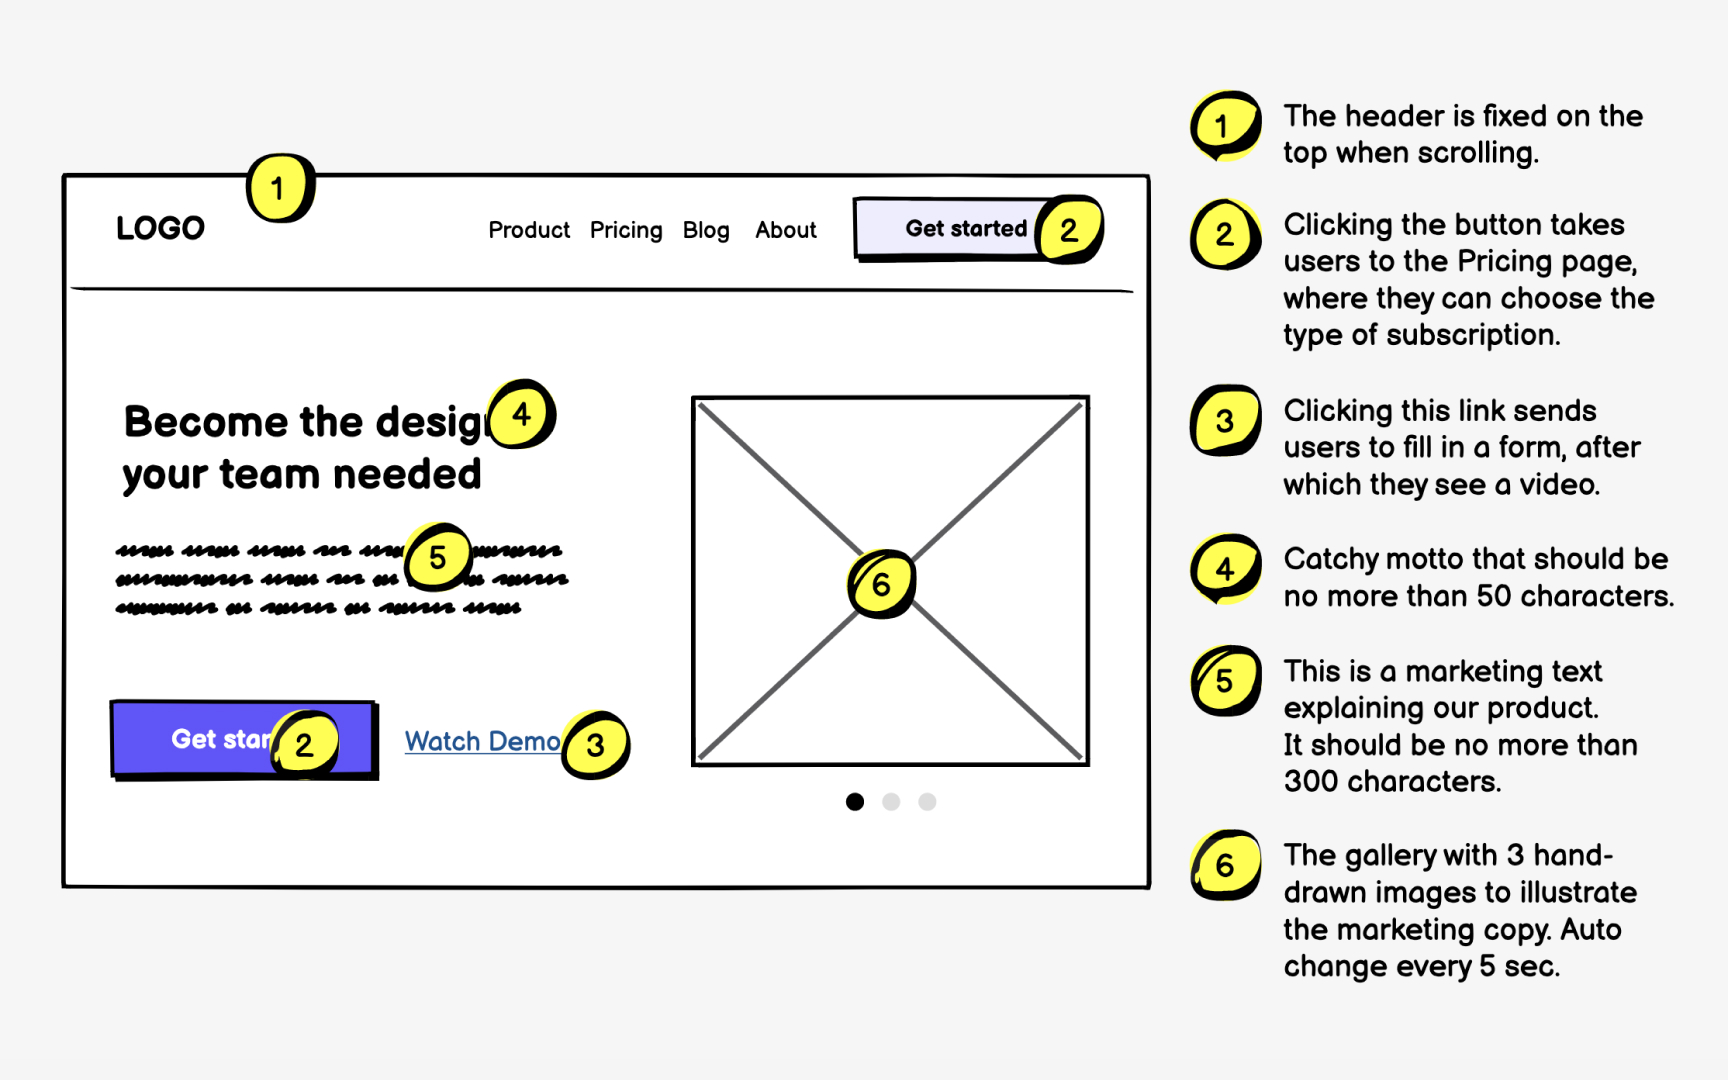
Tailor your annotation approach to address these varied needs simultaneously. A button annotation might include: "Submit form (developer), primary action styling (designer), success message: 'Your request has been received' (copywriter), reduces support tickets by confirming action (client)." This multi-layered approach ensures no stakeholder leaves confused.
Remember that the future you is also an audience. 6 months from now, when asked why you chose a checkbox over a radio button, your annotations should provide the answer. Document design decisions with enough context to defend or revise them later.[1]
Pro Tip: Present wireframes in real time when possible, using annotations as talking points to elaborate based on audience questions.
Static
Your expertise creates blind spots. Elements that seem self-evident to you appear ambiguous to others. That modal you designed to appear on error might be interpreted as a welcome message by developers. These misunderstandings compound through production, resulting in products that barely resemble your original vision.
Combat expert bias by annotating every interaction, state change, and dynamic behavior. Explain what triggers actions, what feedback users receive, and how elements respond to different conditions. Think of annotations as your voice in every meeting you can't attend.
When you add annotations to a
You can think of annotations in two groups:
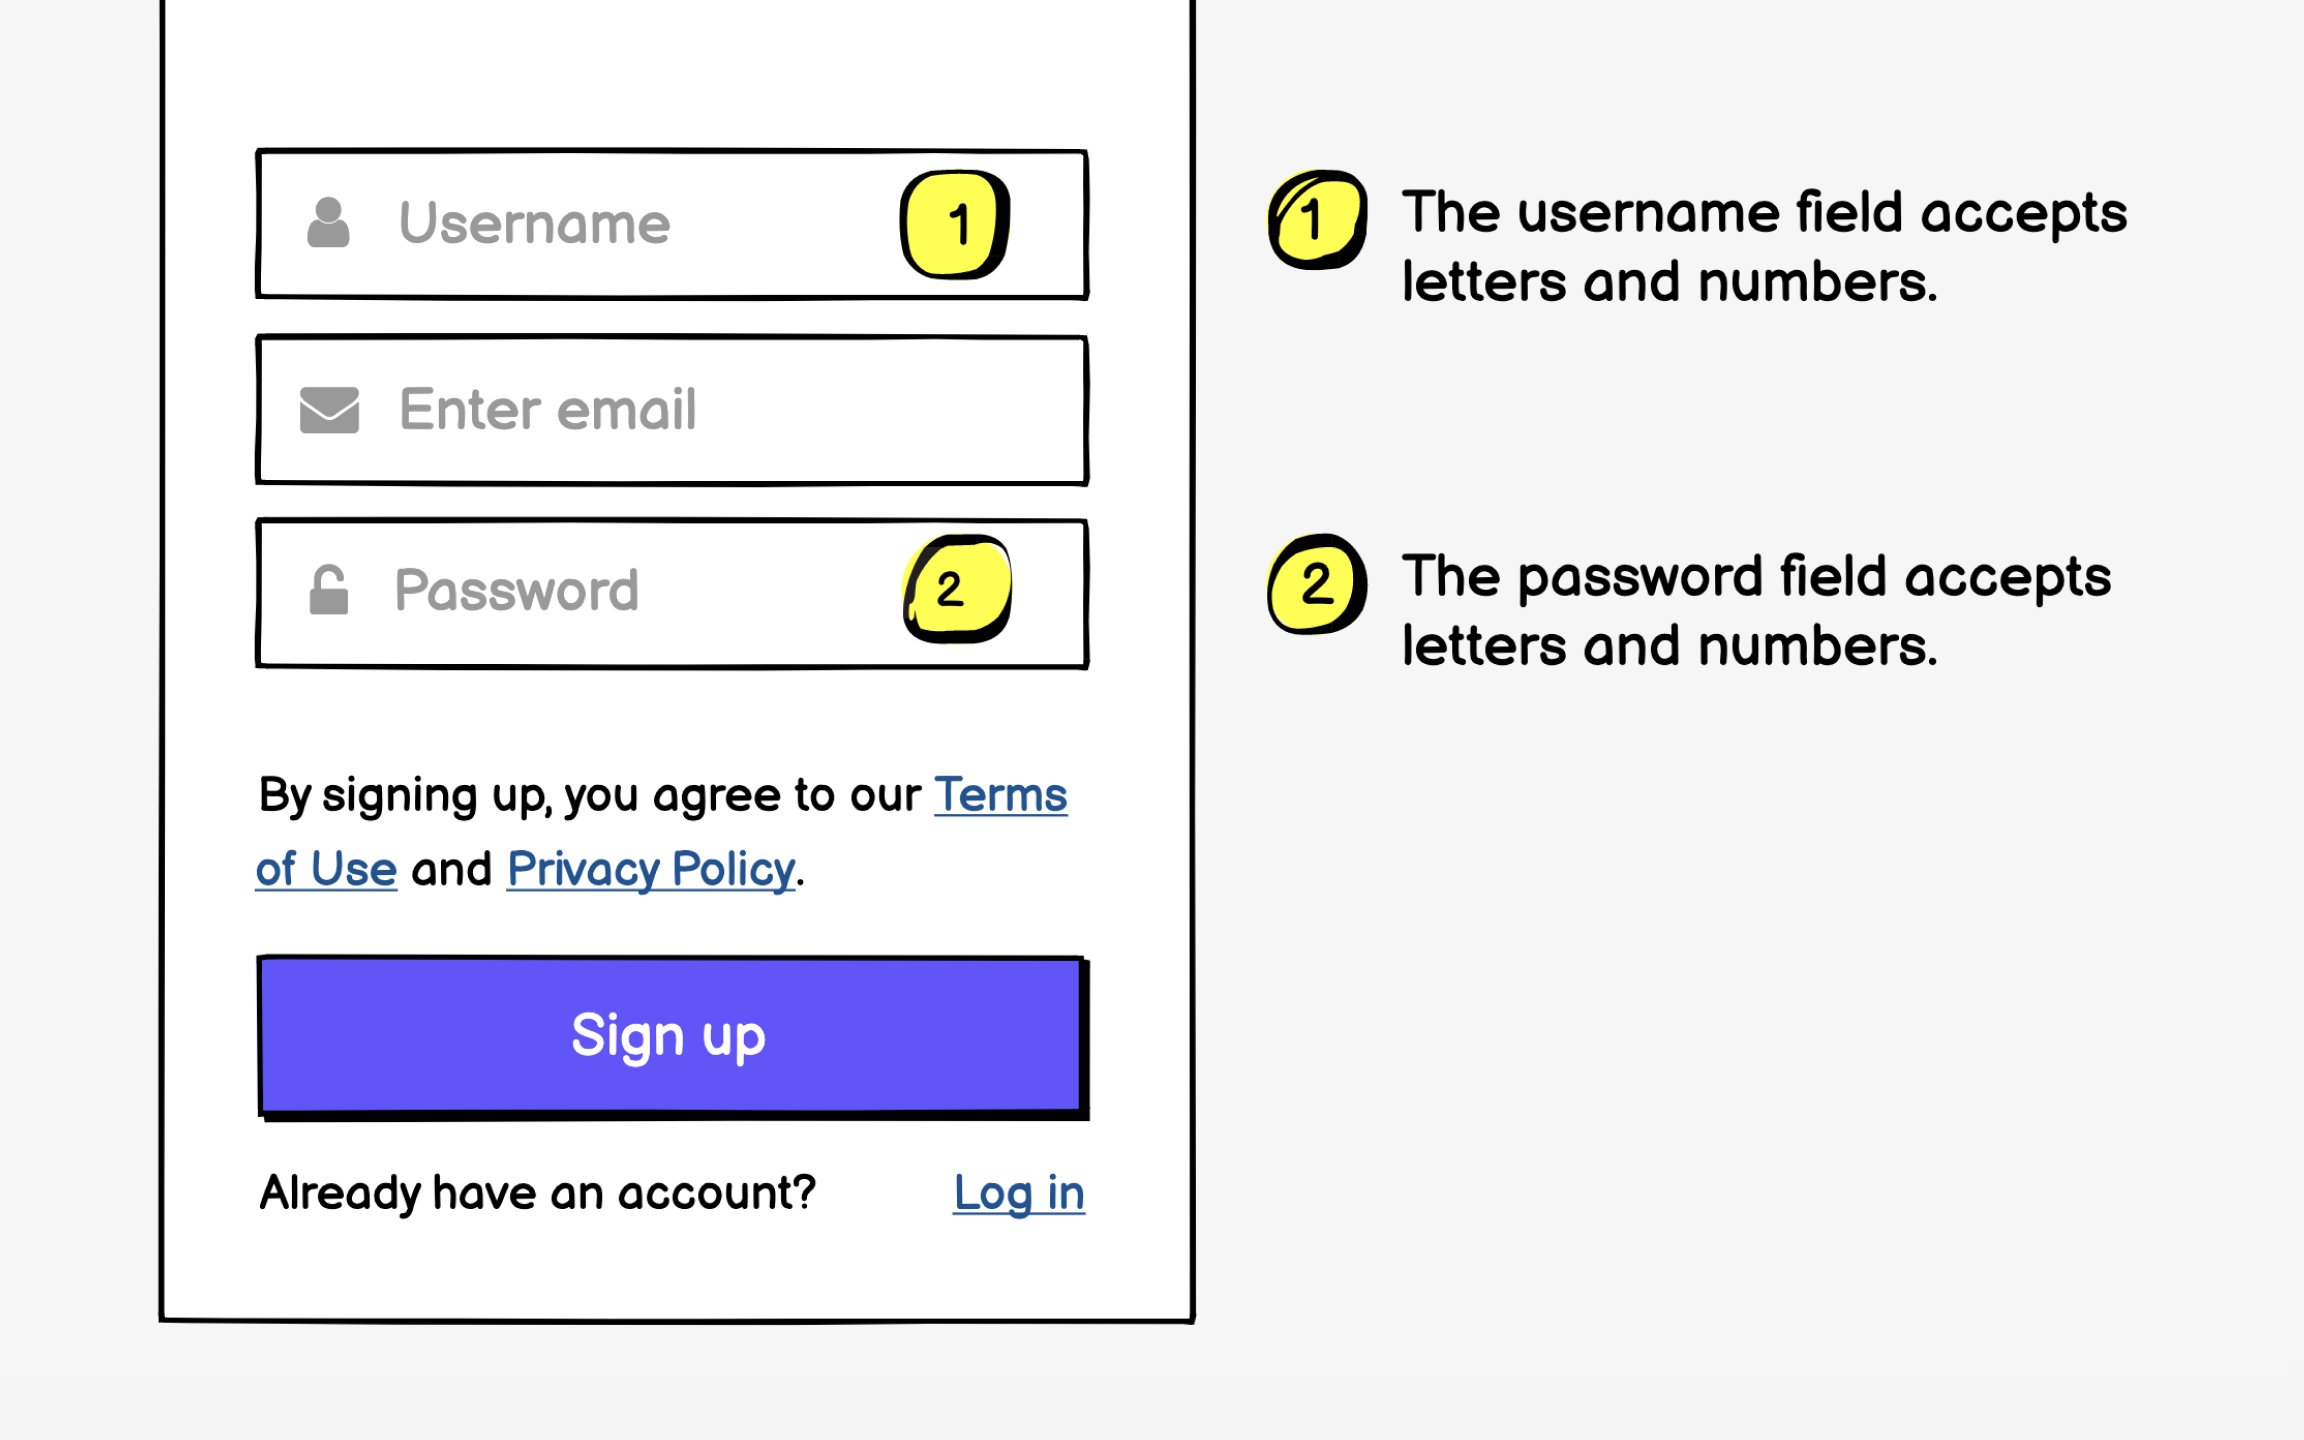
- Content notes might specify: "
Error message uses friendly tone, explains what went wrong and how to fix it" or "Hero image showcases product in real-world use, changes seasonally." These guide writers and visual designers in creating appropriatecontent that serves user needs while maintaining brand voice. - Functional notes detail mechanics: "Clicking 'Show more' reveals additional 10 items with smooth scroll animation" or "Form validates inline as user types, showing green check for valid fields." These ensure developers build the right
interactions and designers create appropriate state variations.
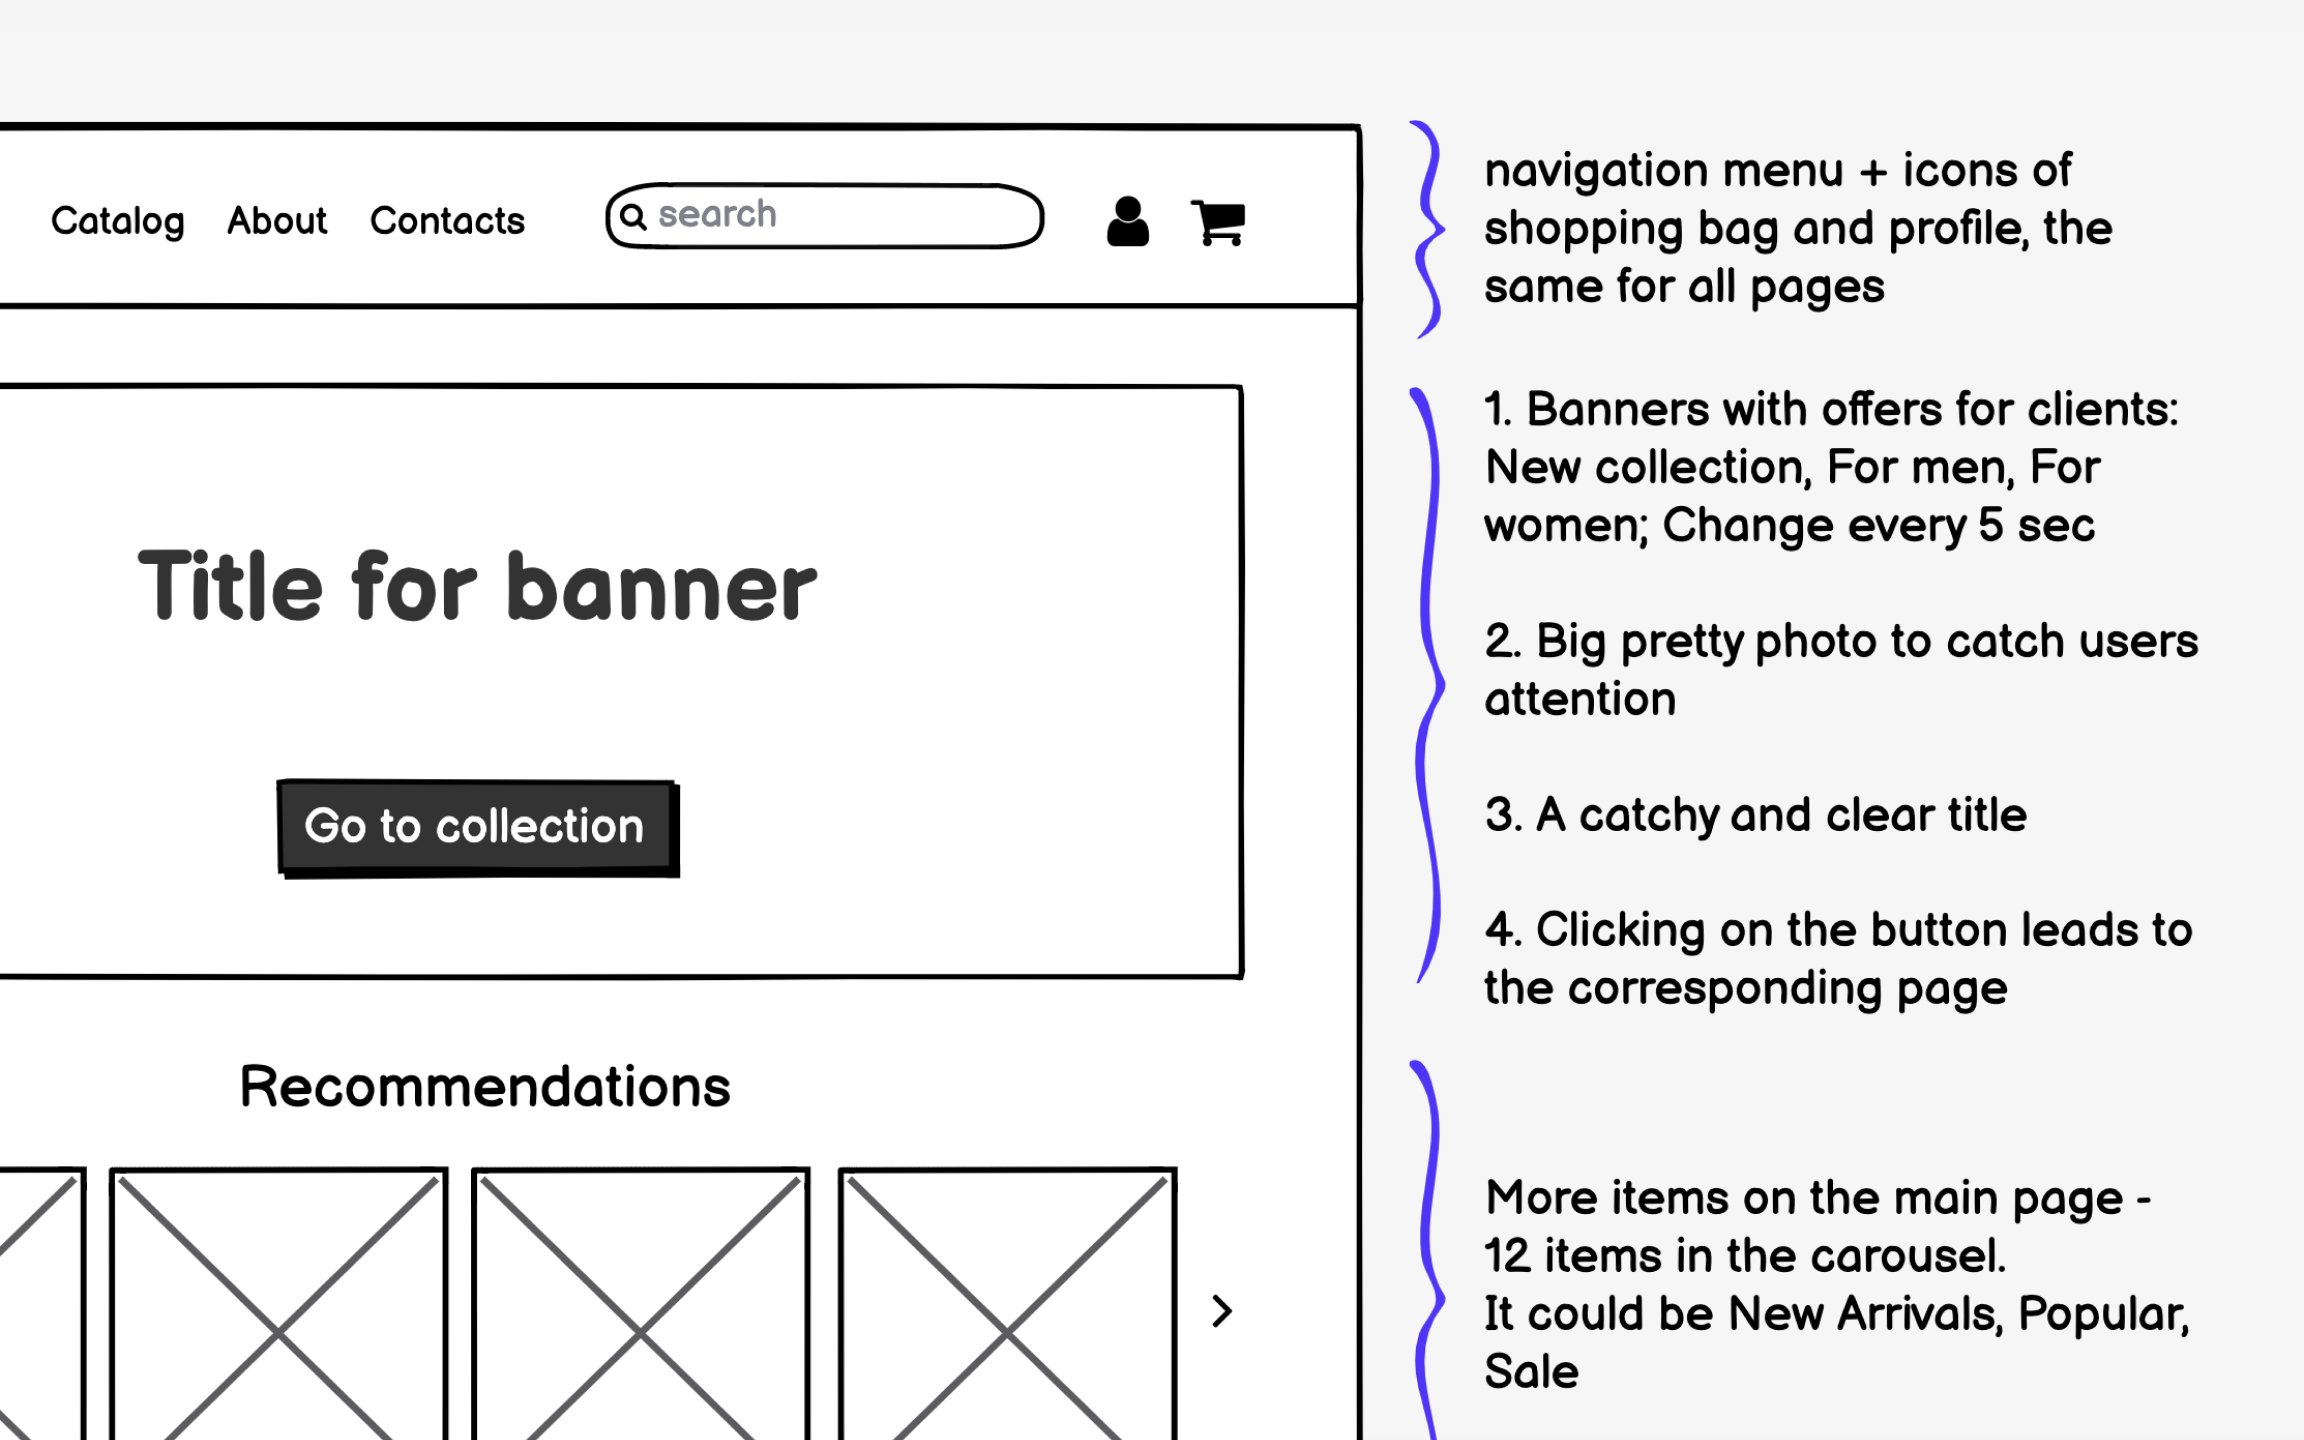
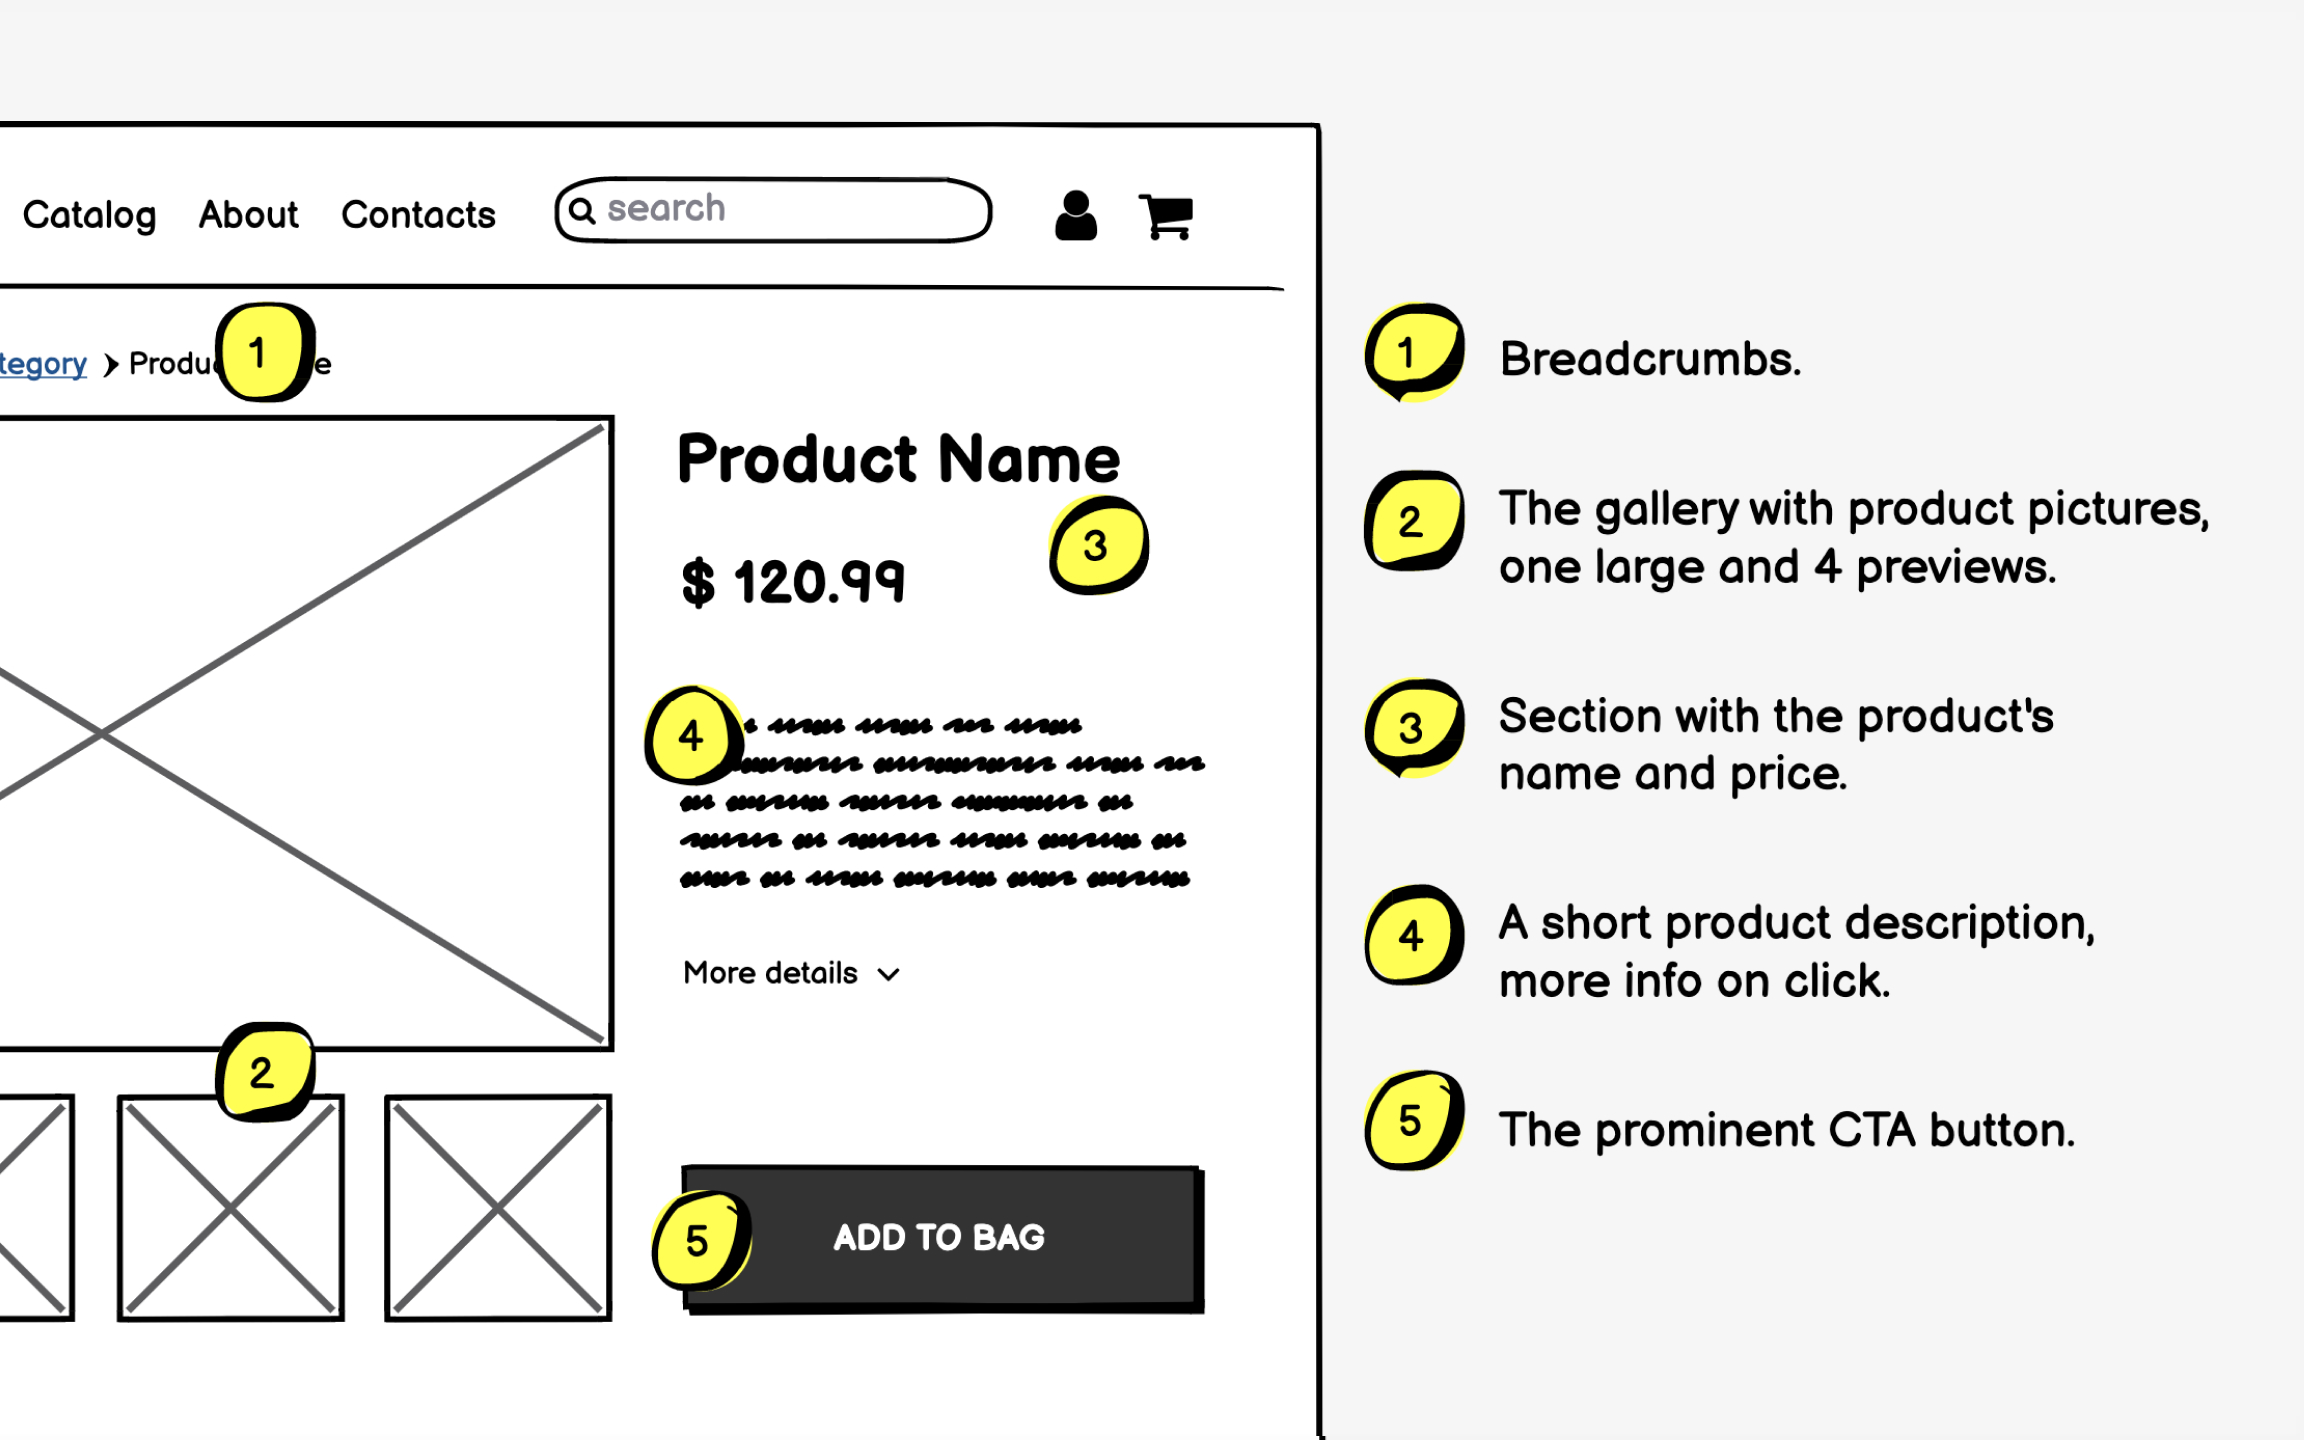
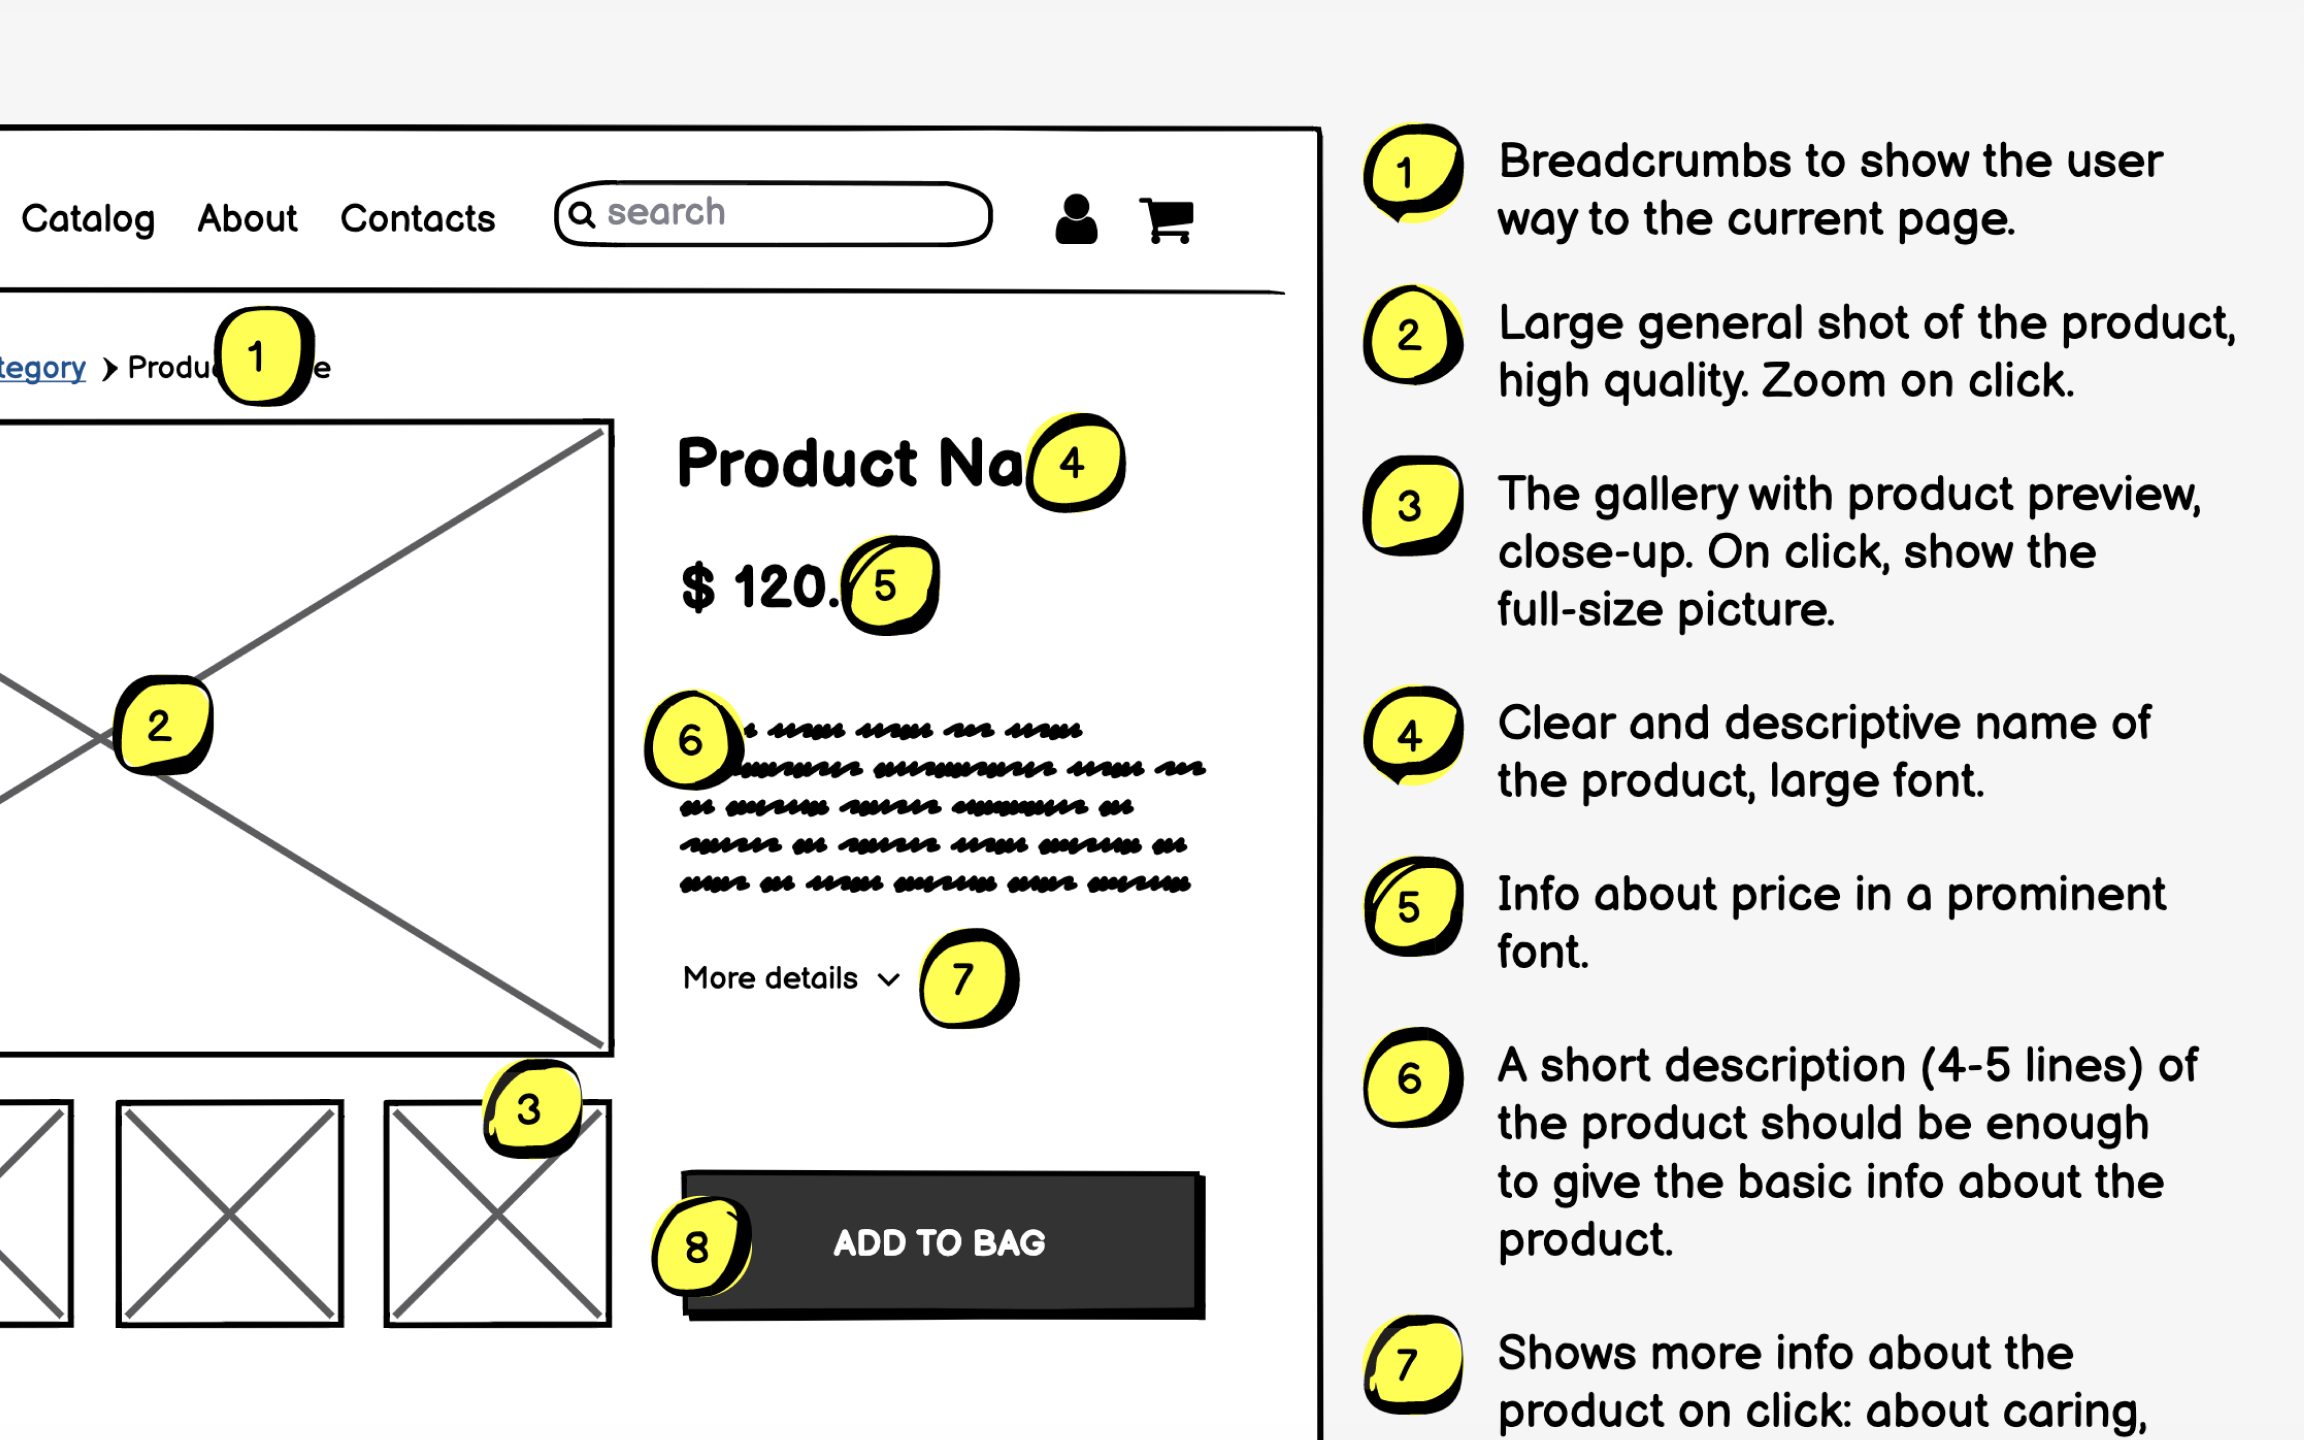
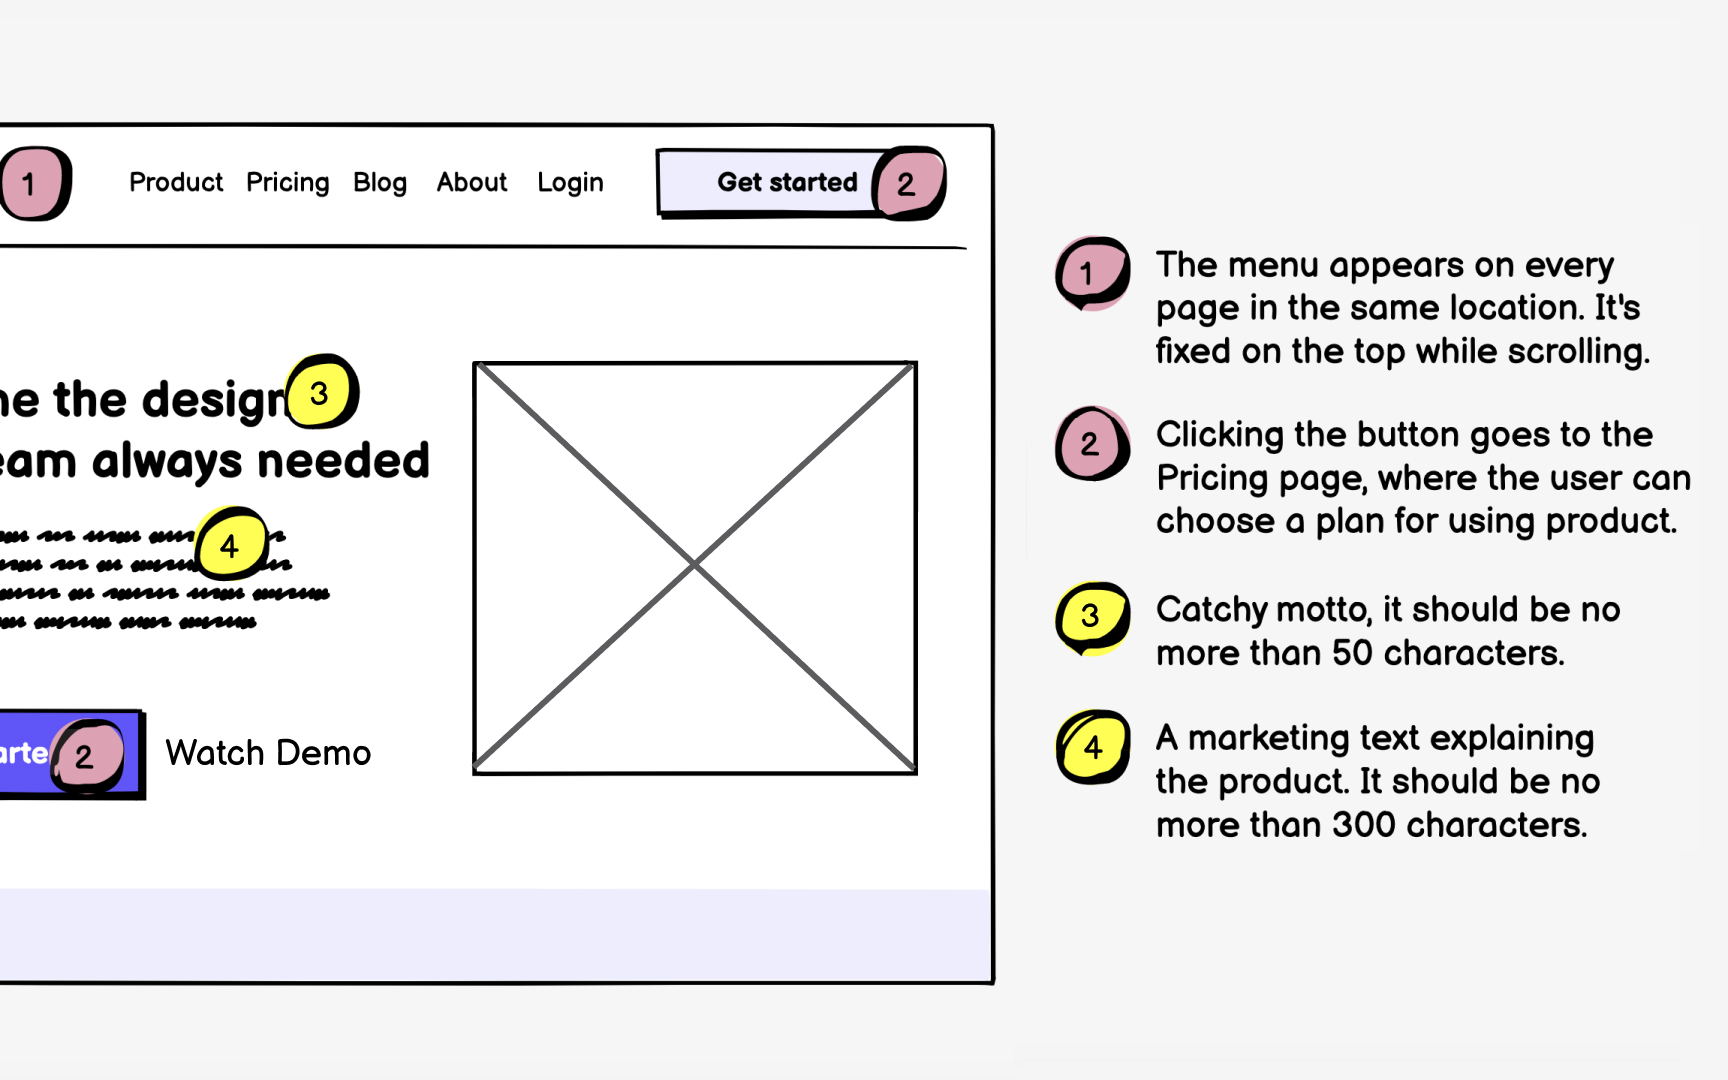
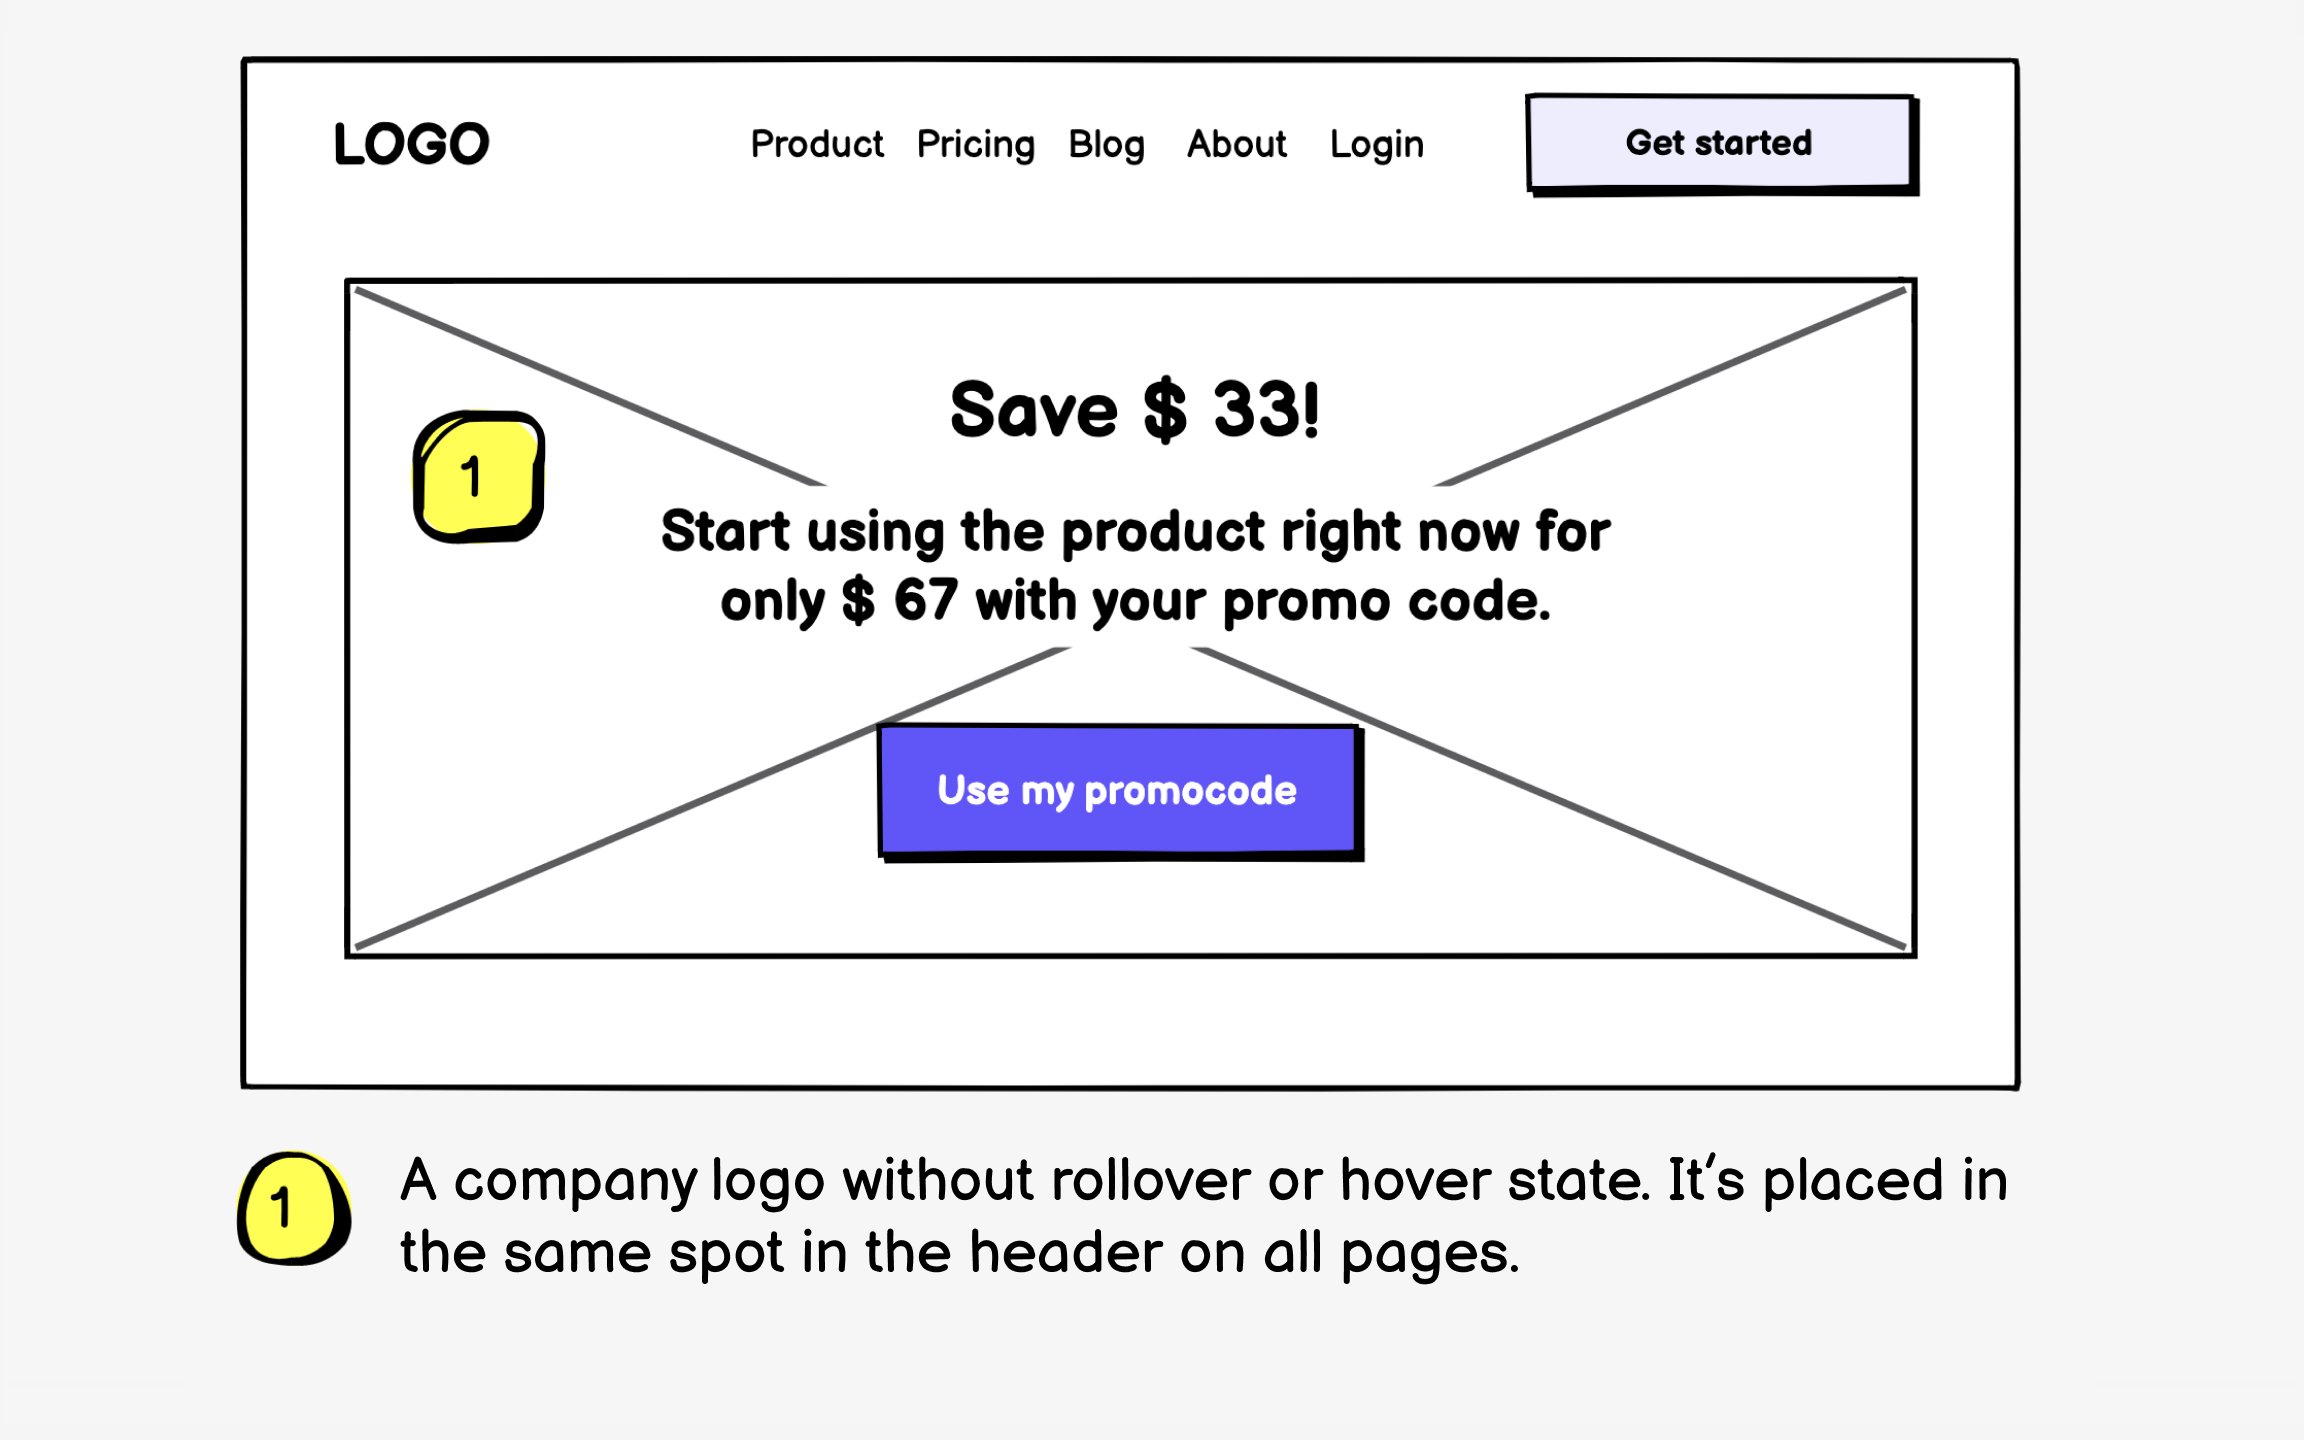
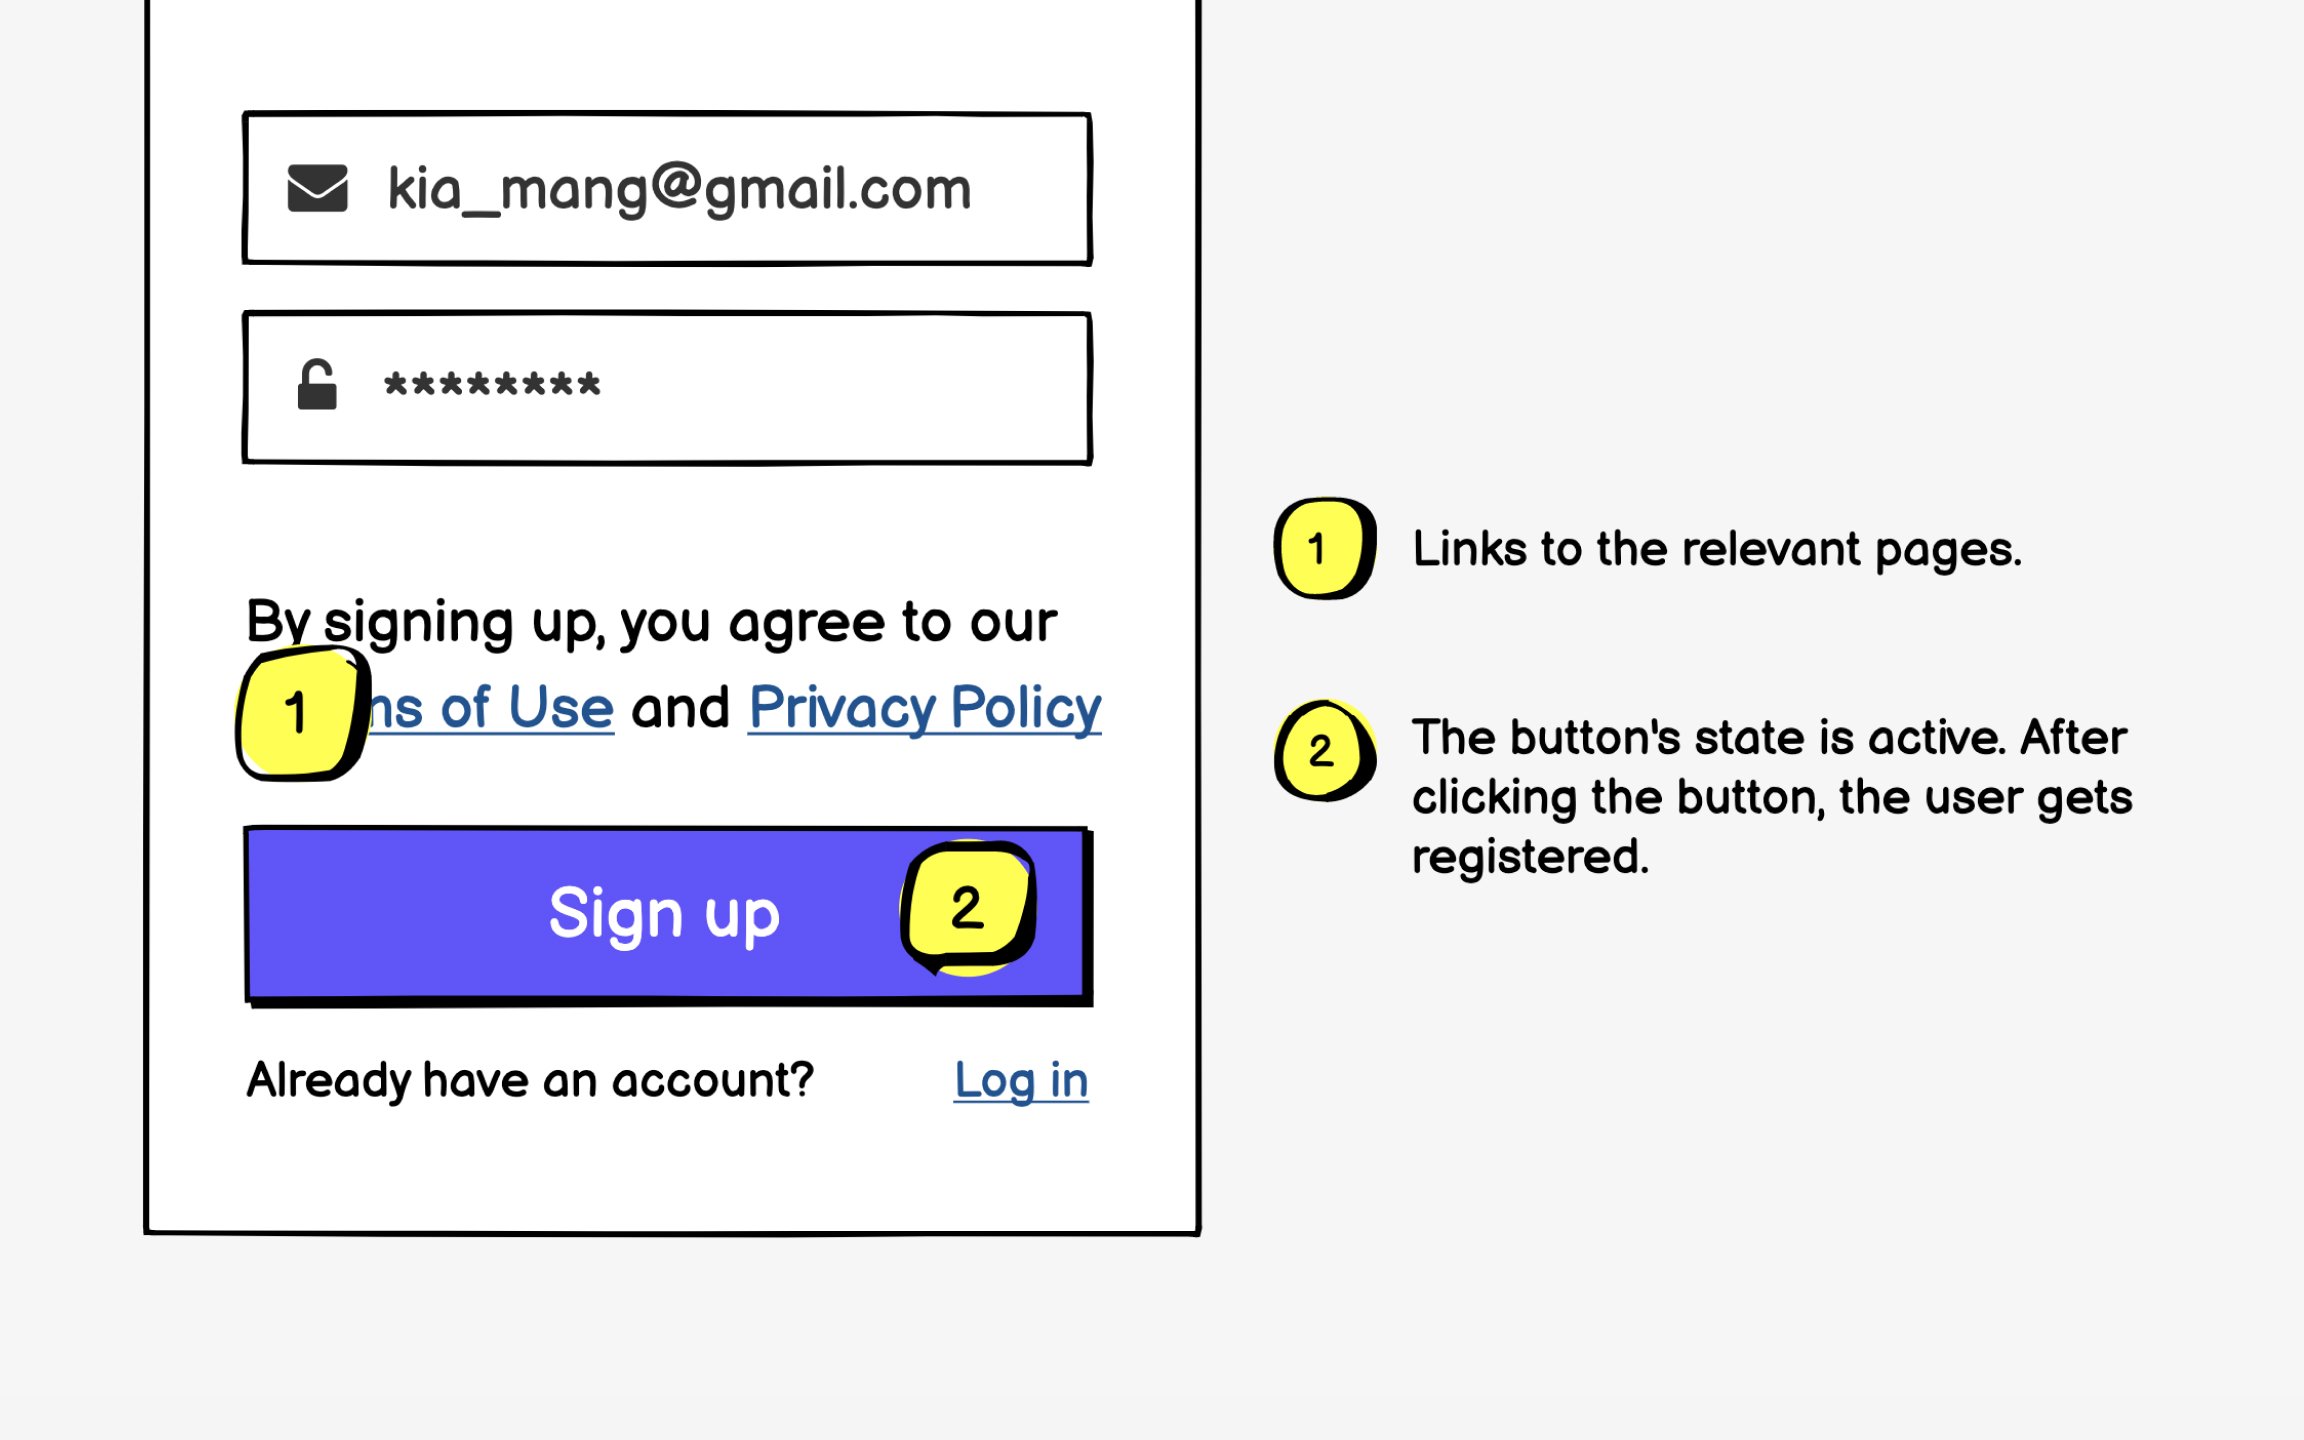
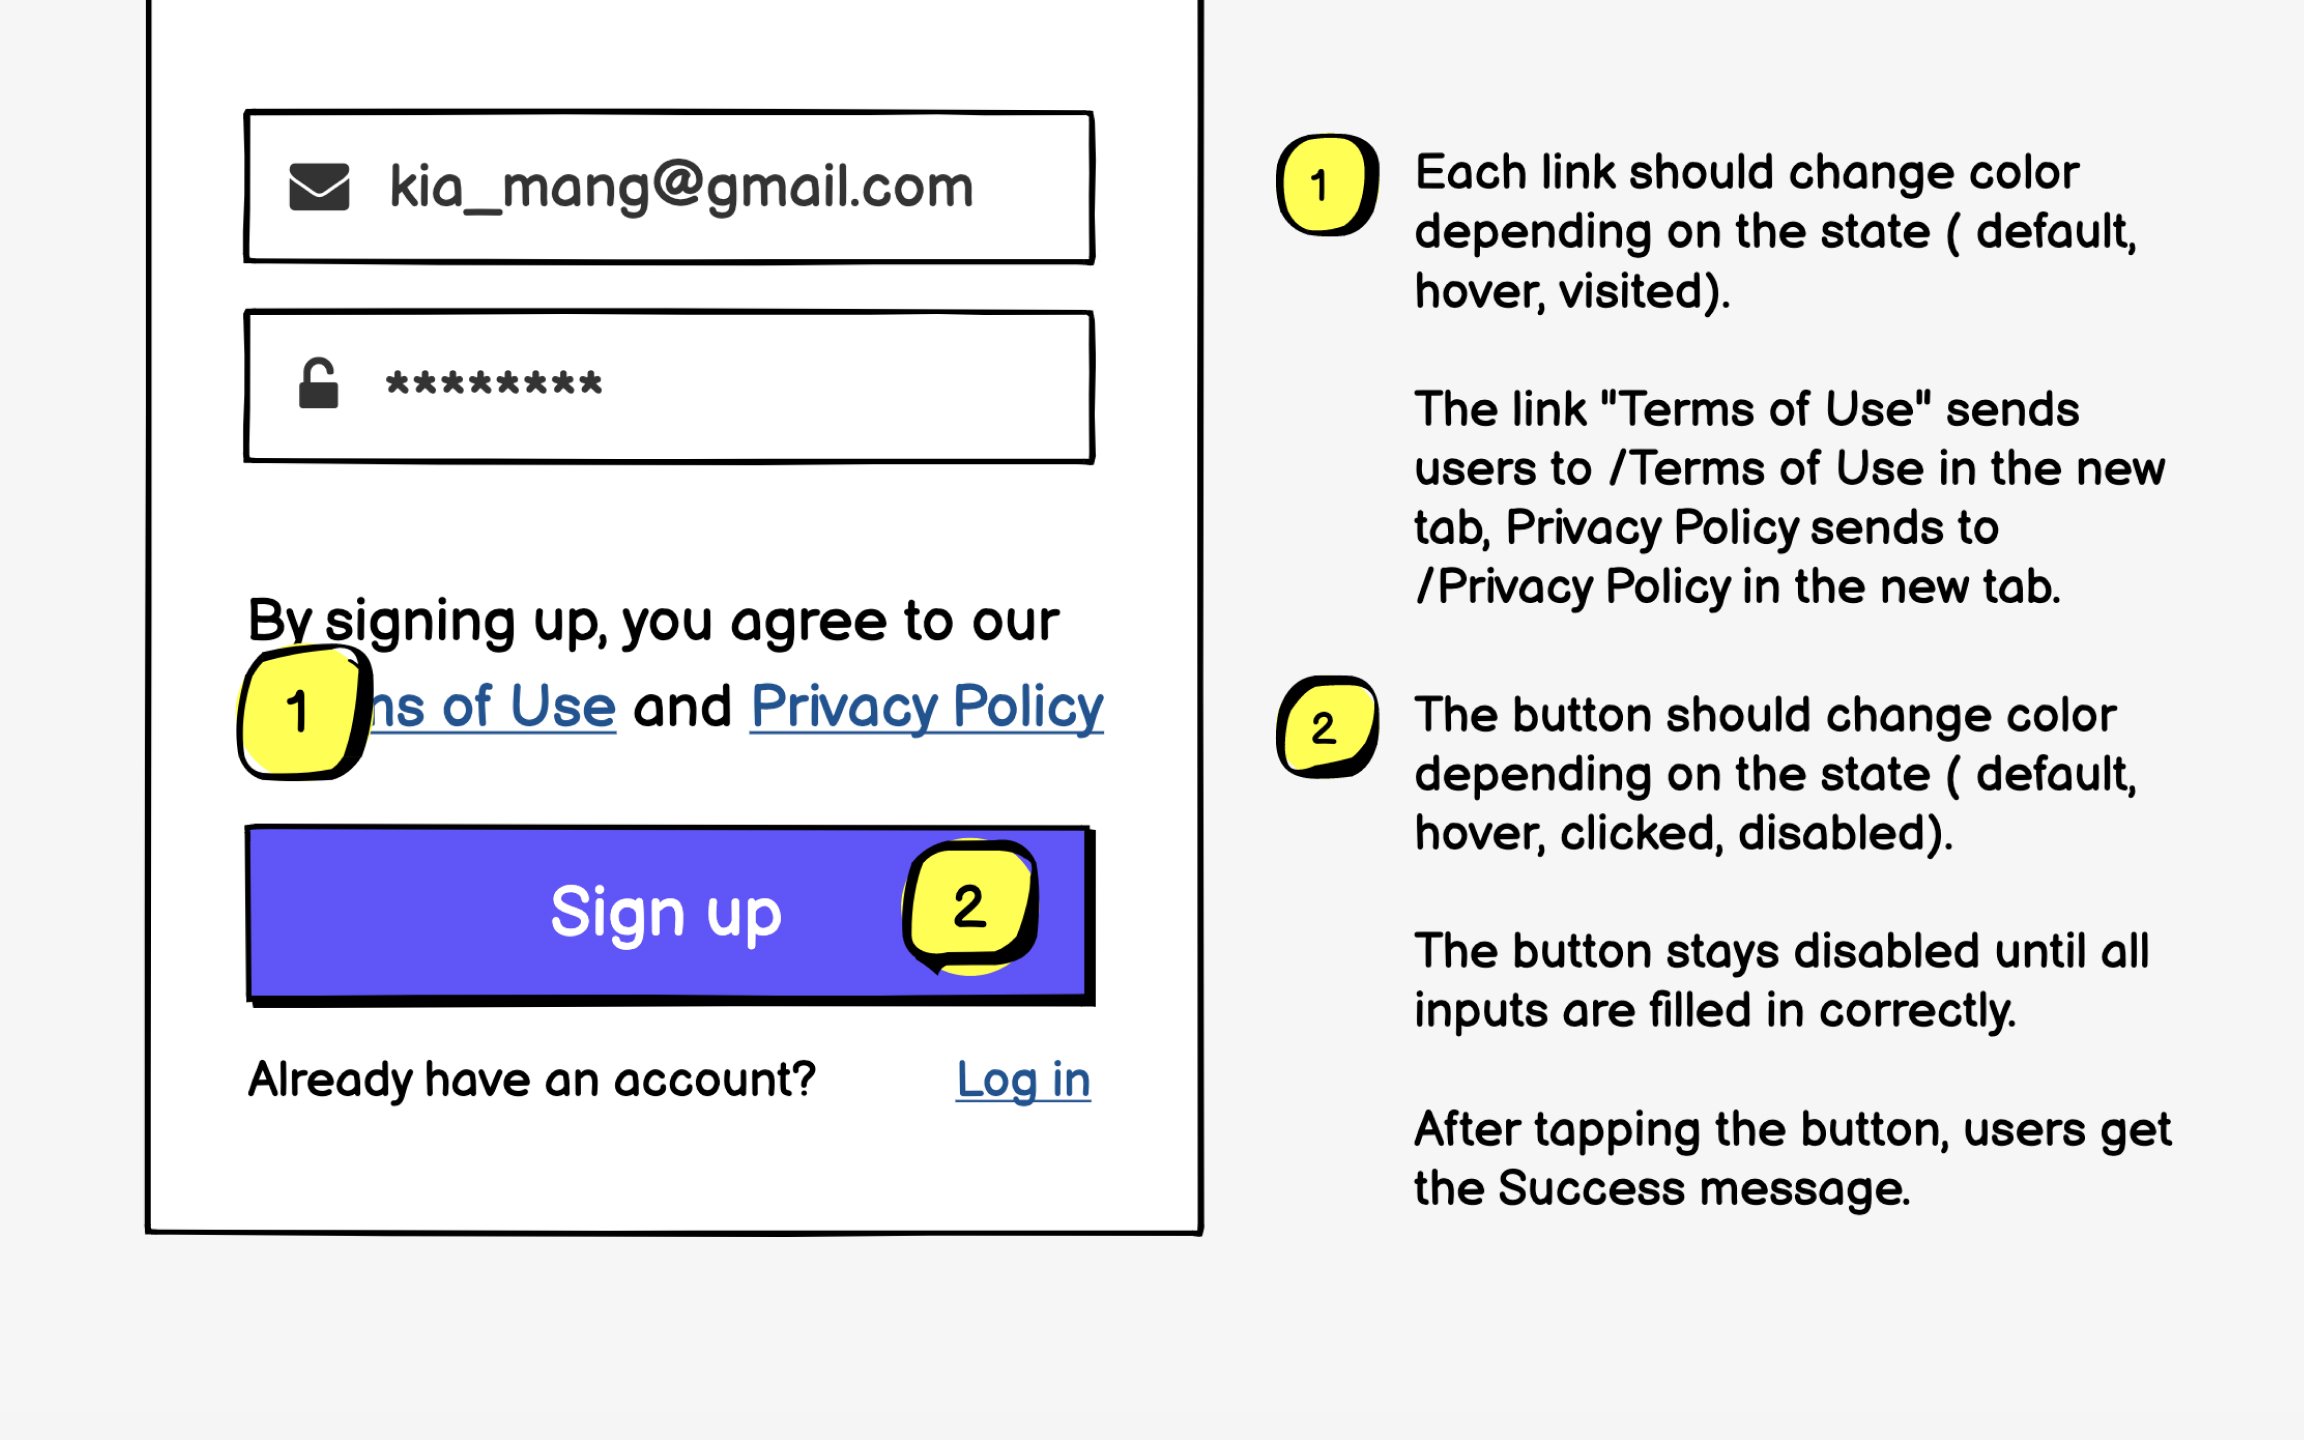
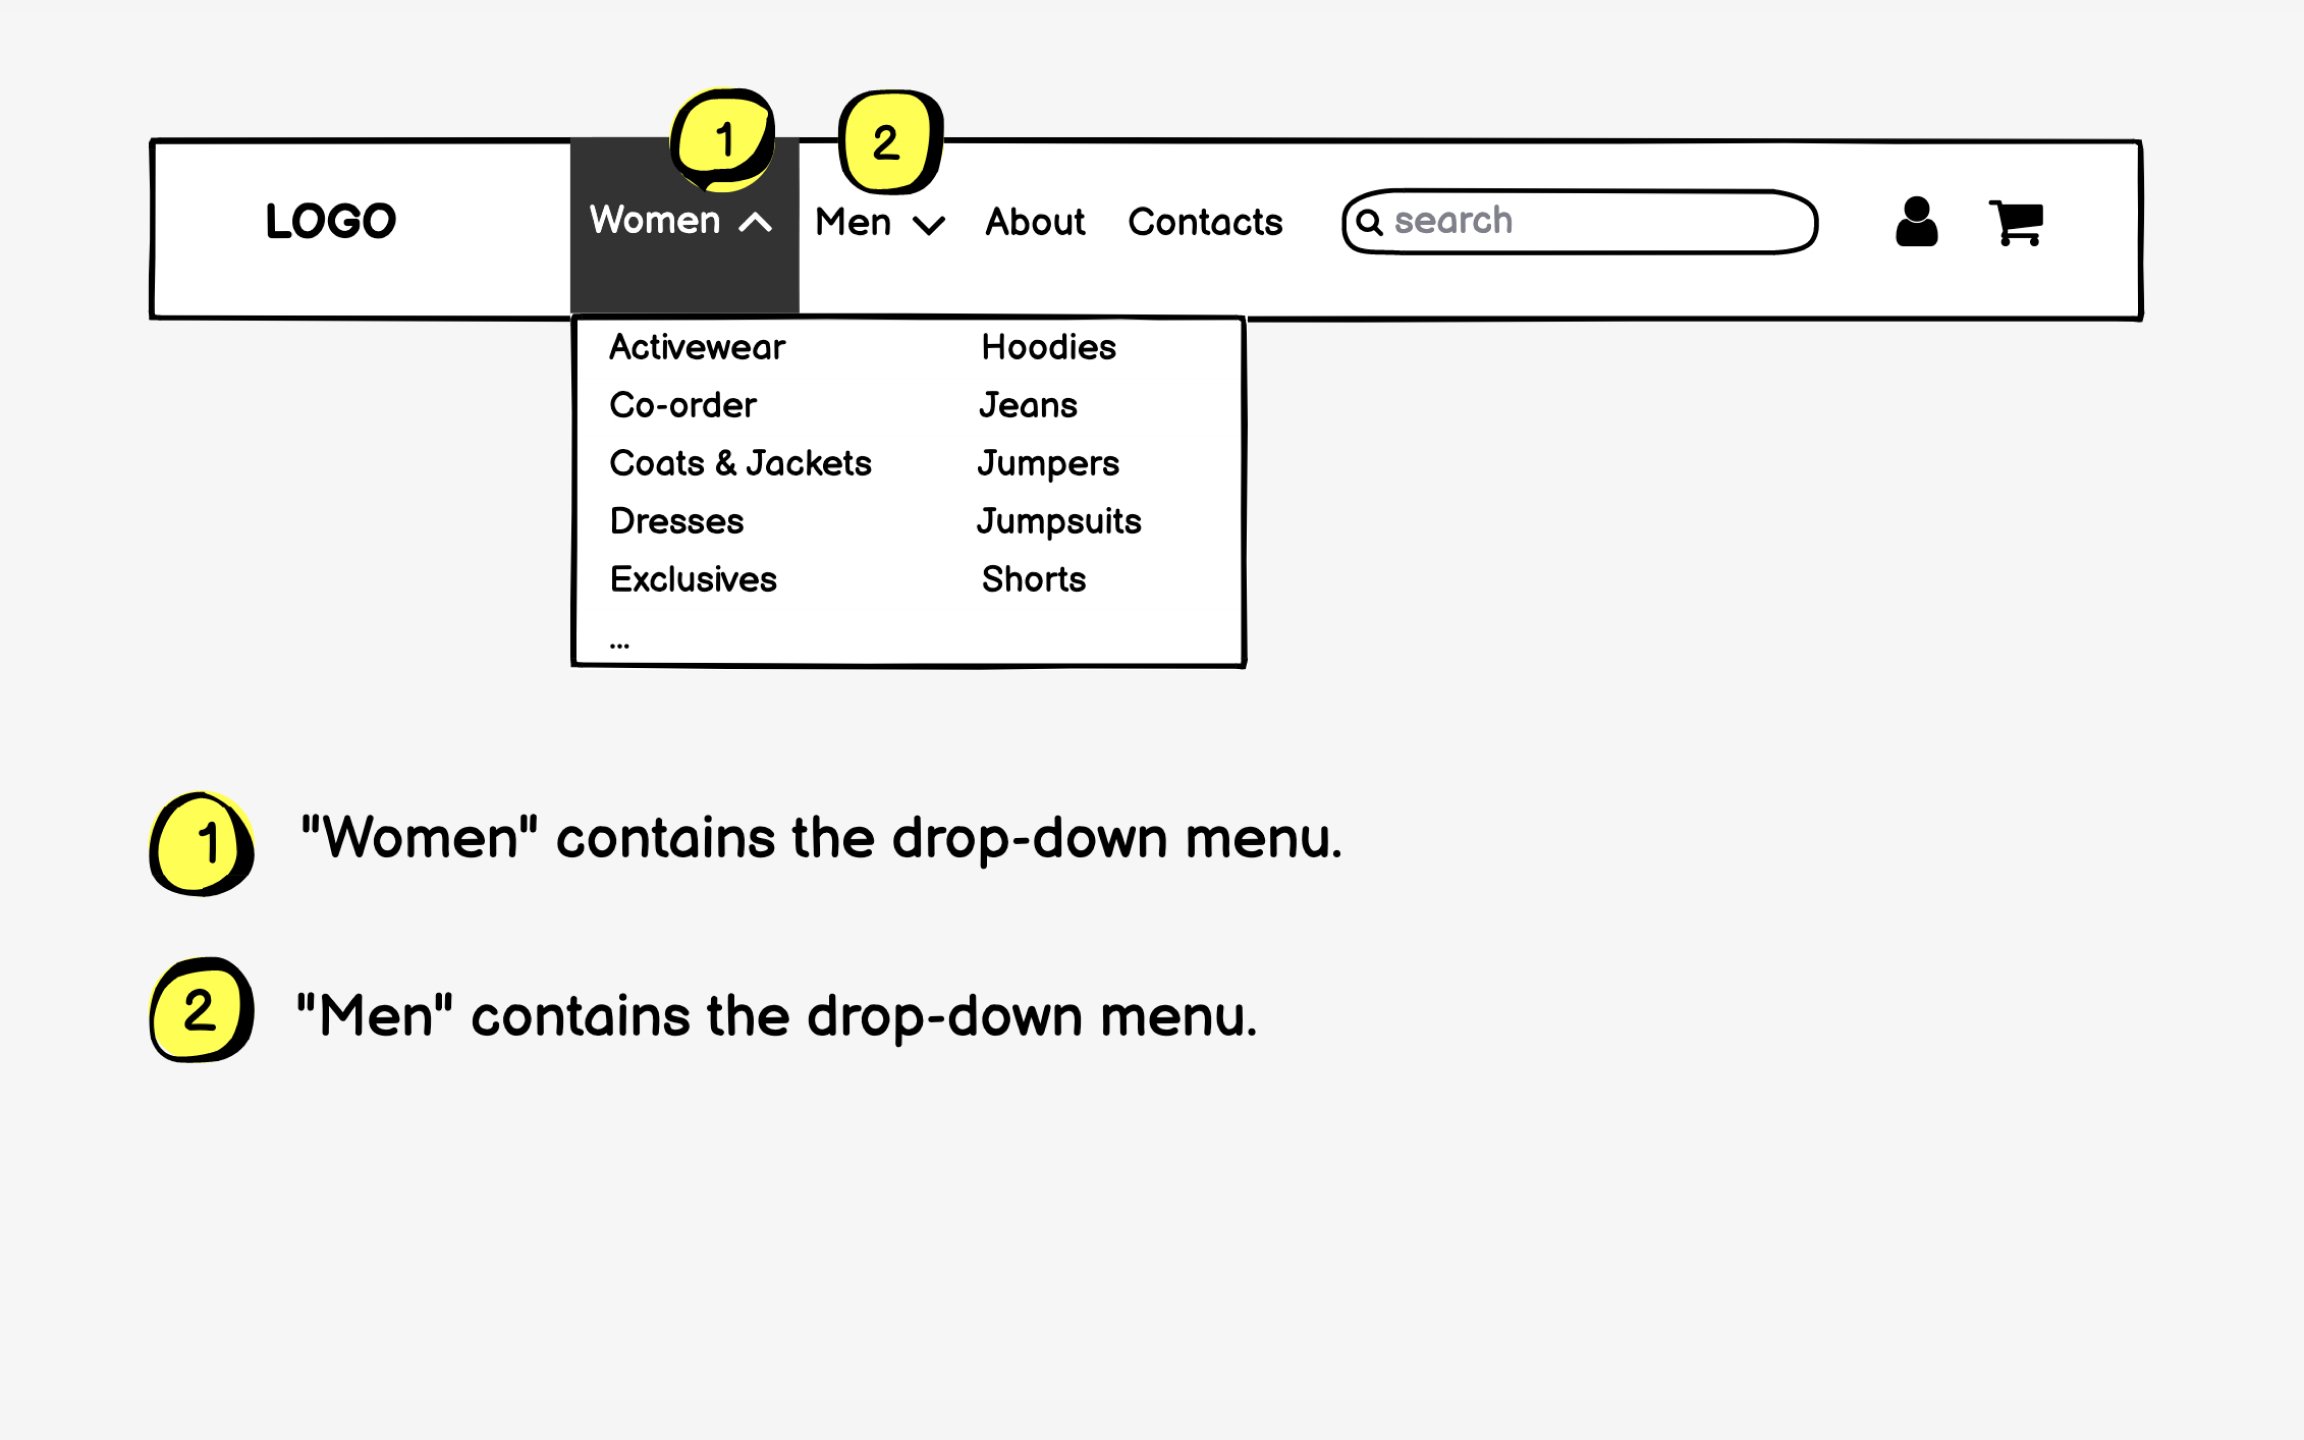
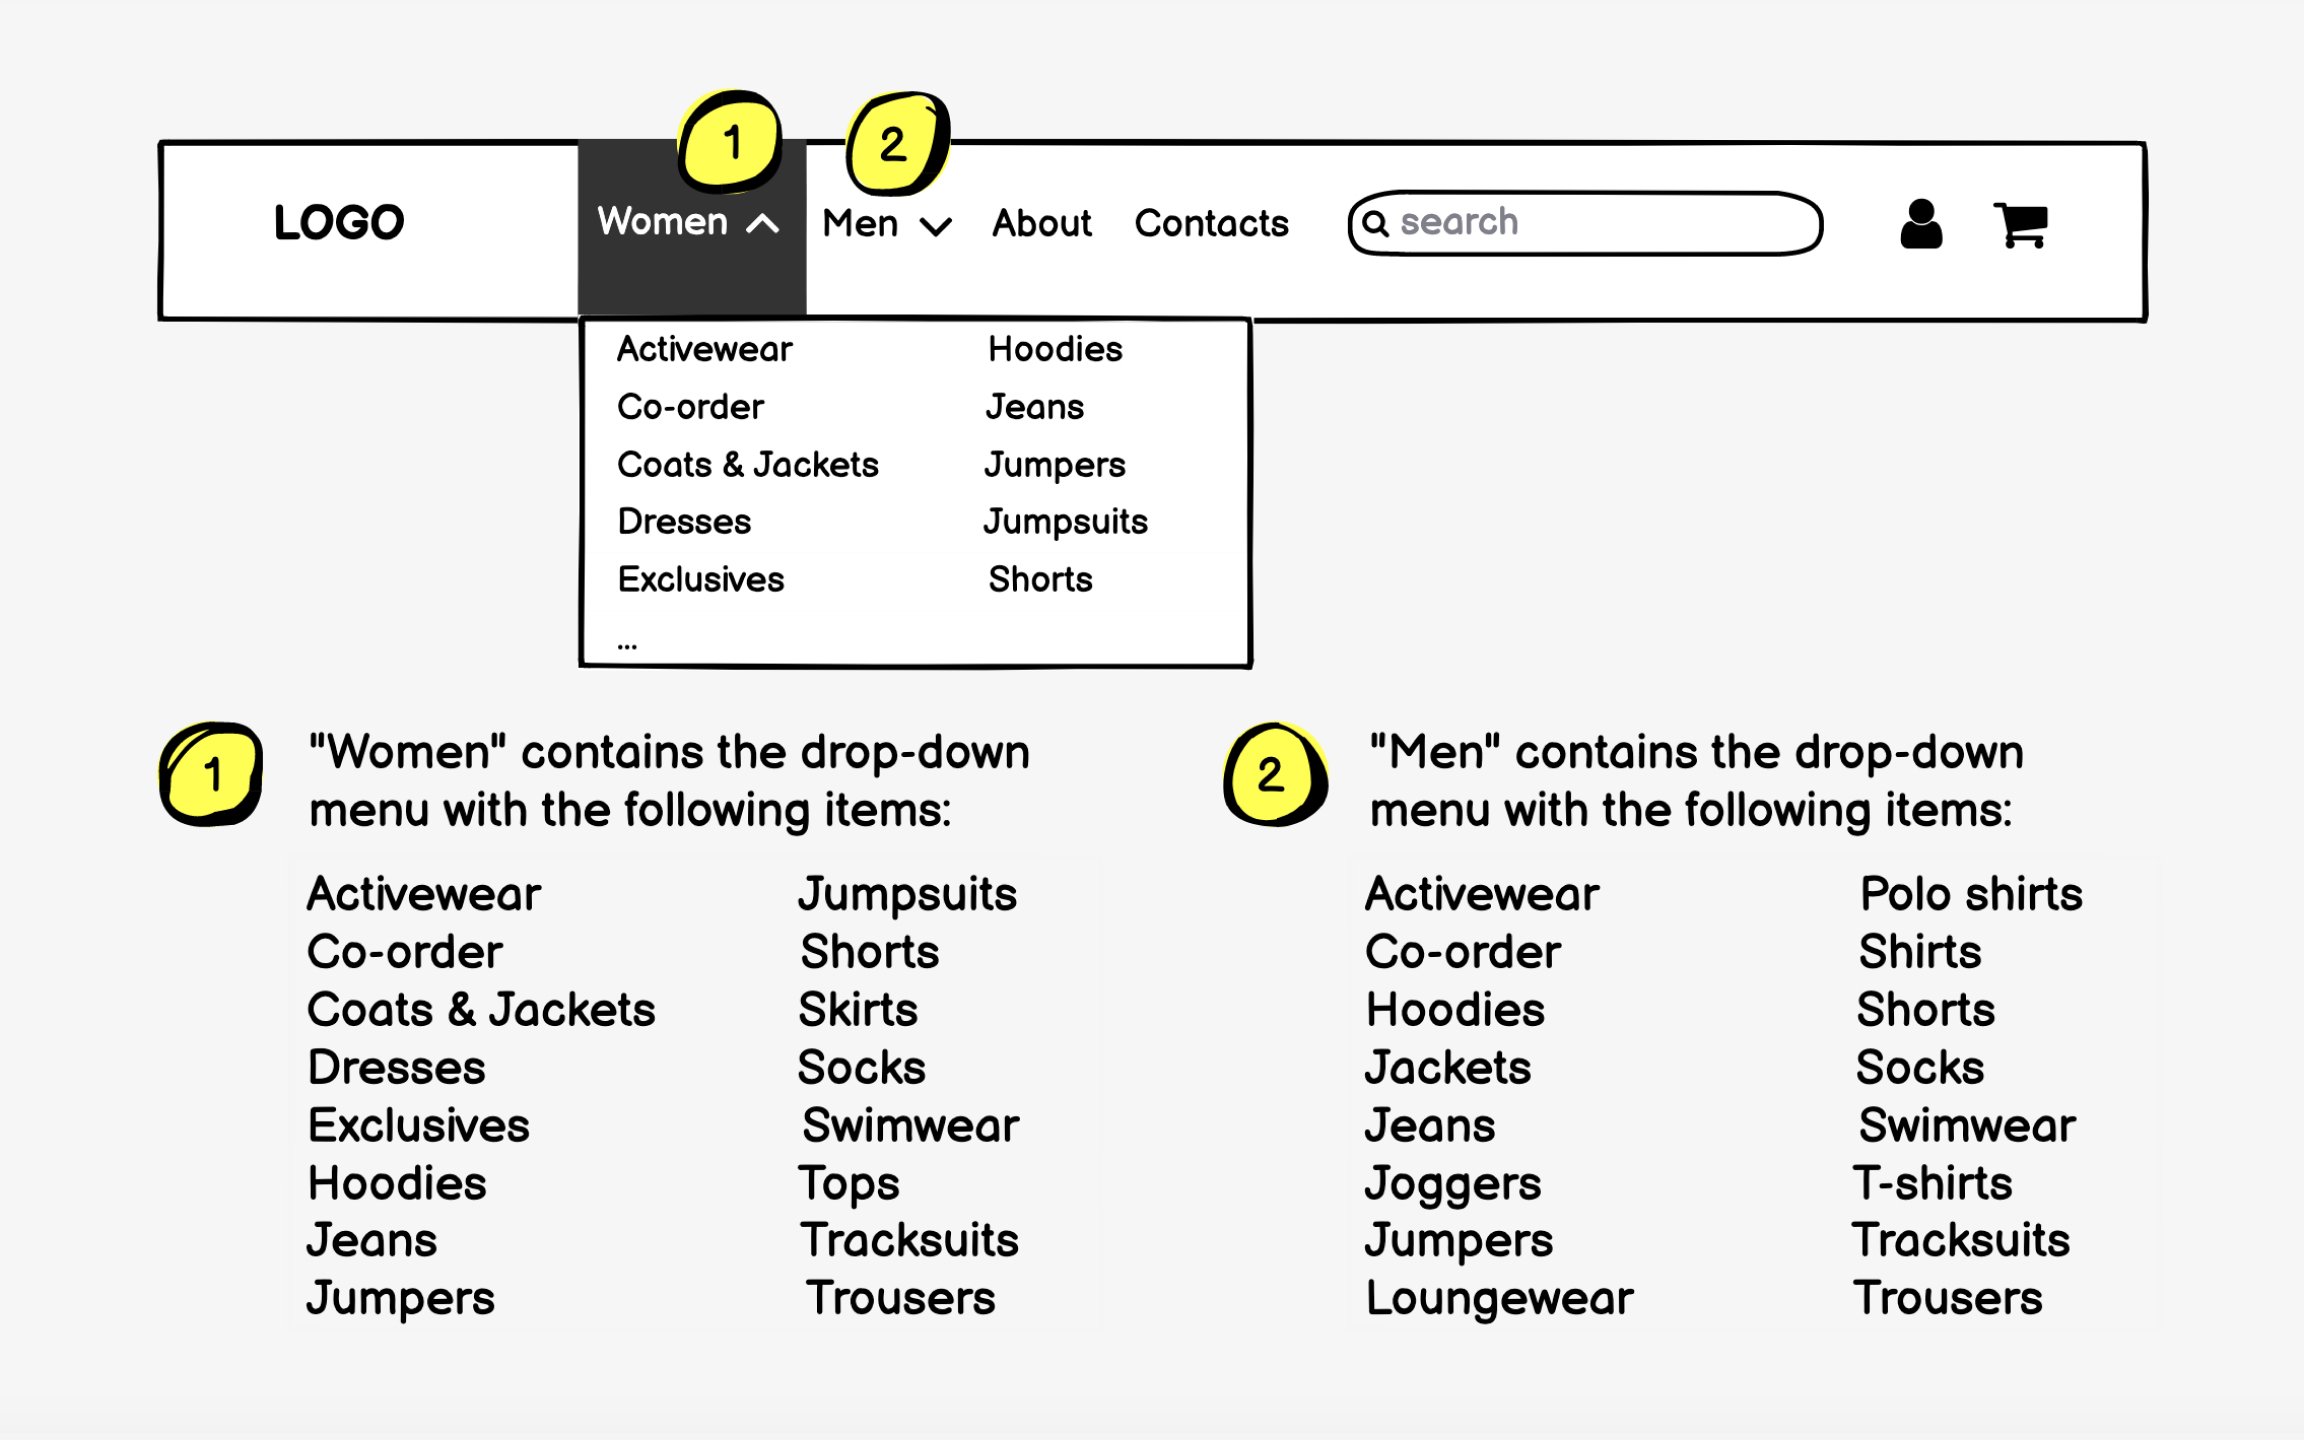
Most wireframes use small numbered markers to point to the right spots. Make sure these numbers stand out by adding a bit of contrast. Then repeat each number next to a short explanation at the side or bottom of the page. This keeps everything clean and easy to follow.

Conditional elements create the most confusion in
Document every condition that affects element visibility or behavior. Specify user types ("Shown only to logged-out users"), time constraints ("Displays December 1-25"), geographic limits ("US and Canada only"), or behavioral triggers ("Appears after 3 failed login attempts"). Include what happens when conditions aren't met.
Clear conditional annotations prevent scope creep and development confusion. They help teams understand the full complexity of seemingly simple features and plan appropriate testing scenarios. Most importantly, they ensure everyone implements the same logic.
Interactive elements demand comprehensive annotations because their behavior often extends beyond simple clicks. A
Answer critical questions in your annotations:
- Where do links navigate?
- Do they open in new windows?
- What happens during loading?
- How are
errors handled? - What feedback confirms success?
For complex interactions, describe the complete flow from initial click to final outcome.
Consider accessibility in your
List all options for limited-space elements: dropdown items,
These annotations prevent assumptions that lead to broken experiences. Without knowing all the dropdown options, developers might size the container incorrectly. Without understanding pagination rules, designers might create inappropriate
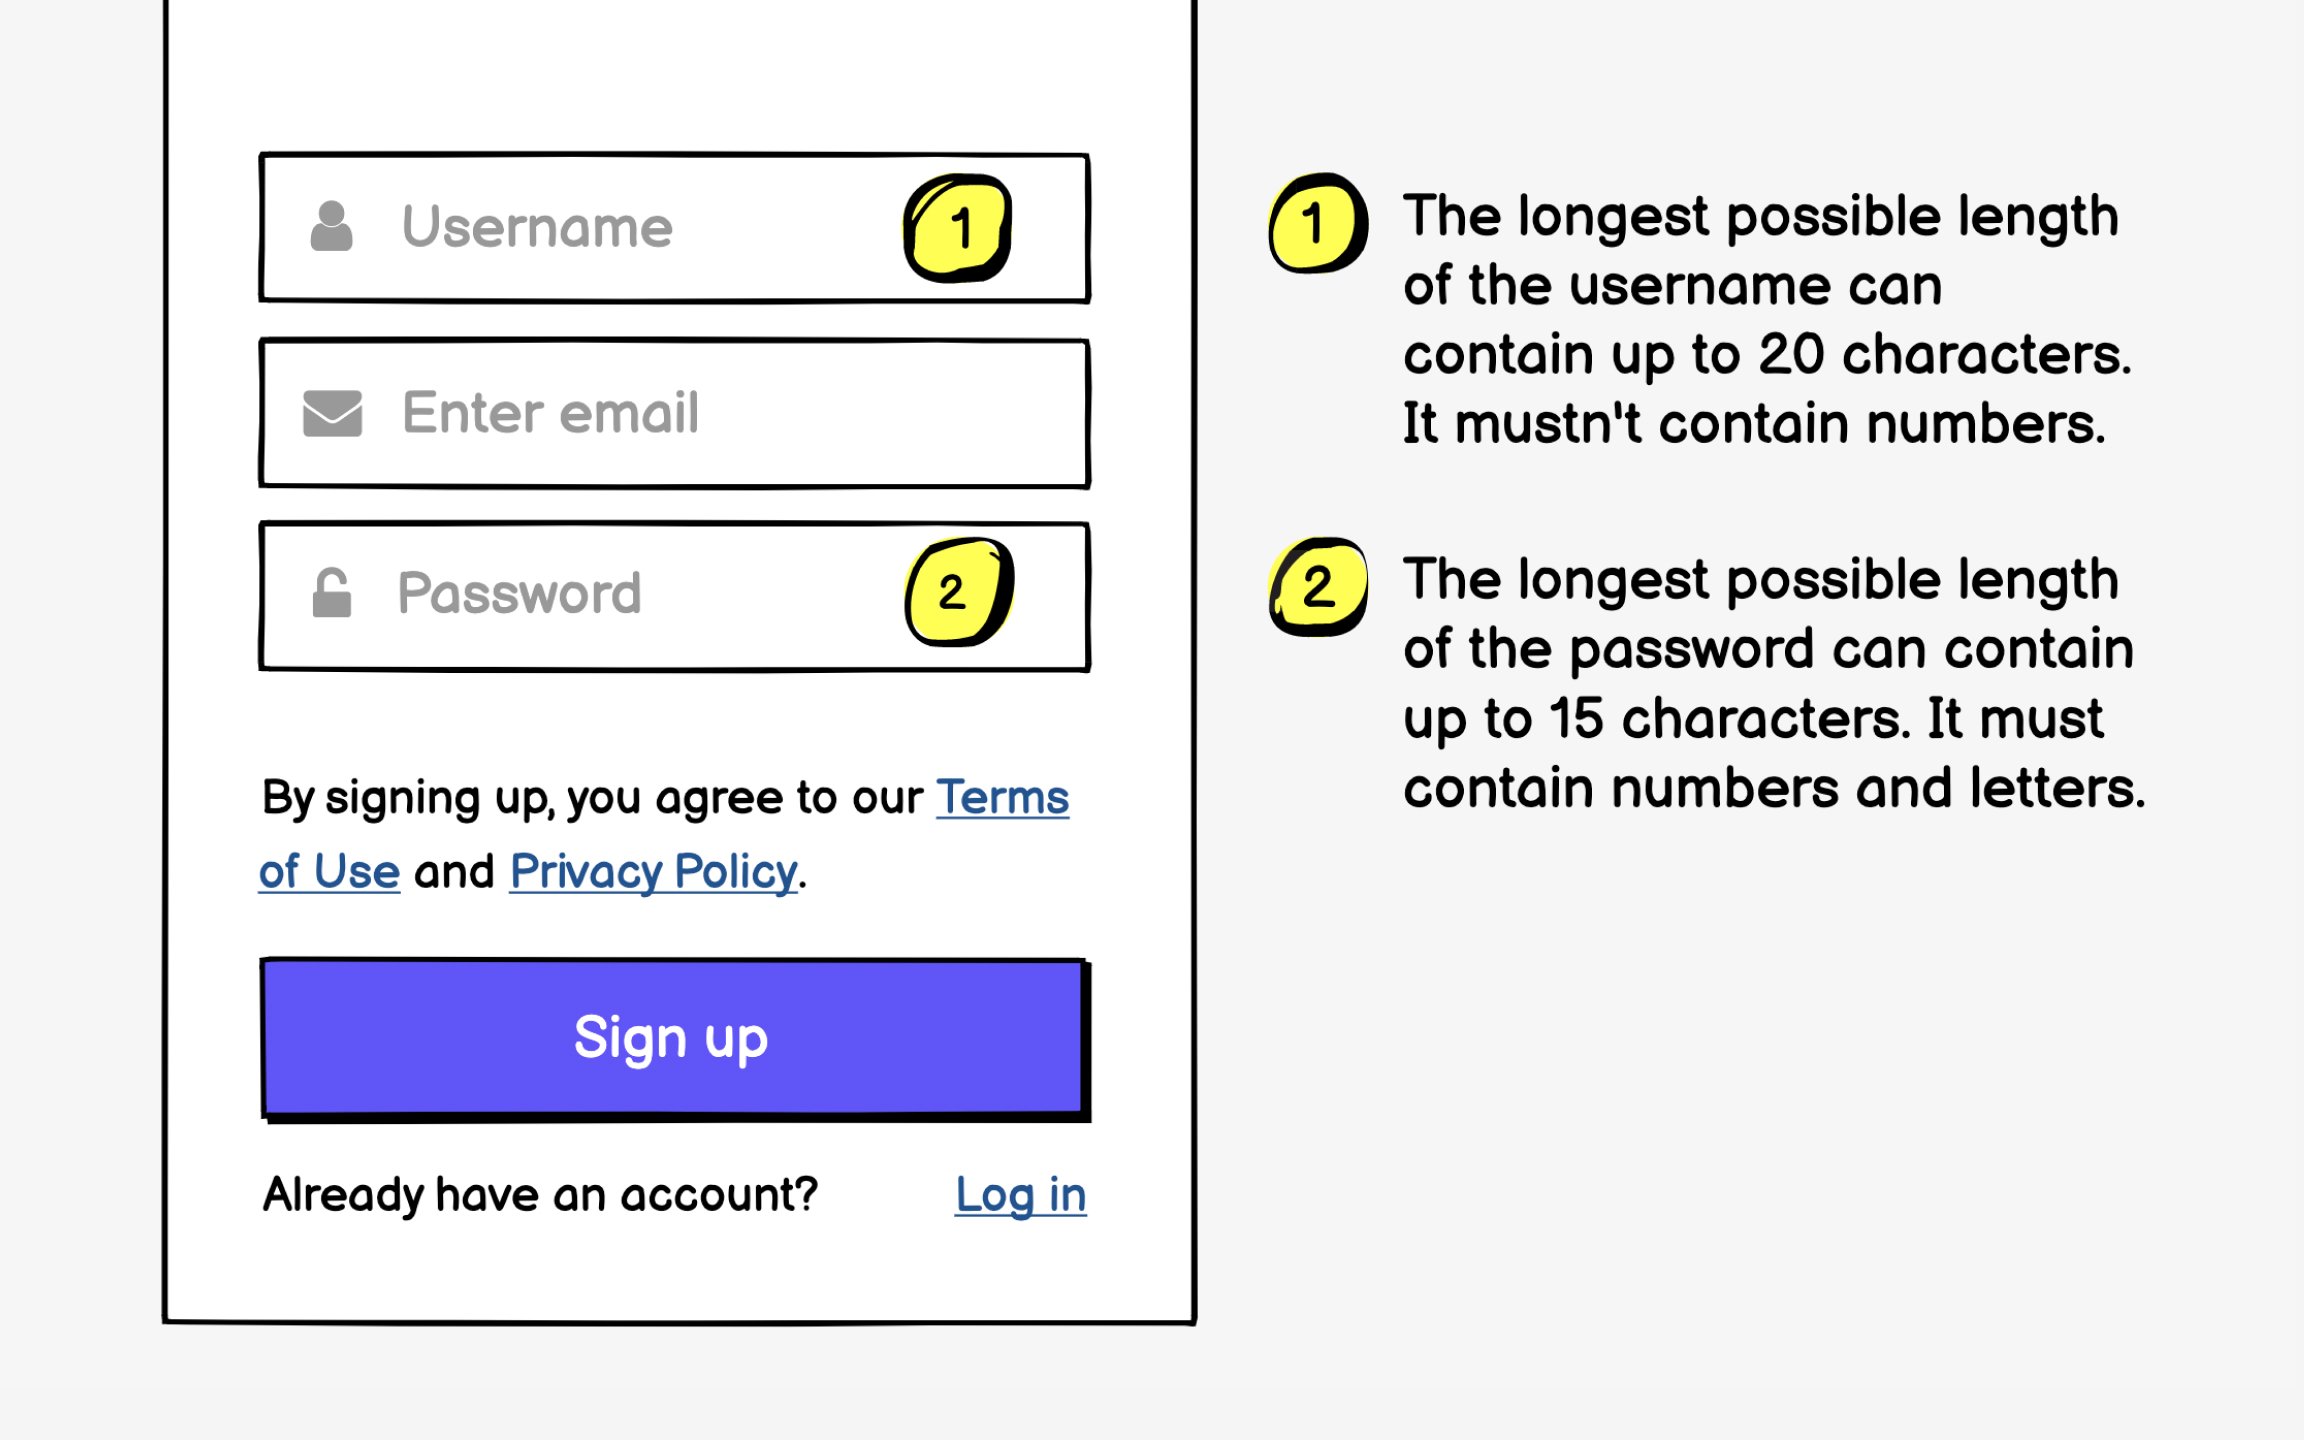
Constraints shape design decisions but often remain invisible in
Document not just what constraints exist, but why they matter. "Username: 3-20 characters (database limitation)" provides context. "Price updates every 15 minutes (exchange API refresh rate)" explains seemingly arbitrary behavior. This transparency helps teams work within limitations rather than against them.
Include business logic that affects user experience: calculation formulas, approval workflows, inventory rules, or pricing tiers. These annotations transform wireframes from interface drawings into system specifications that account for real-world complexity.[2]
Annotating while designing captures fresh thinking and prevents forgetting crucial details. Your brain holds context during creation that evaporates once you move to the next screen. These initial notes serve as memory triggers.
However, annotations written mid-design often lack coherence. They reflect your internal monologue rather than clear communication. That's why post-design editing is essential. Review all annotations for clarity, consistency, and completeness. Transform personal notes into stakeholder
This hybrid approach leverages the benefits of both methods. Real-time annotations preserve design rationale and catch details you'd otherwise forget. Post-design editing ensures professional, understandable documentation that serves its intended audiences.
Annotating
Here's what you need to concentrate on at different fidelity levels:
- In sketches, add comments on ideas, personas, and scenarios.
- In low-fidelity wireframes, concentrate on initial design decisions and explore various UI options.
- In medium-fidelity wireframes, describe the functionality and
layout reasoning. - In high-fidelity wireframes, detail in-depth functionality,
content and design decisions, and scenario rationale.
References
Top contributors


Topics
From Course

Share


Similar lessons

Intro to Wireframing

Wireframe Fidelity
