Layer Alignment
Learn how to align layers in Figma for visual balance and harmony in your designs.
Layer alignment in Figma is the secret to a harmonious design, ensuring elements are positioned just right. Alignment is essential for visual balance. Whether it's centering a logo, lining up buttons, or stacking cards in a feed, proper alignment brings order and professionalism to your design. When the alignment is off, designs look cluttered and may confuse users, while a well-aligned layout feels intuitive and pleasing.
Figma's alignment tools help select your layers and use the alignment options (top, bottom, center) to line them up perfectly. They not only save time but also eliminate guesswork, making your design process efficient and your outcomes visually appealing. It's all about providing users with a great experience when interacting with your design, with every element feeling like it's precisely where it's supposed to be.
In Figma, alignment streamlines the positioning of elements, ensuring each layer sits just right. Here's how it works:
- For a single layer, Figma aligns it relative to its parent layer, which could be a frame, group, or component container. It's like adjusting a photo within its frame, ensuring it's centered or snugly fit to an edge.
- When multiple layers are selected, Figma aligns them either to each other or their common parent layer. It's a balancing act, like arranging items on a shelf, where each one is positioned in harmony with its neighbors and the shelf itself.
Aligning layers precisely is straightforward with alignment controls on the Design panel, ensuring every element is in its ideal place. Use these options for precision and remember these keyboard shortcuts to speed up your workflow:
- Align left: Moves layers to align with the leftmost edge. The shortcut is Alt A
- Align horizontal centers: Adjusts layers so their horizontal centers align, creating a straight vertical line through their midpoints. The shortcut is Alt H
- Align right: Aligns layers to the rightmost boundary. The shortcut is Alt D
- Align top: Anchors layers to the top edge. The shortcut is Alt W
- Align vertical centers: Lines up layers so their vertical centers align, forming a horizontal line through their midpoints. The shortcut is Alt V
- Align bottom: Sets layers flush with the bottom edge. The shortcut is Alt S
Pro Tip: Holding Shift while using alignment controls lets you align multiple objects as a group within their parent frame.
Snap to settings in Figma are like magnets for design elements, ensuring precision and tidiness. As you move or resize objects, or tweak vector points, snap to settings subtly guide your elements into perfect alignment with others on the canvas, signaled by a handy red guide.
Here's a snapshot of how it works:
- Snap to geometry: Exclusive to vector editing, this snaps vector points neatly to others, ensuring sharp, clean shapes.
- Snap to objects: Harmonizes objects by aligning their centers or edges, like puzzle pieces fitting together.
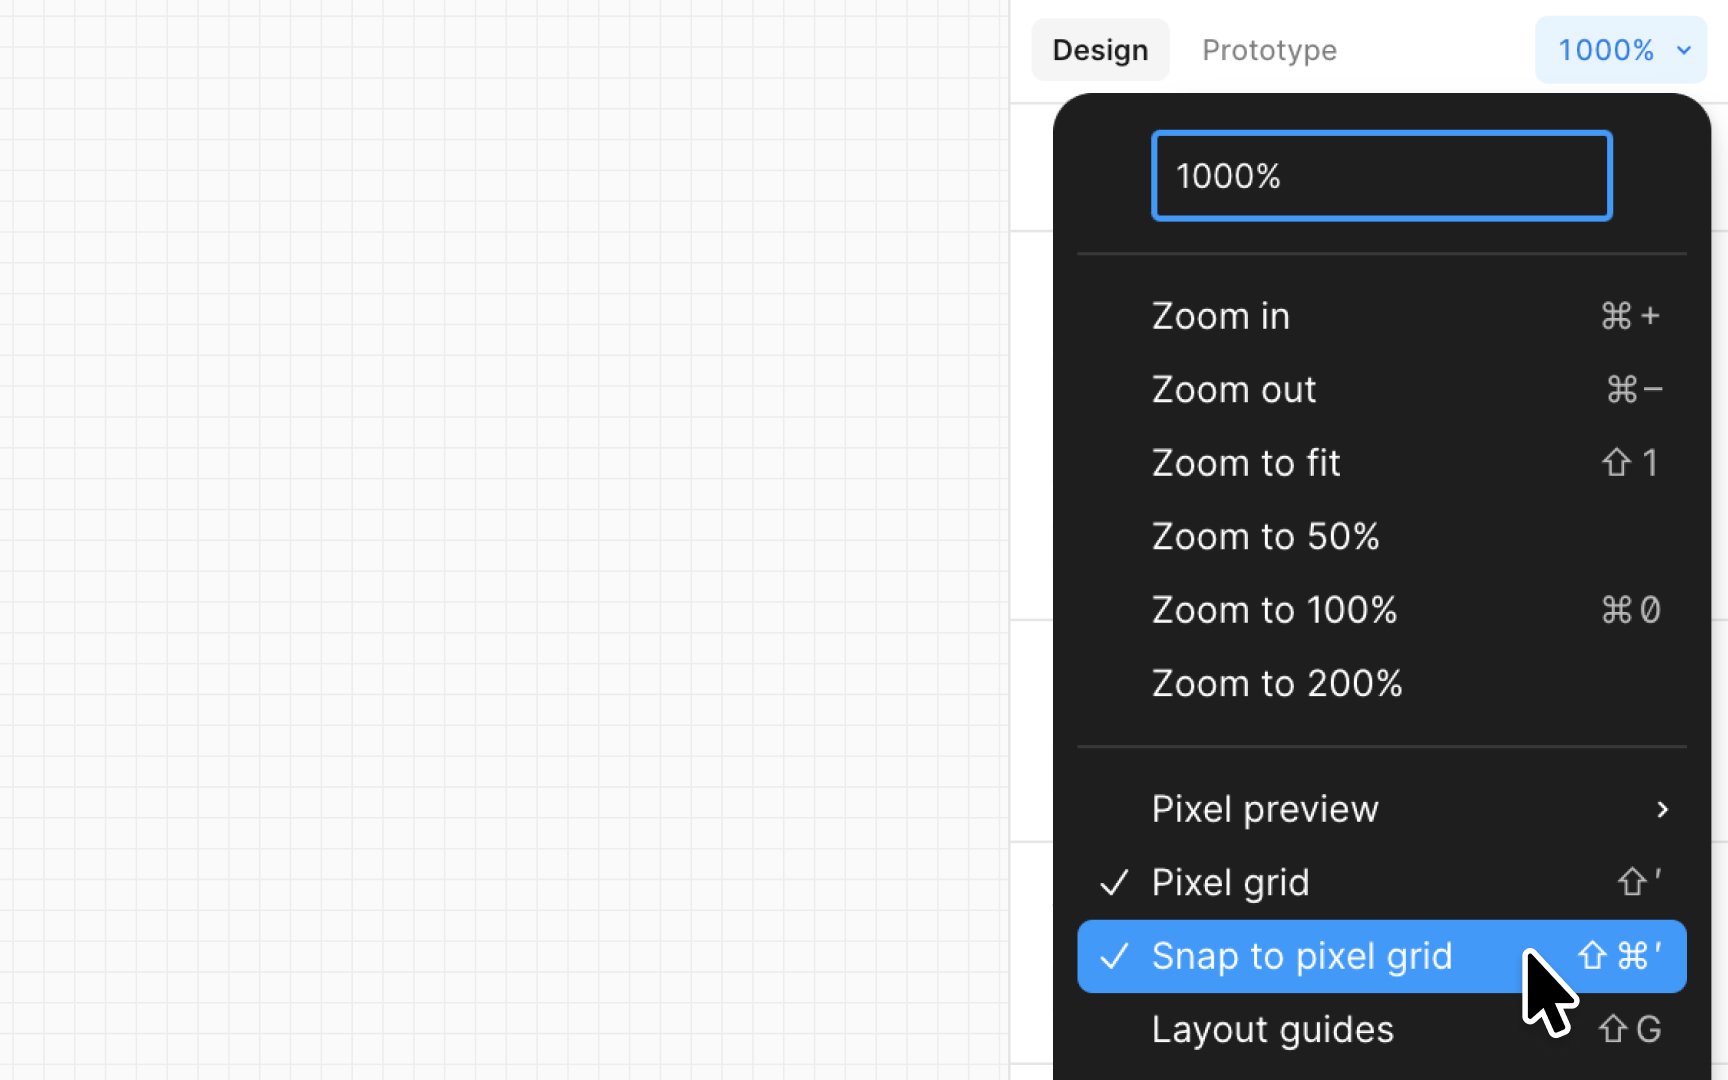
- Snap to pixel grid: This ensures crisp, clear visuals by aligning objects to a pixel grid, eliminating fuzzy edges or unintended blurs, especially important when exporting your design.
Toggle these settings via Preferences in the Main menu or find it in the Quick actions menu by using the shortcut:
- Mac: Command /
- Windows: Ctrl /
These are global settings, maintaining consistency across all your design files, making your
Layer distribution in Figma is like ensuring equal elbow room for each guest at a dinner table. It's all about spacing layers or objects evenly, and it requires selecting more than one layer or object.
Here’s how it simplifies design spacing:
- Distribute horizontal spacing: This keeps your leftmost and rightmost objects anchored, evenly distributing the rest in between. Imagine a row of plants on a windowsill, each equally bathed in sunlight.
- Distribute vertical spacing: This aligns layers vertically. The top and bottom objects stay put, and the others space out evenly in between, like a neatly stacked set of shelves.
Figma's Tidy up tool effortlessly aligns your
Imagine organizing a gallery of product images or a sequence of
Select the elements, hit the Tidy up button in the Design panel, or use the shortcut:
- Mac: Control Option T
- Windows: Ctrl Alt T
Nudging in Figma lets you fine-tune layer positions with ease, akin to adjusting a picture frame just right. Utilize the arrow keys for precise movements. Figma provides two nudge scales: small and big.
- Small nudge: Press an arrow key for a delicate 1pt shift, ideal for meticulous tweaks.
- Big nudge: Combine Shift with an arrow key for a bolder, 10pt jump, useful for larger adjustments.
To customize these values, head to the Main
Pro Tip: Tap the arrow keys to gently shift your selection according to the small nudge settings. For a bigger leap, press and hold Shift while nudging to engage the big nudge settings.
In Figma, reshaping a layer to fit your vision is straightforward. Each layer's dimensions are readily visible. To check or alter them:
- View dimensions: Simply click a layer, and its size appears under the bounding box or in the W (width) and H (height) fields in the Design panel.
- Adjust width: Hover near a layer's side edge until you see a horizontal line with outward arrows, then drag to resize.
- Adjust height: Similarly, hover near the top or bottom edge for a vertical line with up and down arrows, and drag to resize.
- Adjust both: For proportional
resizing , drag from any corner where you see the diagonal double-arrow icon. - Precise control: Directly tweak the W and H fields in the sidebar for exact dimensions.
Pro Tip: To maintain the layer's aspect ratio, use the Lock Aspect Ratio button on the right to the W and H fields. This keeps your resize balanced, ensuring your design remains harmonious and proportionate.
Every layer starts with a 0° rotation. You can twist it up to 180° counterclockwise (positive) or -180° clockwise (negative). Spin past 180°, and Figma counts back towards 0°. For instance, 195° becomes -165°.
Here's how to rotate:
- In the Design panel: Select layers, then tweak the rotation field in the Design panel.
- Directly on canvas: Hover near a layer's corner until the rotation cursor pops up. Click and drag clockwise for negative angles (up to -180°), and counterclockwise for positive angles (up to 180°).
Pro Tip: Hold Shift while rotating to snap the angle in 15° increments, ensuring precise orientation.
Layer order is key to visual hierarchy, and adjusting it is simple. Here's how to manage layers for a clear, structured design:
- Via Layers panel: Open the Layers panel on the left. Click and drag a layer to reposition it:
- •Move up to bring it forward.
- •Move down to send it backward.
- •Release to set its new place in the stack.
- Context Menu options: Right-click a layer on the canvas to:
- •Bring forward: Move up one level.
- •Send backward: Move down one level.
- •Bring to front: Place on top of all layers.
- •Send to back: Place behind all layers.
For speed, shortcuts are handy. Access them under Help > Keyboard shortcuts in the Main