Figma Toolbar
Learn how to make use of Figma's most popular toolbar to speed up your design process
The Figma toolbar, located at the bottom of your screen, provides access to the core tools and functionalities of the application. Each tool has specific keyboard shortcuts that accelerate your workflow once memorized.
Getting familiar with this toolbar establishes the foundation for effective design work in Figma. The intuitive layout allows beginners to quickly start experimenting with basic shapes and elements, building confidence for more complex design challenges.
Beyond basic tools, the toolbar includes access to plugins, comments, and sharing options. These collaborative features integrate seamlessly with design tools, enabling smooth transitions between creation and feedback cycles.
When the Move tool is selected on the bottom
This custom arrow cursor makes it effortless to select and rearrange layers within the Layers Panel. It also enables precise movement of objects on the canvas. To move an object, simply click and drag it using your mouse or touchpad. For finer control and minor adjustments, the arrow keys can be used.
Pro Tip: You can use the V shortcut for the Move tool for Windows and Mac.
The Scale tool, essential for proportionally resizing objects while maintaining their aspect ratios, is slightly tucked away for access. To find it, click the arrow next to the Move tool on the bottom
This tool is invaluable for resizing layers and objects. It smartly bypasses the constraints of nested layers, ensuring everything scales uniformly. Even blurs and strokes are adjusted in scale.
To use the Scale tool:
- Activate the Scale tool.
- Click on the object you want to resize.
- Move your
cursor over the object’s bounding box until the scale cursor appears, then click and drag to adjust size.
Pro Tip: To scale an object proportionally in Figma, select it with the Scale tool, then hold Shift while dragging a corner handle to maintain its aspect ratio.
In Figma, frames are similar to artboards in other design tools, used to define specific areas on the canvas for your designs. It is crucial for organizing
To access the Frame Tool, press A or F, or find its
The Slice tool, found by clicking the arrow next to the Frame tool on the bottom
Upon activating the Slice tool, the
Unlike the Frame tool, which is used for designing and structuring layouts, the Slice tool zeroes in on specific design areas for export. This allows for precise control over which parts of your design are saved as image files, making it a key tool for exporting individual elements without altering the entire design
The Pen tool, represented by a retro fountain pen icon on the bottom
Commonly employed for tasks like logo design, crafting unique graphic elements, or generating detailed vector illustrations, the Pen tool offers precision and versatility. Whether you're shaping a brand's identity or adding intricate details to a digital illustration, this tool is key for achieving sharp, clean lines and curves in your design work.
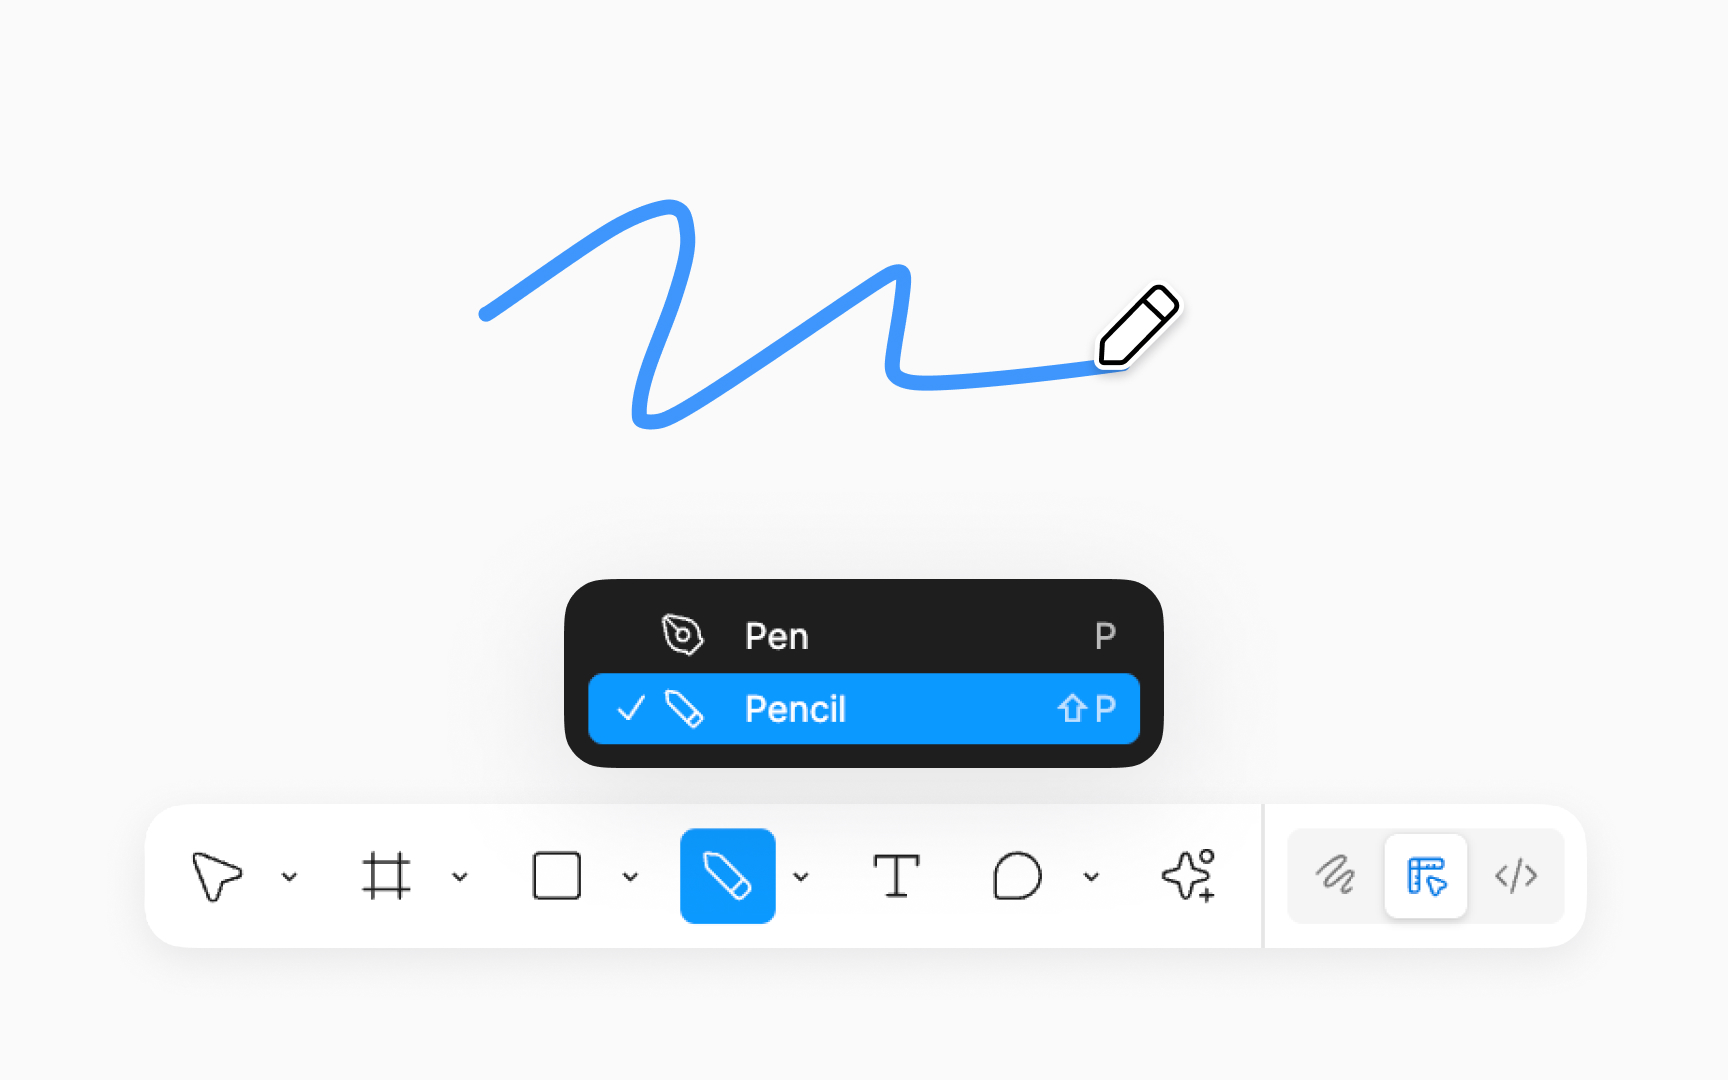
The Pencil tool, identifiable by its pencil
Ideal for jotting down rough ideas or adding creative flair, the Pencil tool brings an organic feel to digital designs. Figma lends a helping hand by smoothing paths as you draw. And if you need to fine-tune these paths on Vector Edit mode, click on the path and press:
- Mac: Return
- Windows: Enter
Figma offers a variety of default shape tools, each marked by a representative icon. To draw a shape, simply select the Shape tool from the
Available shapes and their shortcuts include:
- Rectangle:R
- Line:L
- Arrow: Shift L
- Ellipse: O
- Polygon
- Star
Some common use cases include creating button components with rectangles, designing UI card
The Shape tool also offers the option to place
- Mac: Shift Command K
- Windows: Shift Ctrl K
Pro Tip: To draw a proportional shape (like a perfect square or circle), hold down the Shift key while dragging on the canvas.
Text is a key element in interface design, with its placement, arrangement, and font choice significantly impacting the overall look and feel. To add text to your design in Figma, choose the Text tool from the bottom
For a text layer that expands horizontally, click once on the canvas. If you prefer a text layer with fixed dimensions, click and drag to define its size. This flexibility in creating text layers ensures that your textual content perfectly fits and enhances your design's visual harmony.
The Hand tool, nested within the Move tool on the bottom
This tool is particularly handy when you're working on intricate designs and need to shift your view without disturbing the
The Comment tool on the bottom
To post the comment, simply press Return (Mac) or Enter (Windows). This tool brings collaboration to the forefront, allowing anyone with viewing or editing access to the file to join the conversation. It's an efficient way to gather input and iterate on your designs, ensuring everyone's on the same page without leaving the Figma environment.
To quickly access the Comment tool, you can use the shortcut C .
The Draw tool lets you draw and paint directly inside Figma Design files. Use the Pencil tool for quick sketches and line work, while the Brush tool adds texture and color for a more organic, hand-painted look. These tools create vector networks by automatically placing points along your drawn paths, which you can edit later. To draw, open the Figma Draw
Pro Tip: Hold Shift to draw straight lines.