HTML IDs & Classes
Understand the difference between HTML IDs and classes and when to use each one effectively
HTML attributes allow us to define additional characteristics or properties of an element. By assigning the id and class attributes to elements, we can target them in CSS rules and style them. In this lesson, learn more about the difference between these 2 attributes and how to use them to define elements' styles.
Have you ever thought about how convenient it is to have names? We don't have to call everyone "you" and can easily specify who we're talking to without going into lengthy descriptions.
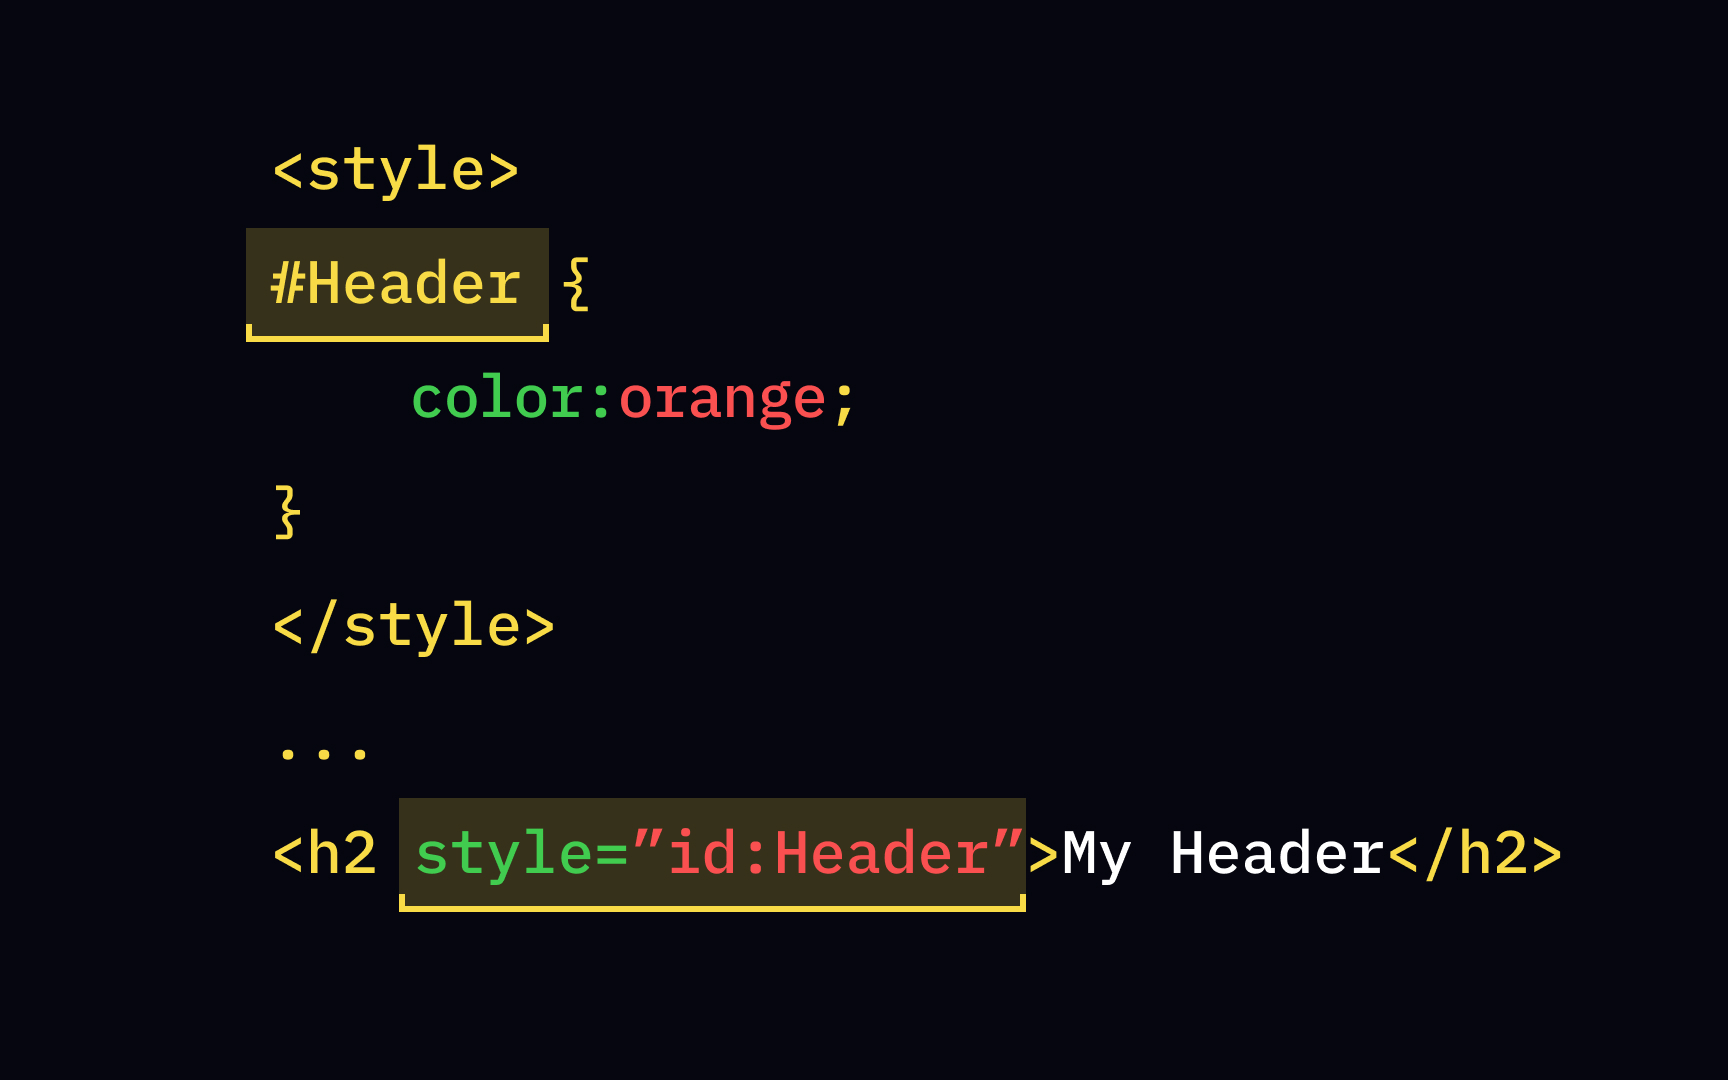
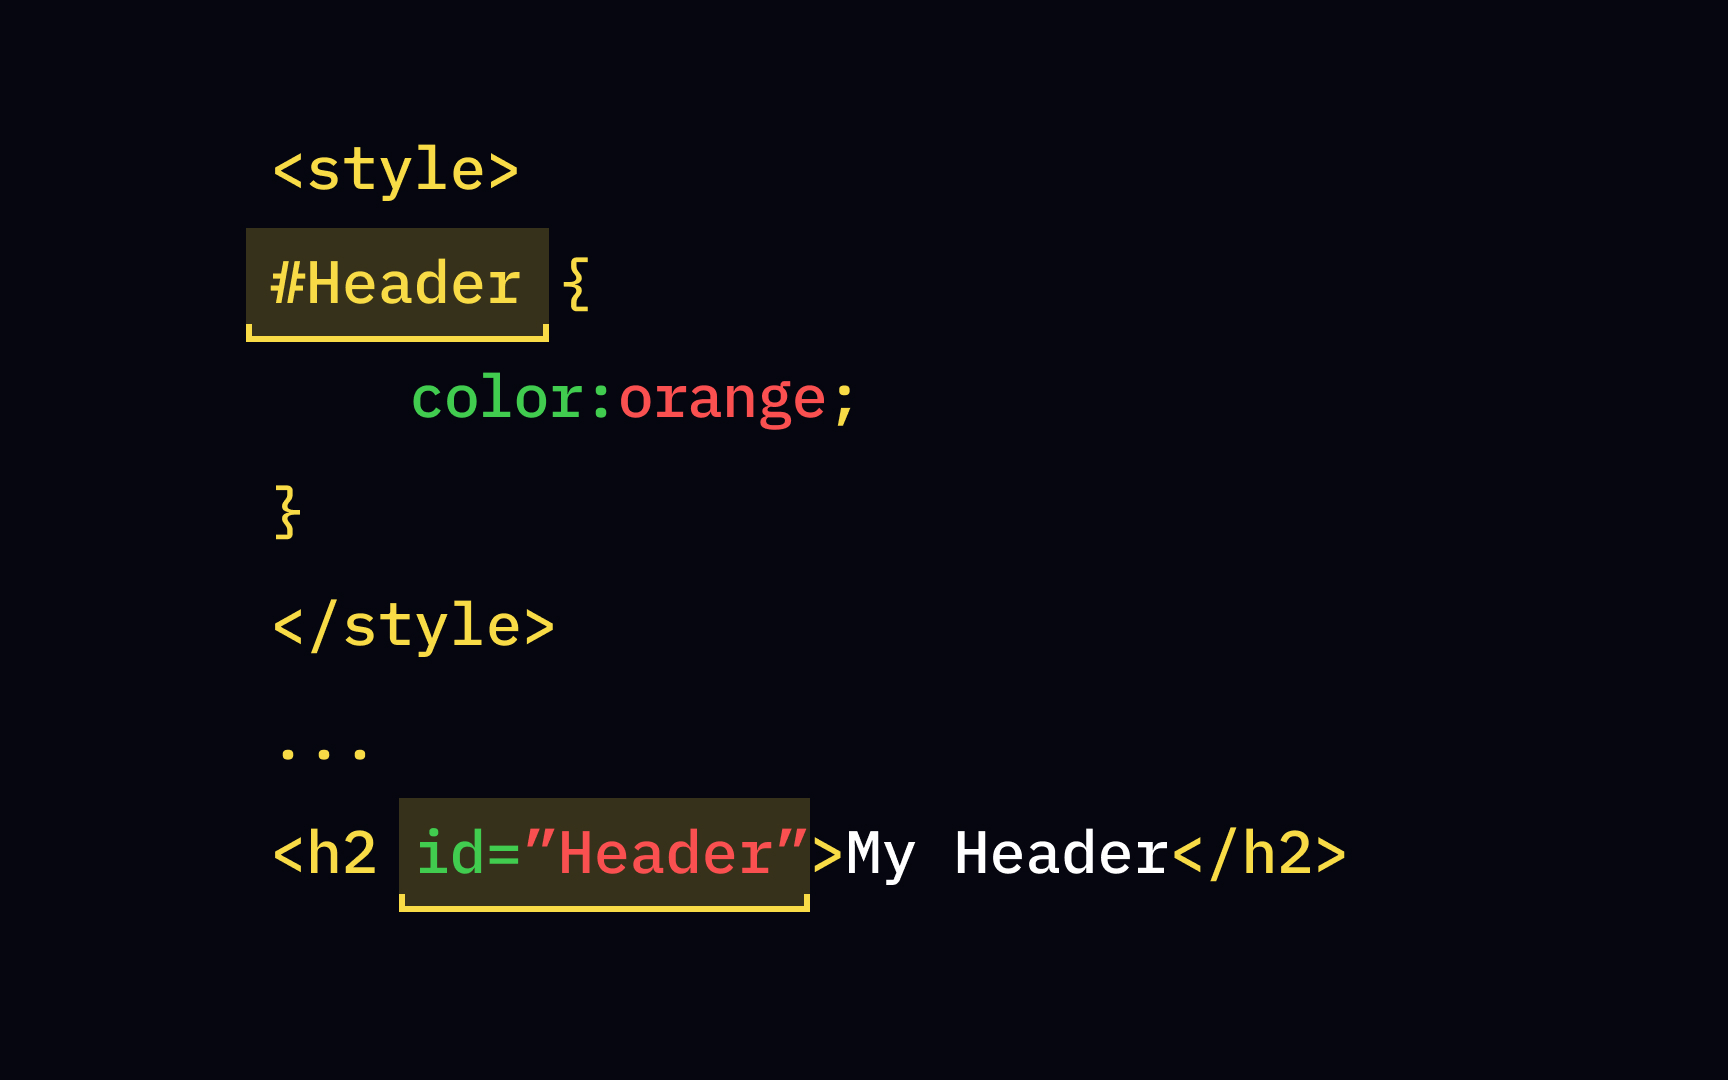
Ids are similar to names in this regard. Giving an element a unique identifier allows you to directly mention it when creating id and set a CSS rule for this element inside the <style> tag.
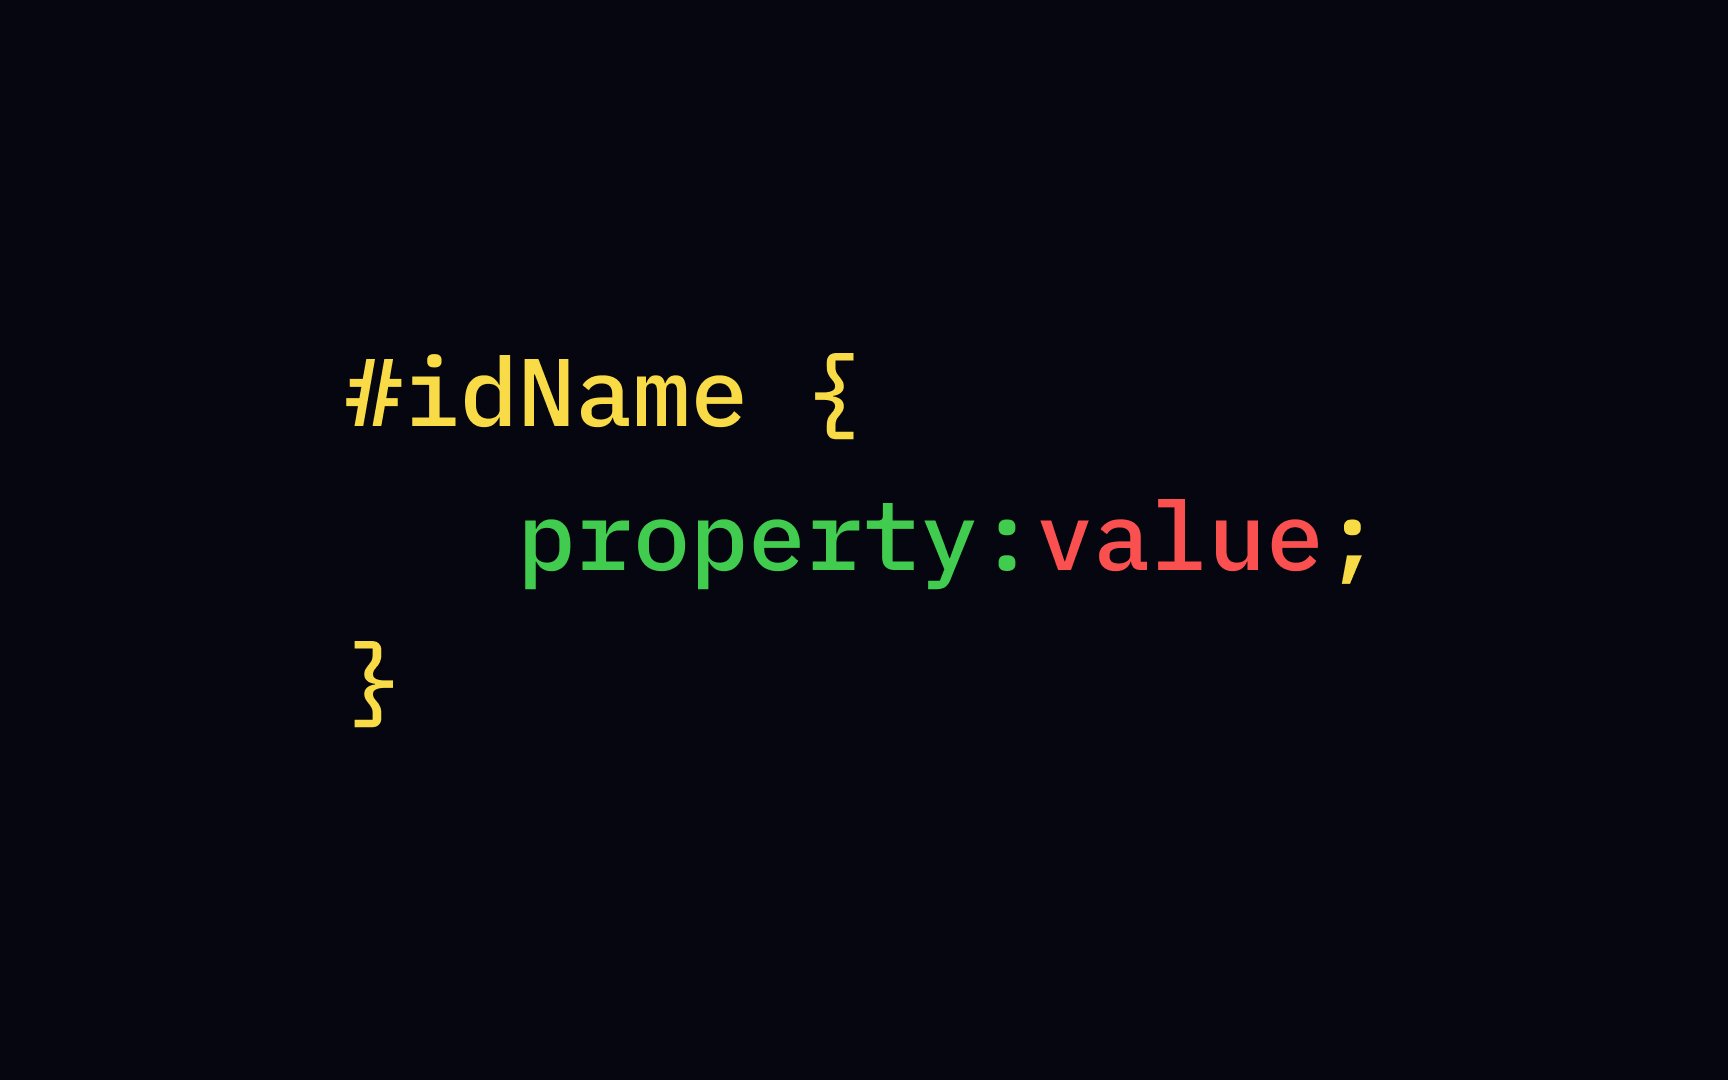
Inside the style sheet, we can access ids with a hash (#). For example, if you gave one of your headings an id, type #Header to use it as a selector. Selectors allow you to set
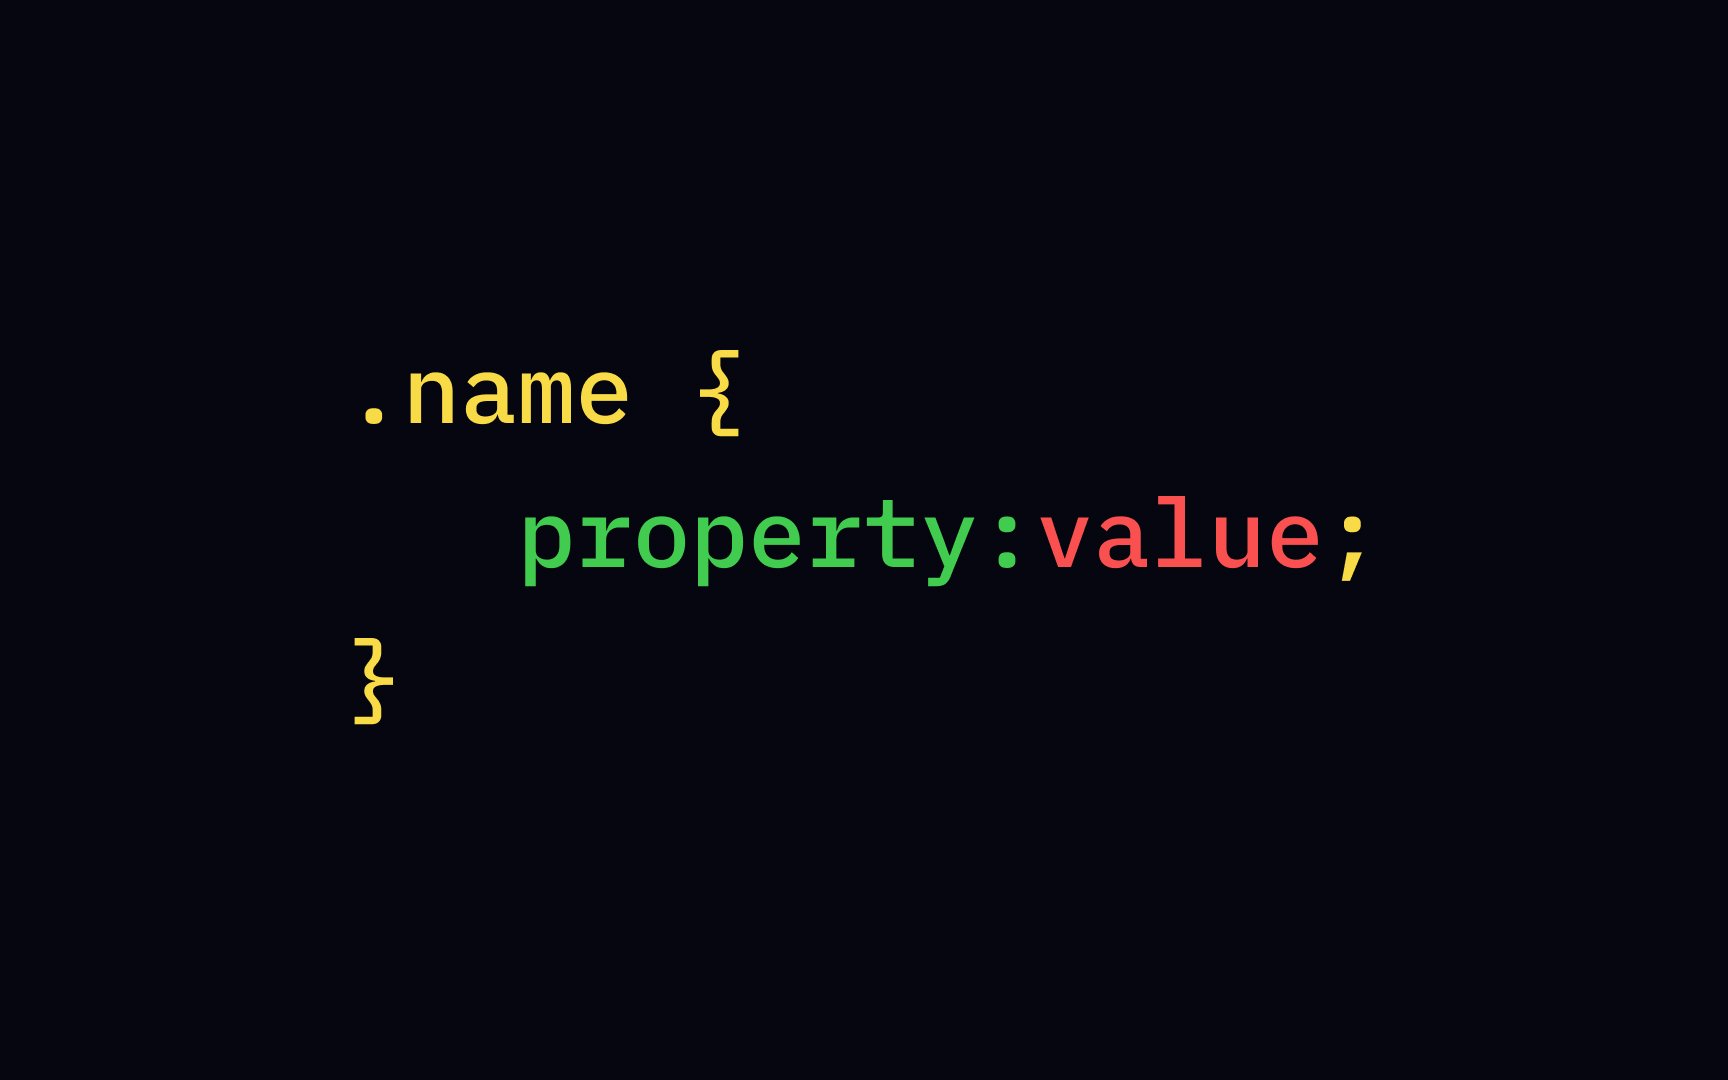
Let's say we want a font-weight and background and give them respective values. In this case, the CSS rule would look like this:
#Header {
font-weight: bold;
background: rgb(255, 0, 0);
}
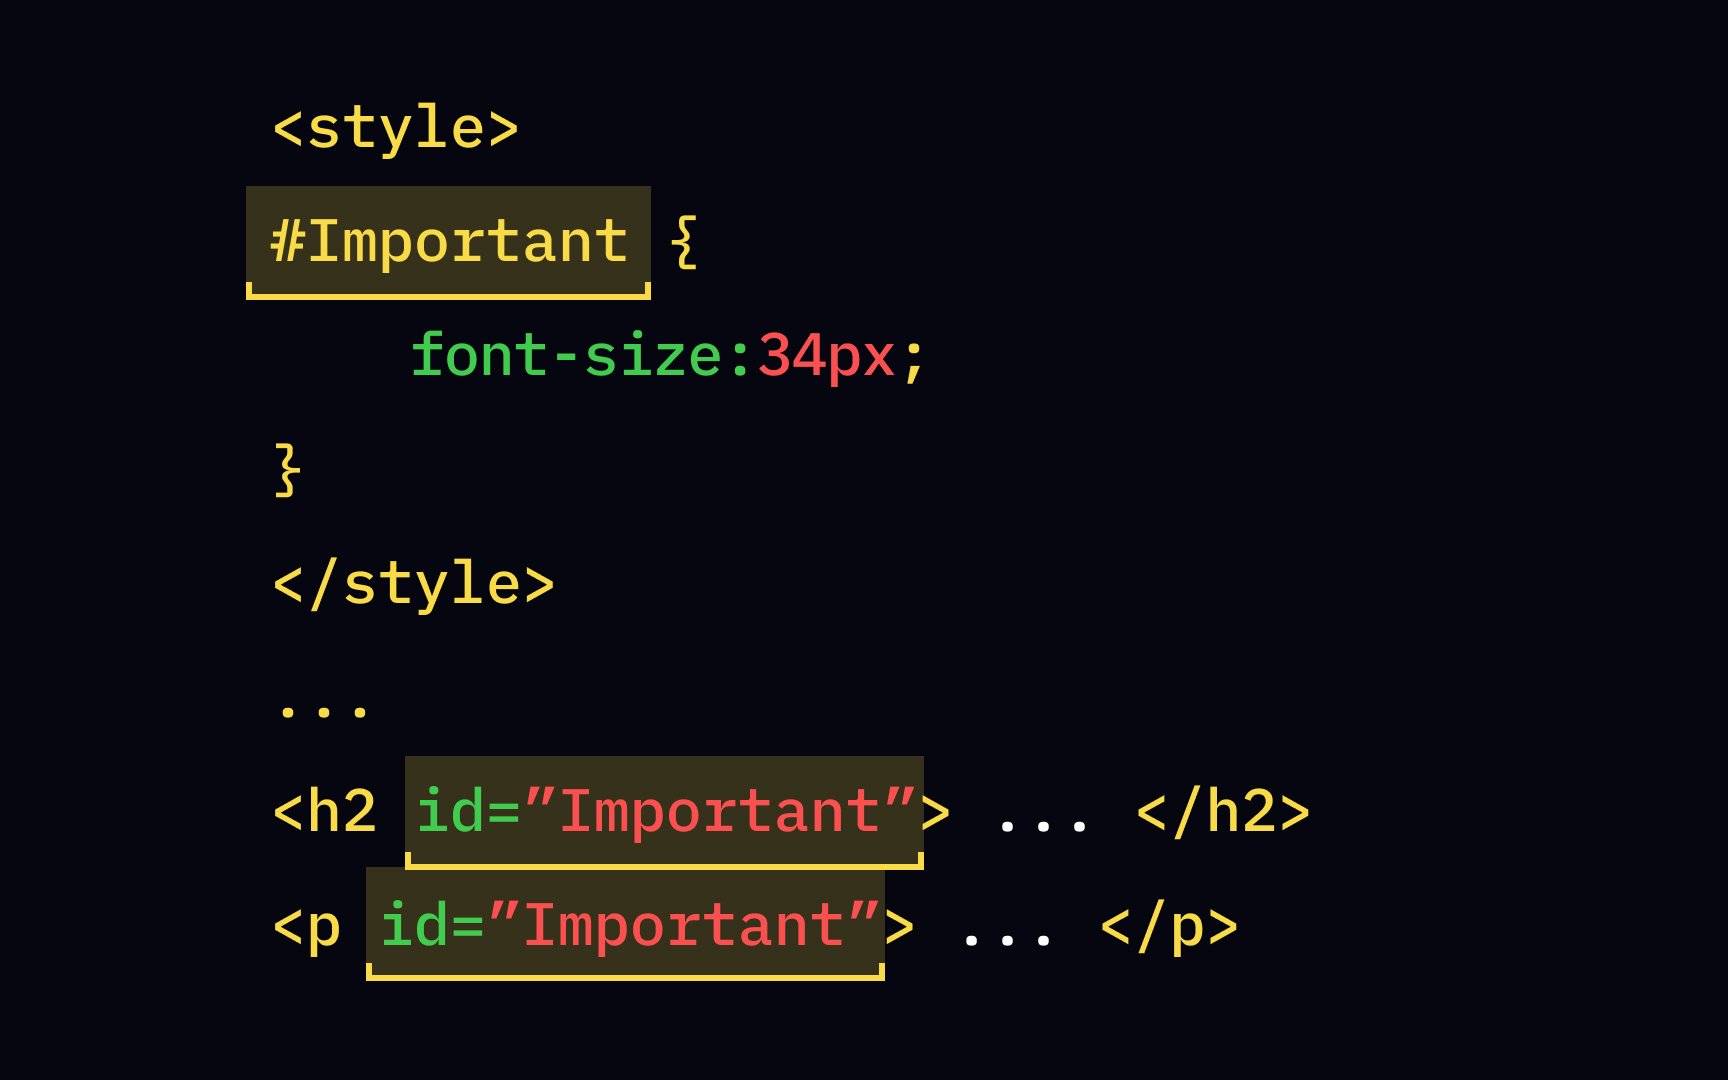
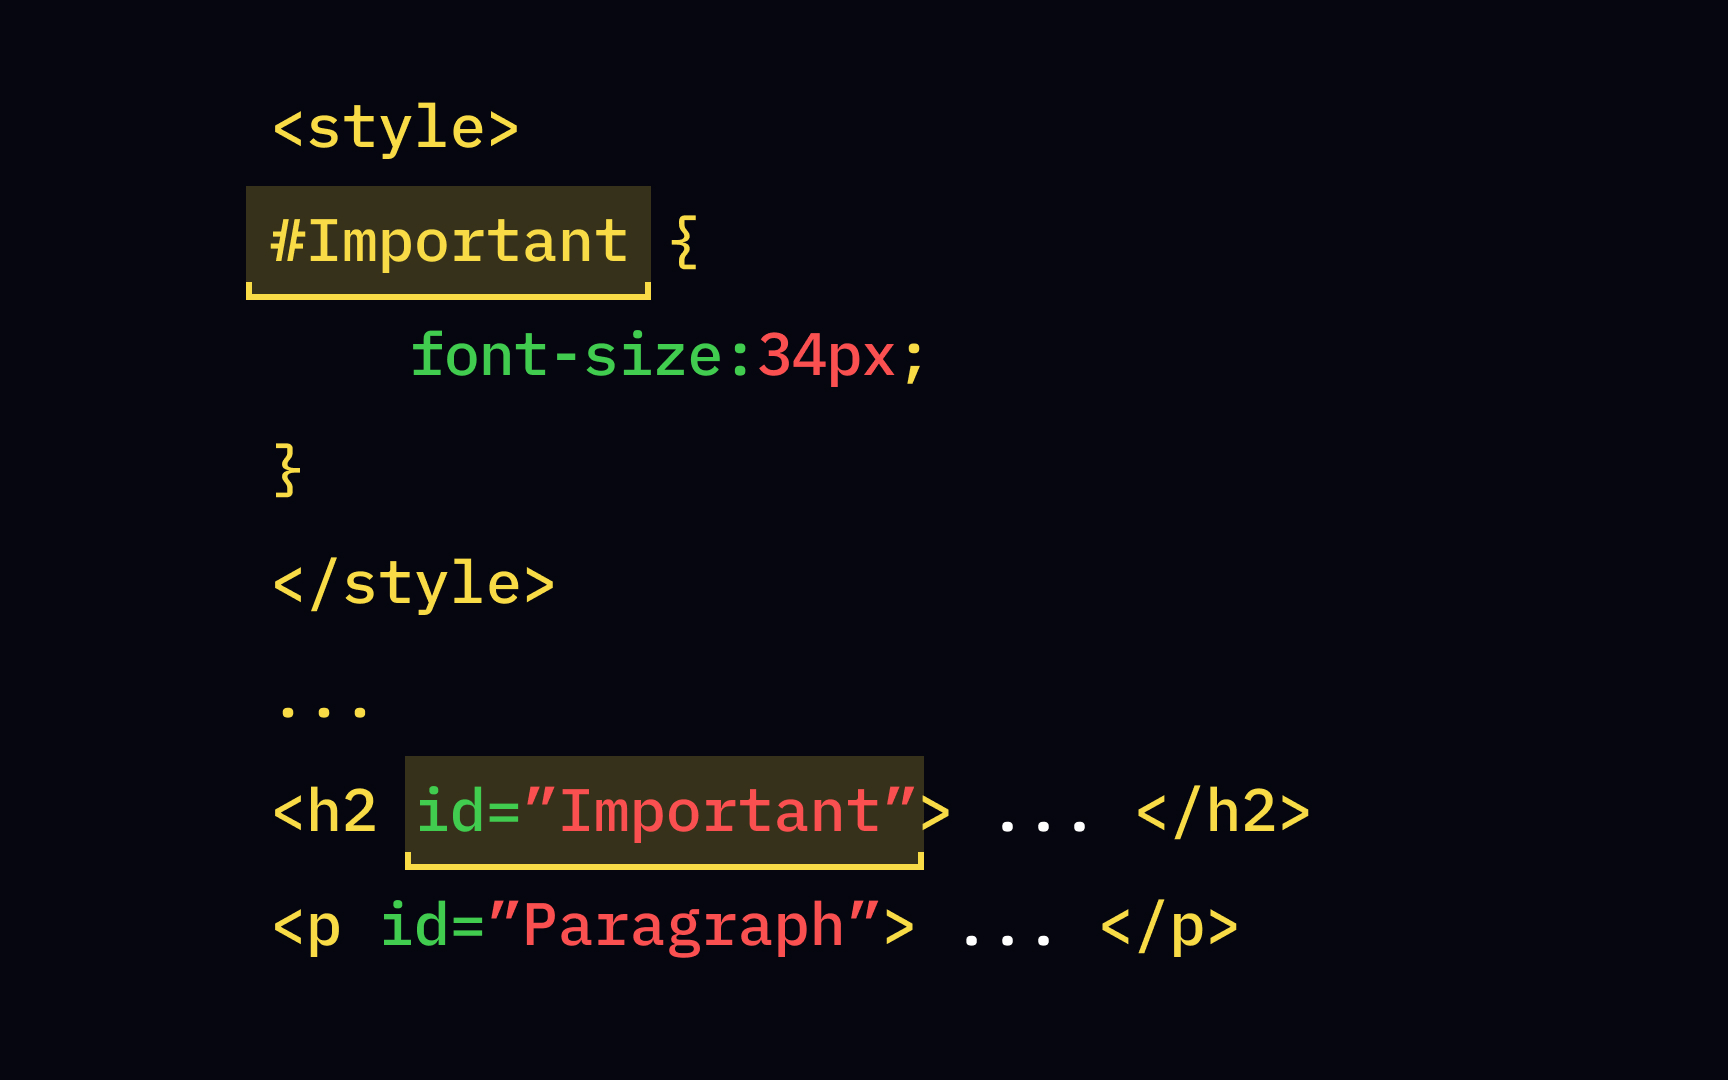
Two different people can have the same name, but it's not the case for elements' ids. Within one document, no two elements should have the same id, and each element can have only one id — this is just the way it is!
Technically,

Id values are case sensitive — this means that capitalizing letters will change the value. For example, id="Header" and id="header" are two ids with different values. When assigning ids and using them as selectors, make sure you're using the right case.
Using characters might cause compatibility problems in some cases, so it's best to stick to letters ASCII letters,[1] digits, "_", "-" and "." for id values.
If you have ever binge-read Wikipedia, you'd know how important bookmarks are. They are the links you see in the table of contents that let you jump to whichever section you're interested in — this is especially handy when reading longer articles.
To create a bookmark, you need to:
1. Add an id to the element you want to use as a bookmark — for example, an h2 <h2 id="Сh2">
2. Add a link to the bookmark using the id preceded by a hash (#) as the link's value. For example, <a href="#Ch2">Jump to Chapter 2</a>[2]
When users click on the link, the page will scroll to Chapter 2.
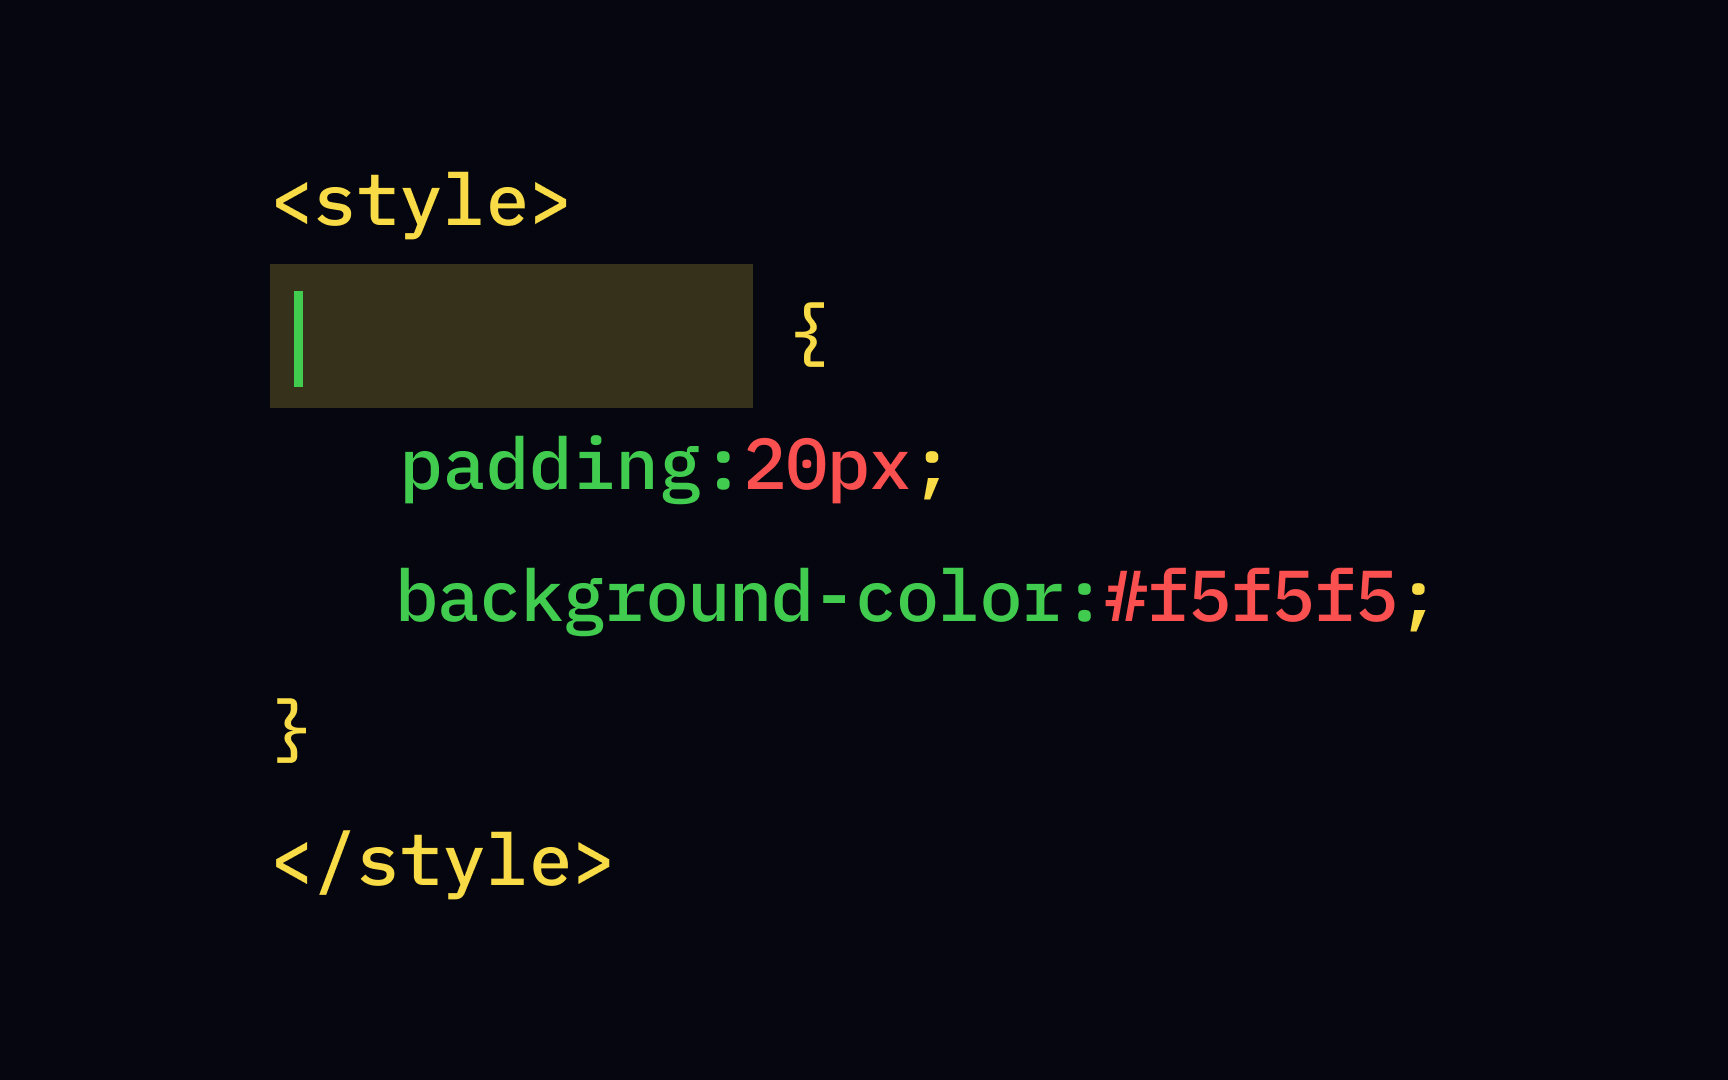
Besides giving unique ids to the elements, you can also assign classes. Unlike ids, many elements can belong to the same class, and one element can have many classes. If we go back to the analogy about ids being similar to names in their uniqueness, classes are more like groups people belong to. For example, you might know only one Chris Hemsworth, but many people have the same gender and same citizenship — being male and Australian are two of the groups he belongs to. class is a global attribute, meaning that it can be added to any element.
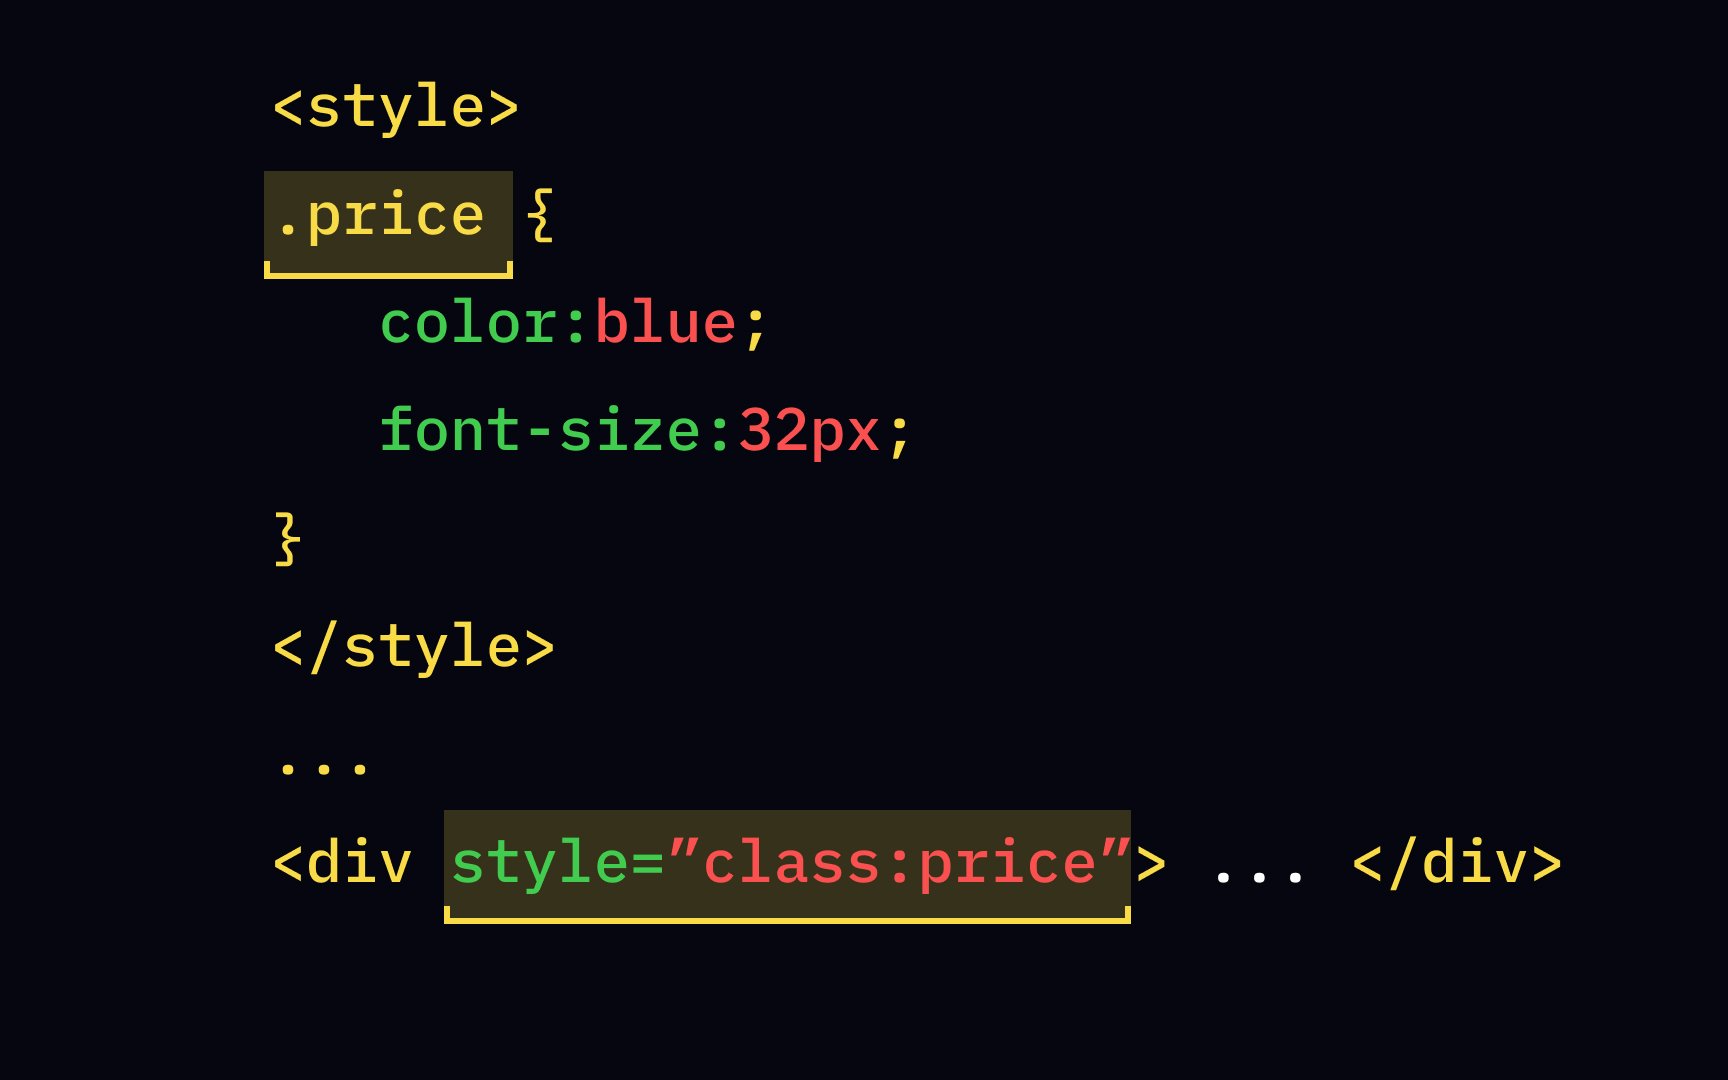
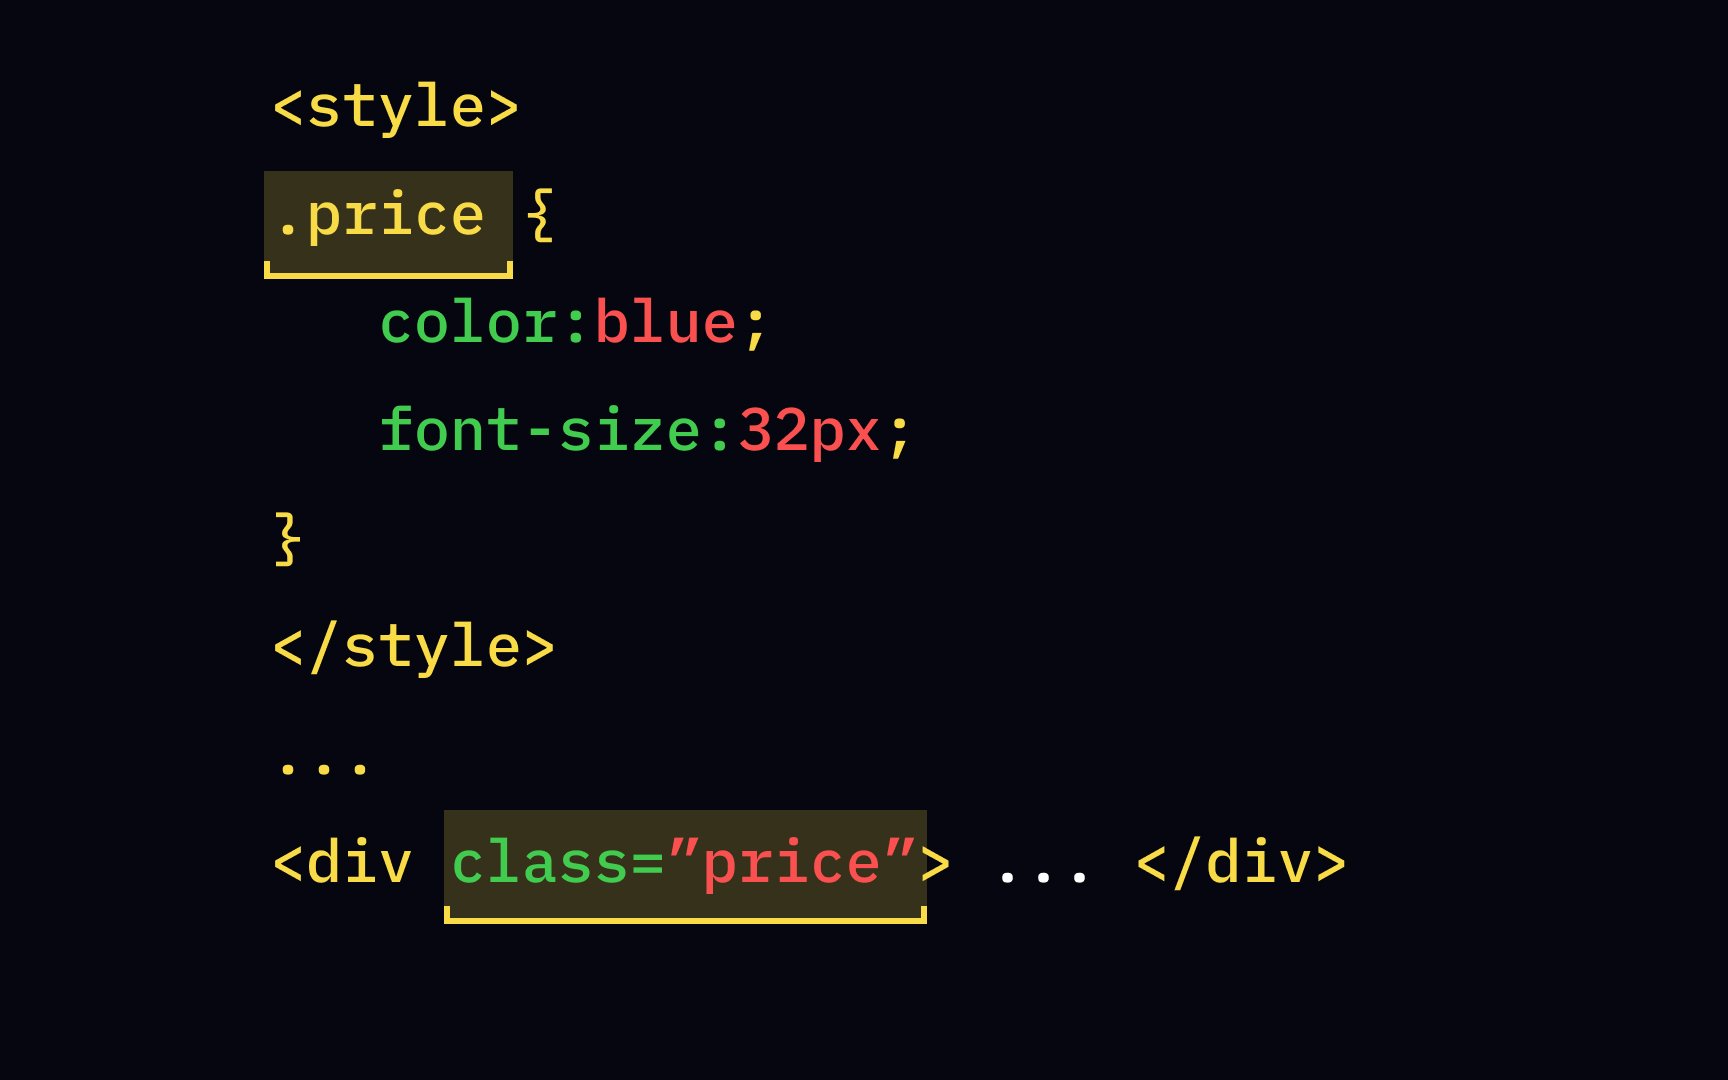
To define any class in the <style> price, we should apply the following rule:
.price {
color:blue;
}
This rule will only affect elements with the attribute class=" price", while other elements will remain unchanged.
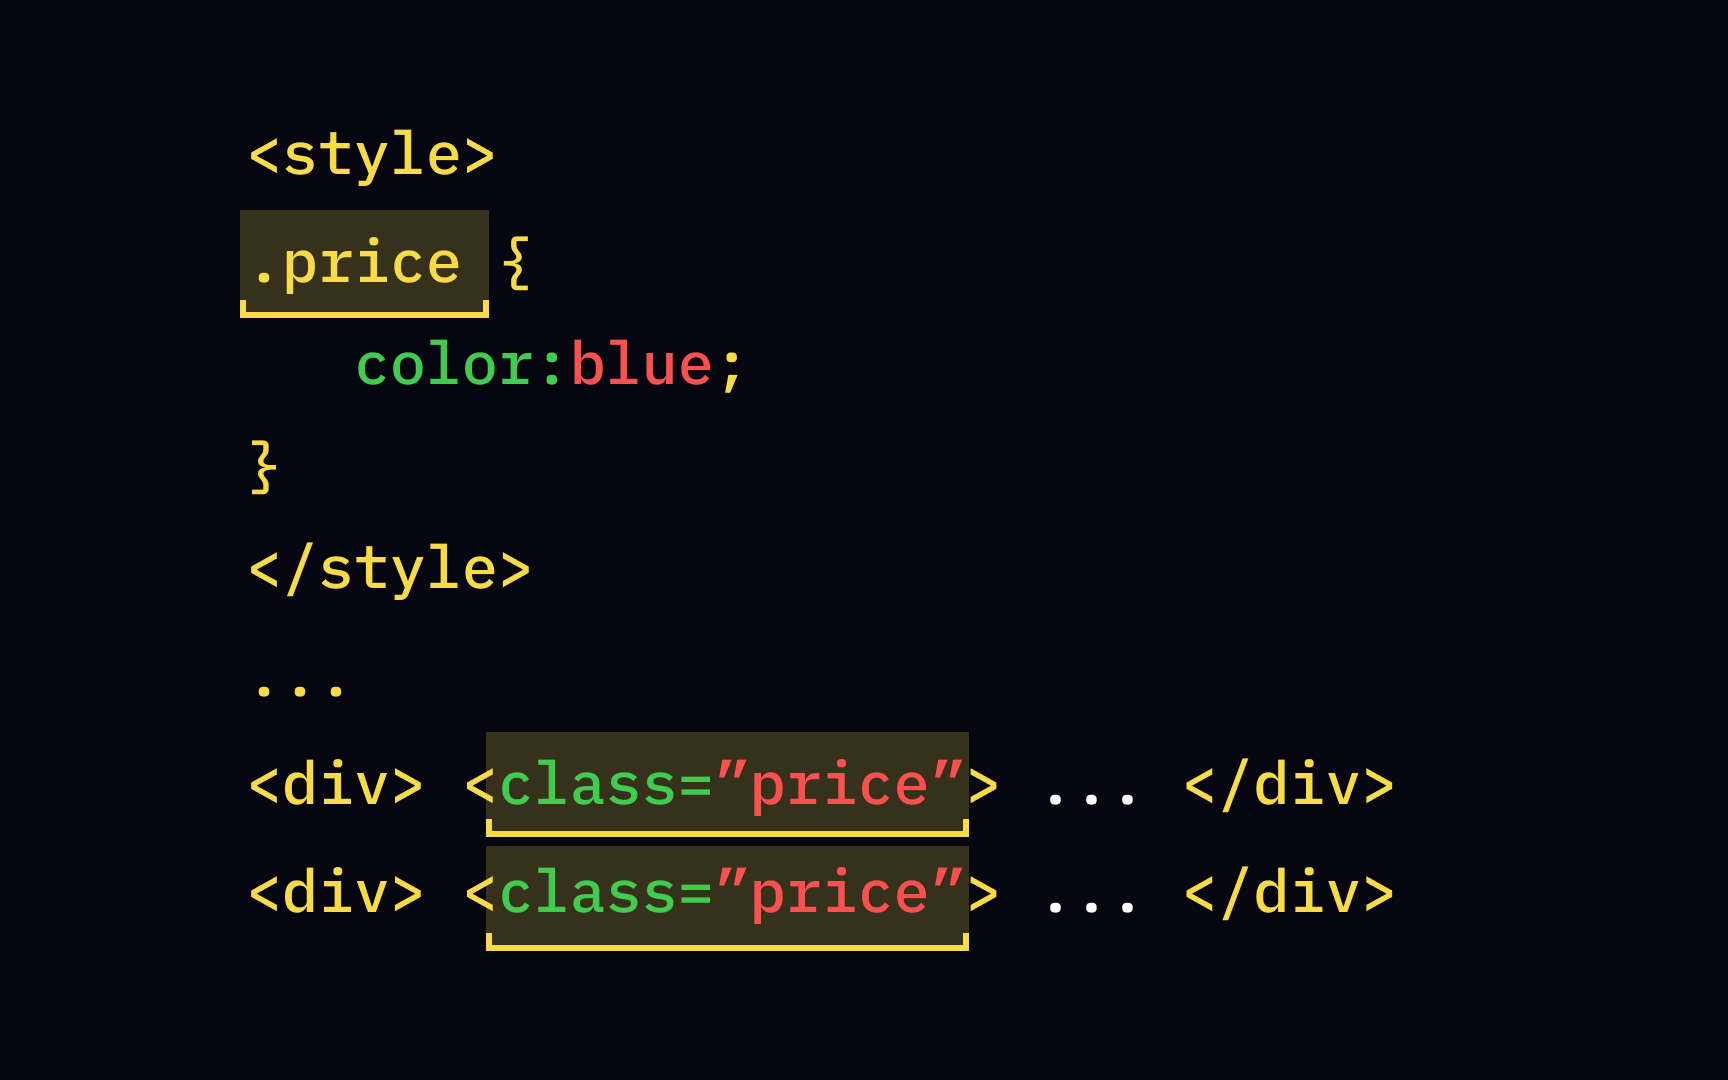
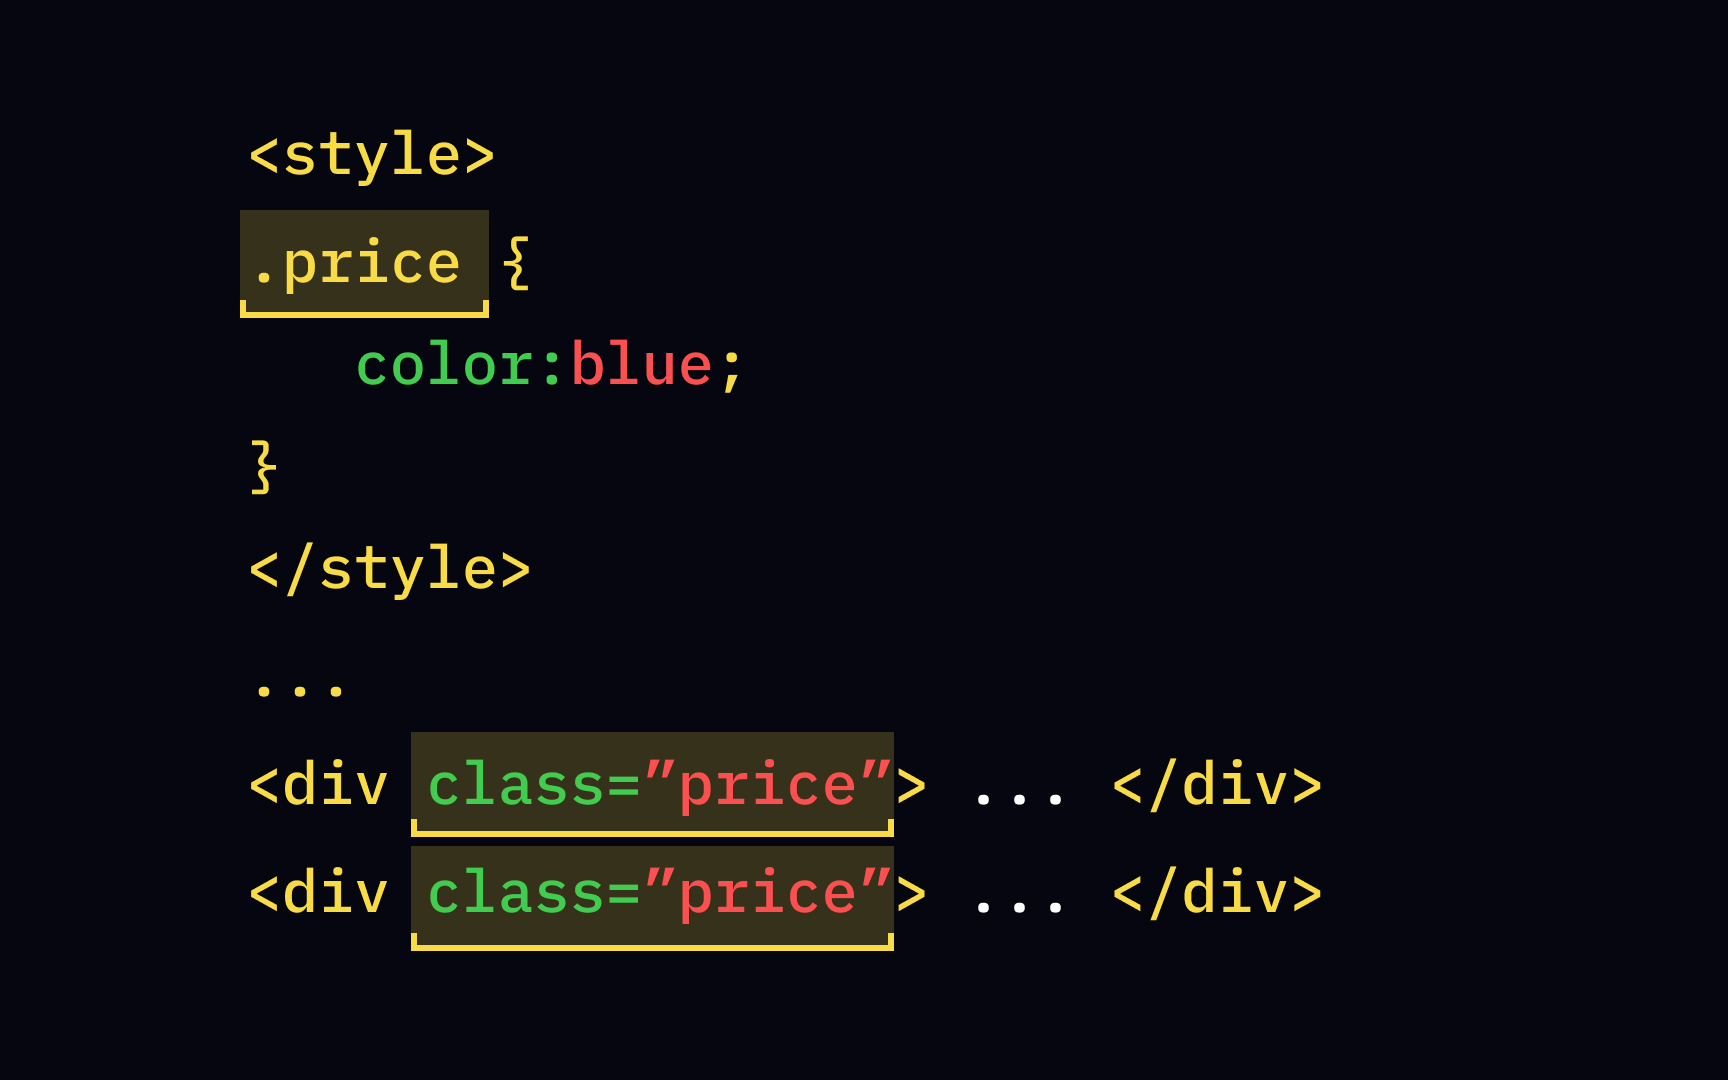
For example, if you want all elements of the class price to be displayed in blue, set the following rule:
.price {
color:blue;
}
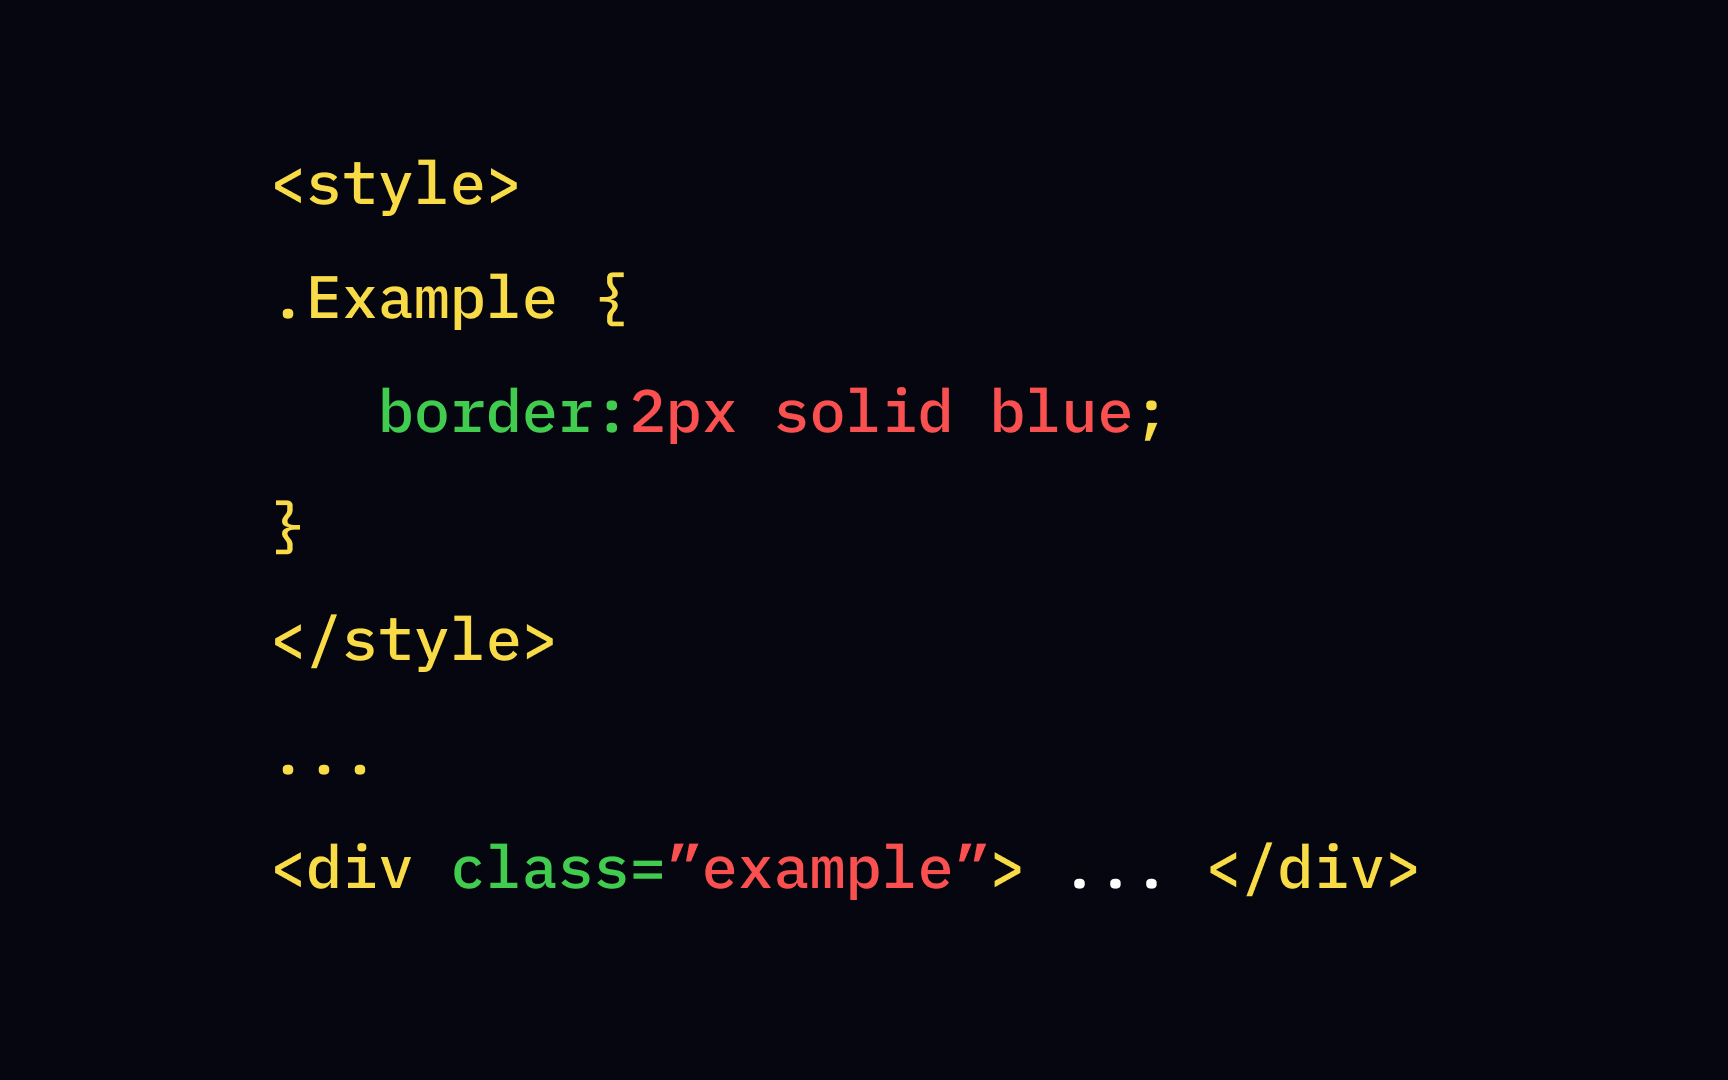

Similar to id values, class values are also case sensitive. If your attribute starts with a capital letter, the selector referring to that class should also start with the capital letter and vice versa. This means that if you set the class attribute to class=" example" and try to set a rule for it using the selector .Example, it simply won't work.
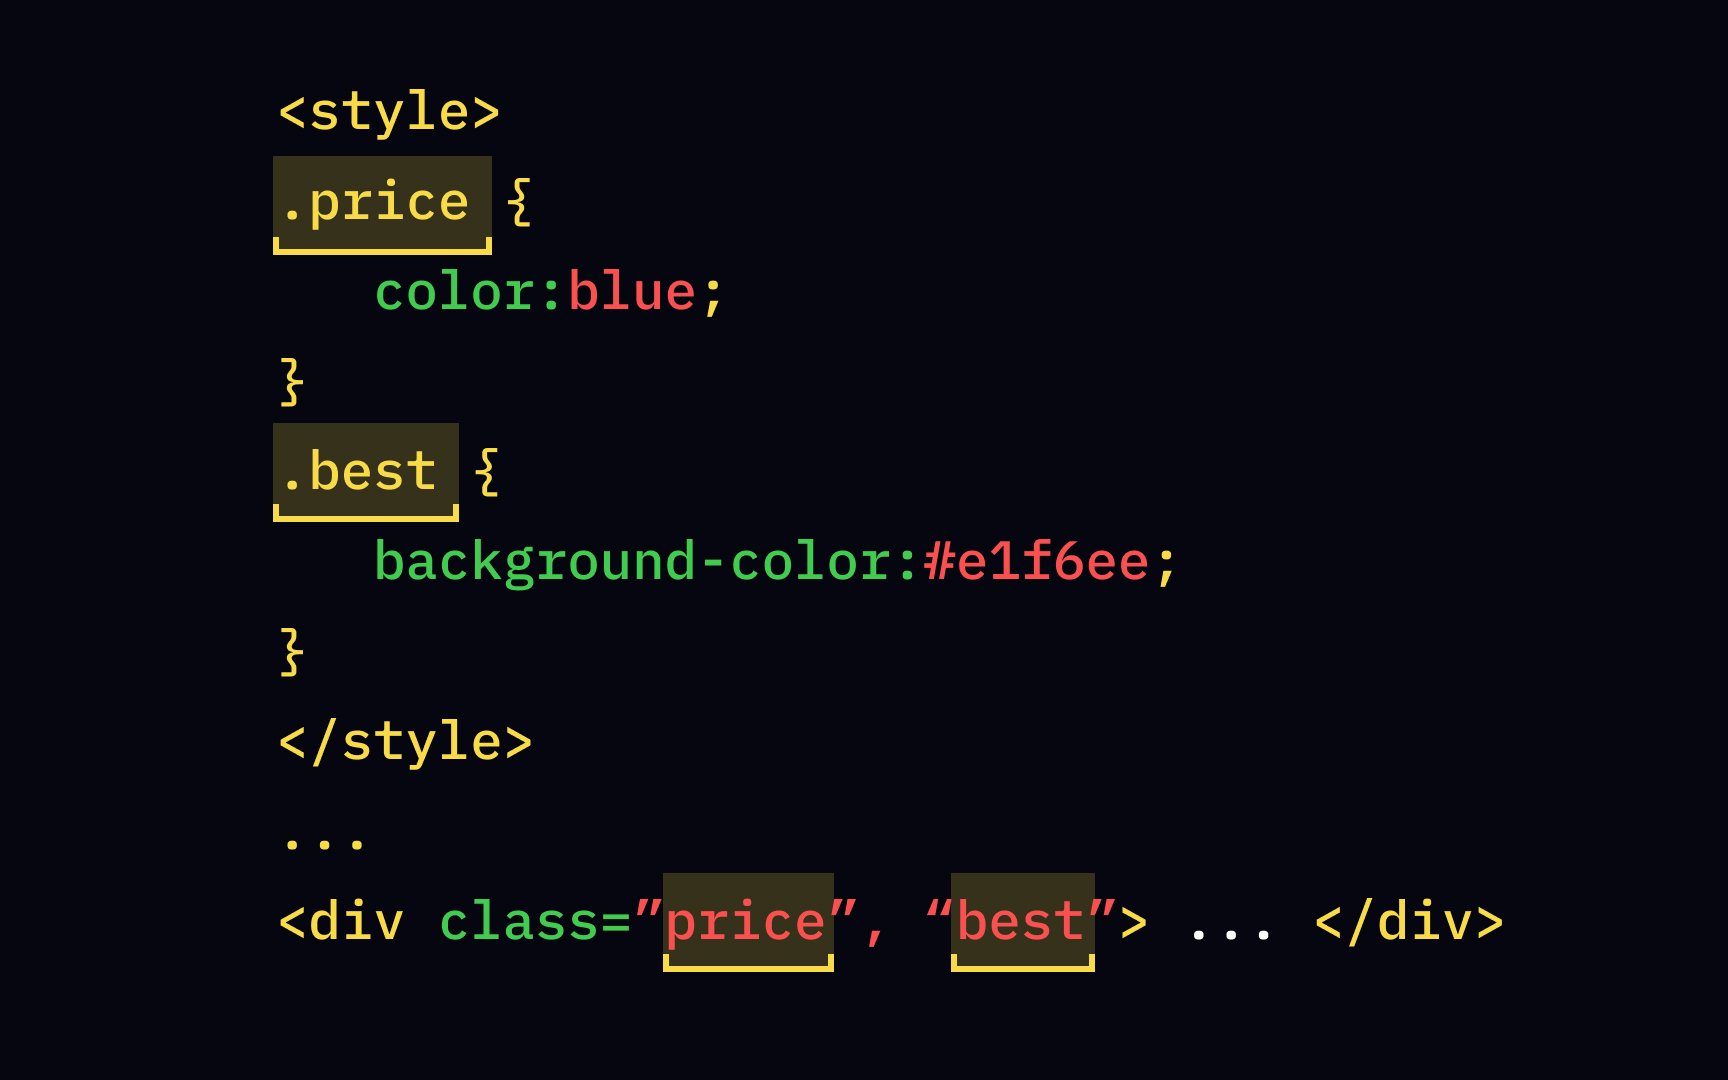
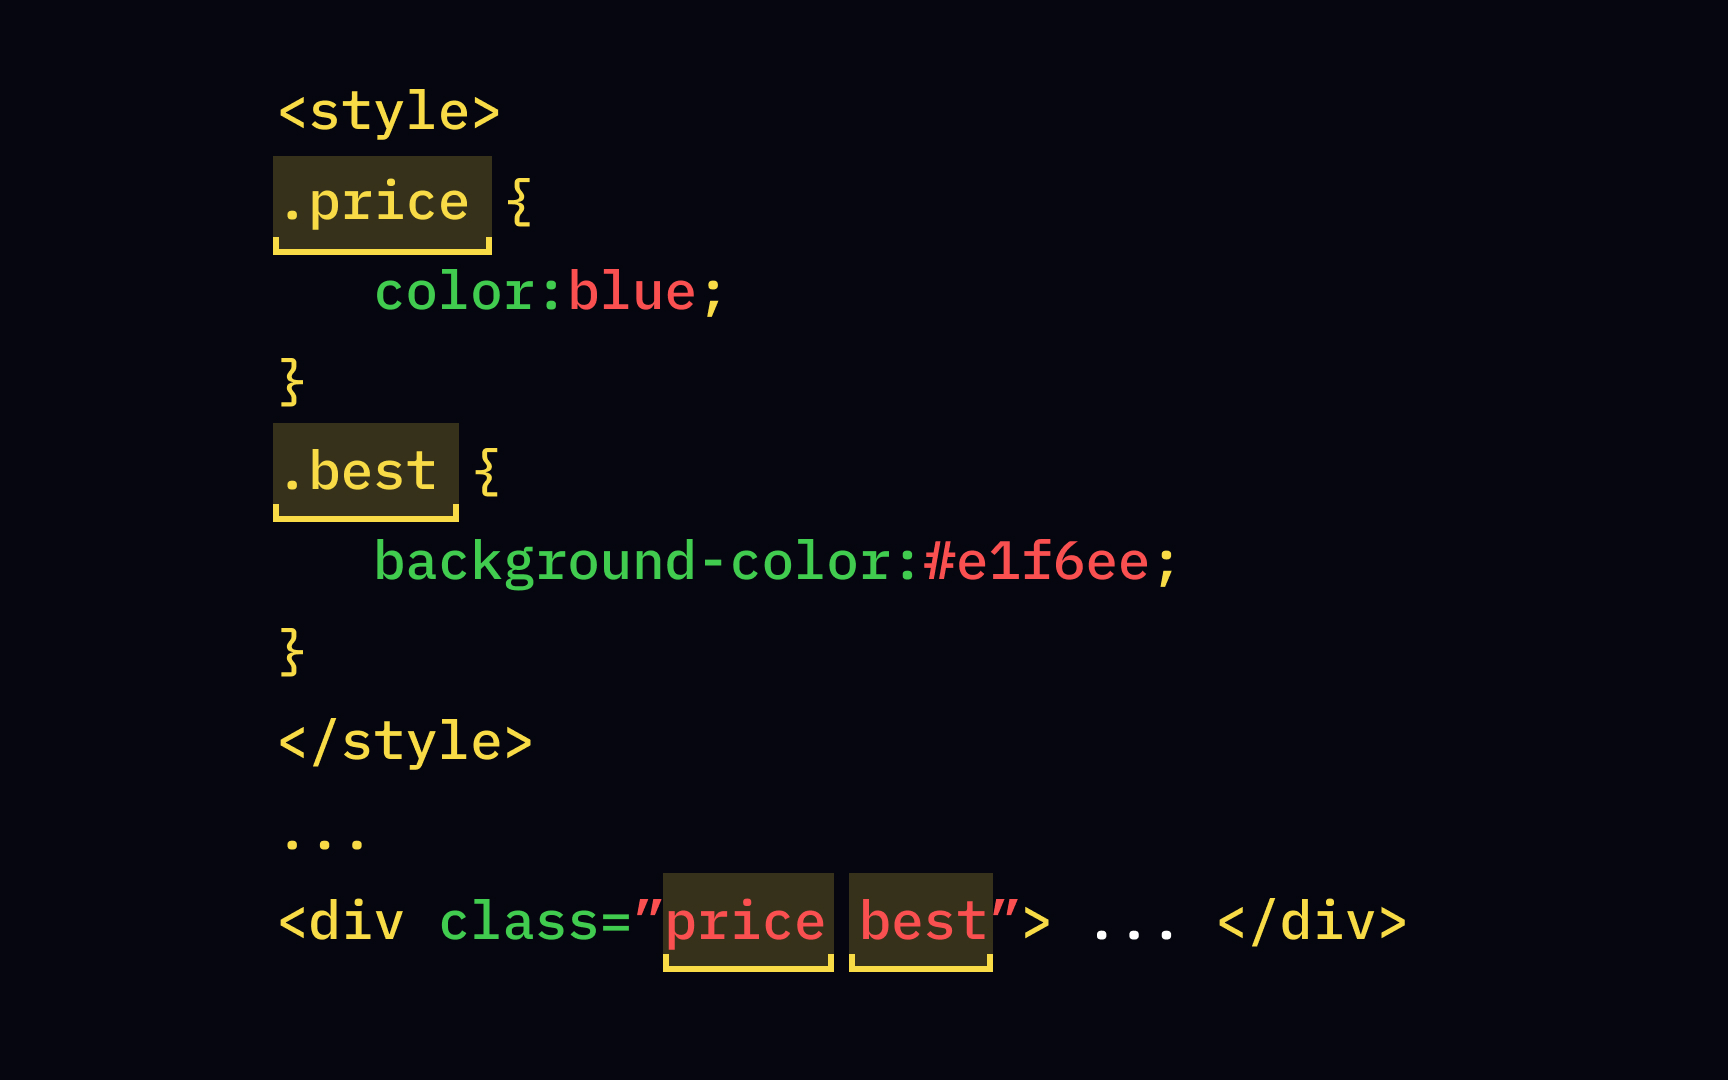
One of the benefits of using classes is that one element can belong to more than one class. To list classes, write them within the class attribute value separated by single spaces.
Let's say you have a price best", and add the following
.price {
color:blue;
}
.best {
background-color:#e1f6ee;
}
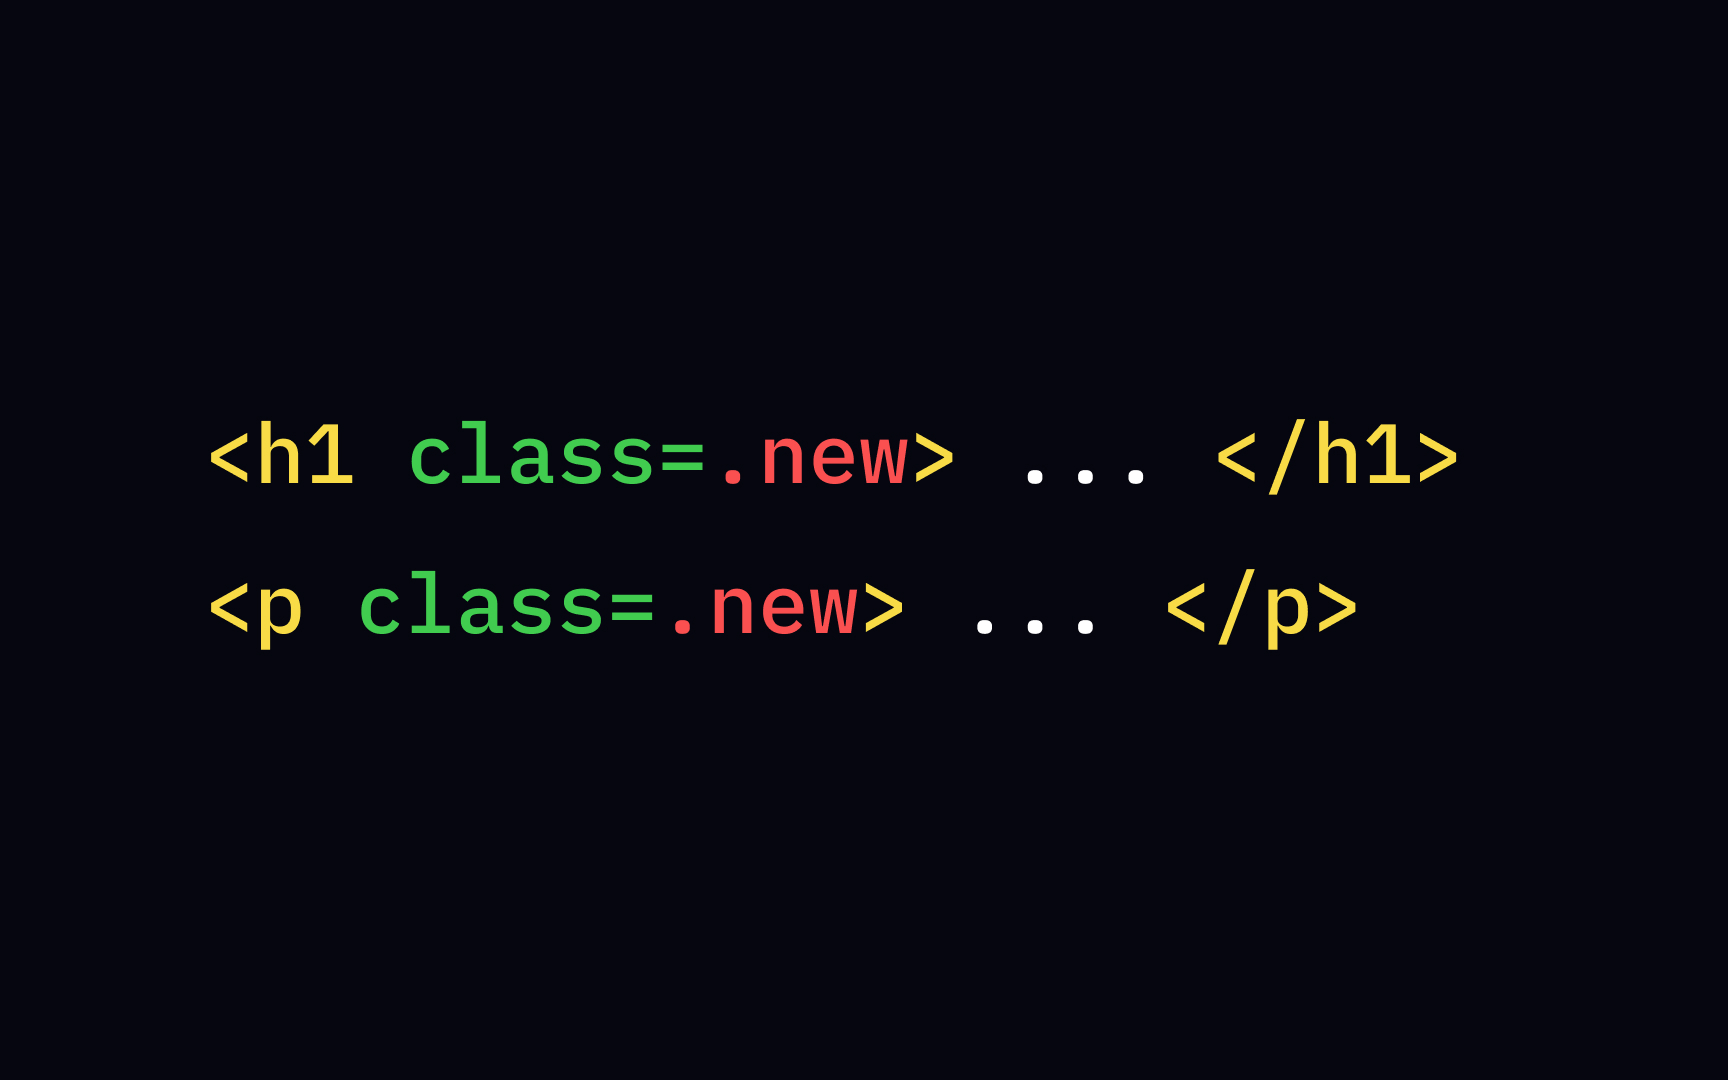
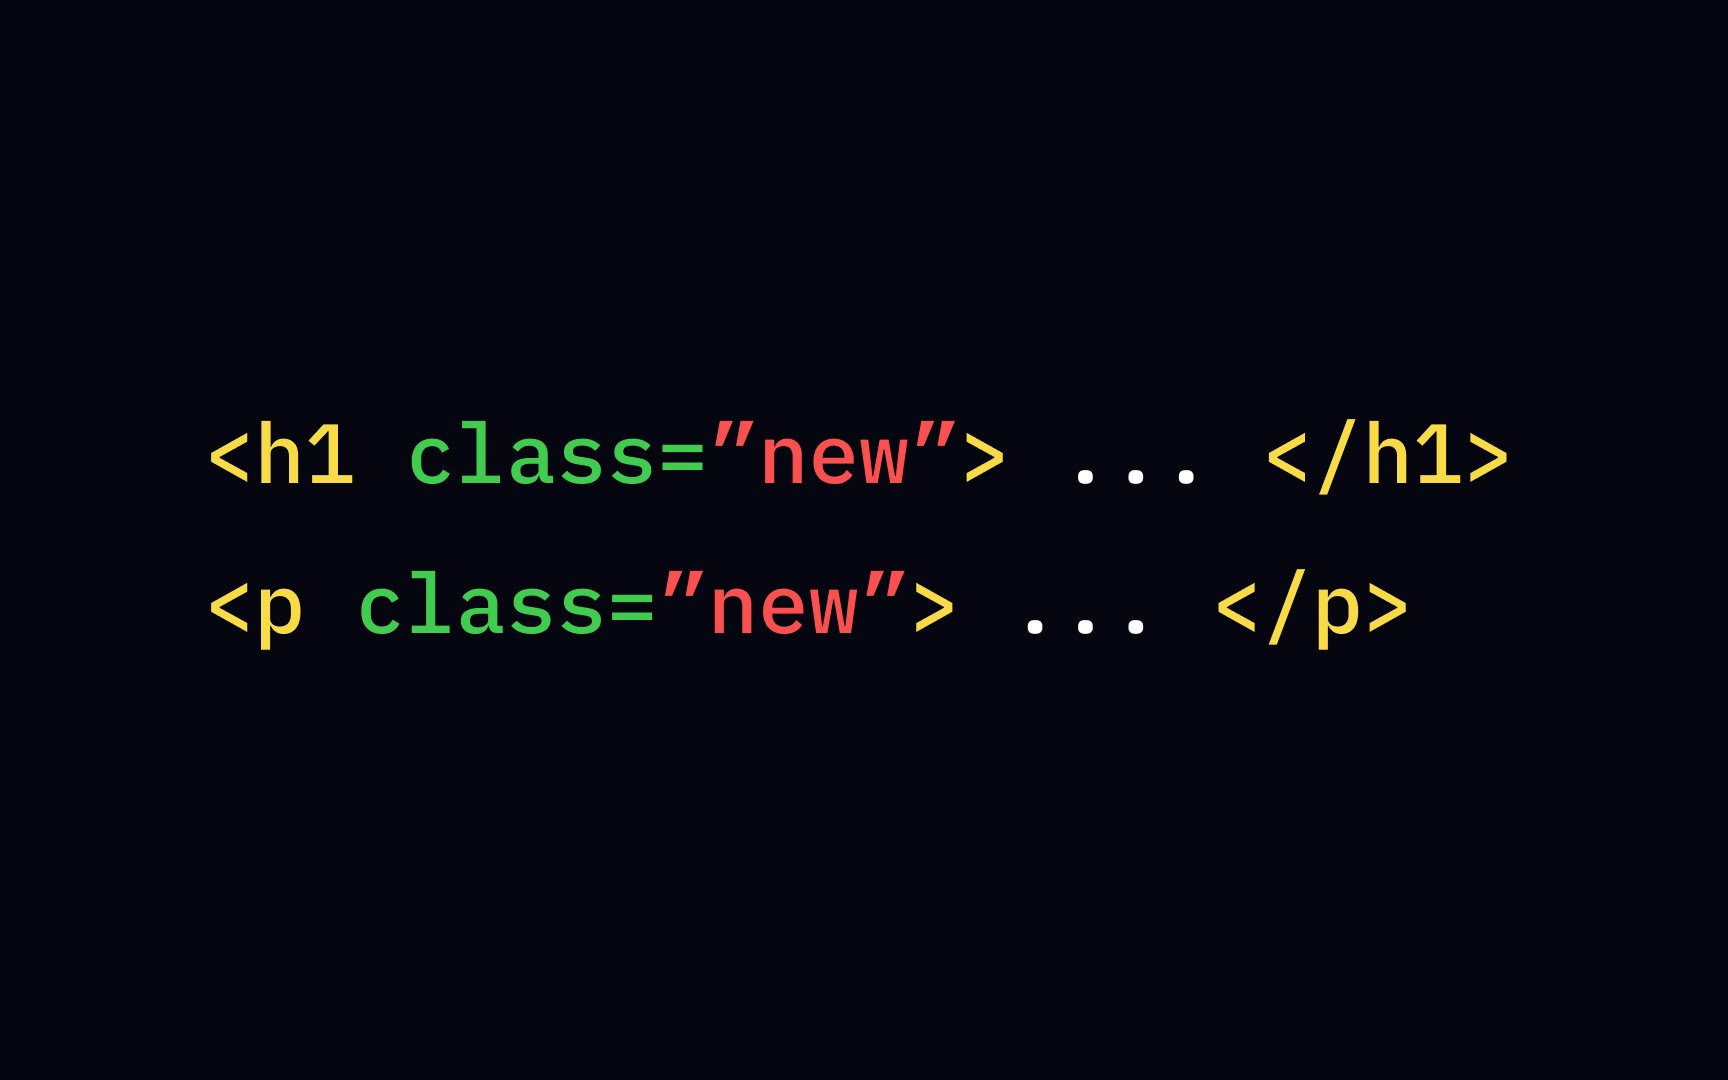
Since one element can belong to multiple classes, it's also possible for different types of elements to belong to the same class. For example, if you want all new information to be displayed on a pink background (for whatever reason), be it new headings or new paragraphs, add the "new" class to the elements <h1> and <p> and create a rule for the selector .new:
.new {
rgb(255, 230, 230
}
Selectors are one of the most important aspects of class attribute.
References
Top contributors


Topics
From Course

Share


Similar lessons

Intro to HTML

Intro to HTML Elements
