Outlining Solutions
Learn how to outline and refine solutions that drive impactful product decisions using the OST framework
When creating an opportunity solution tree (OST), we brainstorm different ways to tackle the opportunities we've identified earlier. At this stage, our goal is to explore many paths, giving us flexibility in how we solve each opportunity. Once we've outlined some promising solutions, we prioritize them based on which ones are likely to have the most impact and can be done with the resources we have. Remember, an OST isn't static — it changes as we refine ideas, gain new insights, and make adjustments. This ongoing cycle of outlining, testing, and refining helps ensure we implement the most effective and practical solutions. In this lesson, we'll go over the best practices for planning solutions in OSTs.
A solution in an opportunity solution tree can be anything that helps solve a problem or meets a need. This can be a product, a feature, a service, a workflow, a process, documentation, or anything else that customers use. For example, if customers struggle to find information on a website, a solution might be adding a search bar (a feature), creating a help center (documentation), or improving the way pages are organized (a workflow). The key is that the solution directly addresses the opportunity or problem identified, making the user experience better and supporting the overall goals of the product.
Focus on solving one opportunity with a small, targeted solution. Avoid creating large, project-sized solutions that try to address multiple opportunities at once. These larger efforts can take weeks or months to deliver, slowing down progress.
By focusing on one opportunity at a time, you can ship updates frequently, sometimes even daily, improving the product step by step. For example, if customers are having trouble with the payment process, rather than redesigning the entire checkout flow, start by simplifying the payment options. This small change solves one clear issue and can be rolled out quickly. By addressing one opportunity at a time, you can continuously improve the product and deliver value to customers faster.[1]
When addressing a specific opportunity, don’t settle on the first solution you think of. Explore a few different solutions before choosing the best one. This helps you avoid jumping to conclusions and ensures you consider multiple approaches that could work. For example, if users are struggling with account setup, you could simplify the form, add tooltips, or offer a guided setup. By generating a few ideas, you can choose the most effective way to address the opportunity.
When choosing a solution, it’s important to assess the risks involved. Ask yourself: How much risk does this solution have? How likely is it to fail, and what would happen if it did? Also, consider how much risk your organization can handle and how much time you have to make a decision. For example, adding a brand-new feature might have higher risk if users don’t understand it, and your team may not have time to fix it if it fails. A lower-risk option could be improving an existing feature. By assessing risks carefully, you can pick the solution that’s safe and fits your timeline.
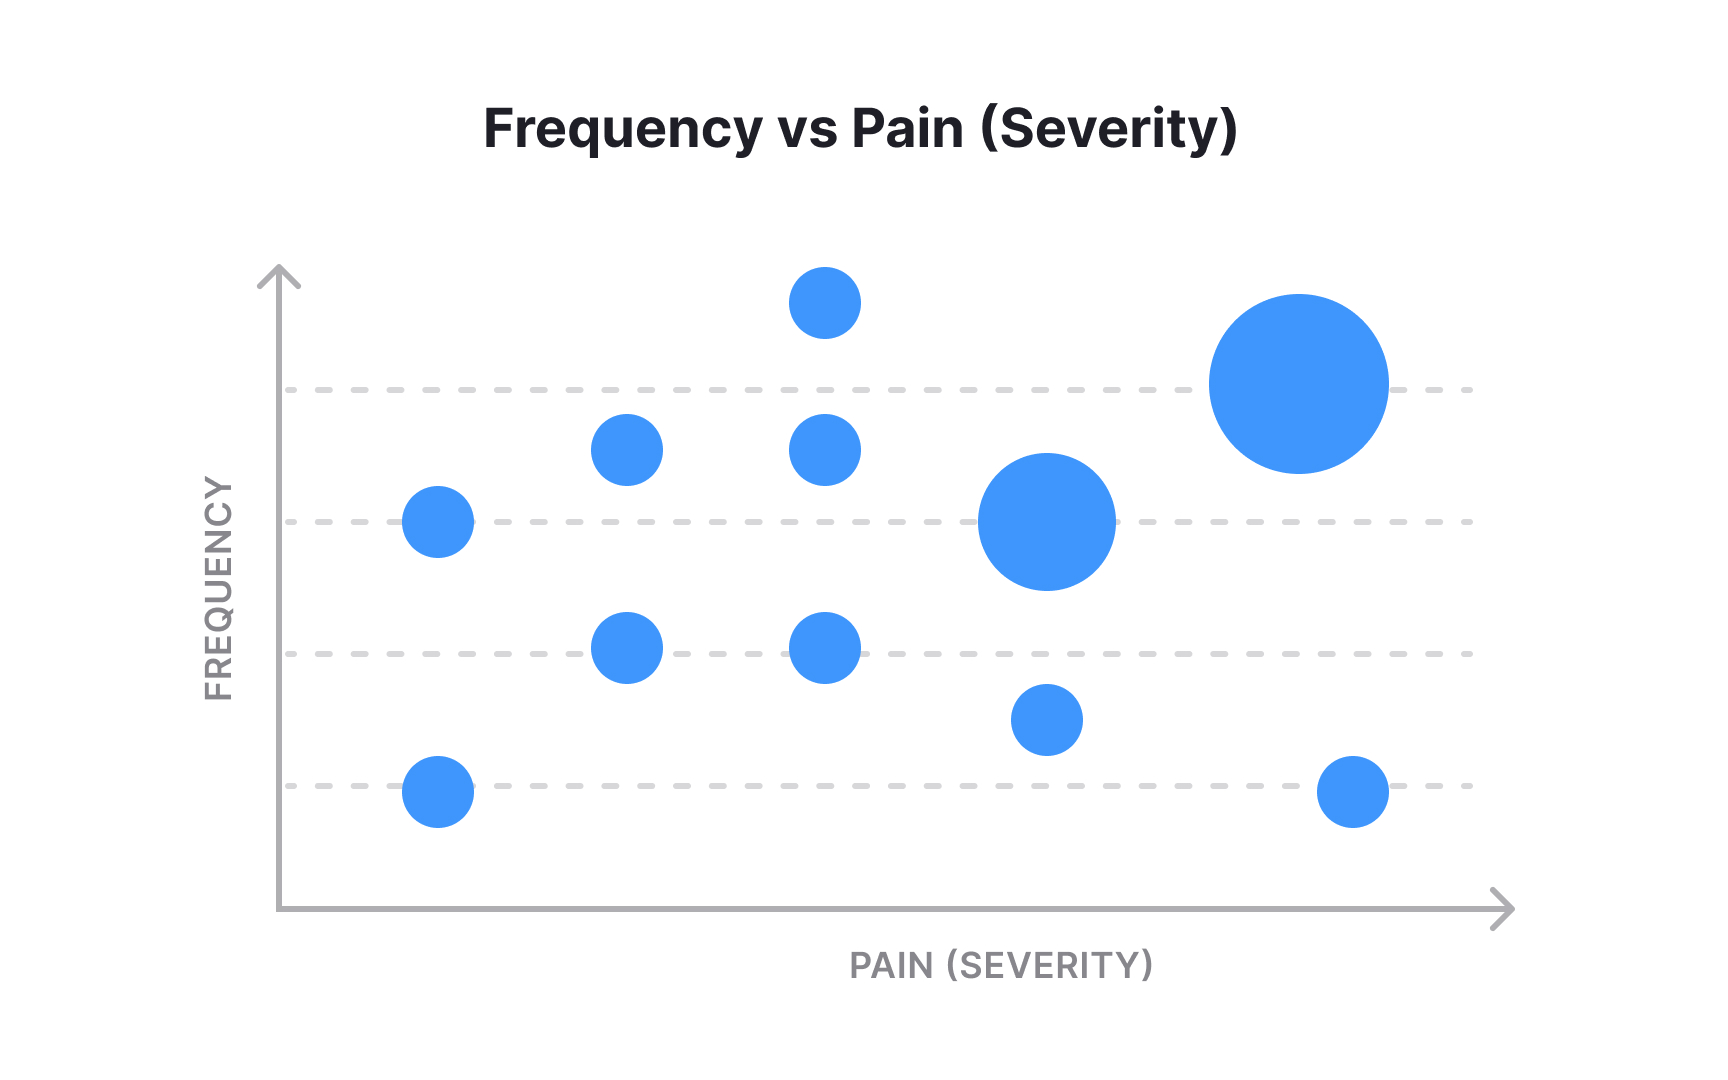
Once you've identified customer problems, you can't solve them all. To decide what matters, product teams use a prioritization matrix based on pain (severity) and frequency, filtered by reach.
- The critical zone (high pain, high frequency). These are the "hair on fire" problems. Customers encounter these often, and they block them from getting value. For example, a slow
checkout process that times out weekly for 50% of users. These are your highest value opportunities. - The friction zone (low pain, high frequency). Death by a thousand cuts. These are small annoyances (like an extra click or a confusing label) that users hit constantly. While not blocking, they destroy user delight and retention over time. For example, a login session that expires every 24 hours, forcing daily logins. Fix them in groups to improve overall product health, especially if they affect all users.
- The table stakes zone (high pain, low frequency). Rare but catastrophic events. These define trust. If users lose data or can't reset a password, it may only happen once, but it breaks the relationship. For example, the app crashes and deletes a draft. Fix for stability. You cannot scale if these exist.
- The distraction zone (low pain, low frequency). Niche issues or minor cosmetic bugs that rarely occur. Ignore or deprioritize. Be disciplined here. Fixing these often comes at the opportunity cost of working on the critical zone.
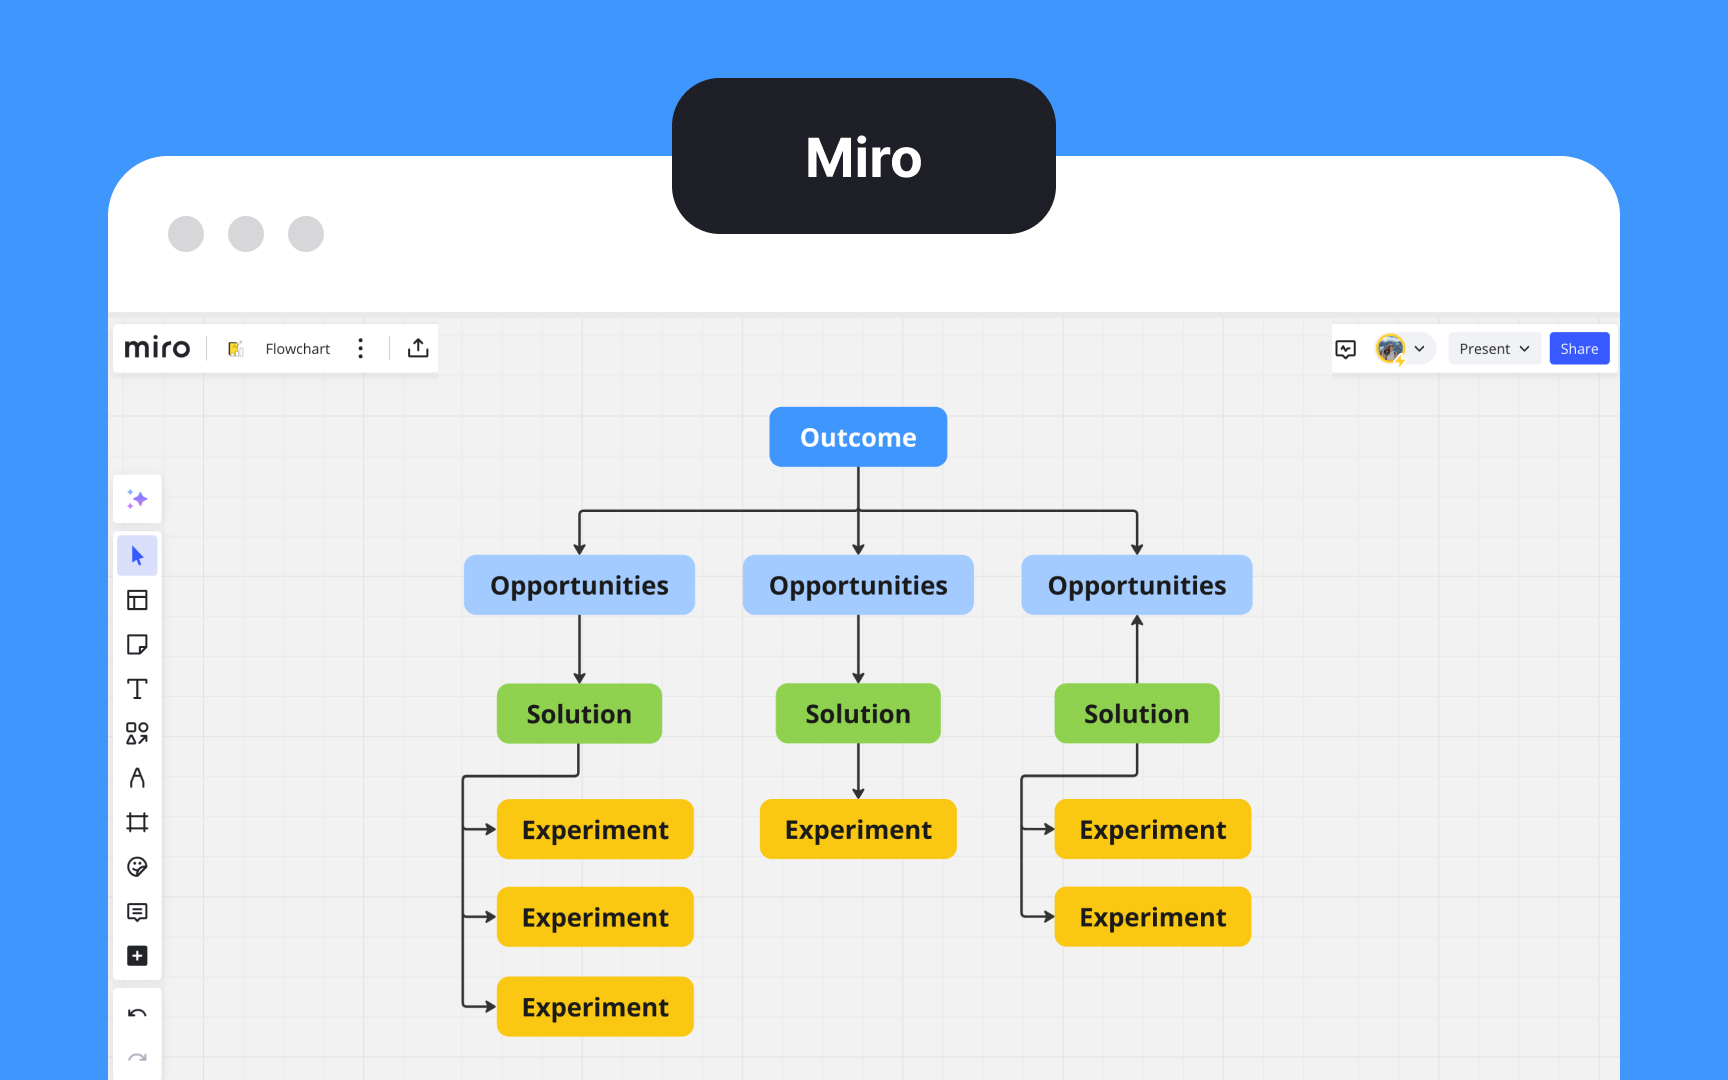
You can create an opportunity solution tree using any tool that lets you connect shapes and arrows:
- For beginners, tools like Miro or Mural, are great for digital whiteboards and easy collaboration.
- If you’re looking for flowchart software, Lucidchart is simple and effective for structuring trees.
- For teams that need something quick and free, LucidSpark or FigJam templates can do the job.
- If you're looking for a tool built specifically for opportunity solution trees, consider using Vistaly.
Update your opportunity solution tree when the overall goals are still relevant, but new data or insights come in. A good rule of thumb is to update your
Also, update when you’ve solved some opportunities and need to shift focus to others. If feedback or research changes your understanding of a problem slightly, adjust the tree without starting from scratch. Regular updates keep the OST flexible and ensure your team is addressing the most current and important needs.
You need a new opportunity solution tree when circumstances shift and your current tree no longer fits your goals or opportunities. Here are some key moments to consider building a new tree:
- A major change in product goals or business strategy
- New user needs or problems arise that weren’t previously considered
- Significant market or competitor changes that impact your current path
- The original outcome in the tree has been achieved or is no longer relevant
- Exploring a new product area or feature that requires fresh solutions
- The current tree becomes too complex or cluttered to navigate effectively
Creating a new
When presenting your opportunity solution tree to stakeholders, always tailor the level of detail to each person. Start by asking who needs to stay updated, then decide how much information to share with each one.
For stakeholders closely involved in the work, like team leads or product managers, you can present the entire opportunity solution tree, including every

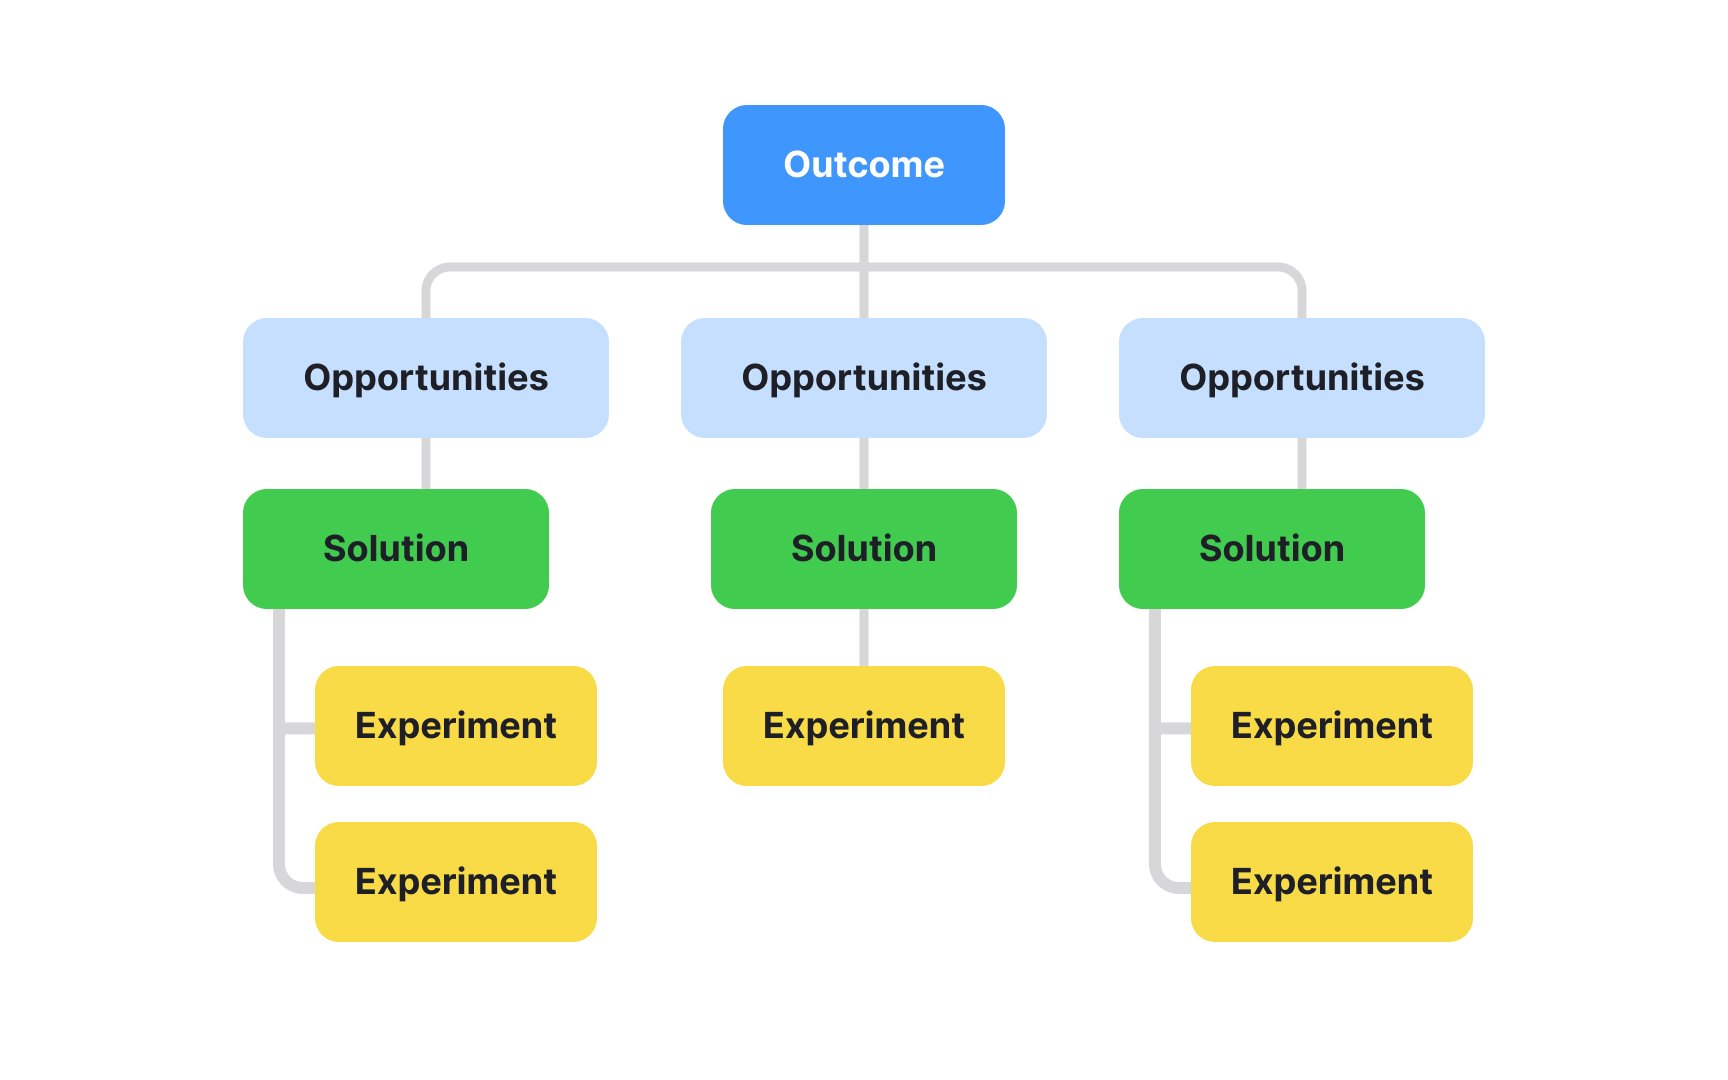
Color coding your opportunity solution tree helps keep things organized and easy to understand. You can use different colors to highlight specific parts of the tree. For example, use one color for opportunities, another for solutions, and a third for outcomes. This makes it easier for your team and stakeholders to quickly see the important details.
You can also use color coding to track progress. For example, green can show completed work, yellow for work in progress, and red for problems or blocked areas. The goal is to make the
Before adding opportunities and solutions to your opportunity solution tree it’s important to set clear criteria with your team and stakeholders for when to pursue or reject opportunities and solutions. This ensures everyone is on the same
For opportunities, define what makes an issue big enough to address. This could be based on how frequently it's mentioned by customers or how it impacts your business. For solutions, set clear measures of success. For example, how much a new feature should improve
Instead of just using customers to validate your ideas later, involve them early in the creation of your opportunity solution tree. By co-creating with customers, you get direct feedback on their pain points and priorities from the start, helping you identify the most valuable opportunities.
Gather feedback through
Co-creating ensures you're solving the right problems early on and avoids wasted time on irrelevant solutions. It also strengthens customer relationships, showing that their input is valued from the very beginning.
Once you've identified customer problems, you can't solve them all. To decide what matters, product teams use a
- The critical zone (high pain, high frequency). These are the "hair on fire" problems. Customers encounter these often, and they block them from getting value. For example, a slow
checkout process that times out weekly for 50% of users. These are your highest value opportunities. - The friction zone (low pain, high frequency). Death by a thousand cuts. These are small annoyances (like an extra click or a confusing
label ) that users hit constantly. While not blocking, they destroy user delight andretention over time. For example, alogin session that expires every 24 hours, forcing daily logins. Fix them in groups to improve overall product health, especially if they affect all users. - The table stakes zone (high pain, low frequency). Rare but catastrophic events. These define trust. If users lose data or can't reset a
password , it may only happen once, but it breaks the relationship. For example, the app crashes and deletes a draft. Fix for stability. You cannot scale if these exist. - The distraction zone (low pain, low frequency). Niche issues or minor cosmetic bugs that rarely occur. Ignore or deprioritize. Be disciplined here. Fixing these often comes at the opportunity cost of working on the critical zone.
References
Top contributors


Topics
From Course

Share


Similar lessons

Continuous Discovery Mindset

Business Outcomes vs. Product Outcomes
