Illumination Best Practices
Explore the best practices for 3D illumination to achieve visually stunning and realistic lighting effects in your 3D designs
Lights make a significant impact on how people perceive the world. It guides their attention and makes some objects stand out and others retreat into the shadows. Illumination helps us create a certain feel of the scene: bright, sunny, joyful, or conversely, gloomy, dramatic, or mysterious.
In this lesson, you're going to learn the main components of 3D lighting affecting the subject, the intricacies of controlling light, and making full use of it in 3D space.
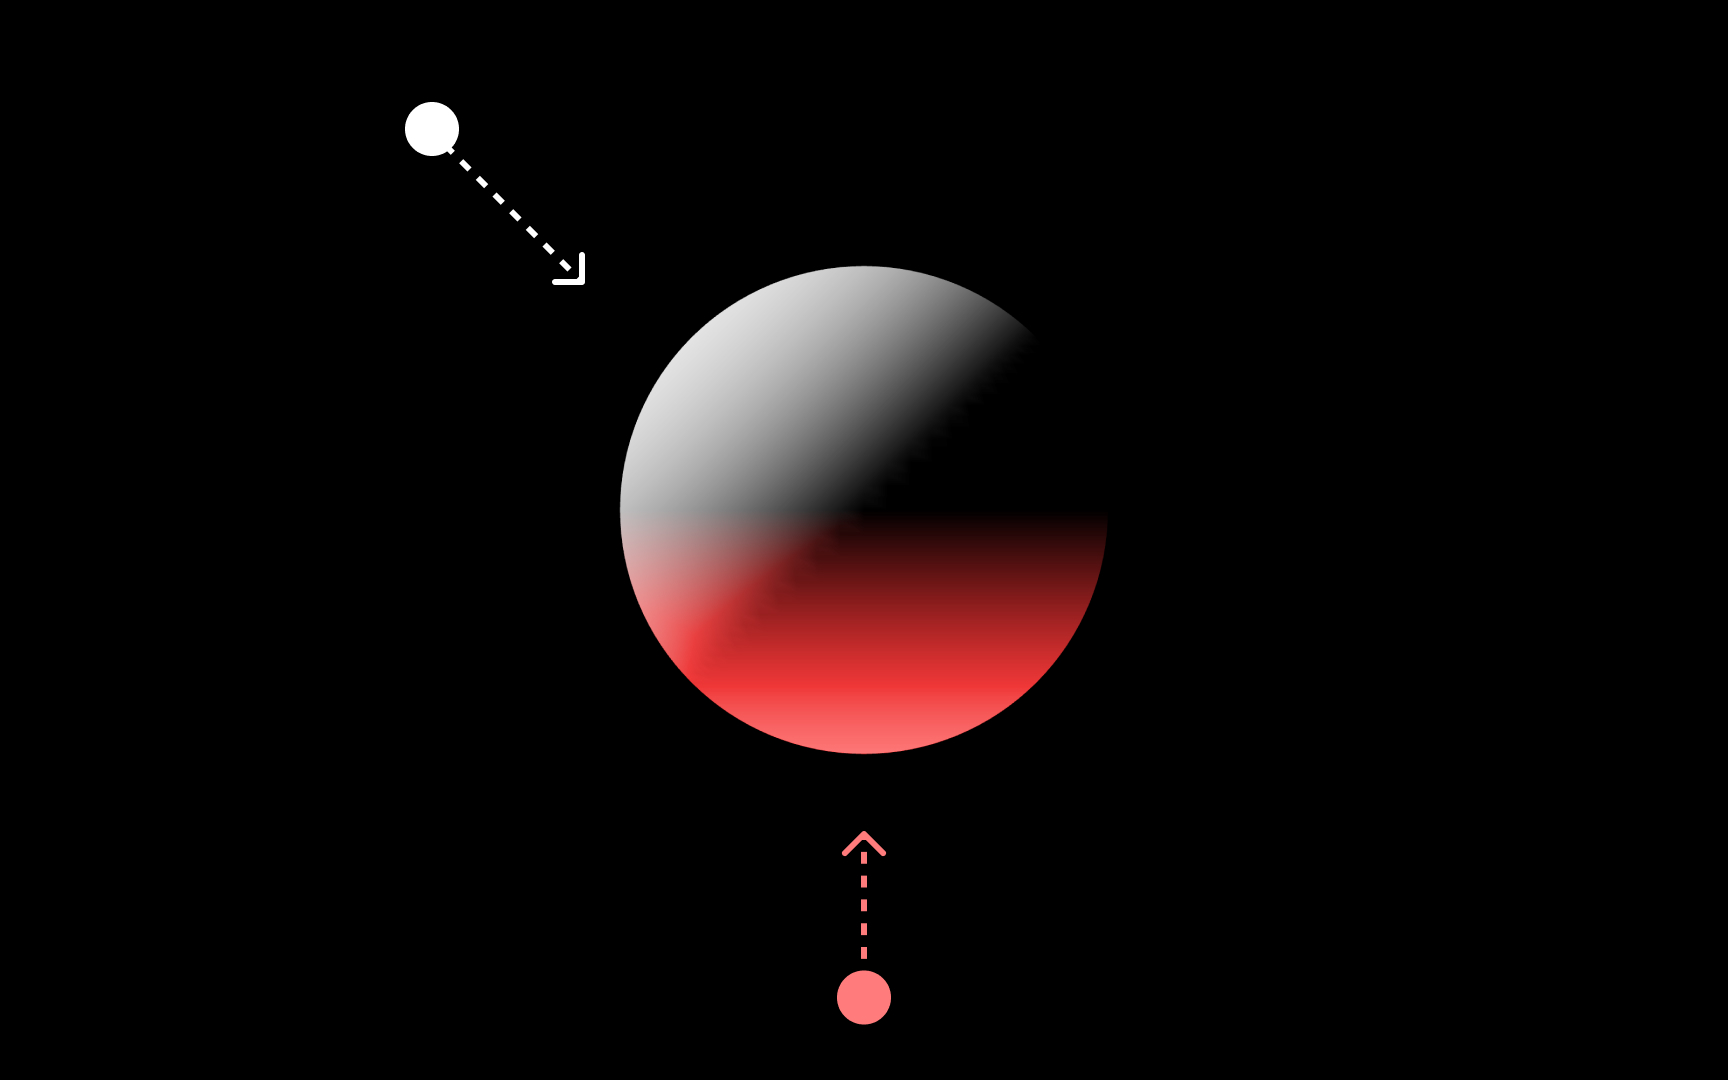
Light direction is the angle that the source of light comes from in relation to objects. The same object lit from different directions can look absolutely different and bring out different emotions. For example, a face lit up from the bottom seems dramatic and even intimidating. By changing the light direction, you can highlight the object, enhance the illusion of depth, and intensify details that you find essential.
Pro Tip: Don't forget about the balance — when you bring some parts to light, mute the other features or submerge them into darkness completely.
The light intensity defines the amount of source light emitting on the object. Adjusting the value, you can either show objects on the scene, highlight or hide them from viewers' eyes. Intense light rays bring out strong features, add contrast to the composition, and make the whole picture look vibrant. Subtle lighting, on the other hand, softens the edges and reduces the tension.
In reality, we can see and recognize objects due to the light rays hitting them from different directions and intensities and painting them with highlights and

The size of a light source can bring a significant difference to the scene. A small-sized light source casts distinct
You may spend hours polishing off the models and scene
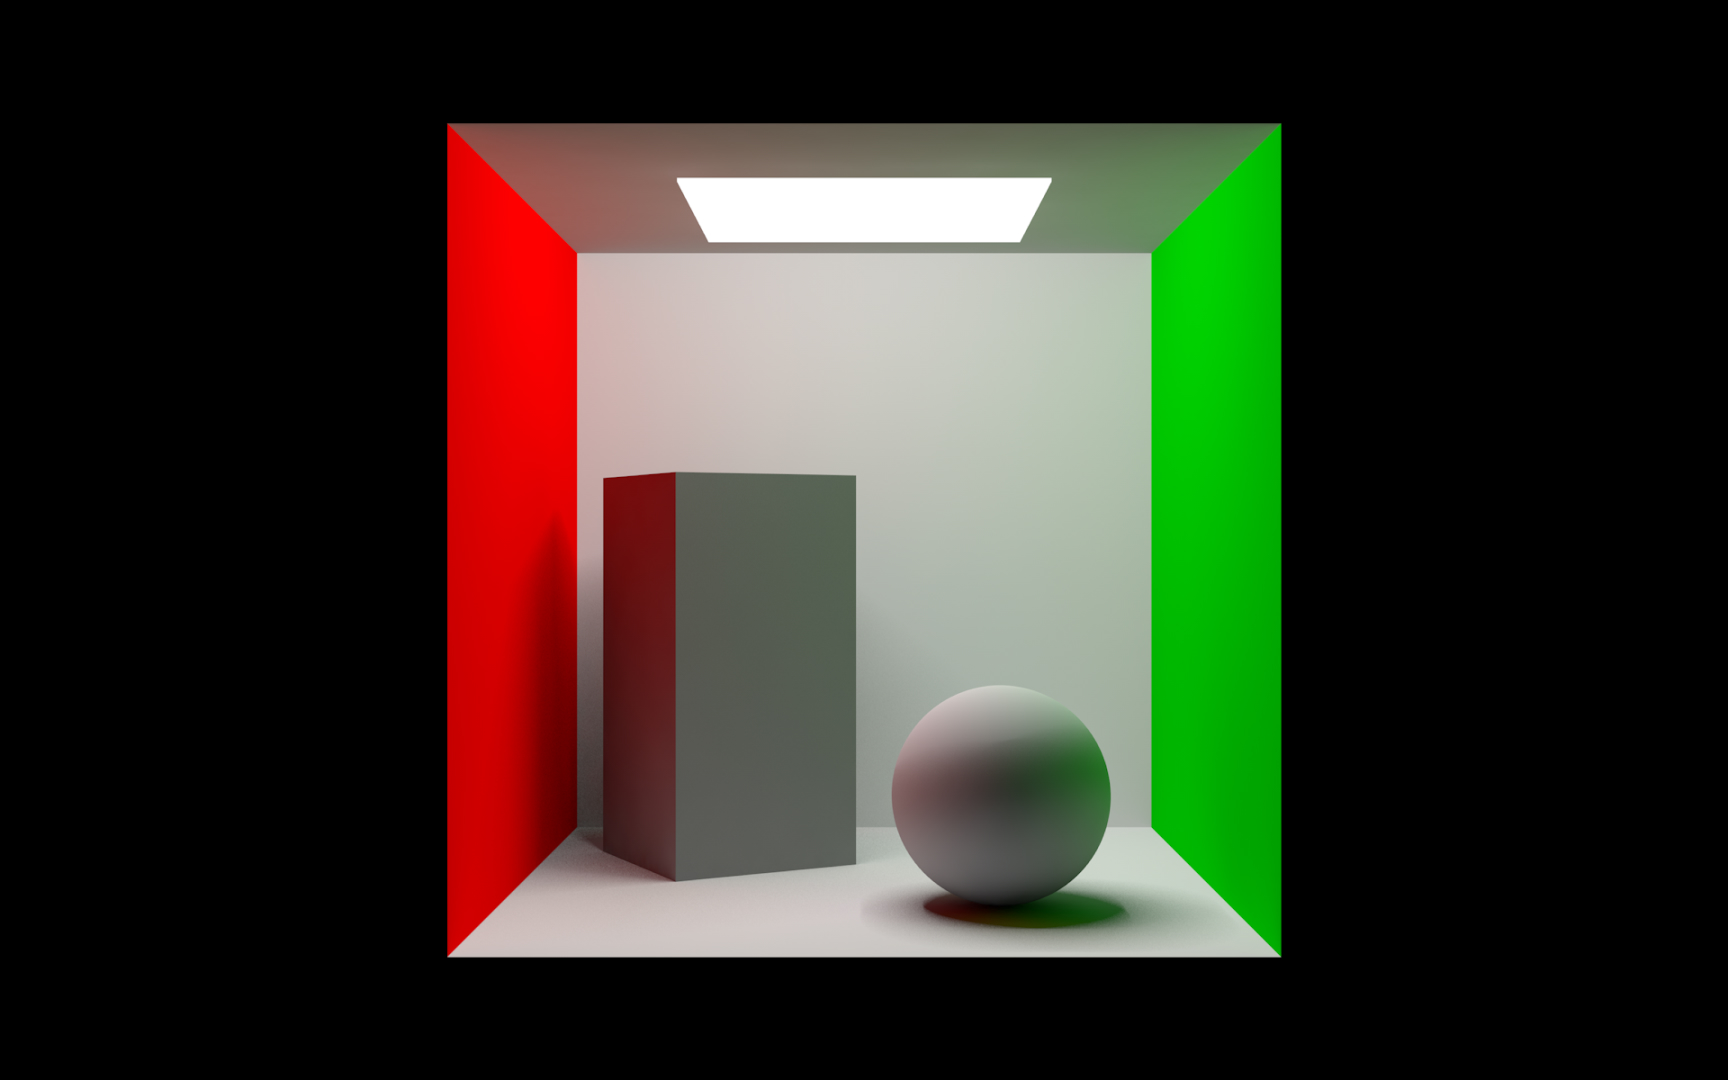
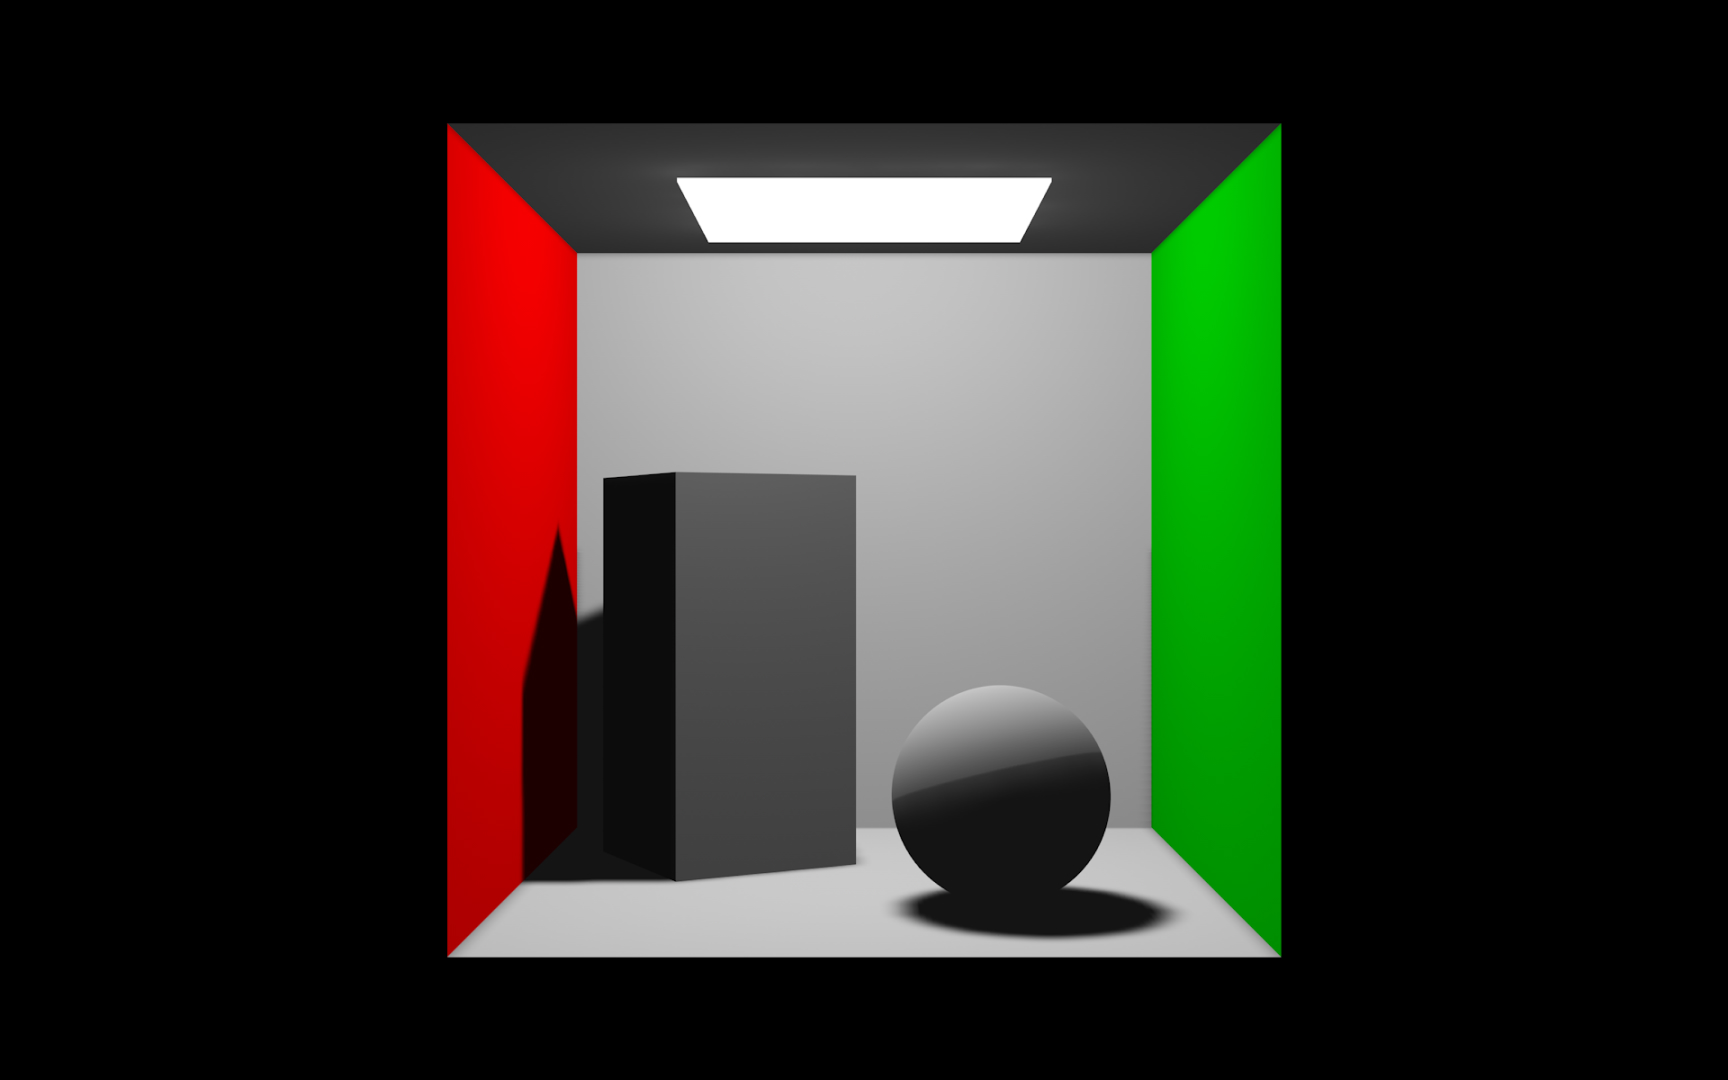
The lighting stage of 3D modeling is about reproducing the light properties we meet in the real world — realistic lighting. To make it right, 3D designers use the Cornel box.[1] It's a well-known method developed at Cornell University that 3D artists use to determine how accurately their computers render the lighting. With all the specific properties and specifications, such as the source of light direction and intensity, the
There's no light without darkness, and they usually work in tandem, affecting users in different ways. Designing a scene, keep in mind the light psychology behind each technique. Some lighting can carry positive feelings and bring joy and happiness. However, by playing around with light intensity, direction, and the size of the source light, you can bring out a dramatic feeling or define the sadness of the moment.
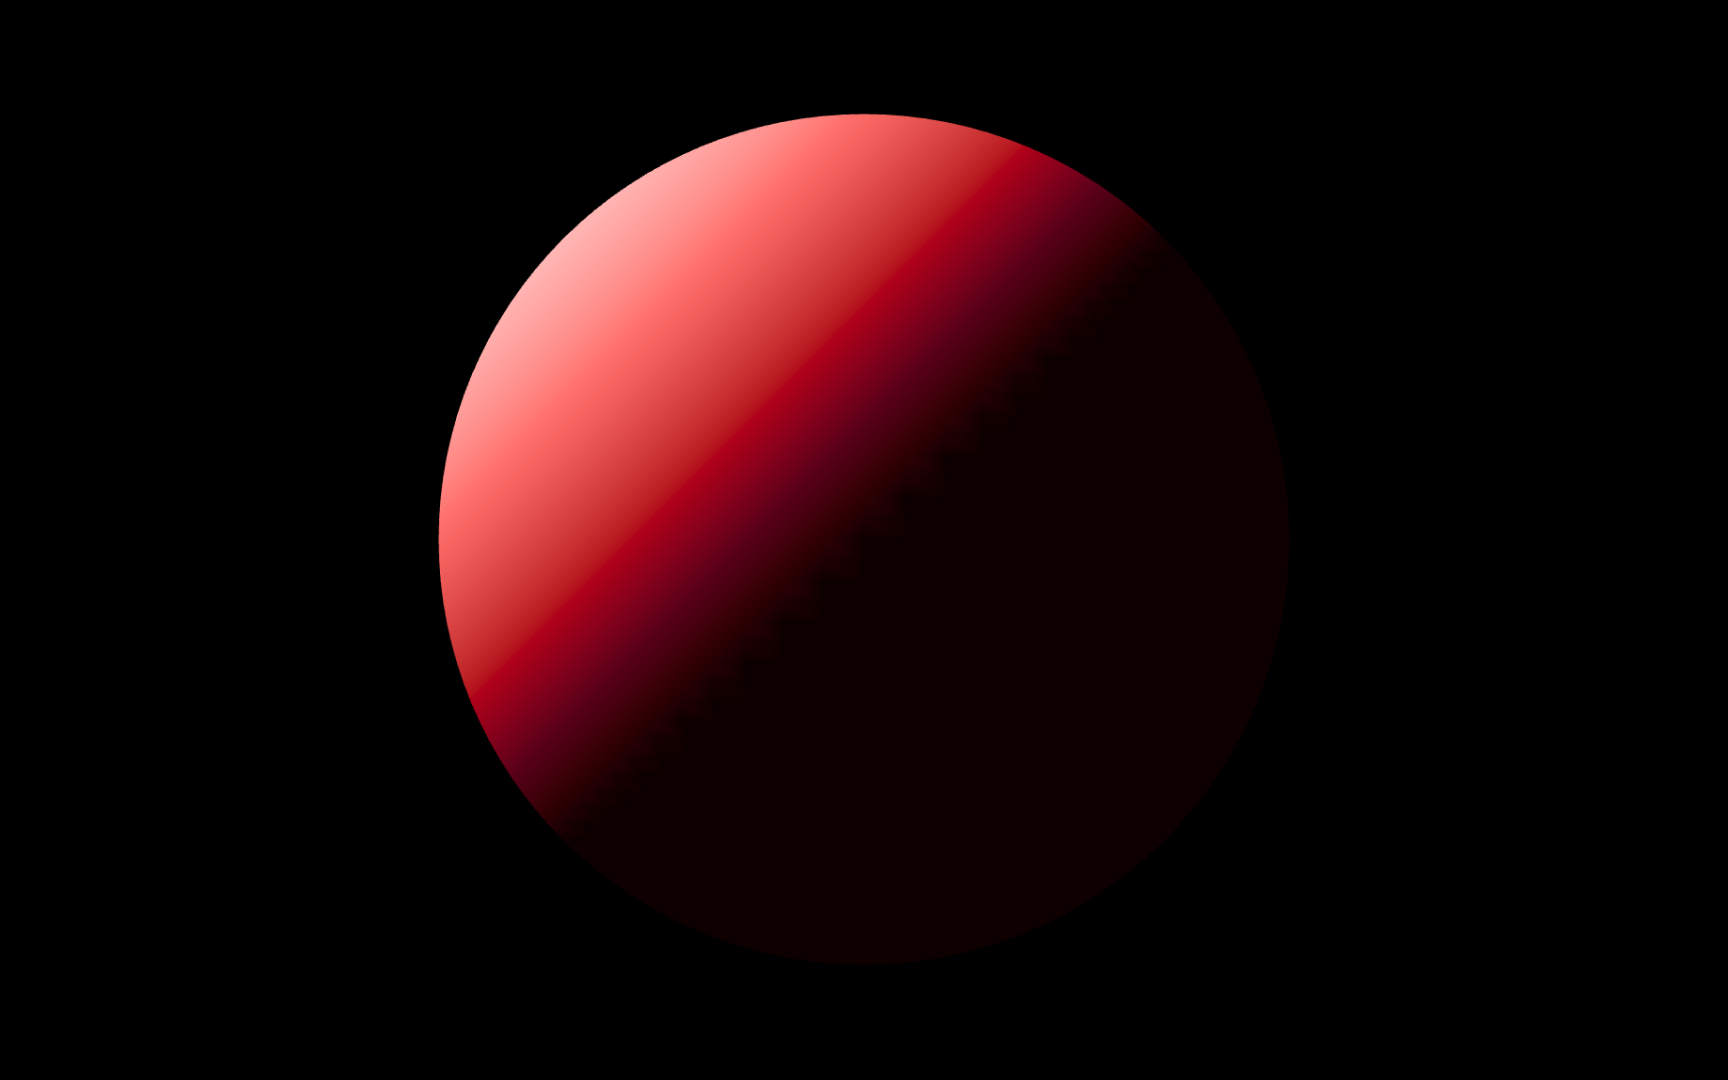
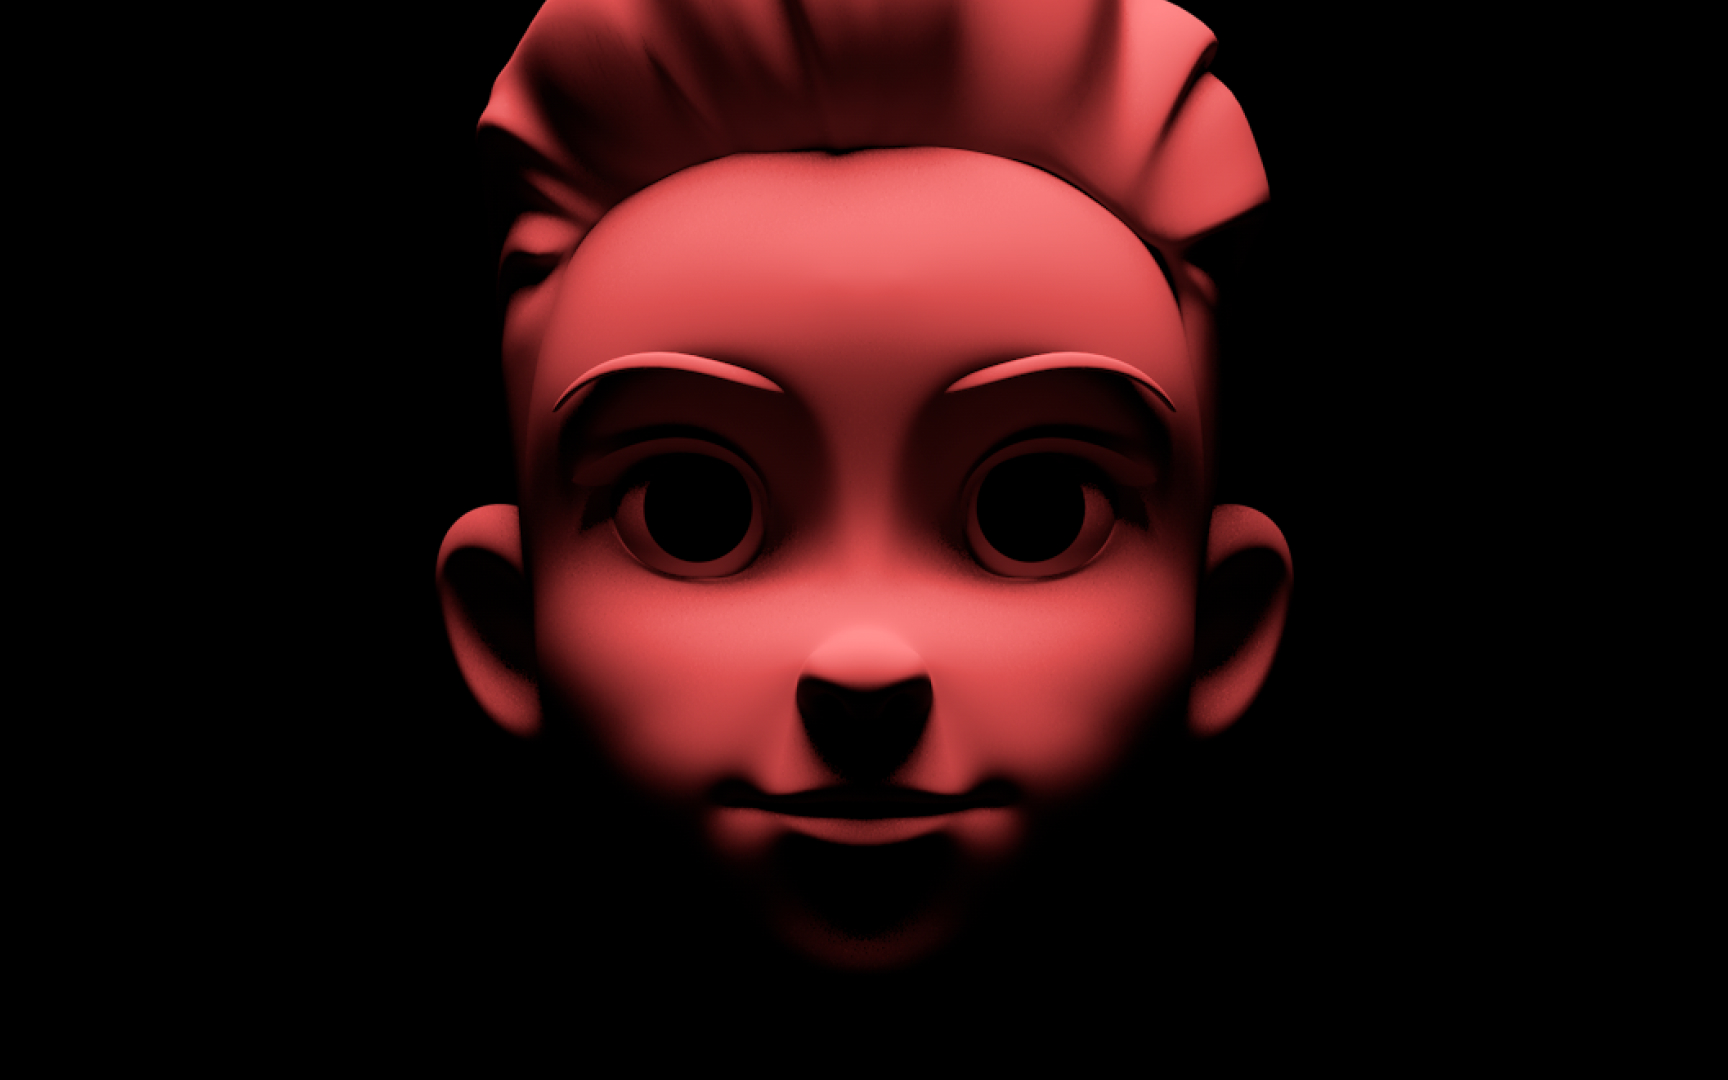
The direction of light can change the scene dramatically, and the bottom-to-top lighting proves it. This type of lighting is a good fit for campfire horror stories or dramatic scenes as it makes villains look even more powerful and fearsome and fills the surroundings with dark

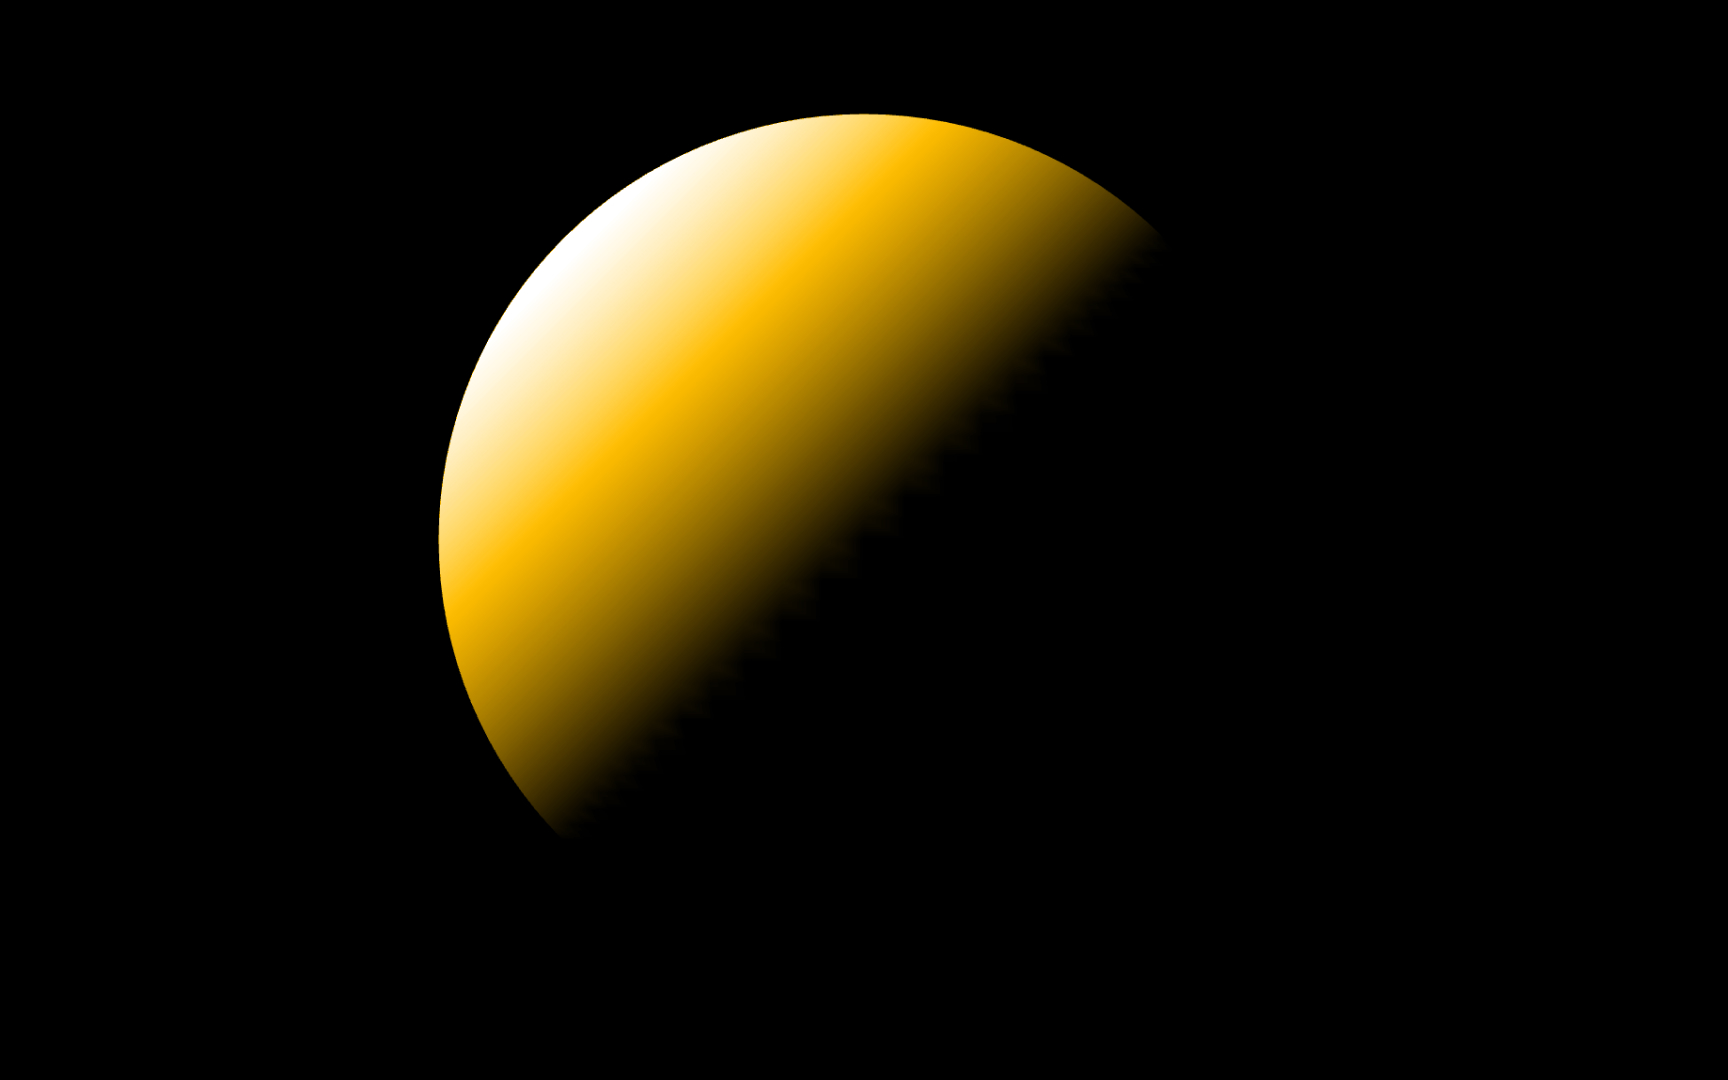
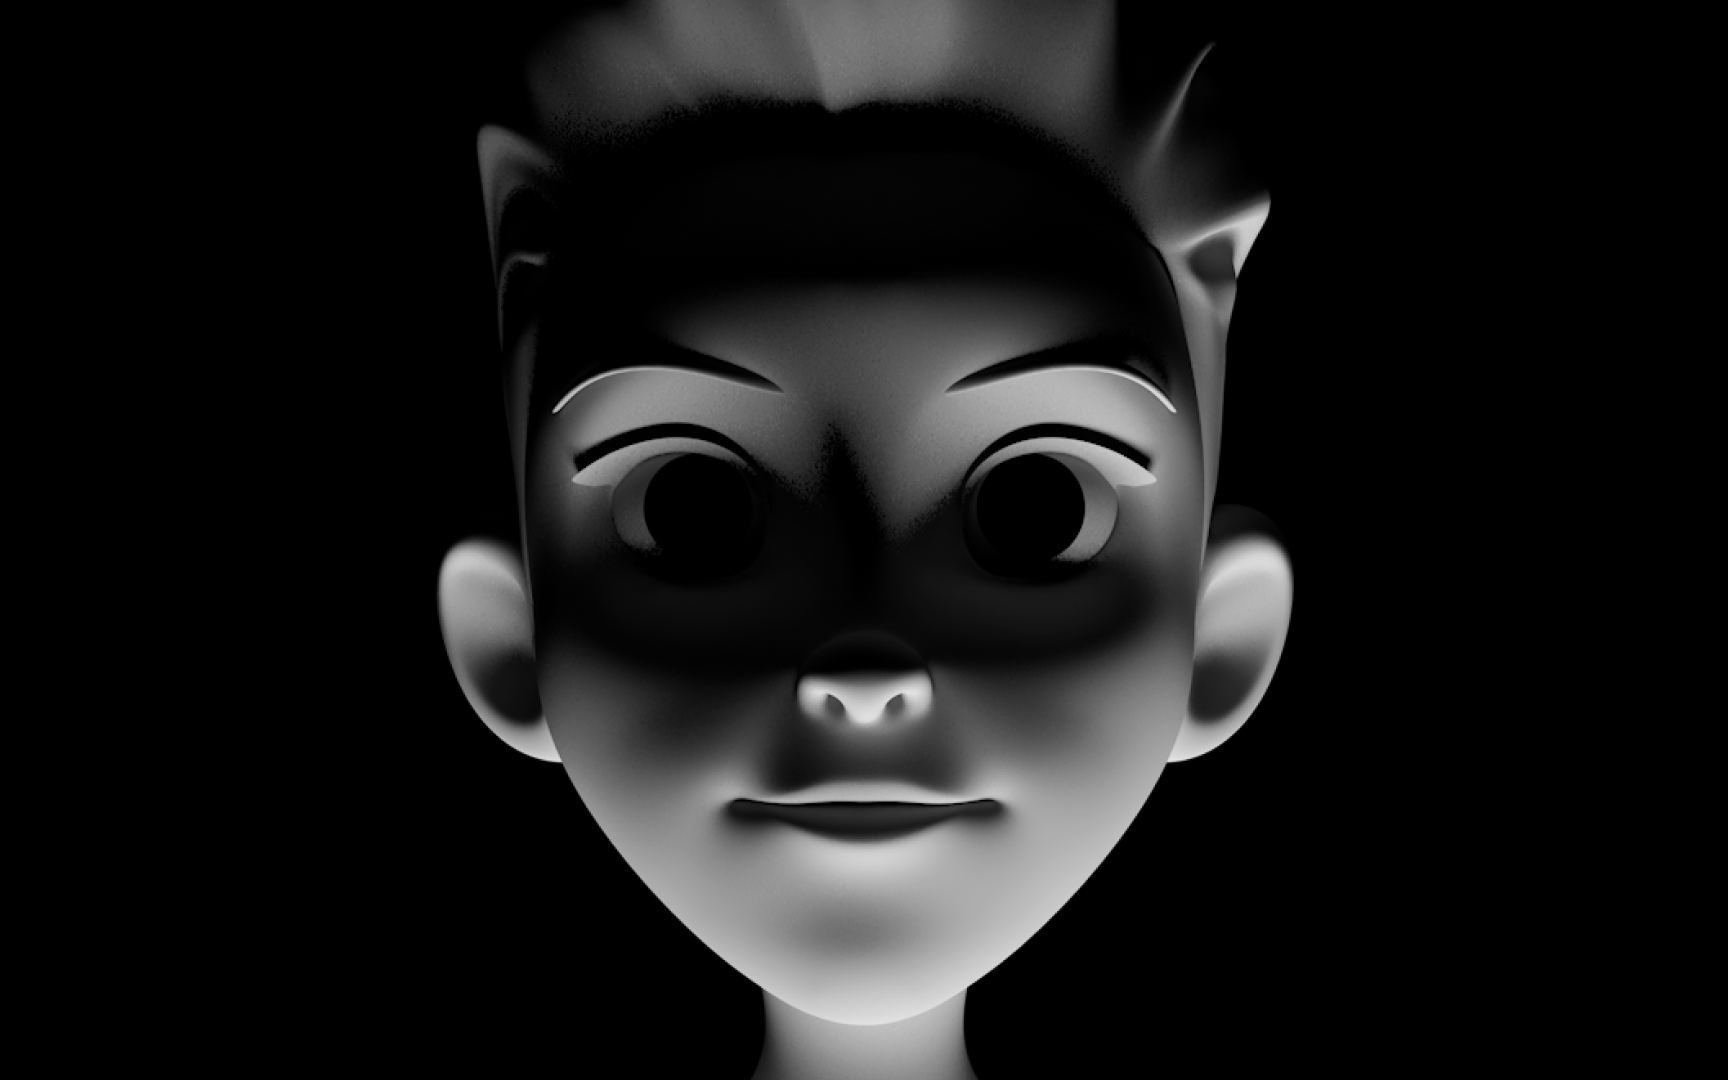
Top-to-bottom lighting is the most natural as it imitates a natural direction of light: the sun's light direction, street lamps, overhead lights in an apartment or office, etc. This light direction creates the most flattering highlights and
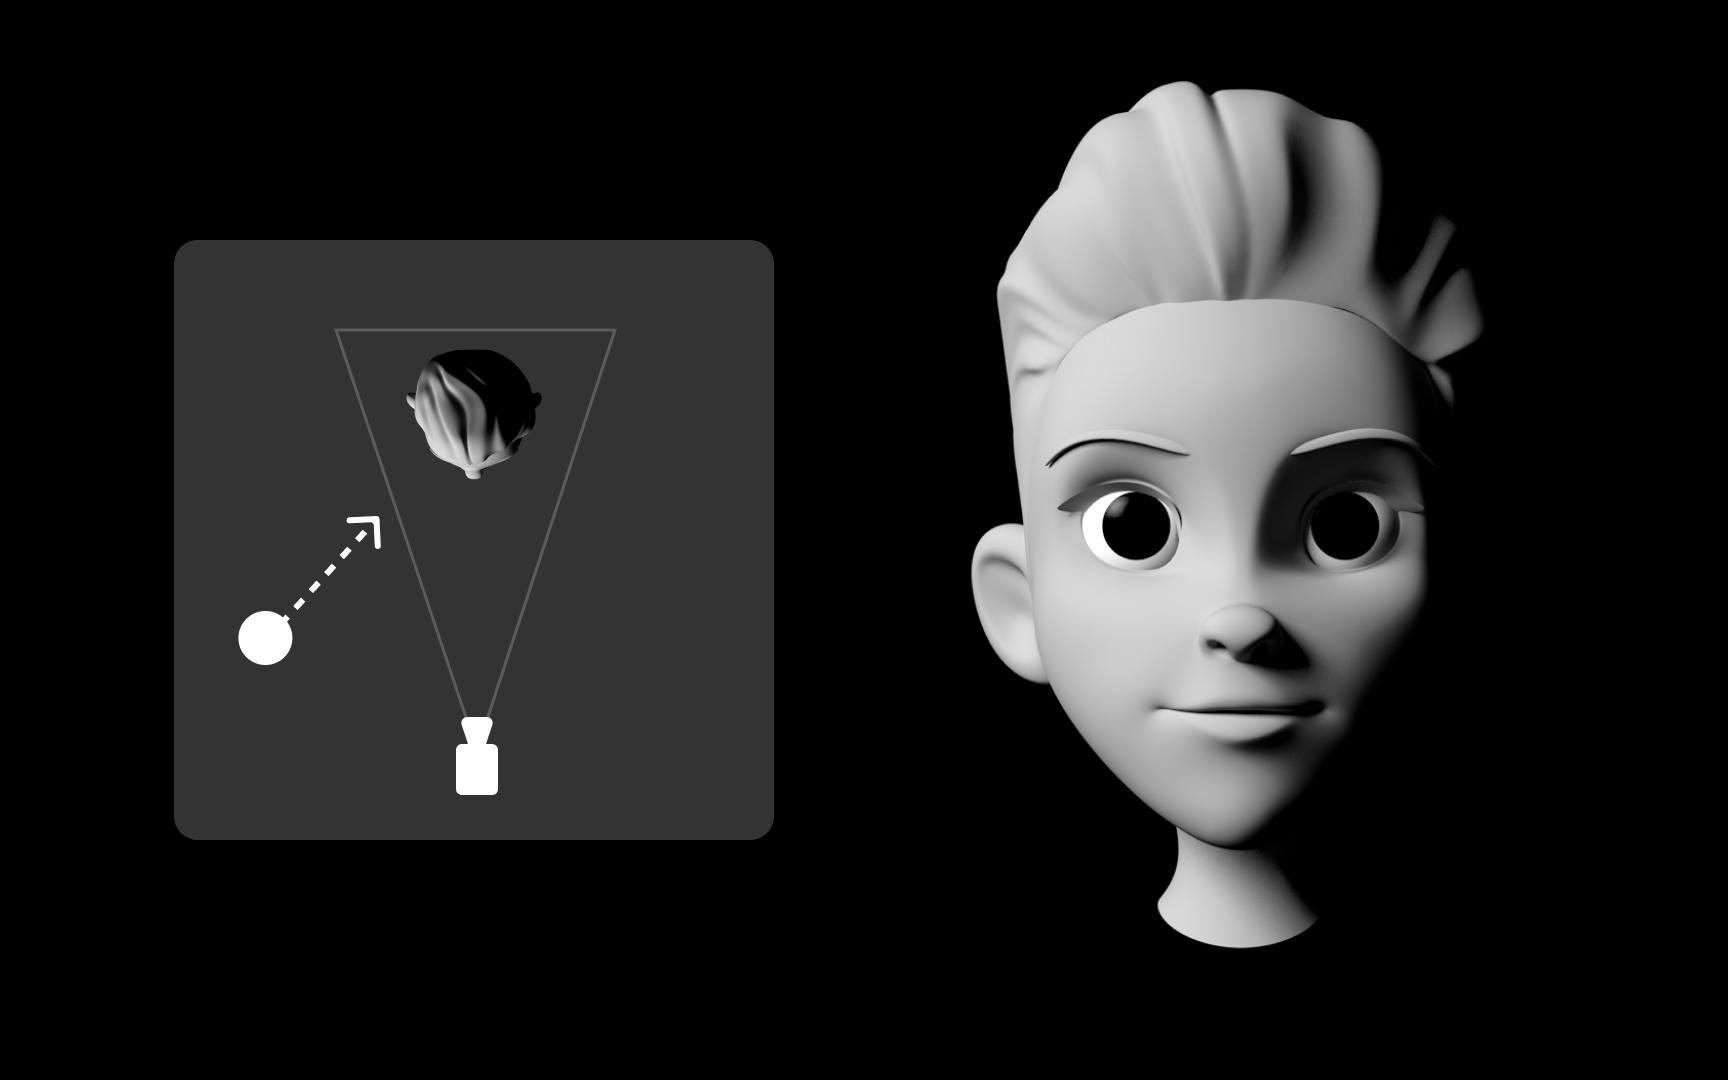
The key light indeed plays a crucial role in the lighting setup of a scene. It's the primary and the brightest light, and its purpose is to illuminate the most important objects and draw viewers' eyes to them. The key light should not necessarily follow the subject at a stretch — it may shine on it through tree leaves, the crowd of people, and other obstacles.[2]
Pro Tip: Create the mood by playing with the color and adding some emotional depth to the scene or a romantic or dramatic touch.
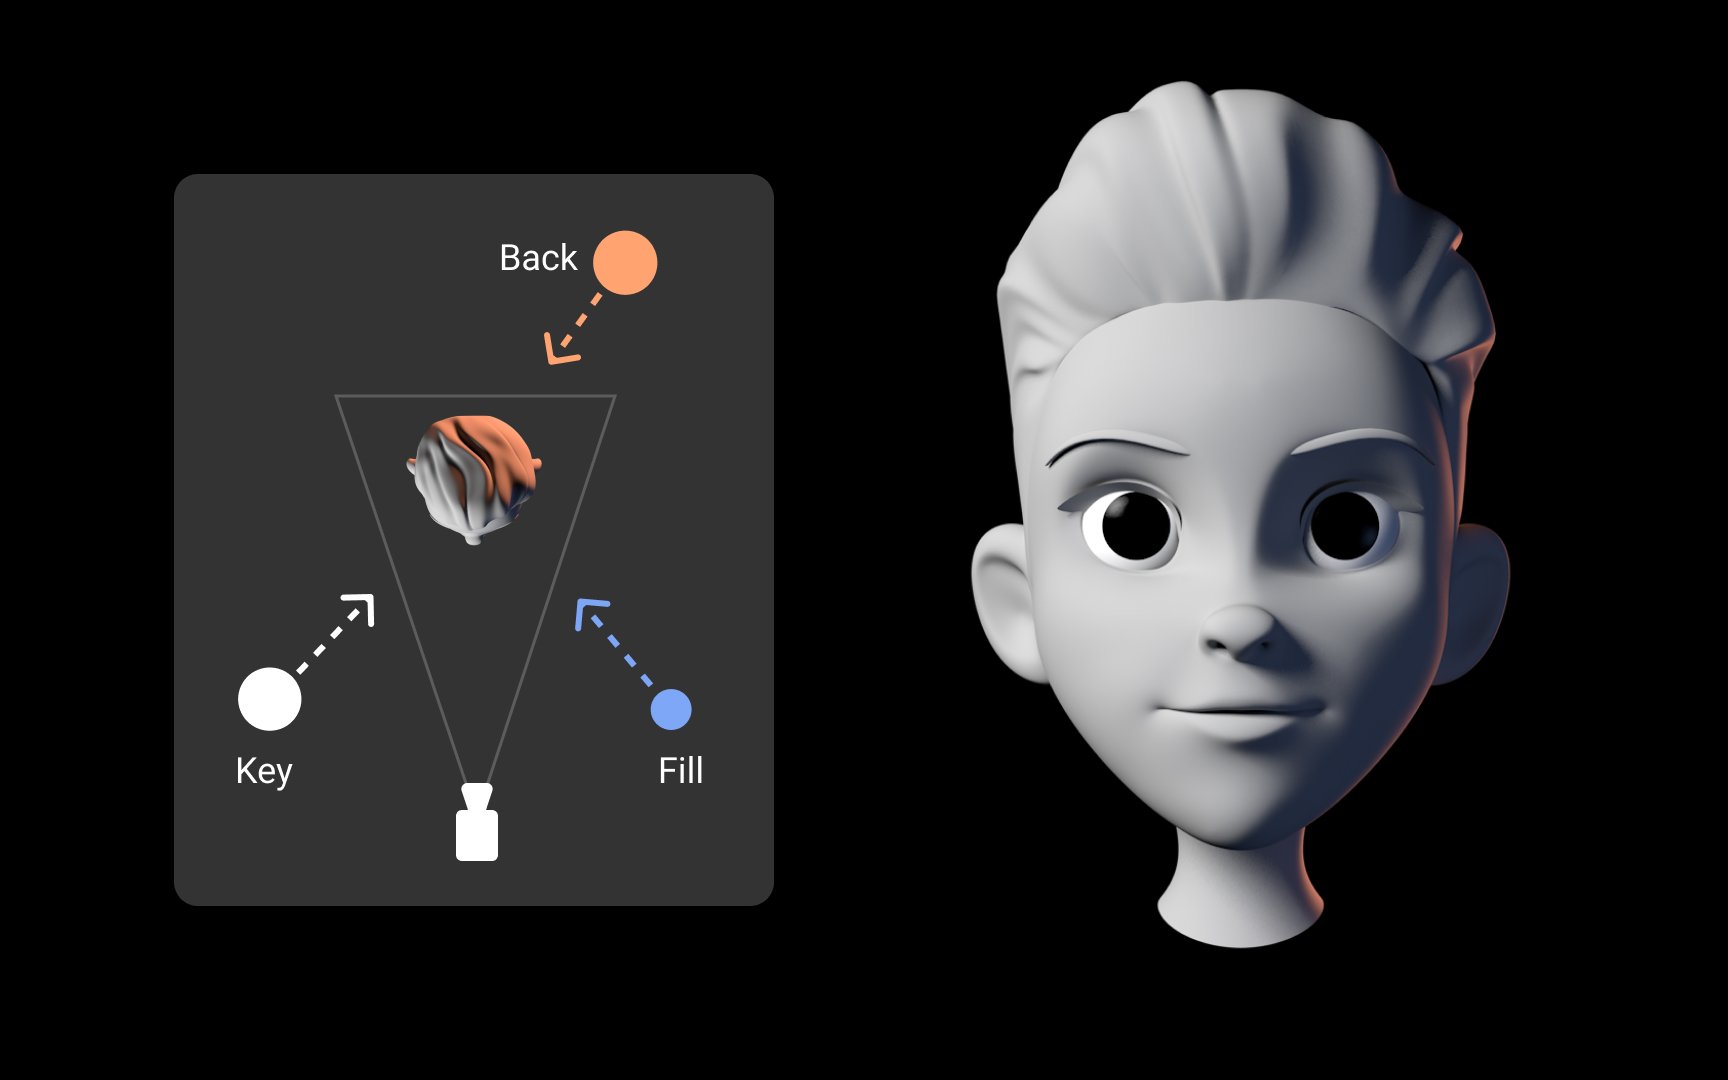
The three-point lighting setup is the most traditional method that contains three types of lights — key light, fill light, and backlight. The key light is the primary one and creates the mood of the scene. The fill lights fill in the
A proper lighting setup helps control shadows and show the best or worst of subjects.
References
Top contributors

Topics
From Course

Share


Similar lessons
Applications of 3D Design
3D Coordinates System